Monthly Archives: June 2013

Me and My Peeps Blog Hop ~ Info

1039627_10151724801629105_1868196326_o

Yay!  So, I have been asked to participate in another blog hop!   This time, it’s the “Me and My Peeps Blog Hop”, put together by Laura Kelly of Laura Kelly Designs and Niki Meiner of 365 Days of Crafts!   And I can’t wait!  I’ve been thinking about what I plan to do!!!

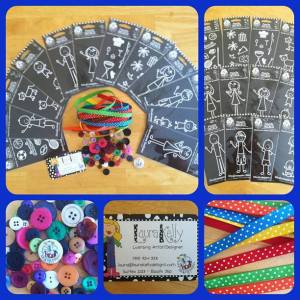
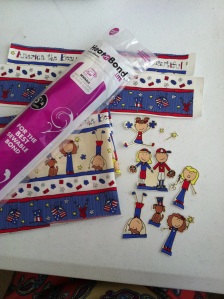
Here’s what all was included in the Blog Hop package:

1004728_10151724814234105_1560106797_n

Me and My Peeps Family Decals from Plaid Enterpises

Laura Kelly Mix  Buttons from Buttons Galore & More

Colorful Polka Dotted Ribbon

Me and my Peeps Button

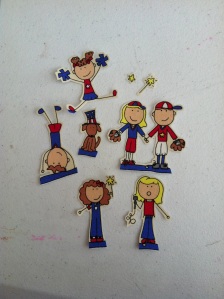
Laura Kelly is the creator of the Me and My Peeps Decal Collection.  You may have seen them on the back windows of cars, but they can truly be used on pretty much anything!  You can also find them at ACMoore!  Our goal is to create something fun from at least one of the decals and the buttons!

The actual Blog Hop is July 16-18, so be on the look out!!!

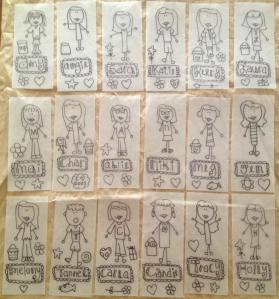
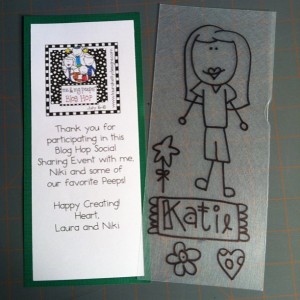
Also, Laura is so creative, she used Shrinky Dinks plastic to design a Peep for everyone participating in the Blog Hop!   She left them colorless so that everyone could color their own!!

1040087_10151725896284105_1270237267_o

Here’s me as a Peep!  Now, to color it!!!!

1044811_10151686517053955_1875731717_n

Until next time………..

Little Boys Play Date with Rit Dye

So, the boys and I were invited over to my friend, Laura’s house for a little play date!   The boys were super excited, because of course they love venturing over to Laura’s house!!!   Laura has lots of toys (She has 2 boys and 2 step daughters) and she has lots of crafts stuff!  Some may know her as Laura Kelly from Laura Kelly Designs!  But I am glad to call her my friend!

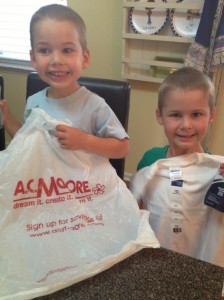
Anyways, this particular day, the boys and I stopped off at ACMoore to pick up some white t-shirts.   Laura was all set up for us to tie dye the shirts with Rit dyes!

IMG_7365

IMG_7364

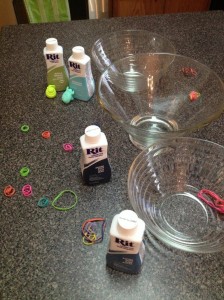
Materials needed:

Rit Dyes (liquid or powder), available where crafts are sold

White t-shirts (we got ours at ACMoore)

Rubberbands

Boiling Hot Water

Bowls

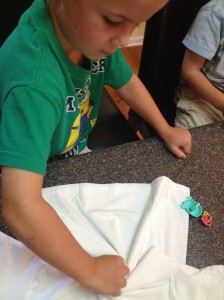
After Laura concocted the right amount of dye with hot water, we talked to the boys about the type of design they wanted on their shirts.  They both decided on the swirl!   So, after a little online research, Laura and I figured out how to get the swirl effect.  It’s super easy.   The shirt needs to be a little damp (we just used the sprayer in the sink, but a spray bottle can be used).   Lay if flat and pinch the middle.  Then twist and keep twisting until its all bunched.

IMG_7366

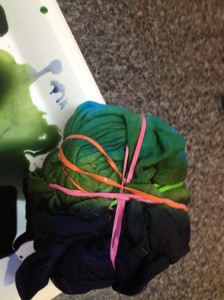
After it is all bunched together, place a rubber band around it to hold it together and then add a couple more in different directions.

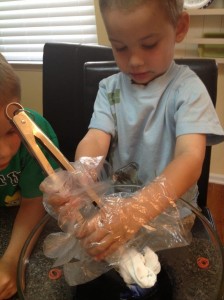
Next, put on some gloves because if not, your fingers will change colors!   Because boiling hot water was used to mix the dye, a set of tongs is helpful, especially for the little ones.

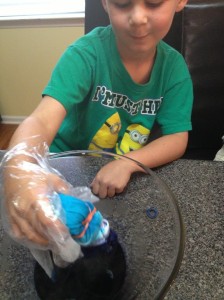
Depending on how many different colors you want to use on the shirt, dip the shirt the dye, but no more than half of the shirt, unless you want it all the same color.

IMG_7367

Once it has been in the dye for at least 2-3 minutes, turn the shirt and dip it into another color.   You can also experiment with multiple colors on top of each other to see what you get!

IMG_7369

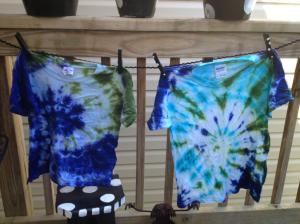
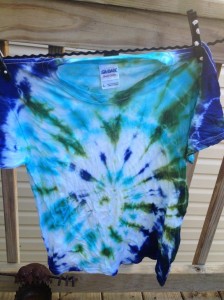
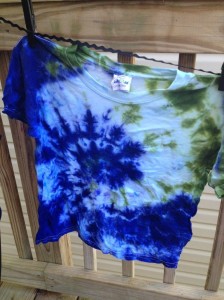
This is what it should look like once you are finished!

IMG_7371

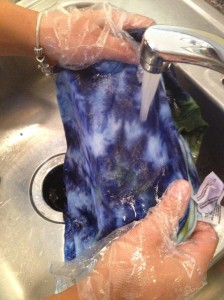
After all of the shirt has been dyed to your liking, it’s time to heat set it.  So, wrap it in some plastic (we used a ziploc bag) and stick in the microwave for about 30 seconds.  Remove it from the microwave and then remove the rubber bands.   Now it’s time to wash out all of the excess dye.   Leaving your gloves on, run the shirt under running water

until there is no dye visible in the sink after squeezing the shirt.

IMG_7374

After it is all free of the excess dye, hang it outside to dry in the sun!  And the Voila, you have a tie dyed shirt!!!

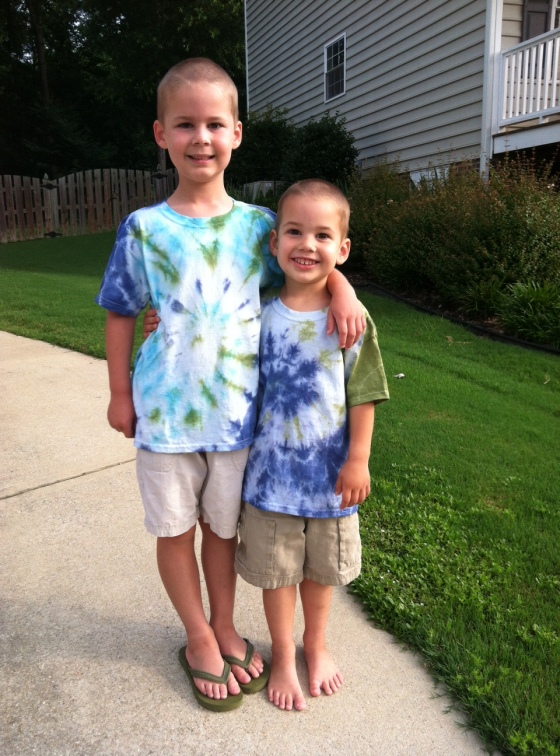
IMG_7379Don’t these look awesome!  The boys love them!

IMG_7380

IMG_7381

Rit dyes are super easy to use and the colors are so bright!

Thank you Laura for having us over for a Rit Tie Dye Play Date!  It was so much fun!

photo

I Love the USA Blog Hop!

20130507-171121.jpg

Wahoo, the Blog Hop has arrived! I am so excited to share some of the projects I have completed from my box of goodies that arrived in the mail back in April!

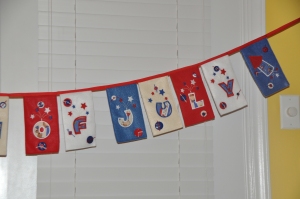
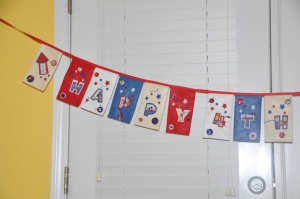
I made a few different pieces! And I am most proud of my awesome “Happy 4th of July” Banner! I love it!

banner

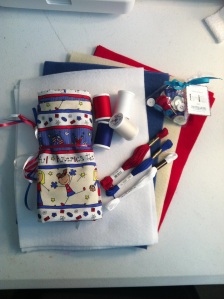
Materials used to make this awesome banner:
Fabric designed by Laura Kelly, available at Jo-Ann Stores

Laura Kelly’s Patriotic Mix of Buttons, available at Button’s Galore & More
Red, White, Cadet Blue, and Antique White Classic felt from The Kunin Group, available at Jo-Anns
Coats & Clark thread
Coats & Clark Embroider Floss
Pure Color Grosgrain Ribbon

Planet Applique’s Firecracker Applique Alphabet and Firework Applique
IMG_6738

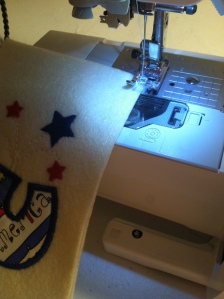
Using my embroidery machine, I embroidered each letter from Planet Applique’s Firecracker Applique Alphabet and Firework Applique.  This took the most time because of having to change the thread.
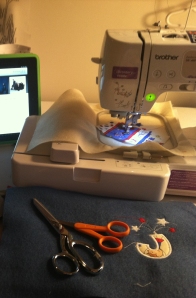
IMG_7260_crop

After all of my letters and fireworks were done, I folded my pieces of felt in half so that my rectangles would be double.   I then used a piece of cardboard cut to my desired size, a ruler, mat and a Fiskars rotary cutter to cut the sides evenly.

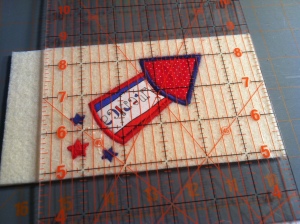
IMG_7262

IMG_7264

Because the designs were not even on the felt, I wanted to measure them to make sure they were all even once they were cut out.  I knew that all of my appliques were approximately 4 inches square, I decided to cut them at roughly 1.5 inches from the applique tops and bottoms.  That way, once they were all cut out and lined up, the appliques were all even!
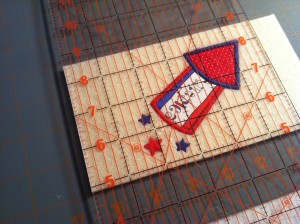
IMG_7265

After they were all cut, I did trim the stabilizer from the back of the felt that was used for the applique.
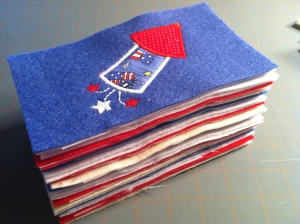
IMG_7266

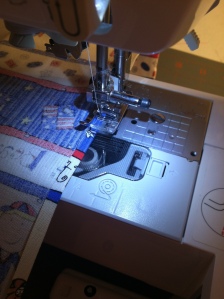
Then it was time to sew the two pieces together.  I lined them up and sewed them up at about 1/8″ away from the edge.
IMG_7268

IMG_7267

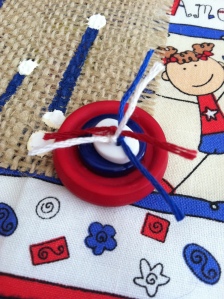
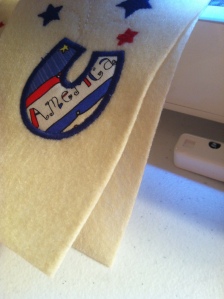
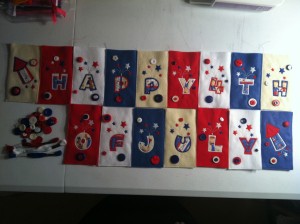
Once they were all sewn, I used the Coats & Clark embroider floss and added some buttons from Laura Kelly’s Patriotic Mix.
IMG_7270

The next step was the put the banner together, attaching it to the ribbon.   Before sewing it, I folded the grosgrain ribbon in half and ironed it so that it would stay.  I laid it all out and put my desired amount of space between each letter and the fireworks.  I tucked the top edges between the ribbon, pinned them in and then it was time to sew!!
DSC_0089

DSC_0090

I hope that you like my 4th of July banner using Laura Kelly’s fabric and buttons!  I can’t wait for it to be July!!!

Here are a few of my other pieces that I created with Laura Kelly’s Patriotic Fabric:

Happy 4th of July Garden Flag
IMG_6929

Patriotic Peeps Decorated Bag

IMG_7072

A Patriotic Peep Pillow Case Dress

DSC_0081

Peeps Hair Clips

IMG_7408

Thanks for stopping by!

Now, Hop on over to some of the other designers participating in the I Love The USA Blog Hop!

The Country Chic Cottage – Angie Holden

The CEO Blog – Debra Quartermain

Major Hoff Takes a Wife – Sara Hoffman

Doll Diaries – Char Polanosky

You can find a full list of all of the designers that participated in the Blog Hop at 100 directions!!!

Here is an awesome Rafflecopter Giveaway you should definitely take part in!!

Patriotic Peeps Decorated Bag

20130606-221033.jpg

Patriotic Peeps Decorated Bag

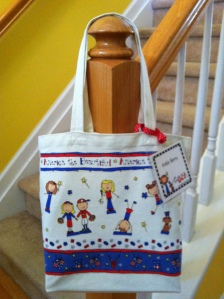
Another addition to my I Love the USA Blog Hop projects is a Patriotic Peeps Decorated Bag!

IMG_7072

Materials used:

Canvas Bag

Laura Kelly’s Patriotic Peeps Fabric, available at JoAnns Stores

Heat’n Bond Ultrahold 

Iron

Fiskars Scissors

First, I ironed the Heat’n Bond Ultrahold to the back of the fabric.  I then cut out the Peeps and a few of the stars and pompoms and wands!  I also cut out strips from the fabric.

IMG_6802

Once everything was cut out, I then lined it up on the canvas back, removed the backing of the Heat’n Bond and then ironed it to the bag!

IMG_6801

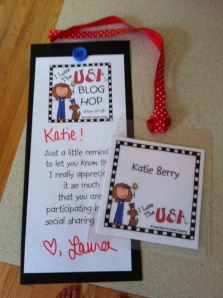
This was a super simple project, but it turned out really really cute and I am currently using it to carry around some books and other things!  Oh, and I also attached my personalized bag tag that was made for me by Laura Kelly!

321415_10151600483123955_505616037_n

Click here to go back to my original I Love the USA Blog Hop page.

Peeps Hair Clips

20130606-221033.jpg

Peeps Hair Clips

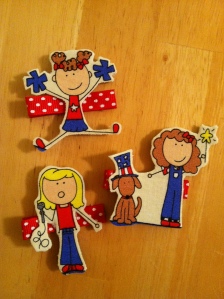
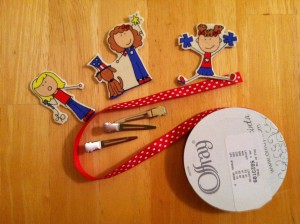
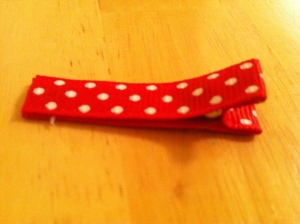
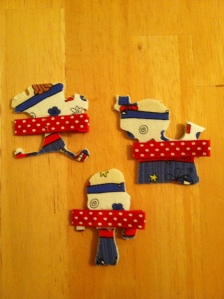
To go with my Patriotic Peeps Pillow Case Dress, I decided to make Peeps Hair Clips!  How stinkin’ cute are these?!?!

IMG_7408

Materials need:

Laura Kelly’s Patriotic Fabric, available at JoAnn Stores

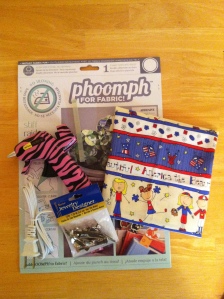
Coats & Clark Phoomph for Fabric

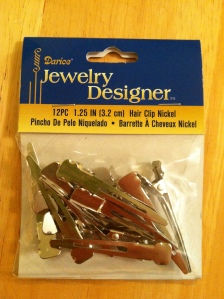
Hair Clips

Red Ribbon

Ad-Tech glue gun and glue stick

Fiskars Scissors

Until I received my box of goodies for the I Love the USA Blog Hop, I had never heard of Phoomph.  But this is some awesome stuff!

So, Phoomph is a double sided, fabric bonding sheet that creates a brand new way to craft with fabric.  There is no ironing needed.  I love this stuff!!!!
IMG_7400

On one of my many trips to JoAnn’s, I picked up these hair clips.

IMG_7401

I took the Phoomph and covered both sides with Laura Kelly’s Patriotic Peeps fabric and then cut out some of the Patriotic Peeps.

IMG_7404

Next I covered the hair clips with ribbons, using hot glue.  Just make sure not to glue the clip sides together!!
IMG_7406

Then, I hot glued the Phoomph’ed Peeps to the ribbon covered clips!

IMG_7409

IMG_7408

These were super easy and they turned out super cute!  The would look adorable with the matching Patriotic Peeps Pillow Case Dress!!

Click here to return to my original I Love the USA Blog Hop page!

A Patriotic Peep Pillow Case Dress

20130507-171121.jpg

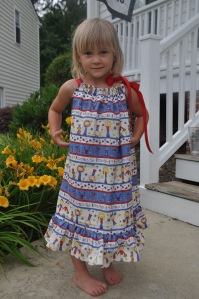
Patriotic Peep Pillow Case Dress

I absolutely love Laura Kelly’s Patriotic Peeps Fabric, available at JoAnn Stores.

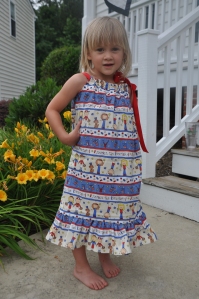
I made a child’s size 4 Pillow Case Dress.  Since I don’t have girls, I was able to get my super cute little neighbor to be my model,

with a little bribery of not one, but two pieces of candy!!!!

DSC_0080

Materials used:

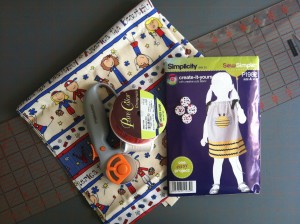
Laura Kelly’s Patriotic Peeps Fabric, available at JoAnn Stores

Coats & Clark thread

Simplicity pillow case dress pattern (I only used this for the measurements.)

Fiskars Rotary cutter, mat, and ruler

Pure Color Red Grosgrain Ribbon

Crochet Thread

IMG_7165

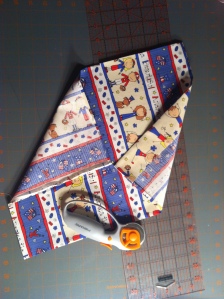
When I started this project, I used the Simplicity pattern to basically get the measurements for the dress.   I needed two squares, so I doubled the fabric and cut two at one time.    I then cut a quarter of a circle out of the top corner of the folded material.  This was for the arms.  I then unfolded the fabric, placed the two right sides together and sewed up the sides.

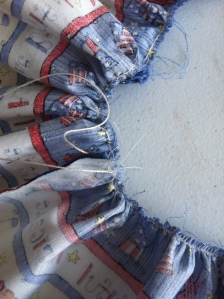
This is the first project where I used gathered fabric.  I found a simple tutorial on Pinterest by The Family Homestead on how to gather fabric.

IMG_7167

IMG_7168

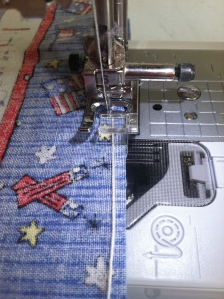
After I was done with the gathering, I sewed a line right below my crochet/zigzag, so that my gathering stayed in place.

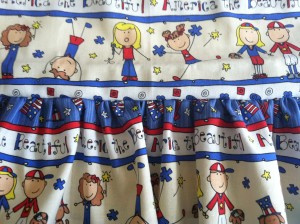
I then sewed it to the bottom of my dress.

IMG_7223

Click here to go back to my original I Love the USA Blog Hop page.

4th of July Garden Flag

20130606-221033.jpg

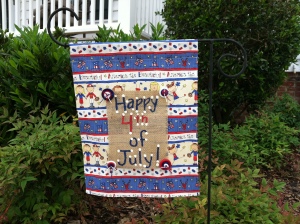
In addition to my 4th of July Banner for the I Love The USA Blog Hop using Laura Kelly’s Patriotic Fabric, I made addition projects.   This project was a simple 4th of July Garden Flag!  I love it and it will proudly hang in my front lawn for the 4th!!!

IMG_6929

Materials used:

Laura Kelly’s Patriotic Fabric, available at JoAnns Stores

Burlap, also available at JoAnns Stores

Laura Kelly’s Patriotic Mix of Buttons from Buttons Galore & More

Coats & Clark Thread

Apple Barrel Acrylic Paints

Coats and Clark Embroidery Floss

For the sizing of the flag that I wanted, I basically just took the measurement from a garden flag that I have.

IMG_6821

Next, I folded over the edges and sewed them just to keep it from fraying.

IMG_6822

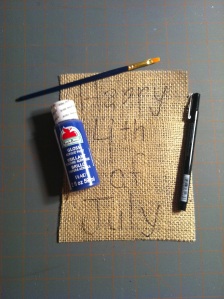
On the burlap, I used a pen to write out Happy 4th of July.

IMG_6827

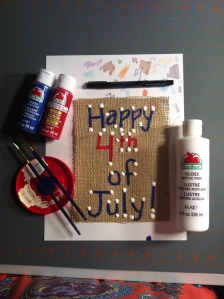
Then, I painted the letters with Apple Barrel Acrylic Paints.

IMG_6832

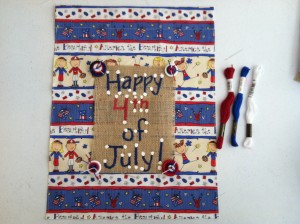
Next, I used Coats & Clark Embroidery Floss and Laura Kelly’s Patriotic Mix buttons to attach the burlap to the flag.

IMG_6924

I made sure to tie them so close to the edge of the burlap so that if the burlap decided to lose a few strands, it wouldn’t fall off.

IMG_6925

I hope you like my little 4th of July Garden Flag!

Click here to go back to my original I Love the USA Blog Hop Page!

An awesome surprise from Expressionery.com

So, today the UPS truck arrived at my house. I didn’t remember ordering anything and Bruce usually lets me know when he does. But when I opened the package, it was a gift for me from Laura Kelly and Jen Goode, the host for the upcoming I Love the USA Blog Hop that I am participating in! It was personalized stationary from Expressionery.com, designed by Laura Kelly!

20130606-220215.jpg
Polka Dotted Monogram Folded Notes

I have always loved Laura’s whimsical designs and this gift definitely made my day! I know exactly who is going to get the very first note!

The I Love the USA Blog Hop takes place from June 10-14!

20130606-221033.jpg

Kindergarten days

I am all about creating memories. I am not a great scrapbooker, but I love to take picture! Any kind of props that you can add to the picture to help remember the day helps, especially if its not in a specific place. Almost a year ago, I wanted to do something for Landon’s first day of Kindergarten, so I decided to create a frame, adding the letters to say. “My 1st day of Kindergarten”. At the time, I just added a little clipboard with the school name and the date.

20130603-092122.jpg
For the end of the school year, I decided to spruce the frame up a little bit. I changed the wording to “My last day of Kindergarten” and then I added Laura Kelly’s buttons collection from Buttons Galore & More

20130603-094553.jpg

20130603-094611.jpg
Supplies used:
Sign stakes
DecoArt Americana paint – Calypso Blue
Laura Kelly’s Mix Buttons from Buttons Galore & More
Glue Dots
Lime Rickey Scrapbook paper (purchased at ACMoore)

Instructions for the letters:
I enlarged the letters in Microsoft Word to about 350pt. I printed the letters, cut them out and then traced them backwards on the back of the scrapbook paper. I then cut those out. Make sure to trace them backwards or else your cut out letters will be backwards. I attached them to the stakes with glue dots, that way when it comes time for the first and last days of 1st grade, they can be easily removed!!

After school on Friday, we started the summer off right with a Strawberry milkshake from Chick-fil-a!!

20130603-094807.jpg

We are excited for summer, even though it is only 6 weeks for us, but we have lots planned!

Until next time…..