Author Archives: Katie

Mother’s Day Flower Bookmark

It’s time for Craft Lightning again!   I love quick and easy crafts and there are some great ones that can be done in 15 minutes or less.   The theme of this Craft Lightning is Mother’s Day!   As a mother, I love getting little handmade gifts from my boys.

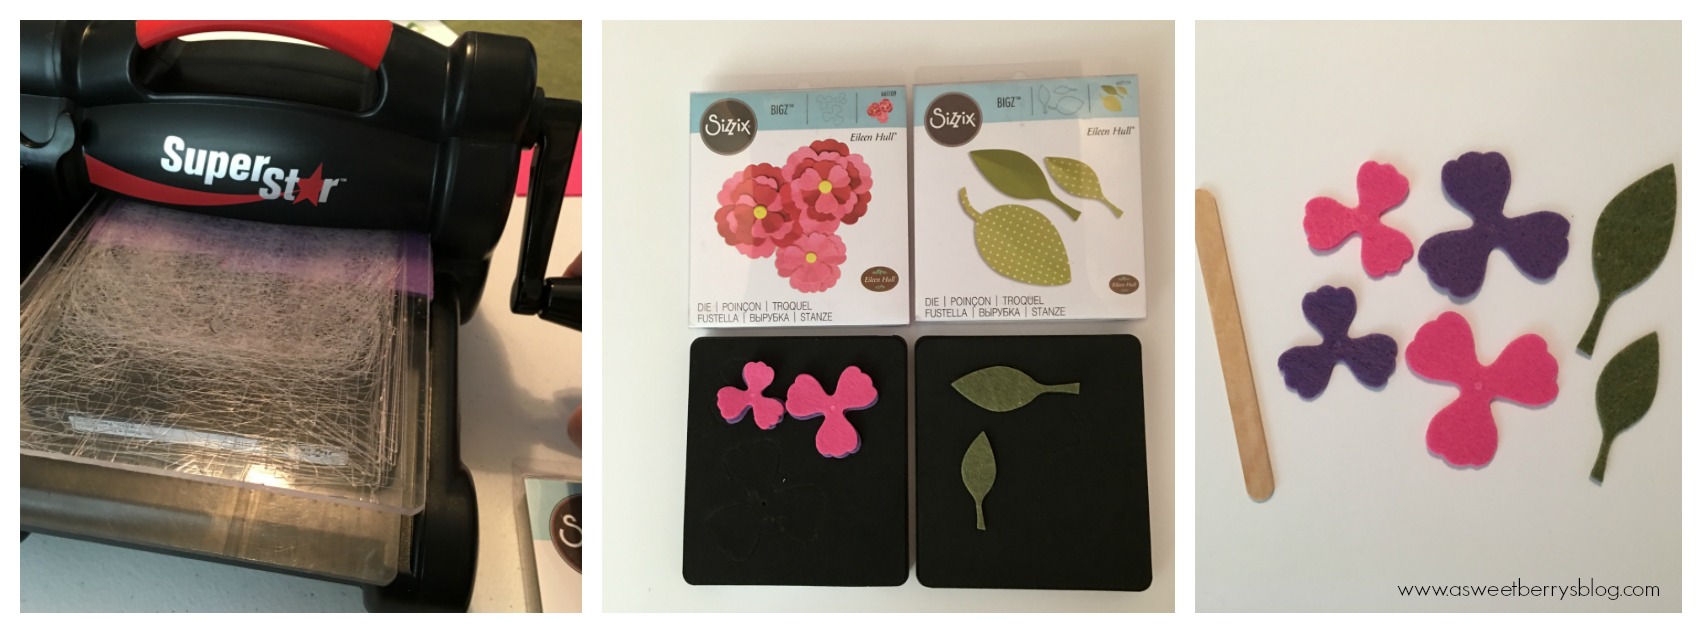
For my Craft Lightning craft, I did a Mother’s Day Flower Bookmark using Eileen Hull’s Pansy Flower die (which I am obsessed with) and Kunin Felt!  

Materials Used:

  • 12” x 18” craft cut of Kunin Premiumfelt™ (1) Violet Sky, (1) Olive, (1) Candy Pink
  • Ellison/Sizzix Die Cut Machine with cutting pads
  • Eileen Hull’s Pansy Flower and Leaf dies from Sizzix
  • Hot Glue Gun and Glue Stick
  • Popsicle Stick
  • Buttons


How to make it:

  1. Cut your felt pieces using the Sizzix/Ellison die cutting machine, cutting pads and the flower and leaf dies.

  1. Using a hot glue gun, layer the flower petals and glue them together in the center.
  1. Glue the leaves to the back of the completed flower.
  1. Glue the popsicle stick to the back of the flower.

  1. Glue a button to the center of the flower.
  1. Using a marker, write a little note on the popsicle stick.
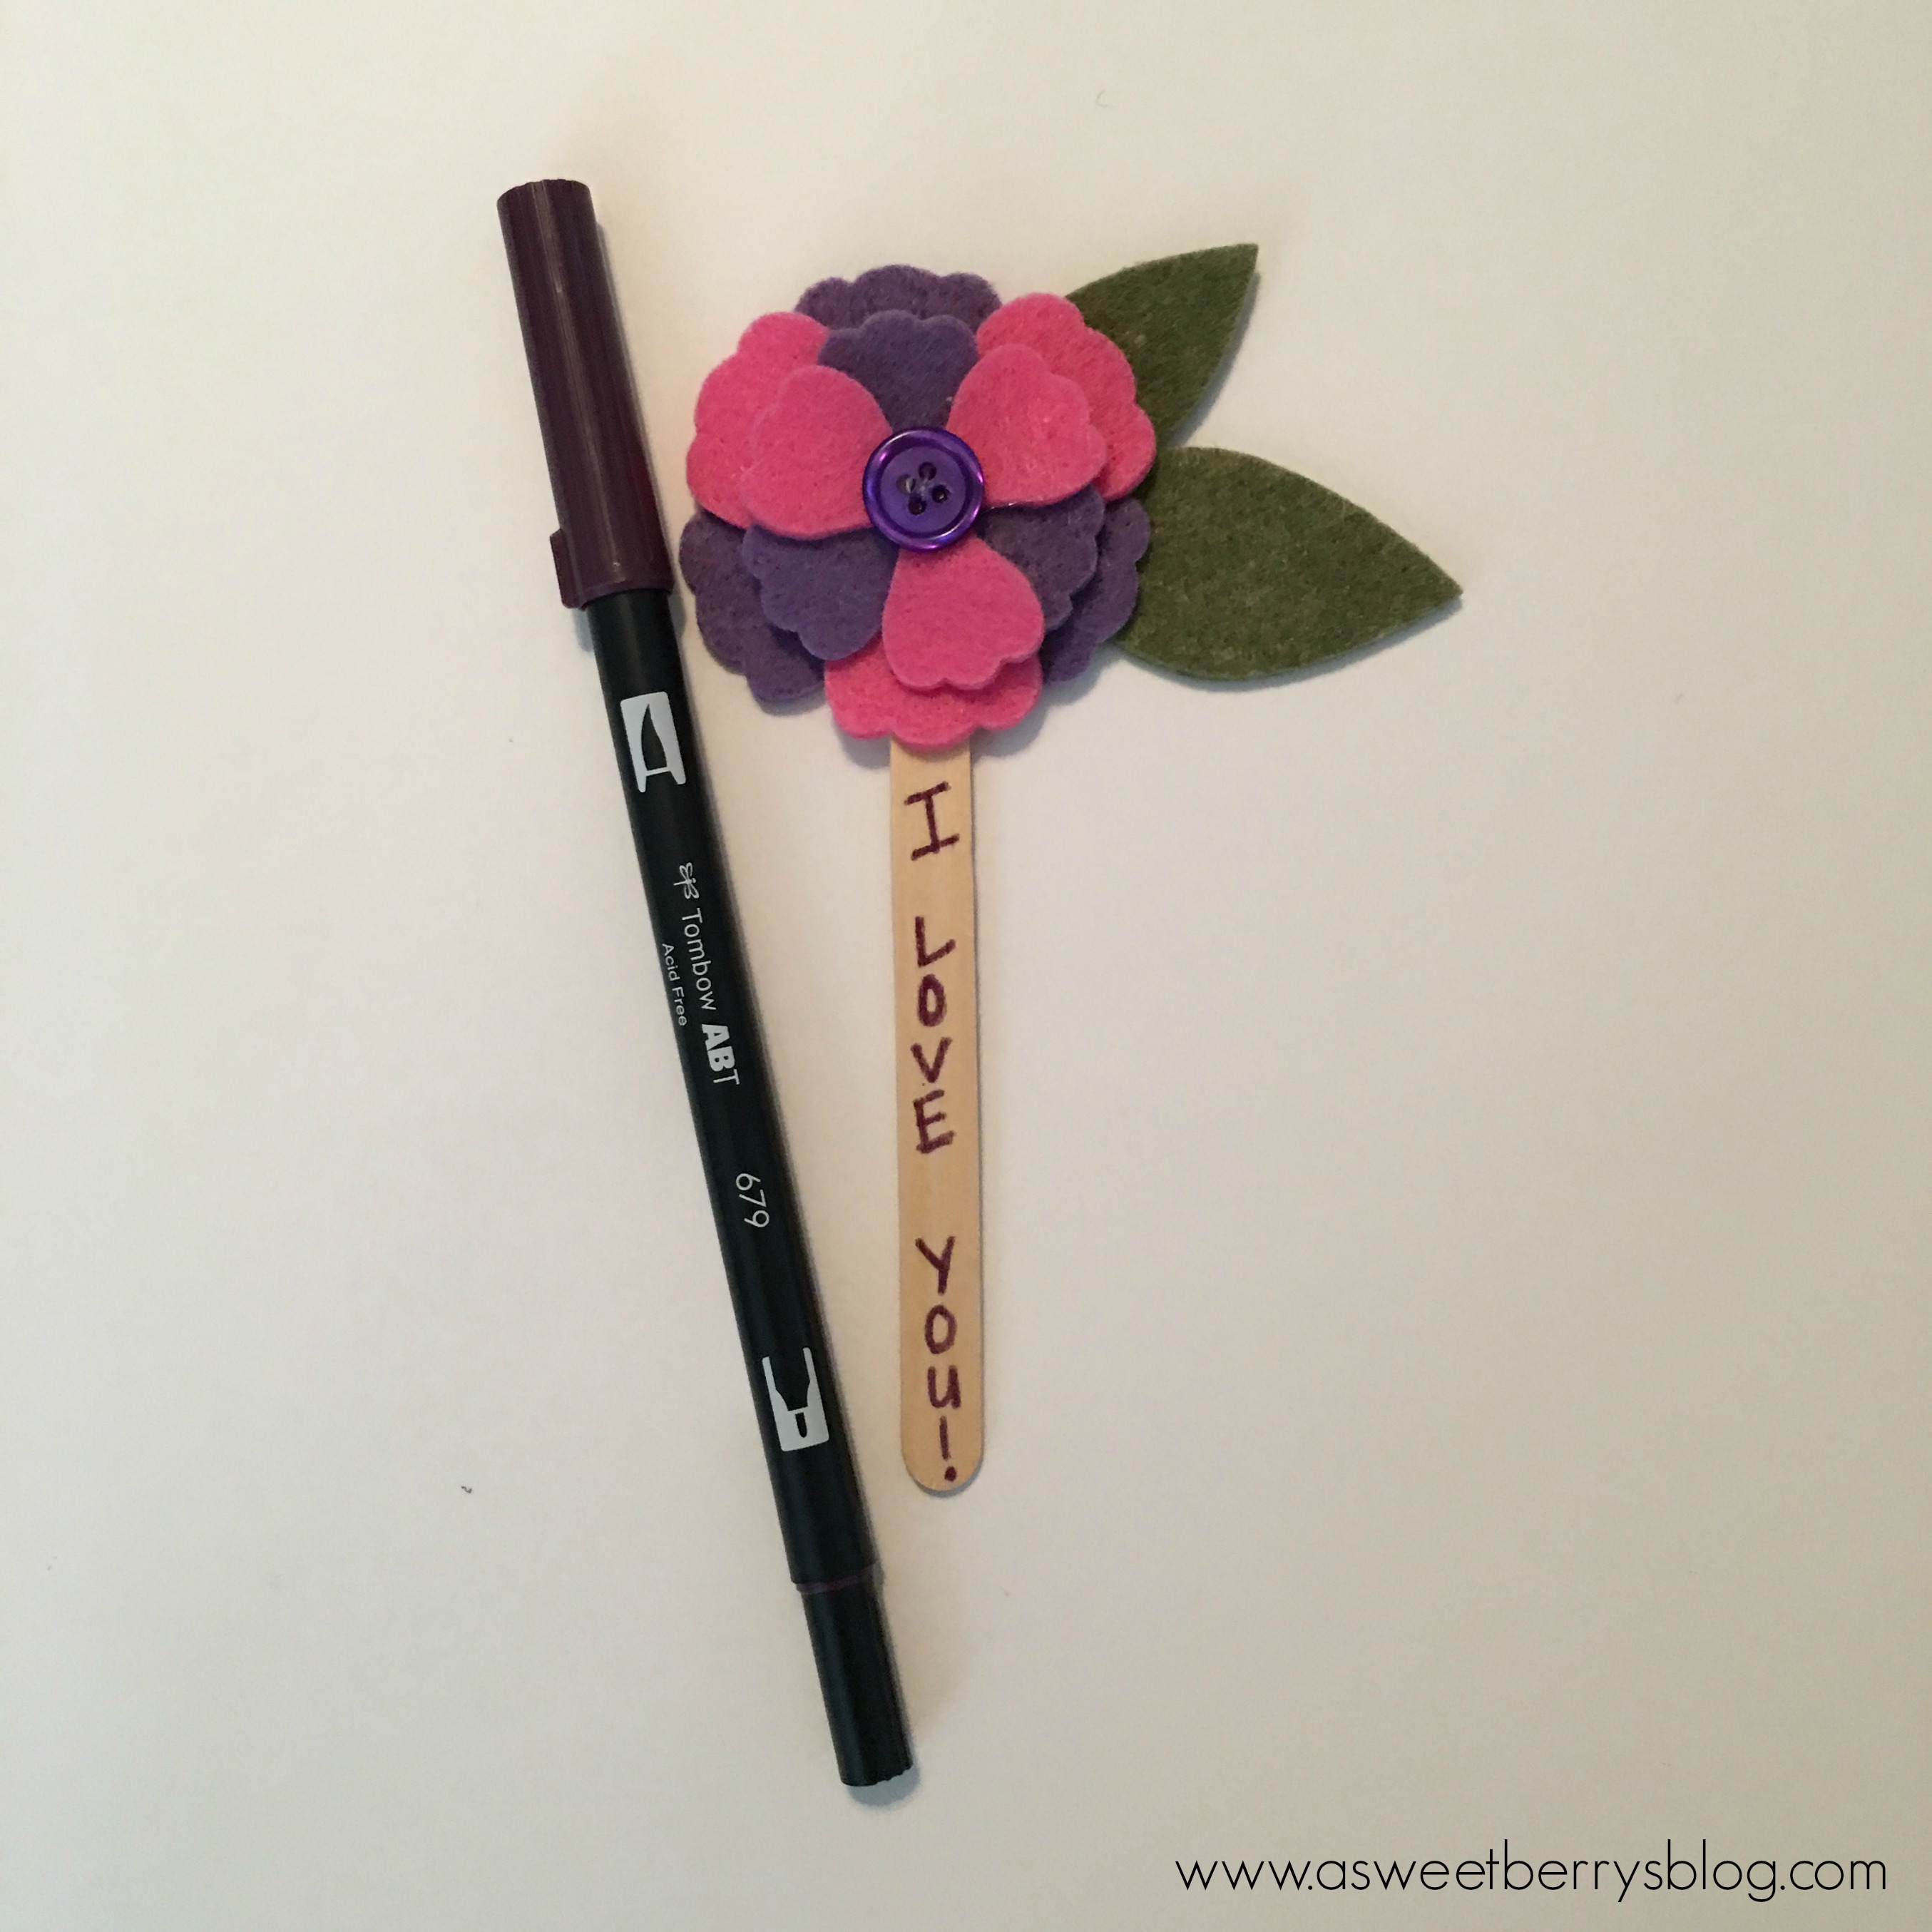

Now you have a quick and easy Mother’s Day gift!
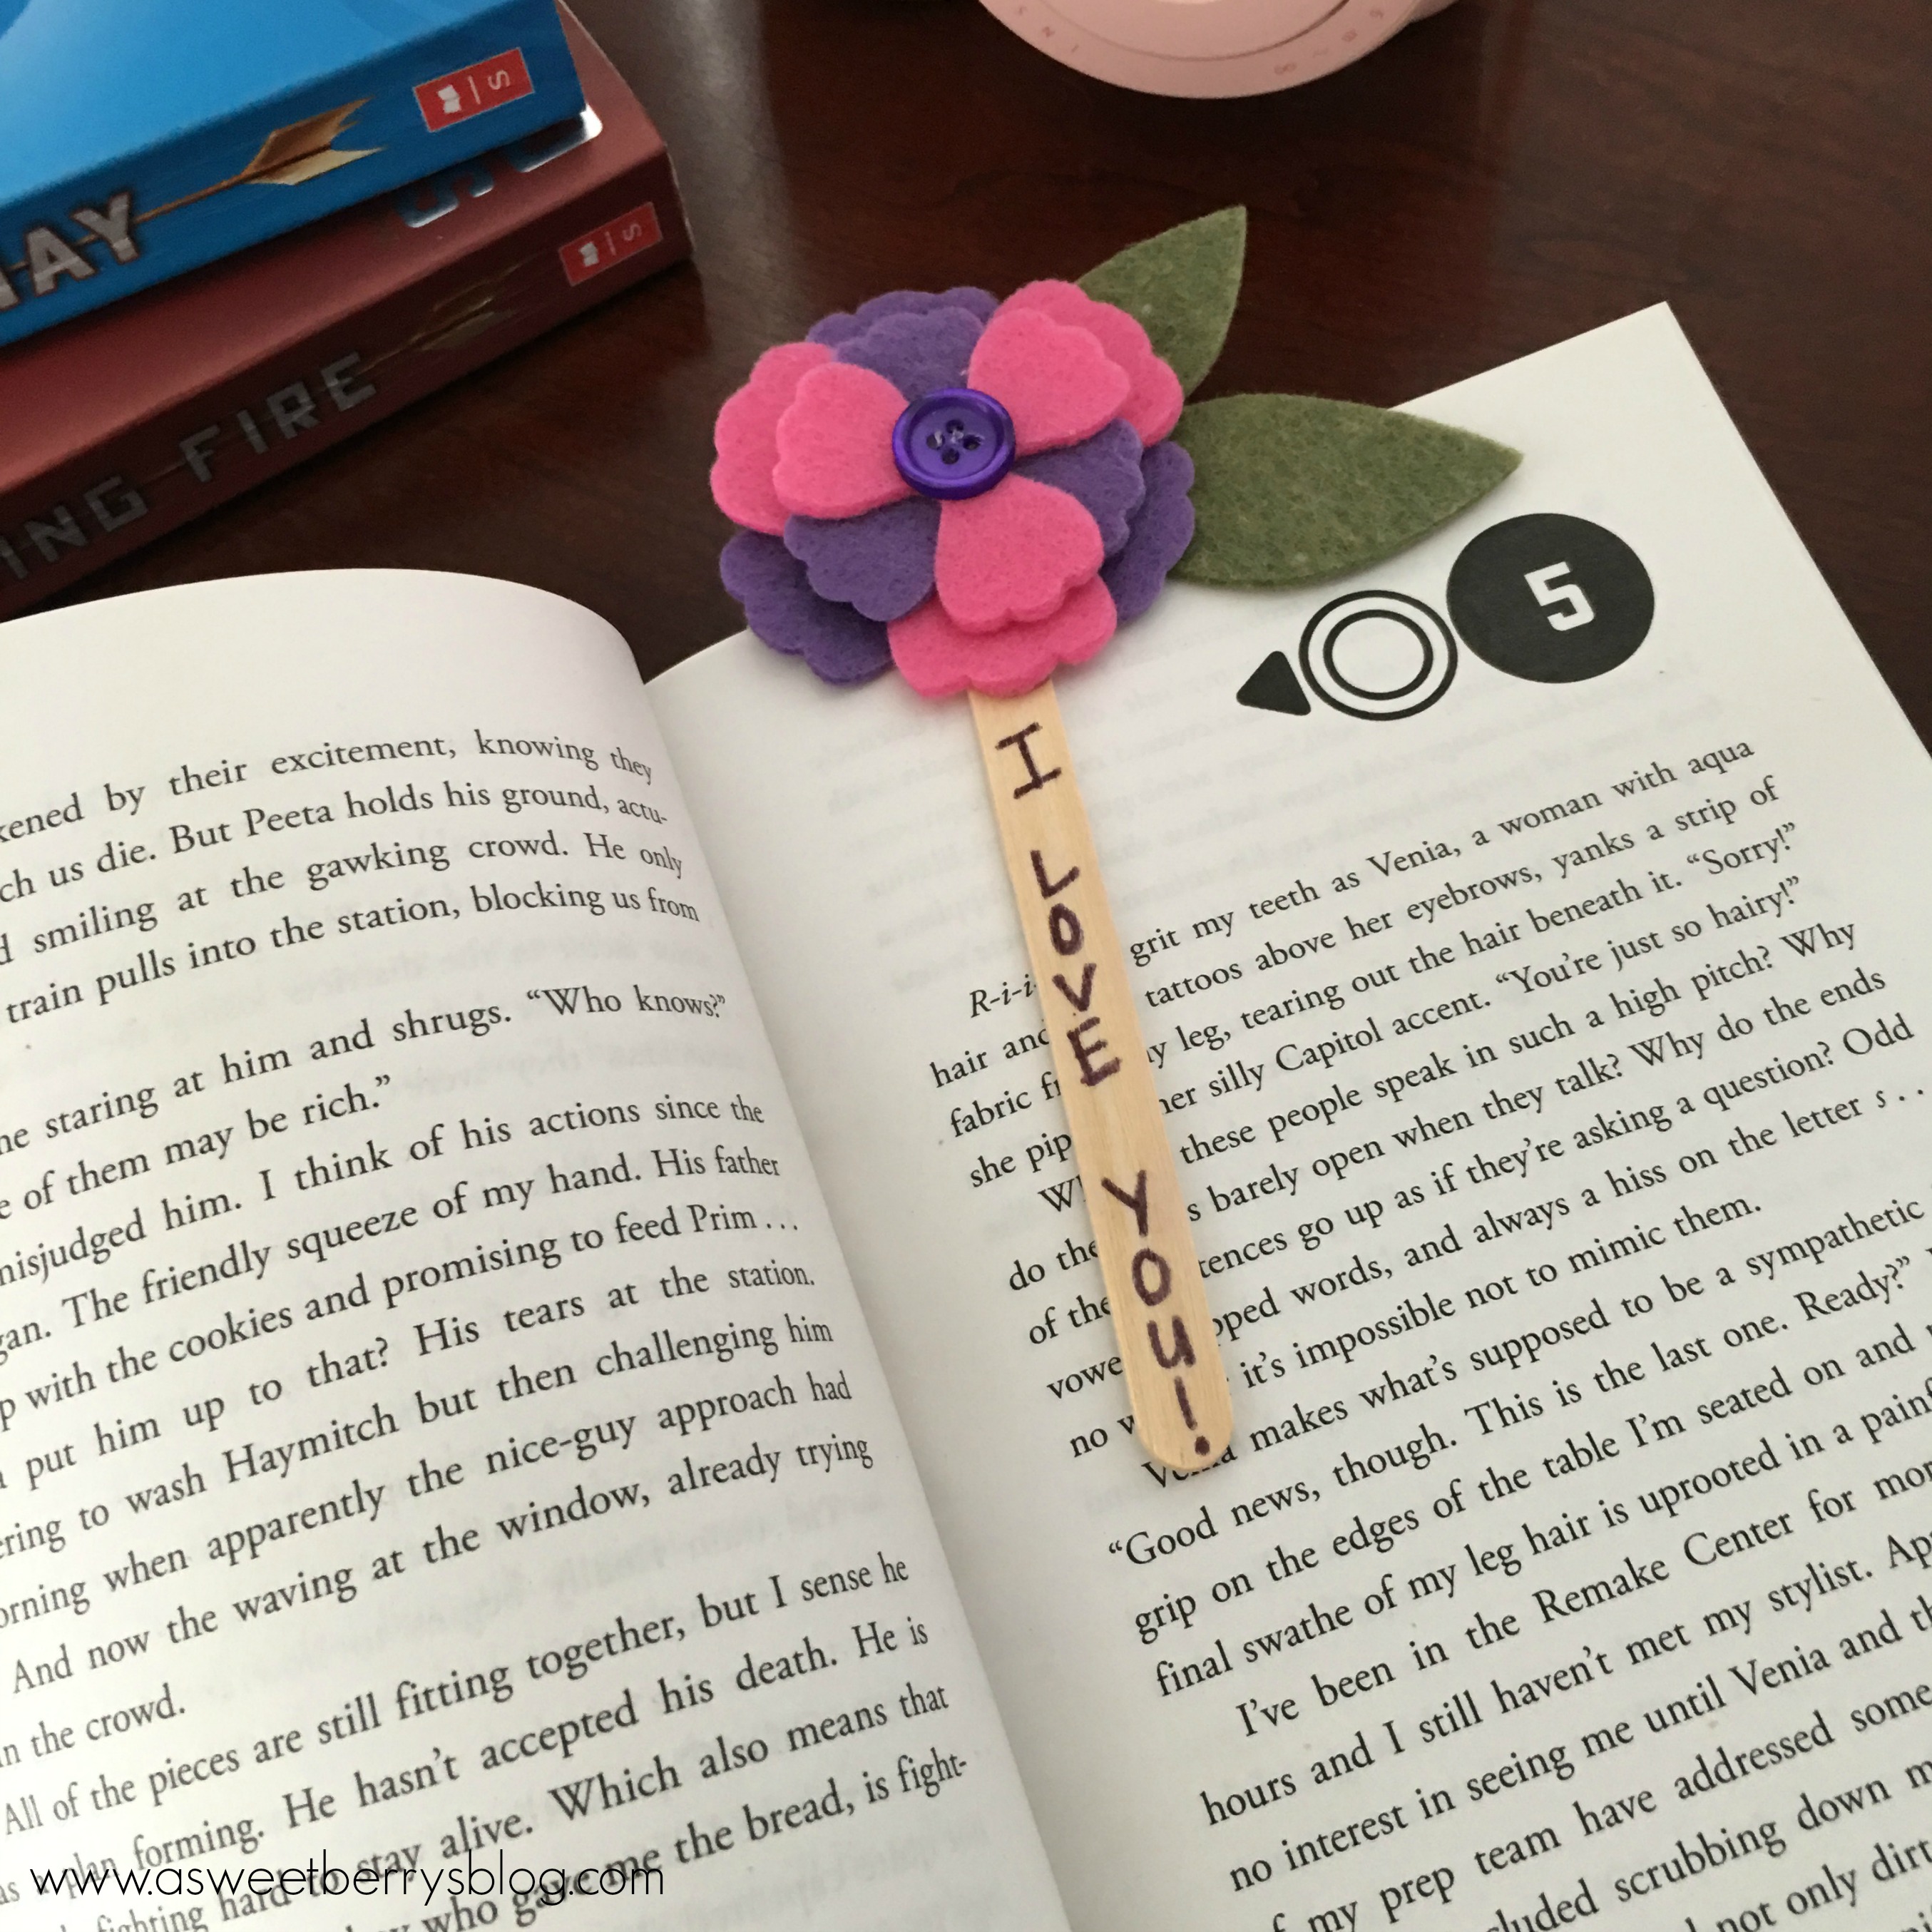
I hope you liked my Mother’s Day Flower Bookmark!

Be sure to check out other great Craft Lightning Mother’s Day crafts by clicking the picture below!

Until next time………

Kunin Felt Welcome Banner

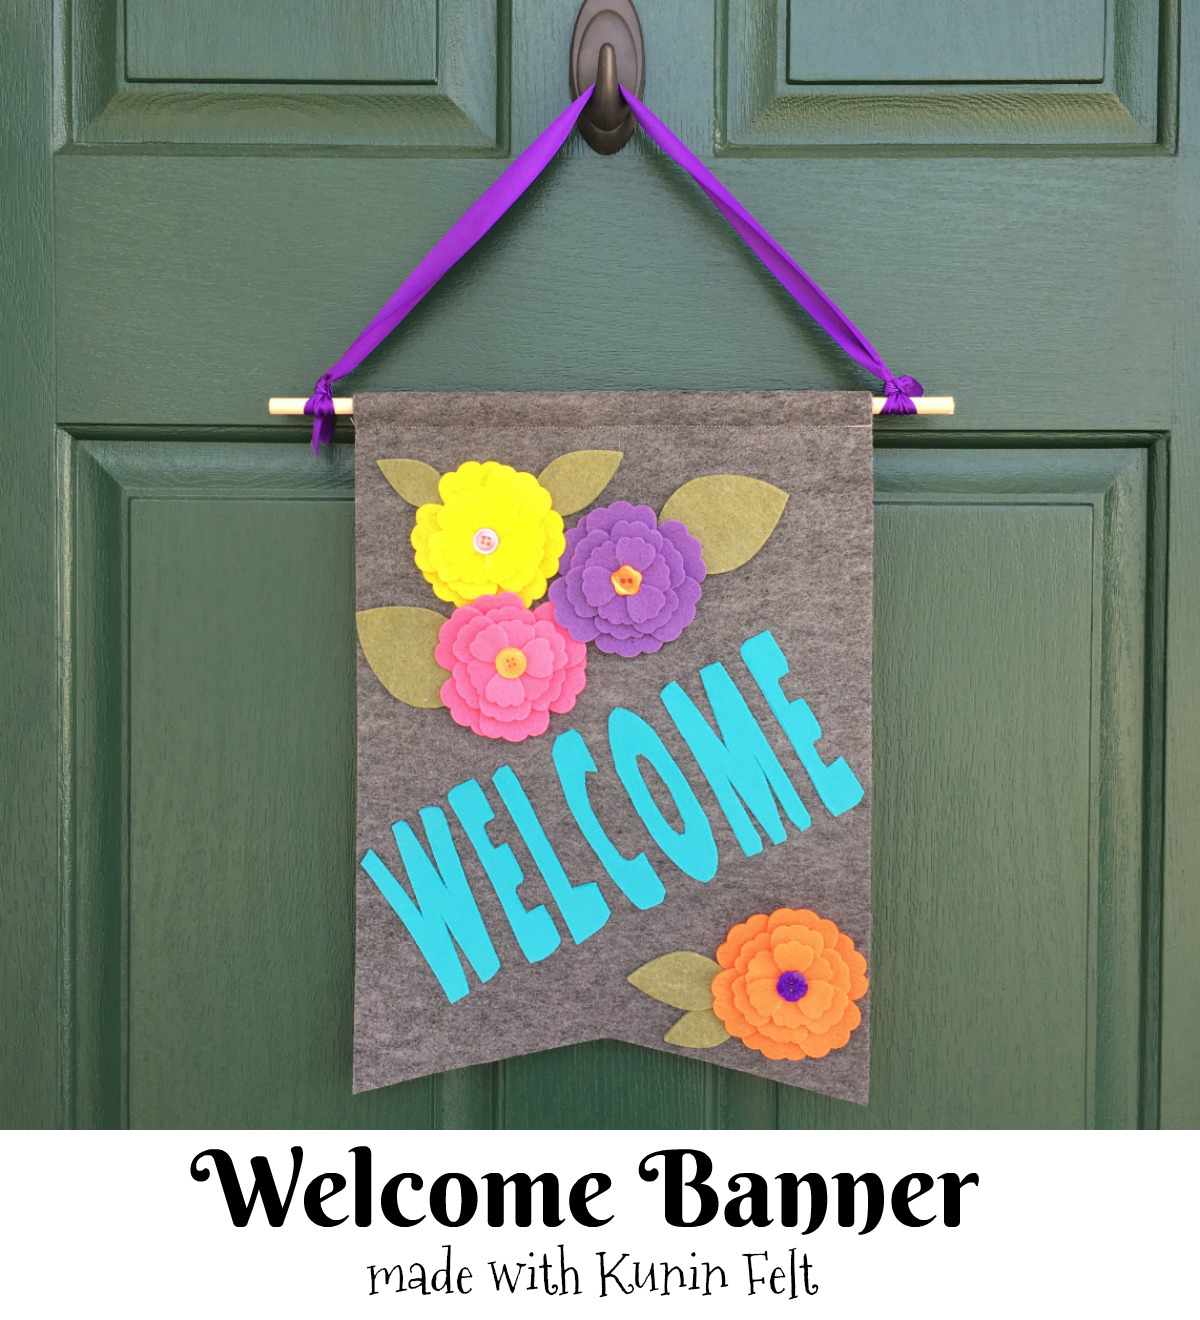
Spring is just days away and it’s time to change out the winter front door decor to something bright and Springy!!!!   Check out this adorable Welcome Banner I made for my front door!  Be sure to CLICK HERE (or the photo) to find out how I made this banner using products from Kunin Felt Group!!!!


Kunin Felt Embroidery Hoop Art

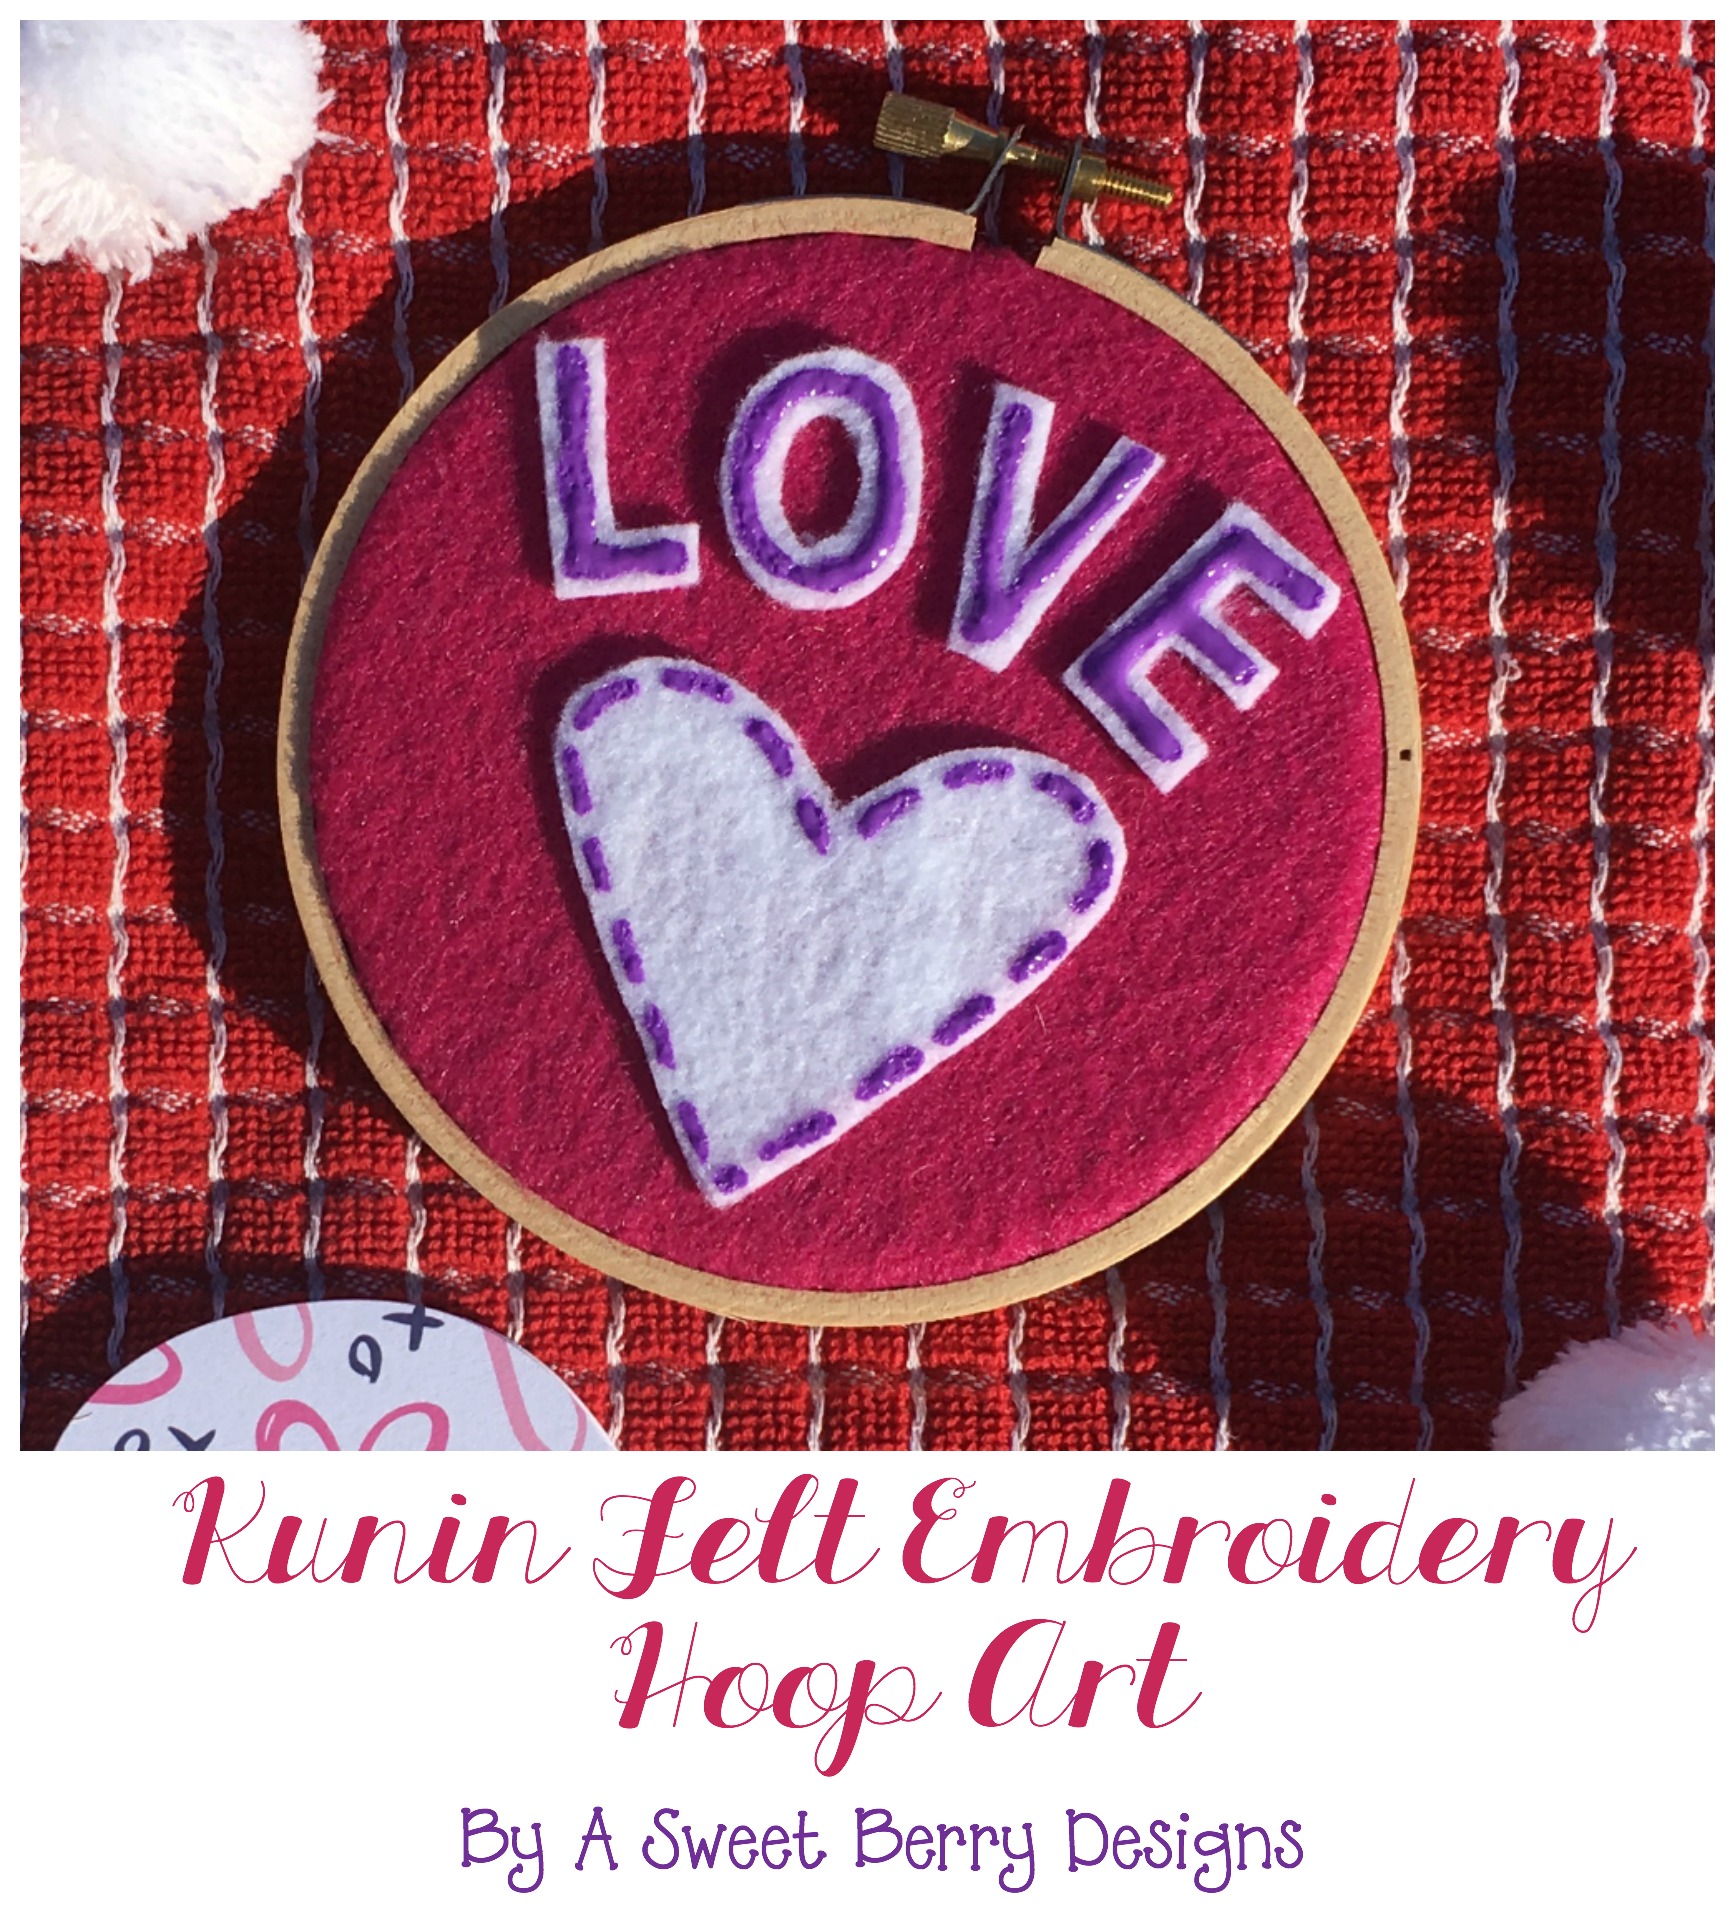
Sometimes I like to be a little unconventional!   This time it’s with a Valentine’s Day Card!  I’m participating in a Valentine’s Day DIY Card Swap!   So, for this Card Swap, I made an Embroidery Hoop Art that can be displayed using Kunin Felt!

Hoop2_Final

Materials Needed:
Embroidery Hoop (I used a 4 inch)
Pink and White Felt (Kunin Felt)
Scissors 
Beacon Felt Glue
Tulip Fabric Paint

Felt In Hoop

Directions:  

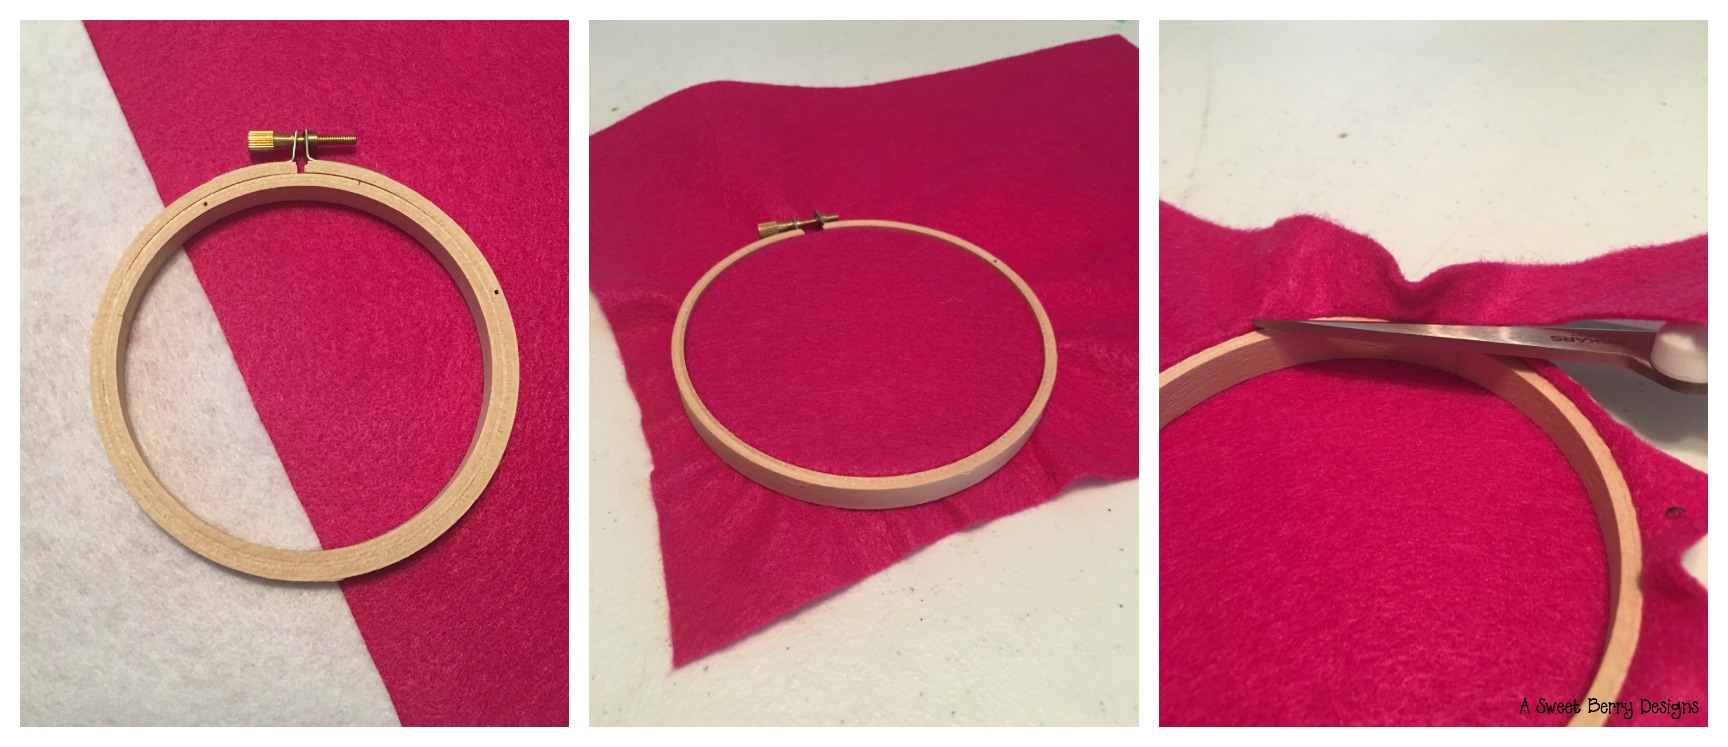
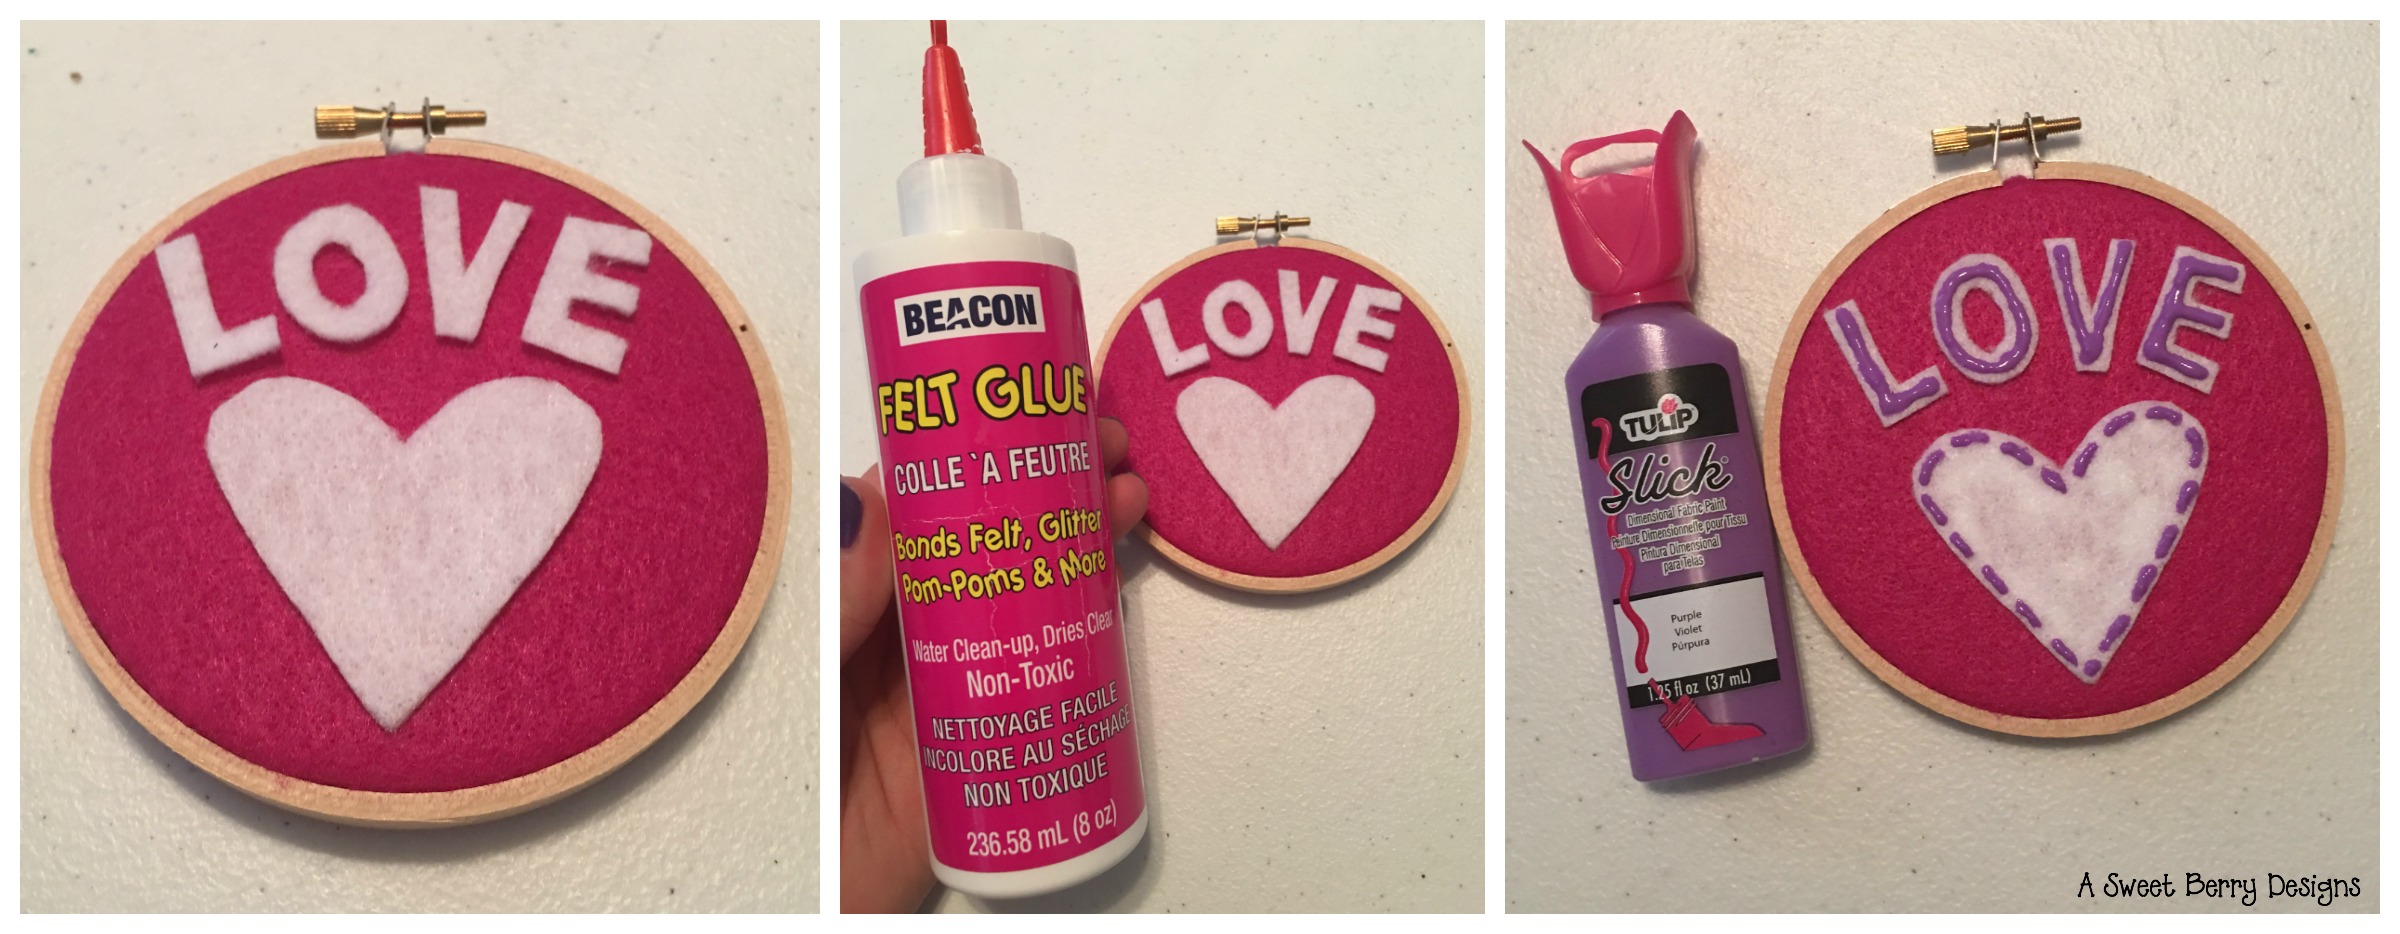
1.  I placed the felt in the hoop and tightened the screw.

2.  Once the fabric was pulled tight, I trimmed the extra felt.

Glue and Paint

3.  From the white felt, I cut a heart and the letters to spell “LOVE”.  

4.  Using Beacon Felt Glue, I glued them down.

5. Using Tulip Slick Fabric Paint, I added some details.

6.  Let dry and then it’s ready to be put in the mail to a special person!

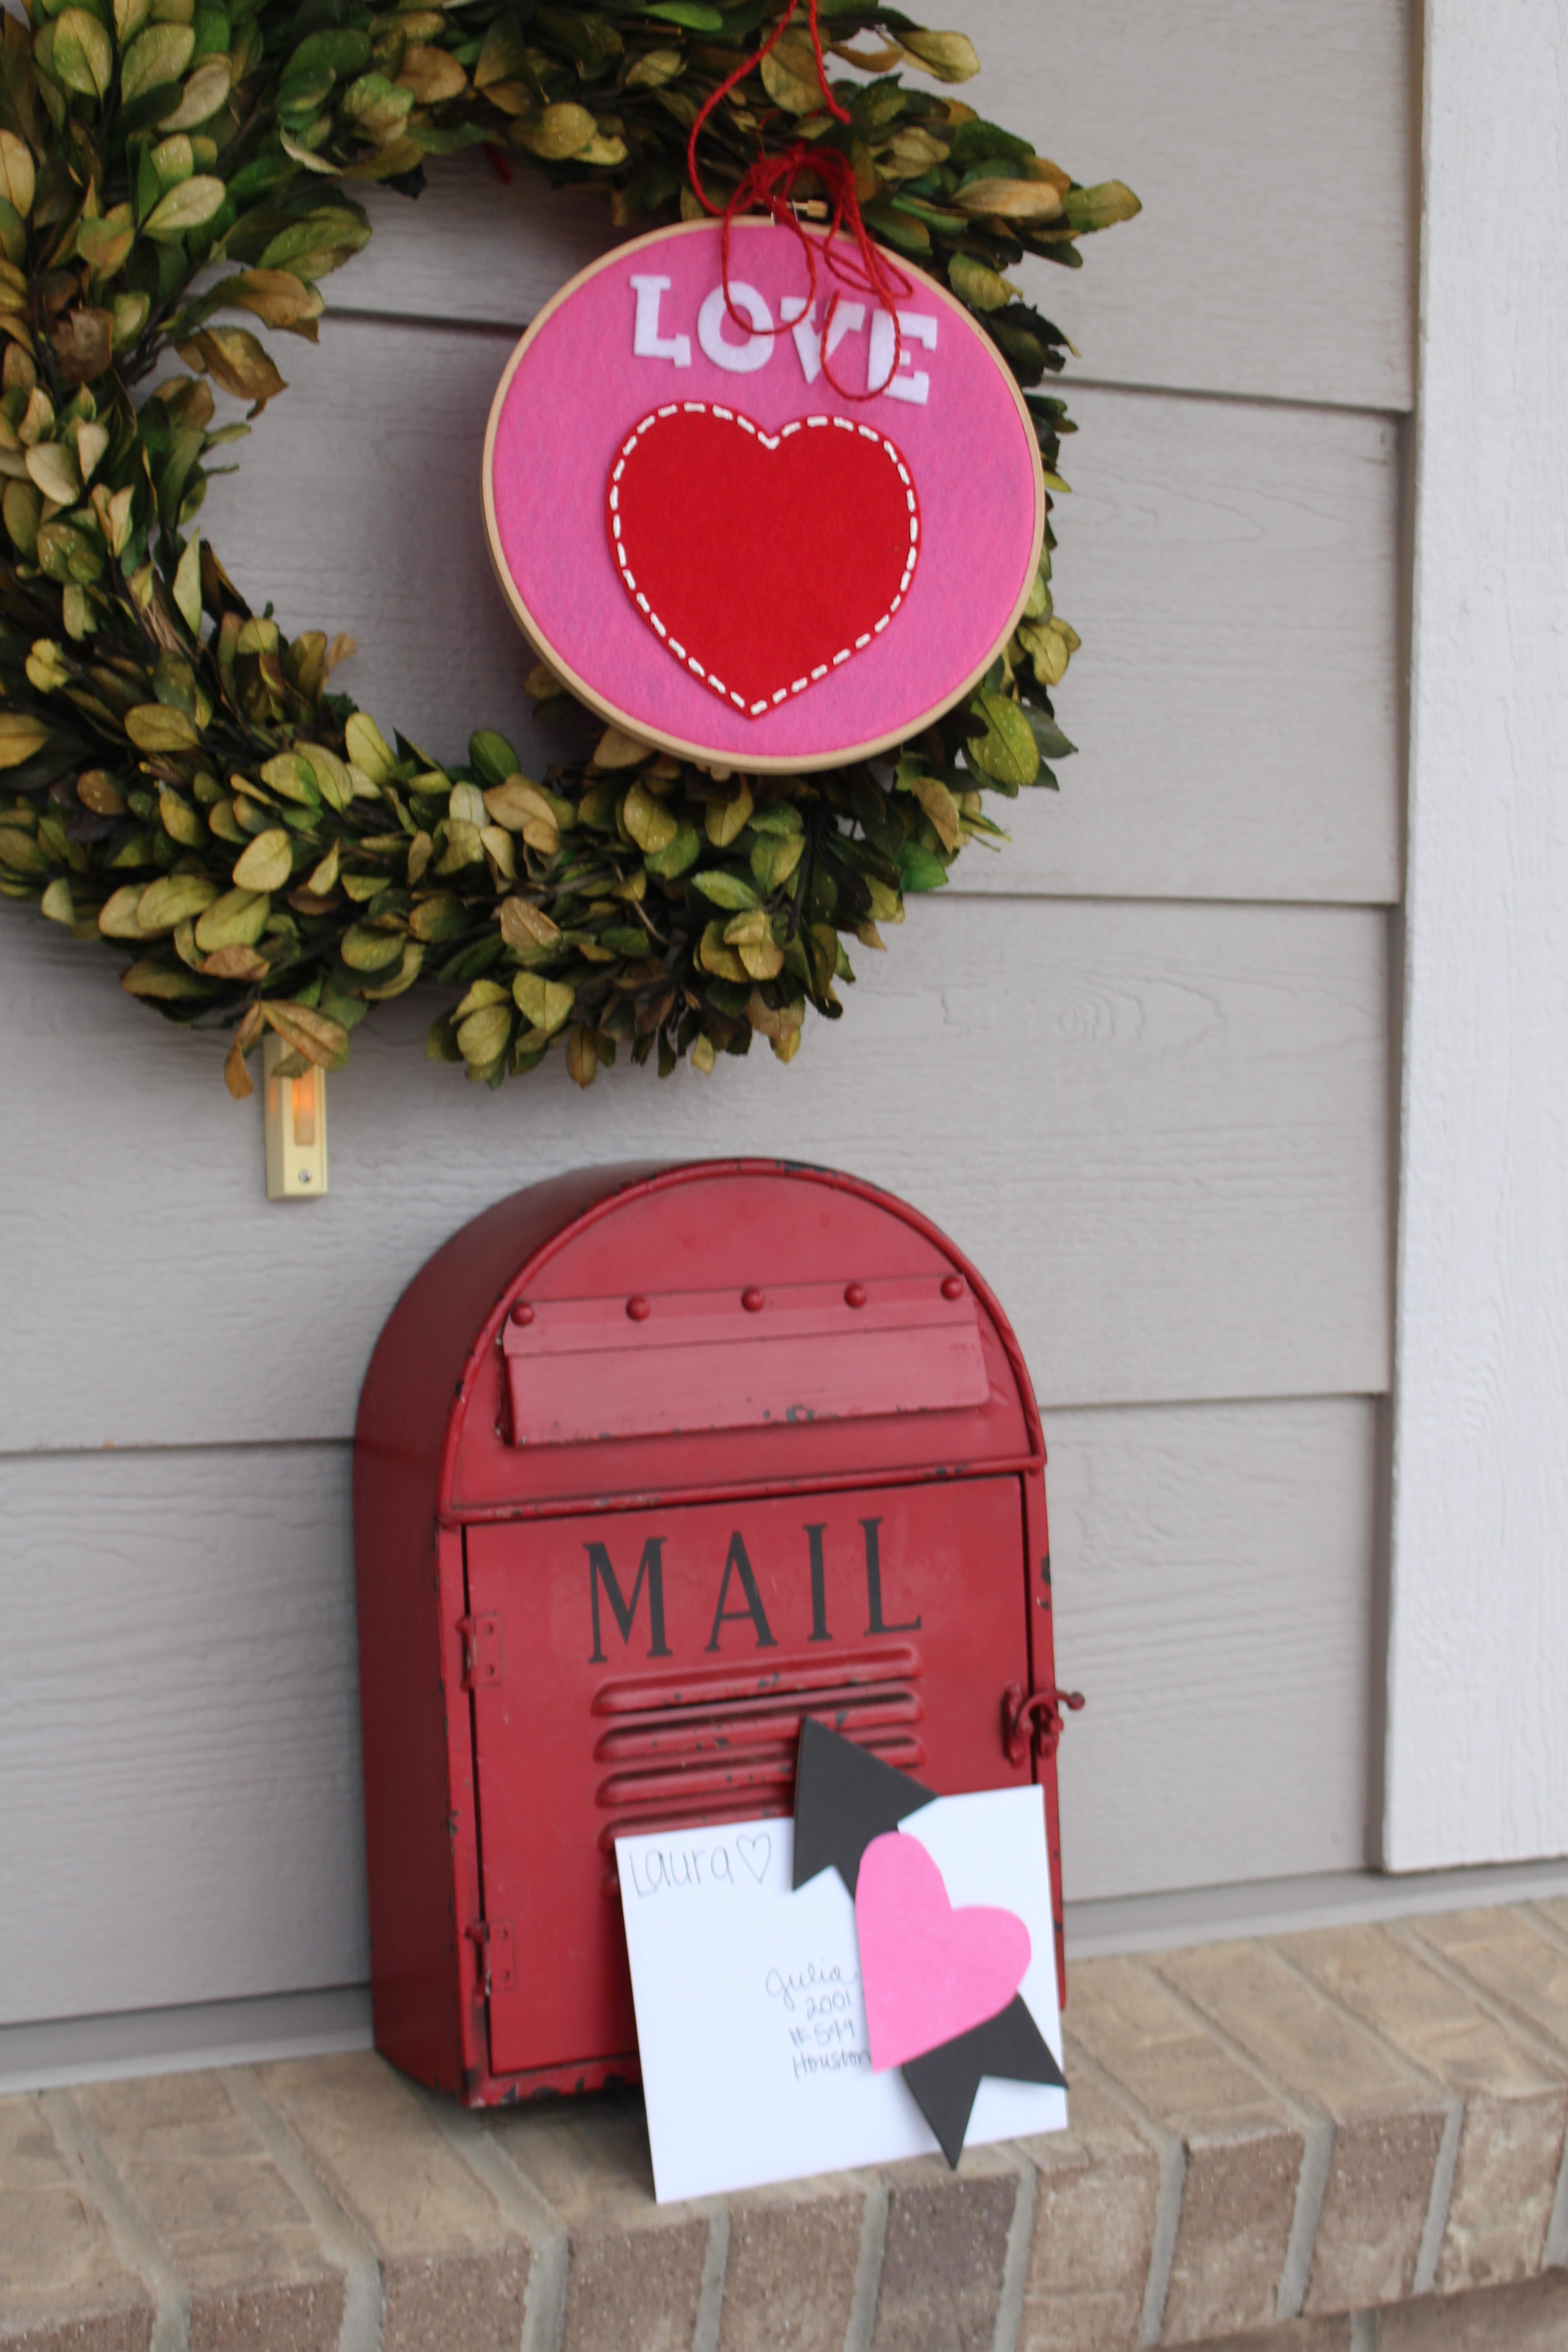
Here is one that I made for the Designer Section Share The Heart Free Art Project at Creativation in Phoenix, AZ last month.  Pieces of Art with a Heart made by the CHA Designers placed art around the show and people could find it and keep it!  My friend Laura Kelly was the one to find mine!  For this one, I used Laura Kelly’s Lemonade Alphabet and Heart #5 dies from Sizzix.

IMG_9201

Check out 9 other great Valentine’s Day Card ideas!

Ariel from PMQ for two’s post // here //

Laura from Me And My Inklings’s post  // here //

Julia from Bunny Baubles’s post // here //

Alexis from Persialou’s post // here //

Mila from Jest Cafe’s post // here //

Lisa & Rachel from Haute Girls Official // here //

Dena from Dena Designs’s post // here //

Mara from Wishes and Merriment’s post // here //

Amy from The Glitter In My Tea’s post  // here //

Also, here is a more traditional Valentine’s Day Card!  Click the photo to check it out!

Heart Card

Hope you enjoyed this Embroidery Hoop Art!  Until next time….


Easy Valentine’s Day Heart Card

Disclaimer:  This post contains an affiliate link.

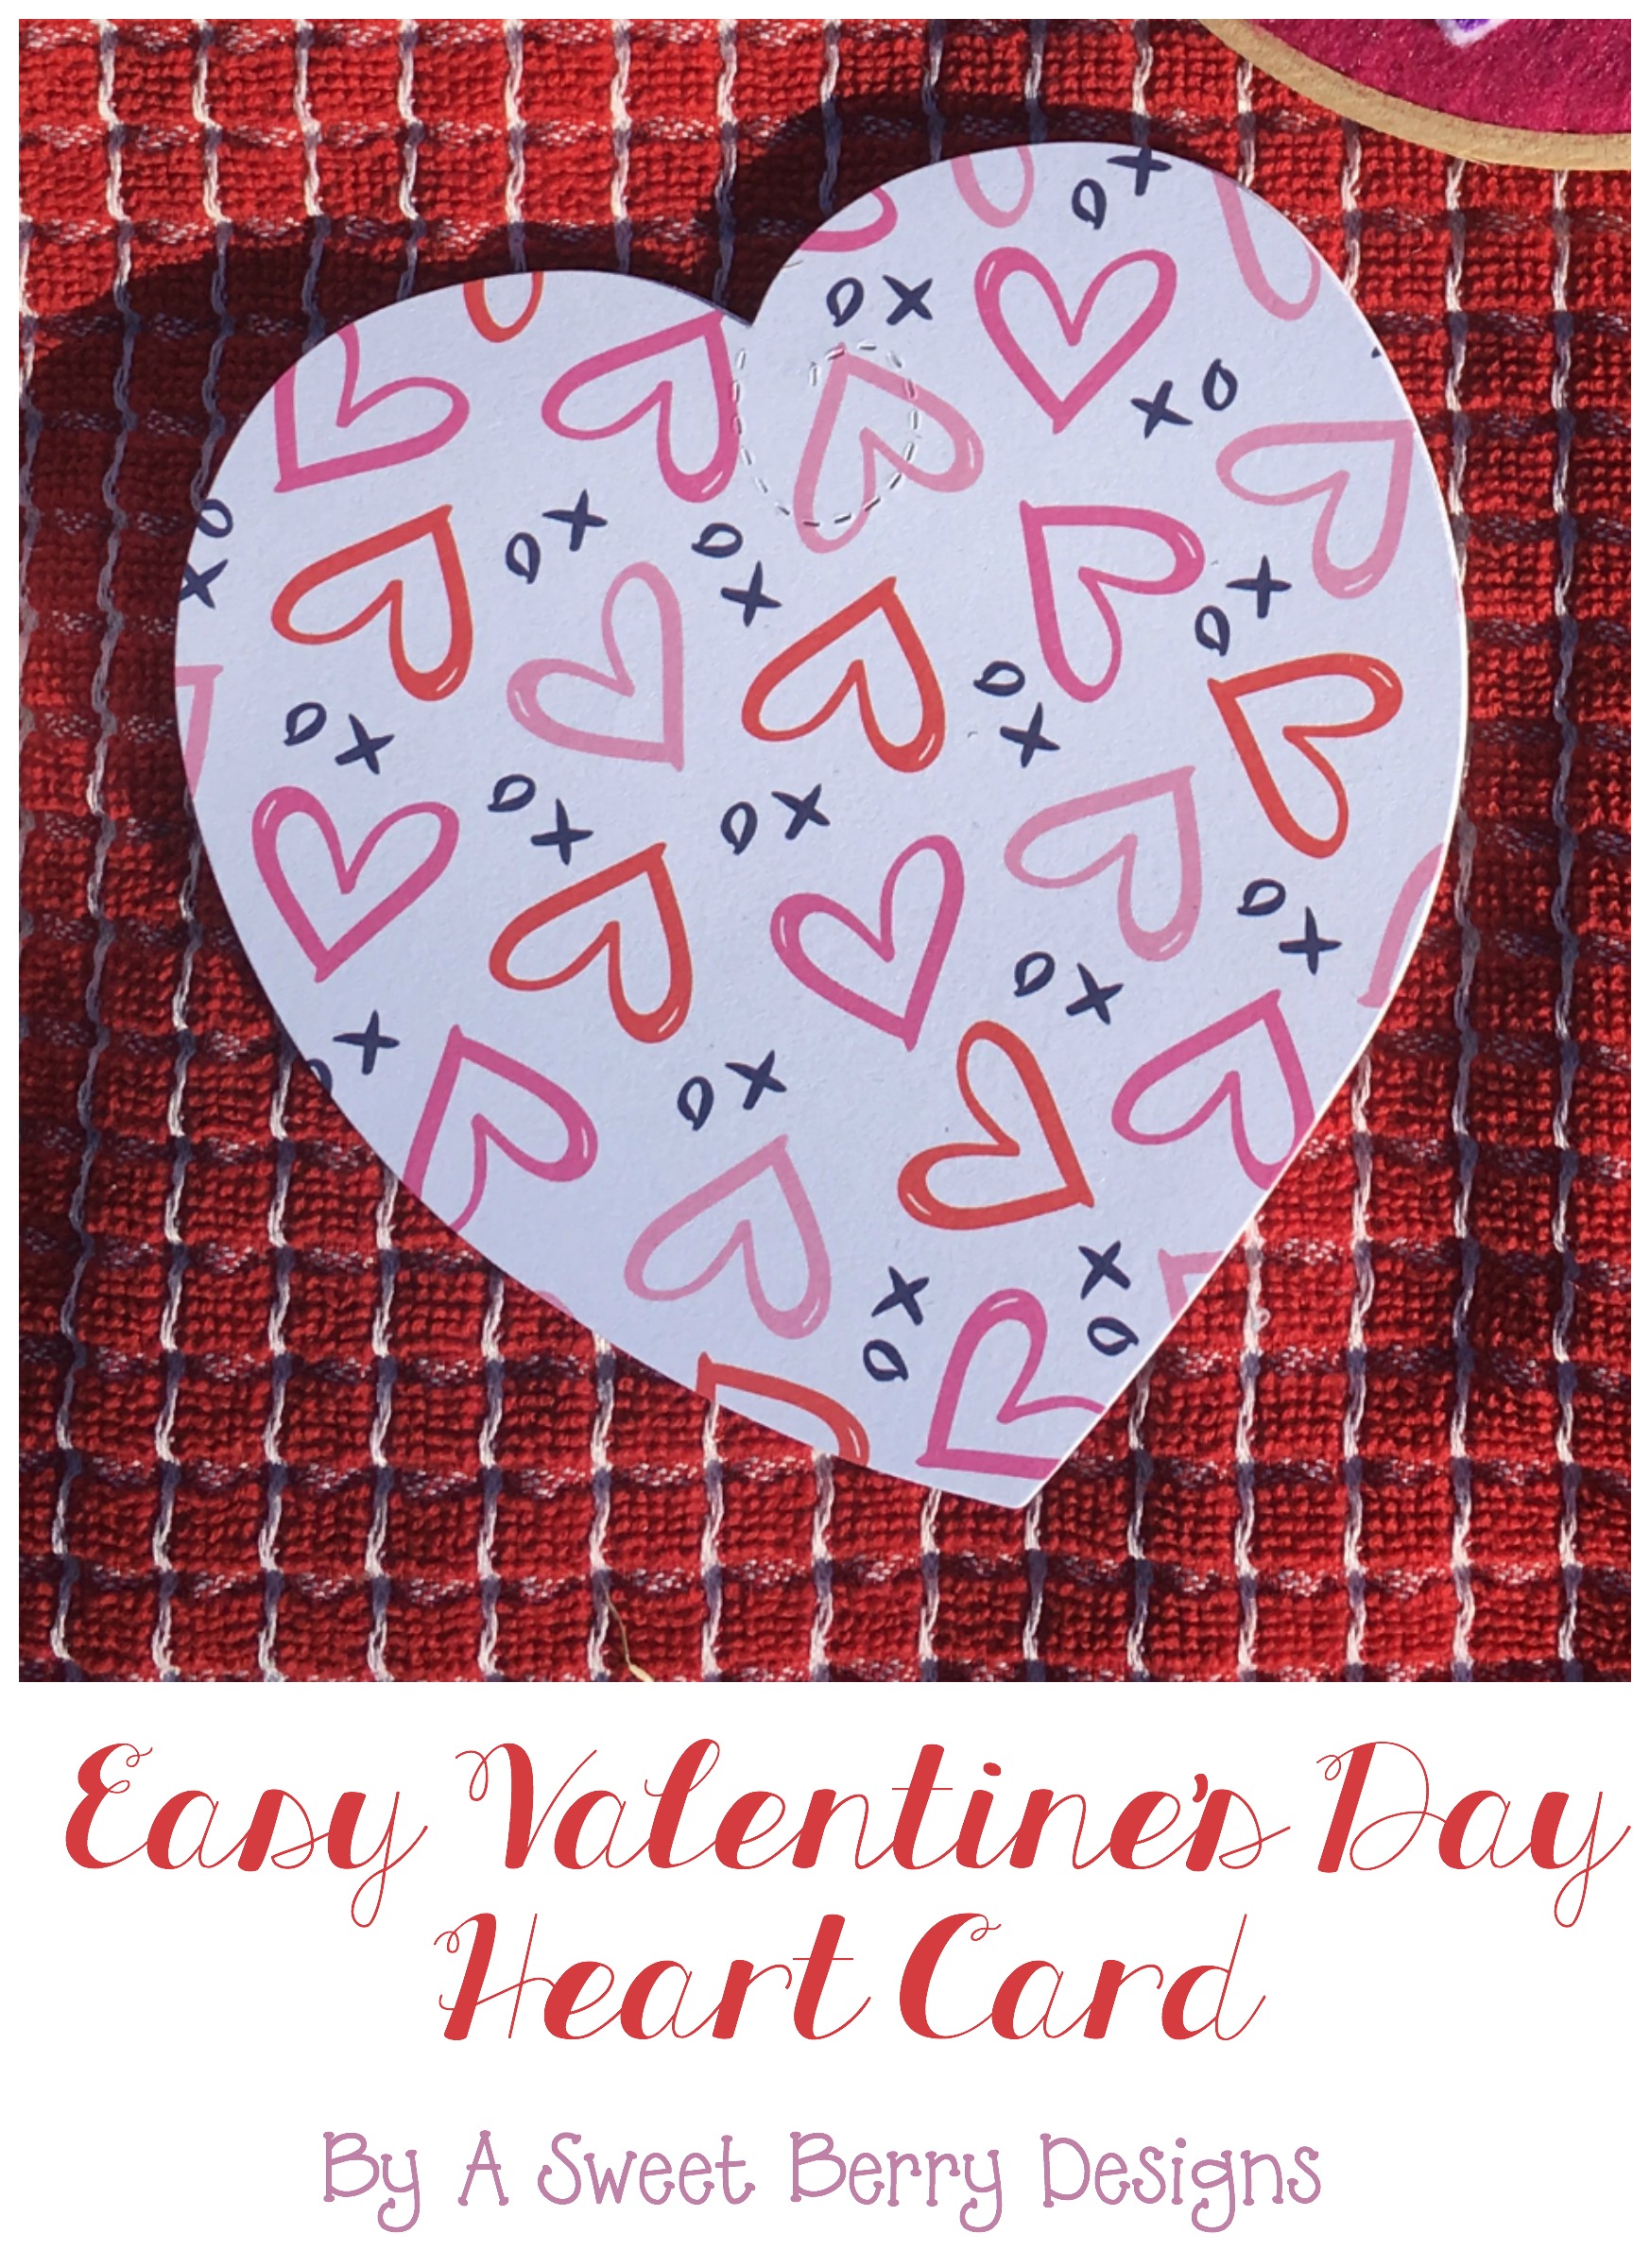
Valentine’s Day is right around the corner!  Need a super easy card?  Here is one for you!  It’s a Valentine’s Day Heart Card!

Heart Card

Materials Need:
Ellison SuperStar Machine
Cutting Pads
Laura Kelly’s Sizzix Heart #5
White Card Stock
Cute Valentin’e Day Card Stock
Tape Runner

Card

Directions:

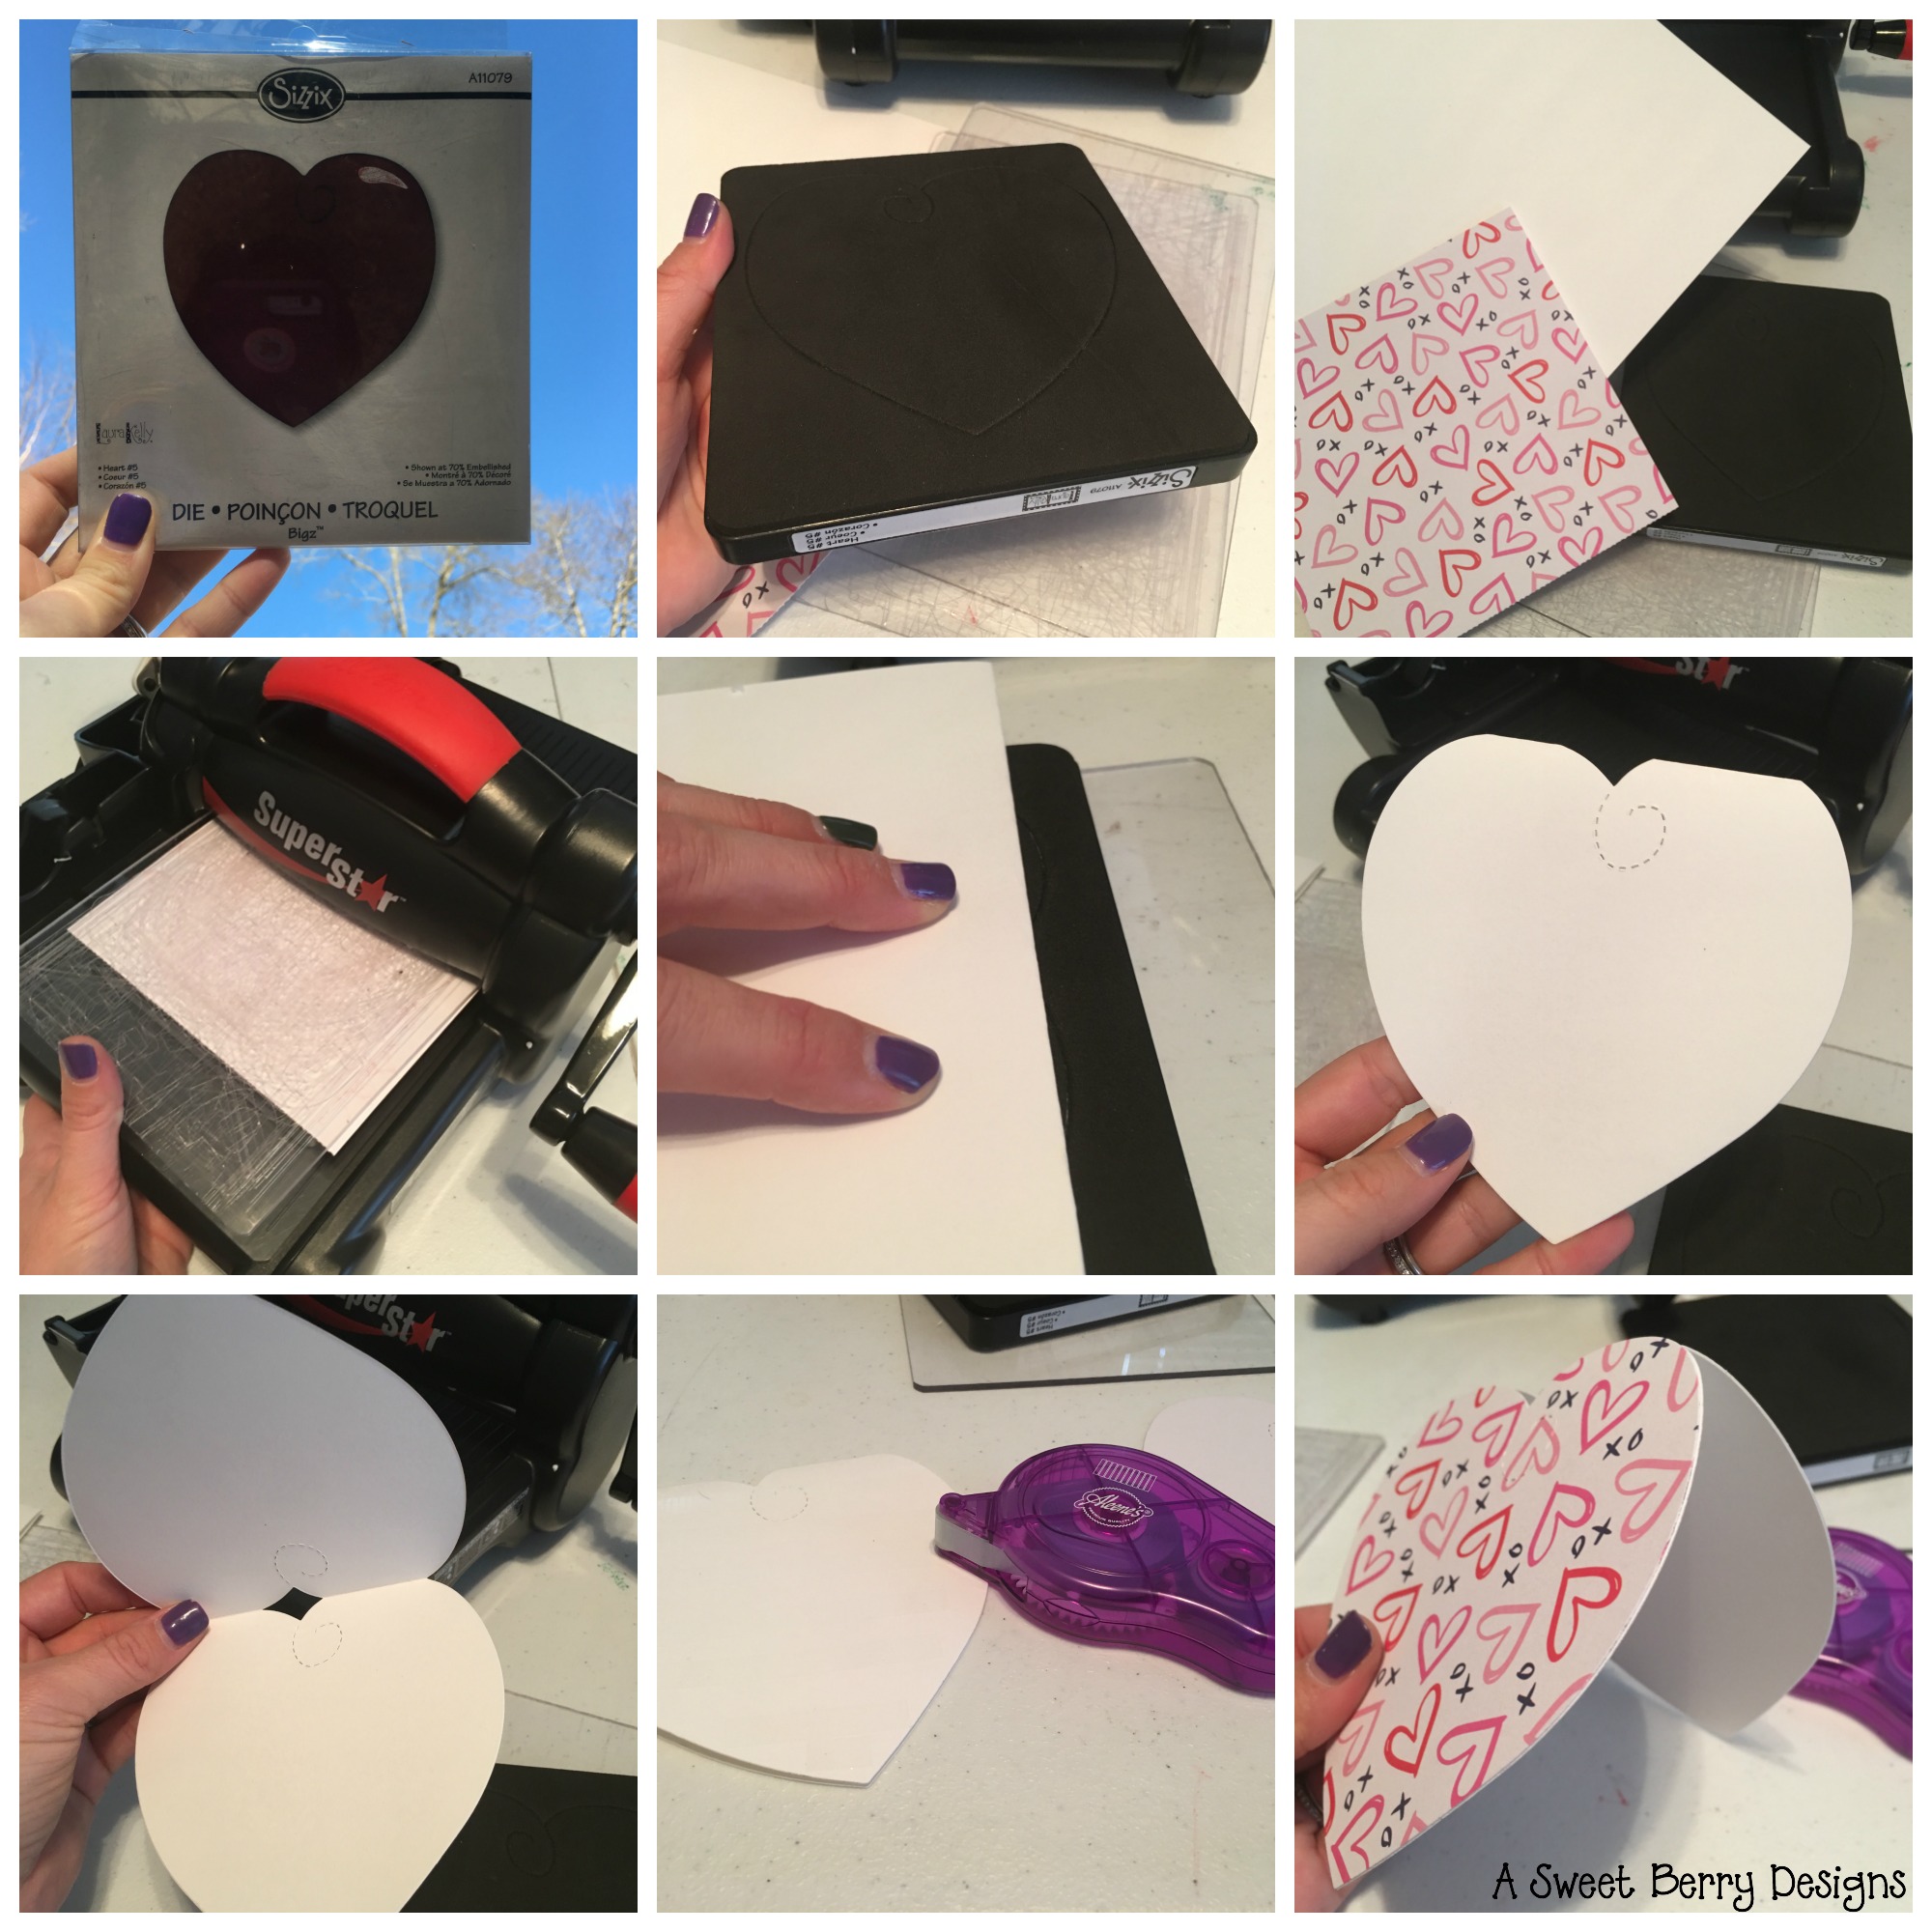
  1.  First, using the Ellison SuperStar Machine, the cutting dies, the heart die and your cute Valentine’s Day paper, cut a heart.  Be sure to place your paper cute side down.
  2. Fold your piece of white card stock in half.  
  3. Place the folded side down at the top of the heart, moving it down to right below the cut lines of the heart.  This will create the fold in your heart card.
  4. You may need to trim off the extra paper on the sides.
  5. Place the die and paper on the cutting pads and run it through the machine.
  6. This step is important:   See which side of your fold card heart matches up to the cute card stock heart.
  7. Using a tape runner, place tape on the front part of your white card stock. 
  8. Place the cute card stock heart on the front side of the card, making sure to line it up with the bottom of the heart.  Know that the top of the card and the cute card stock will not touch because you created that fold below the cut line of the die.
  9. Write a sweet little note inside and send it to someone special!

Hope you like this cute and super easy Valentine’s Day Heart Card!  

Until next time…..

Kunin Felt Love Banner

Disclosure:   This blog post contains one or more affiliate links.

It’s time for the Valentine’s Day Craft Lightning series!   And since I’m obsessed with banners lately, this was an easy one for me!  It really takes less than 15 minute and even the kids can help out with it.

Banner

Materials needed:
Sizzix Cutting Machine (I use a Big Shot)
Kunin Felt
Dies:

Felt Glue (I use Beacon’s)
Jute Rope
Clothespins (I like the medium sized ones)

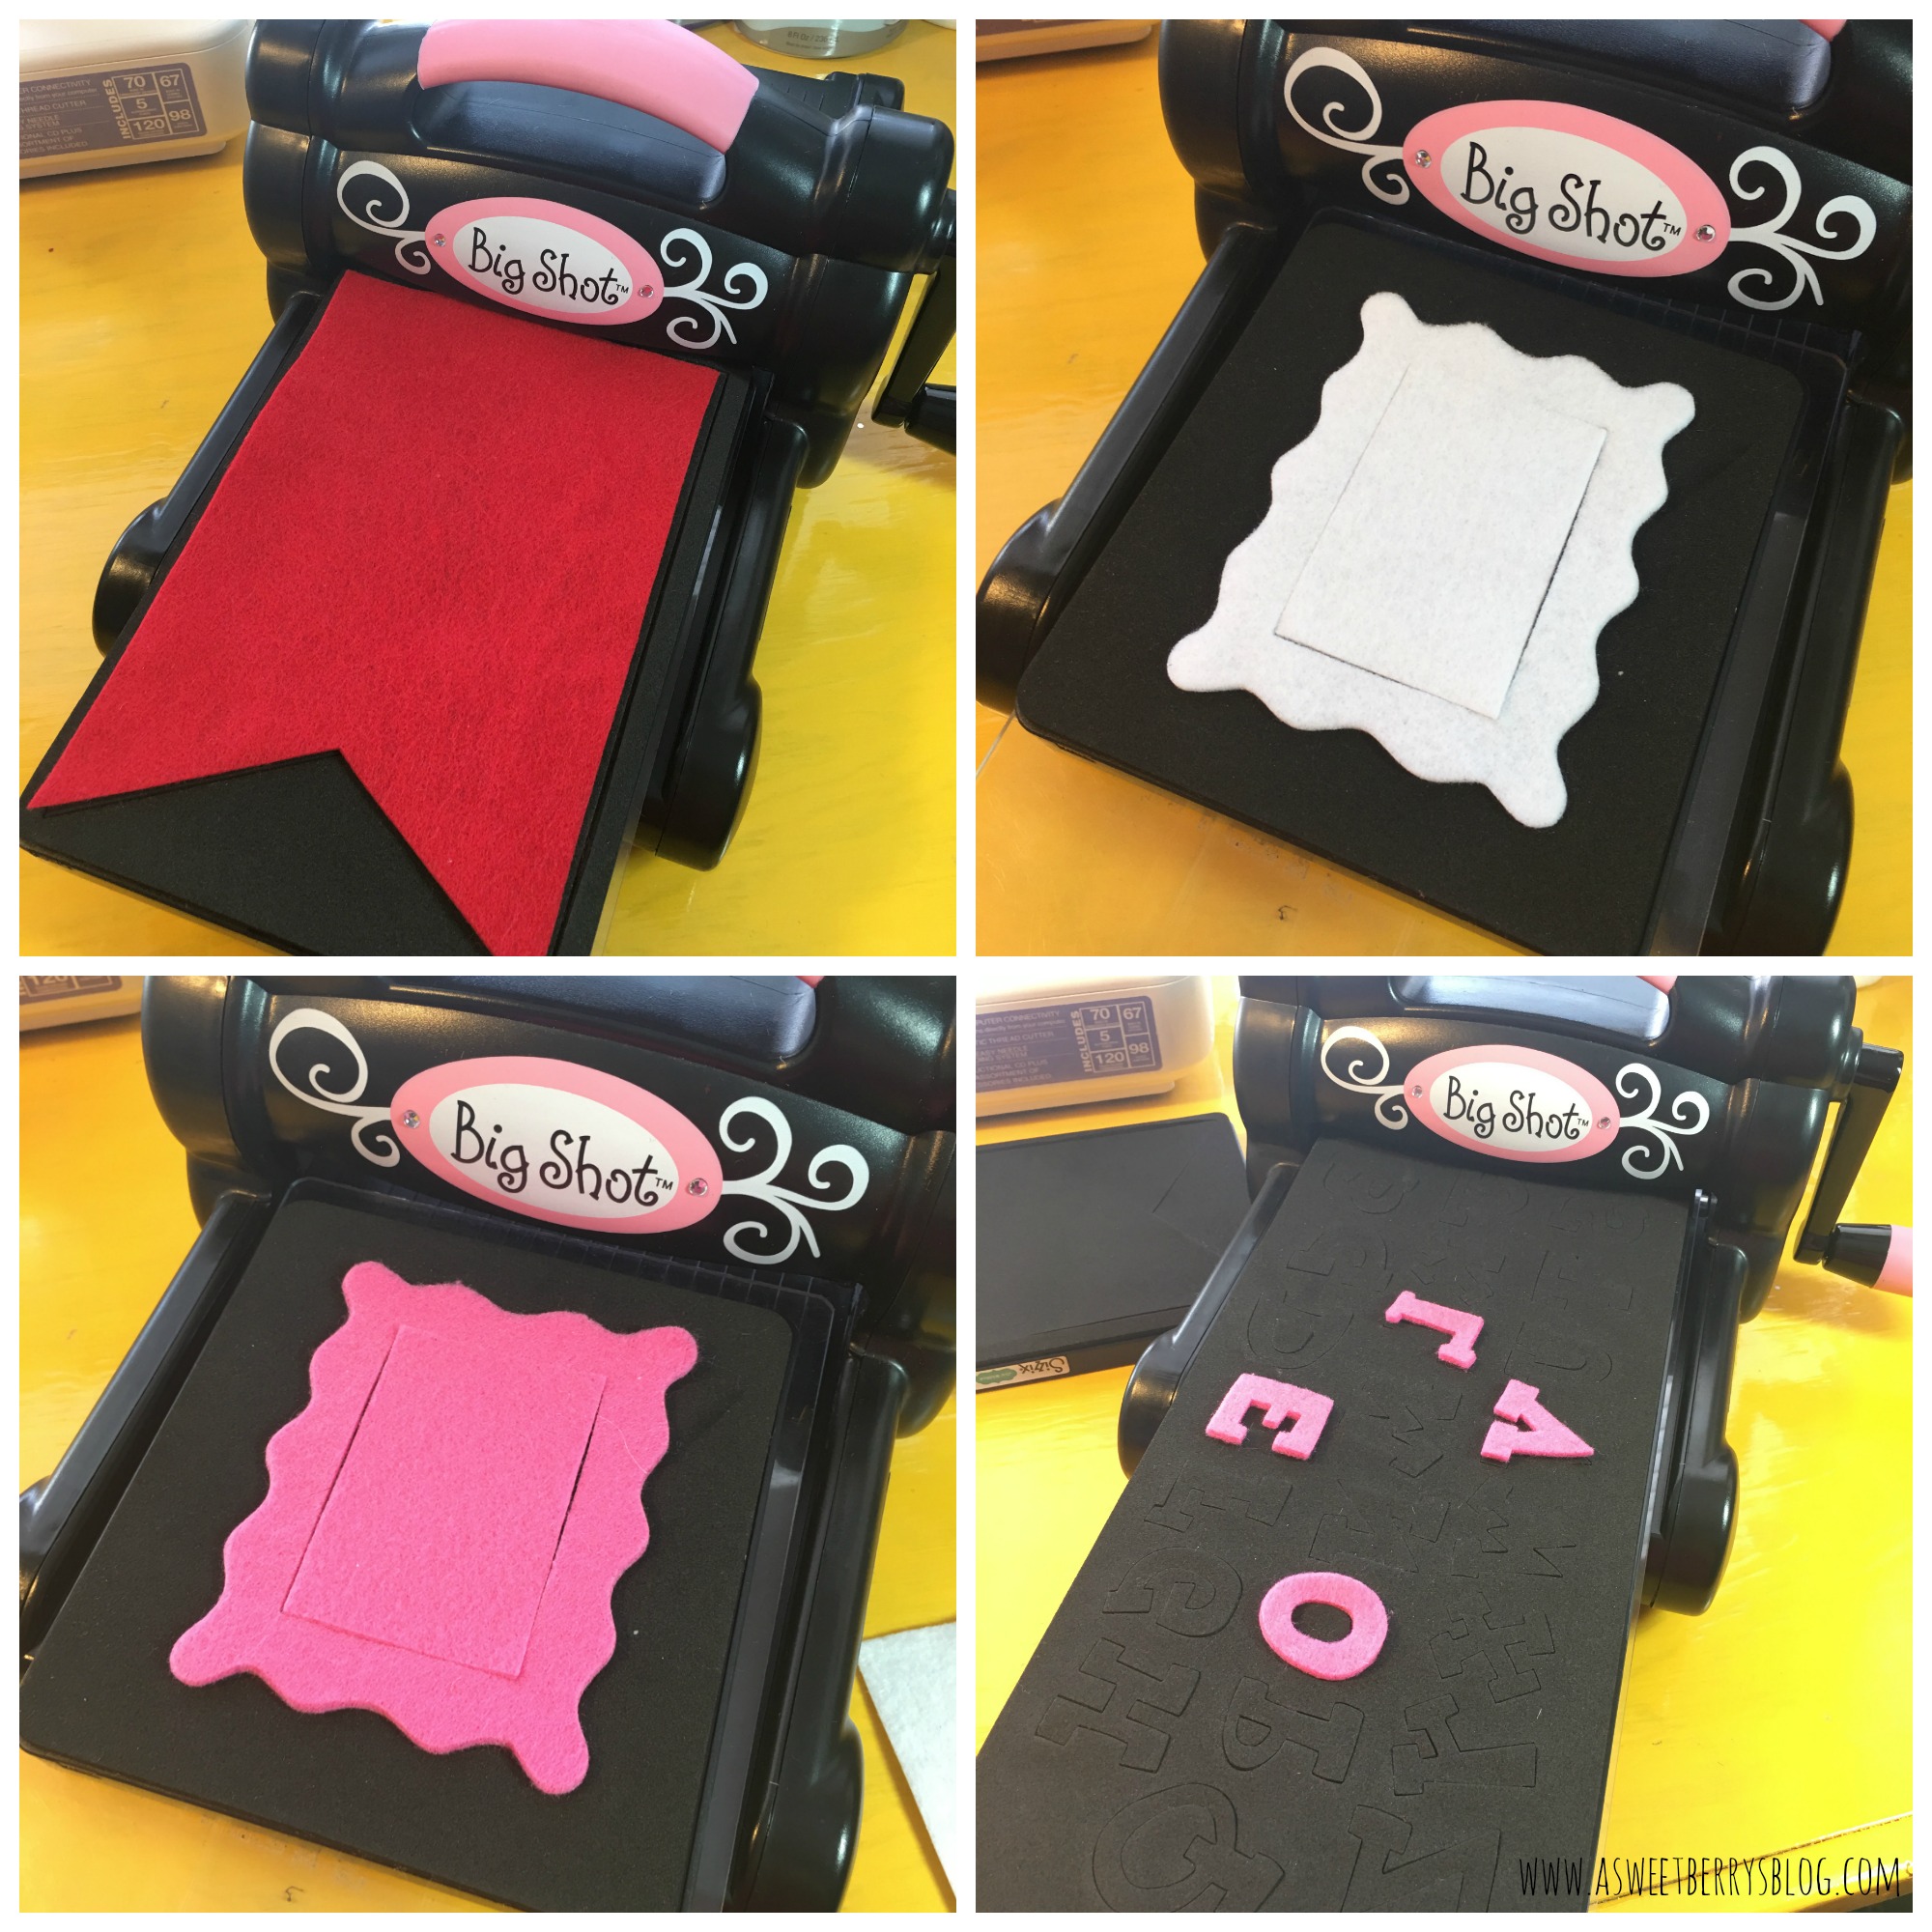
Step 1:  Using the Big Shot machine and dies, I cut all of my pieces.  Lori Whitlock’s Banner die is my favorite die ever, especially with the banner craze that I have right now!!!!   I also love Laura Kelly’s Lemonade Alphabet!   The Sizzix Wavy Frame is so versatile!   I cut the frame out in two different felt colors.  

dies

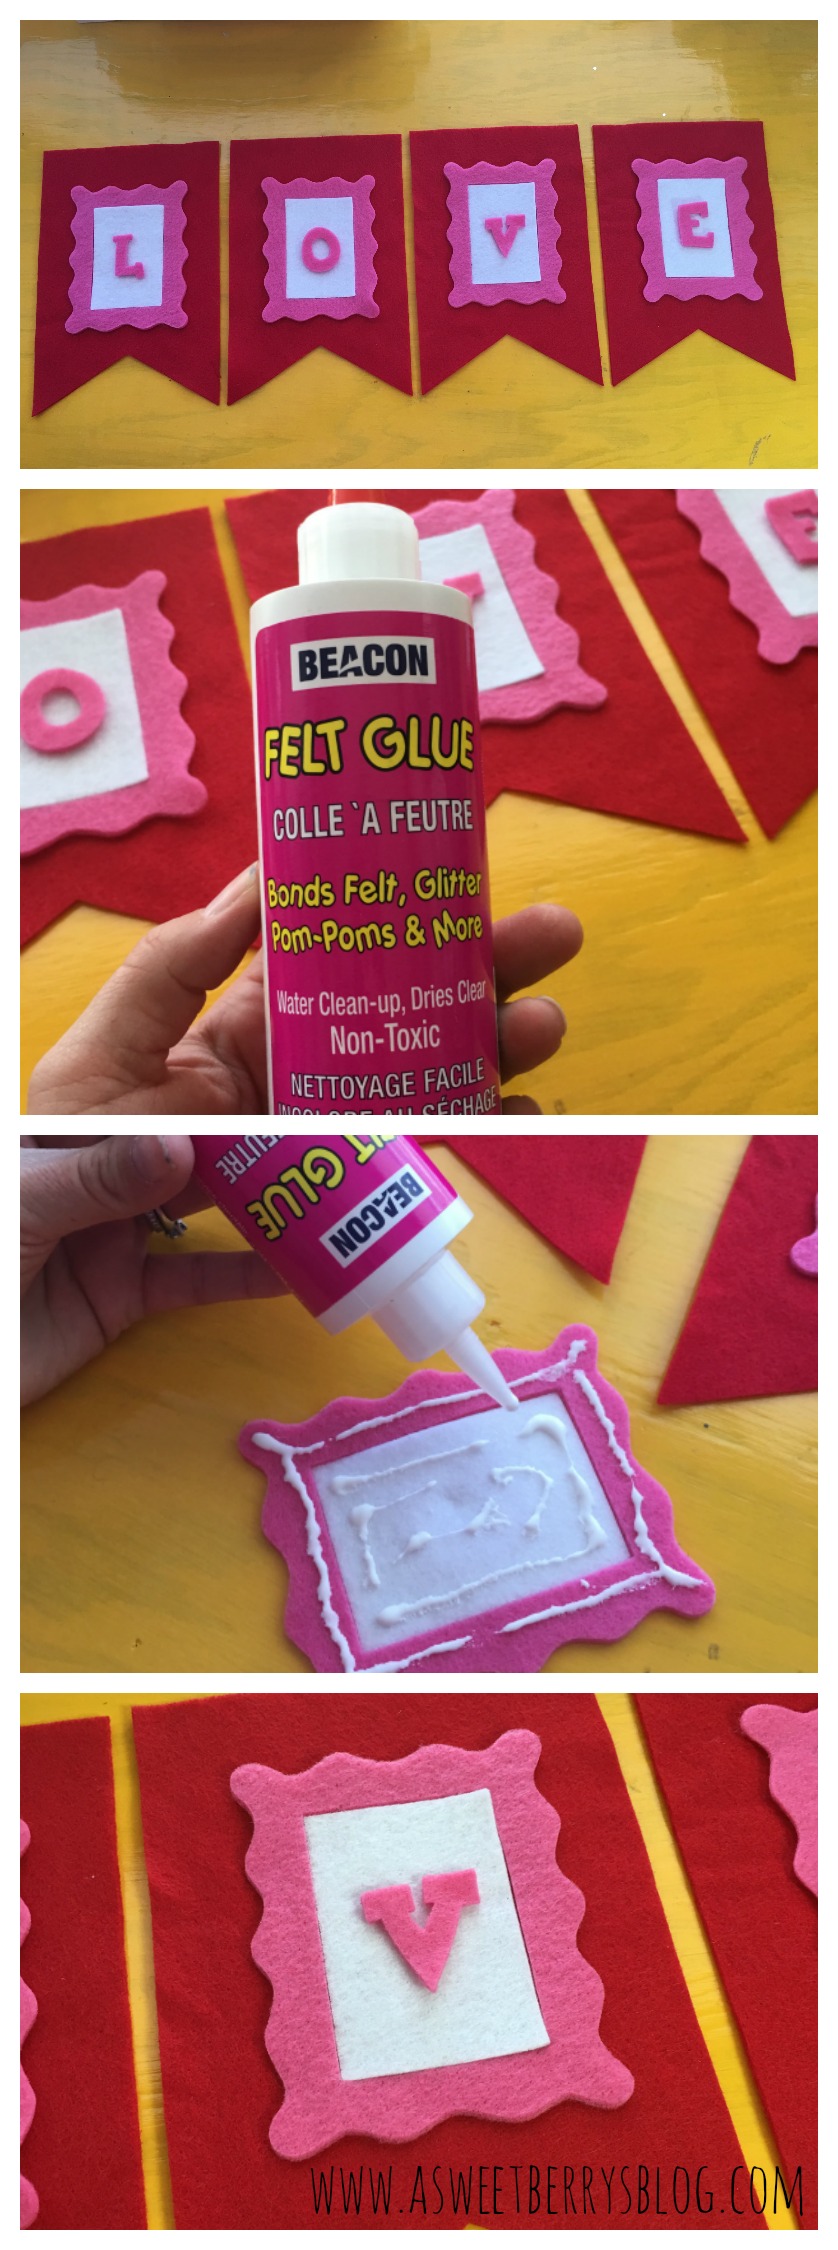
Step 2:   Lay your design out.  At first, I wasn’t going to add the inside of the frame piece, but then I decide to.  I like it!  Once you have it laid out the way you want it, glue it all down.  I glued the frames down first and then added the letters.

Glue Time

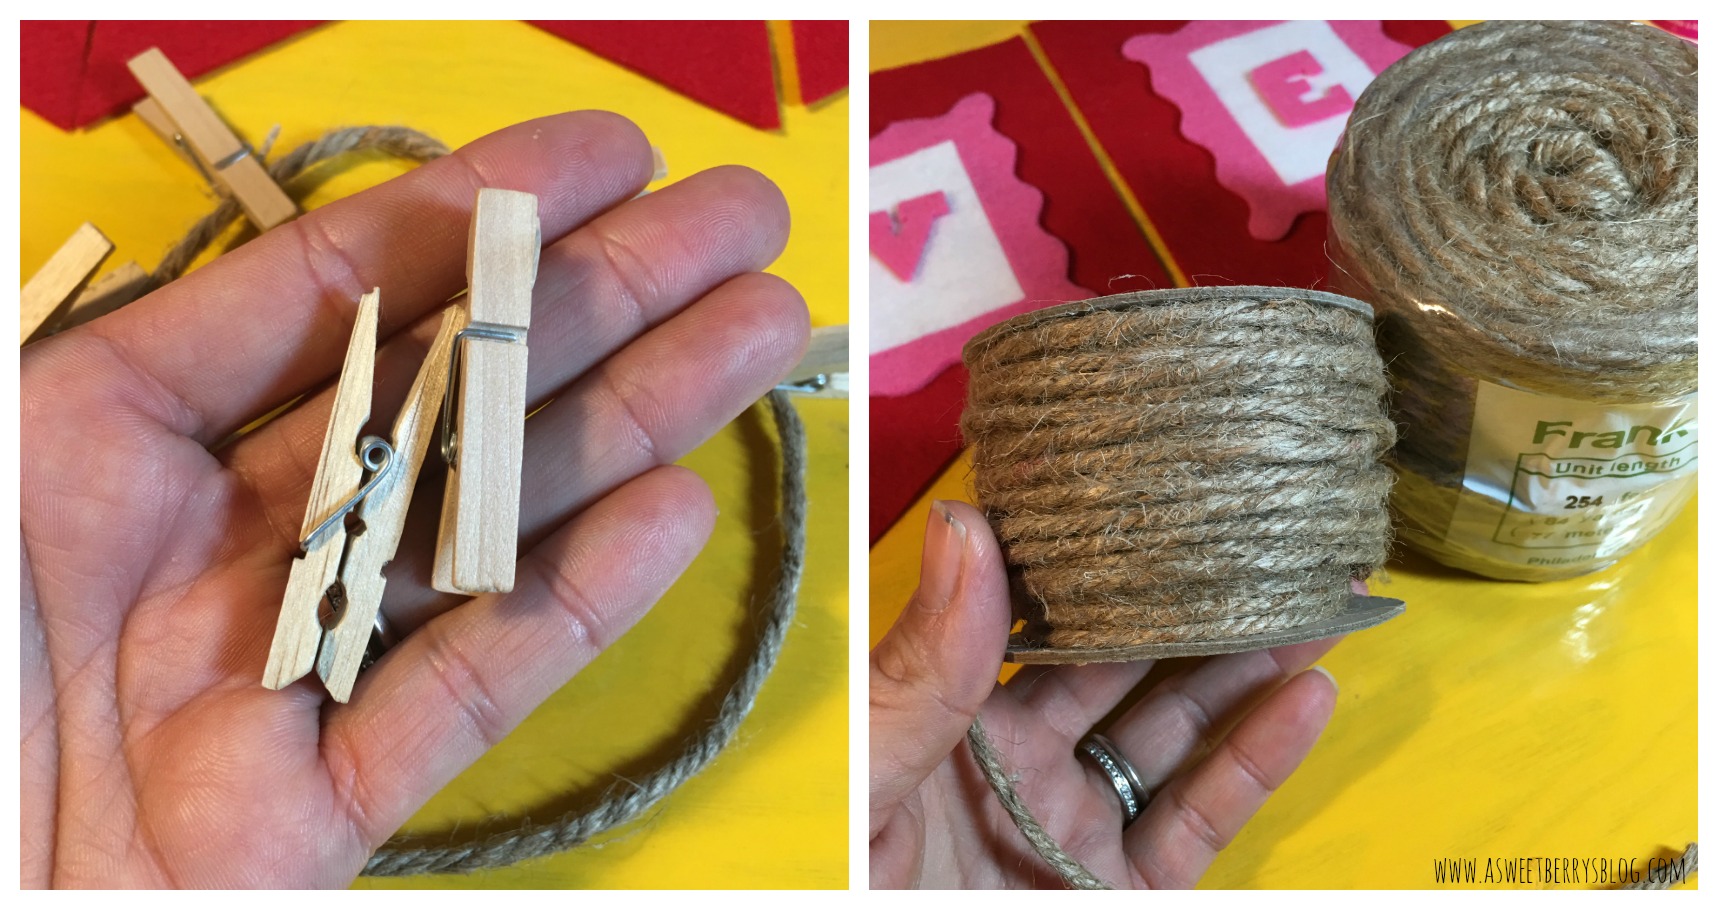
Step 3:  Let it dry and then add it to your jute rope using clothes pins.  Then hang it up!  Another option is to cut small cuts into the top of your felt banner and then slide it onto the jute rope.  I like the clothespins, simply for the fact that I like to make banners for different occasions and I can just switch them out!  I love to use Command Strips to hang up my banners.   They are easy to remove and you can put them wherever you want!

clips and rope

I hope you like this adorable LOVE banner made from Kunin Felt.  

Be sure to check out all of the other quick and easy Craft Lightning Valentine’s Day crafts by clicking the button below!!!


Katie-Signature-2

Holster Brands Products to keep all of your craft supplies handy!

final-2

Disclosure:   I was provided product from Holster Brands for this blog post.   All opinions of this product are solely my own.  

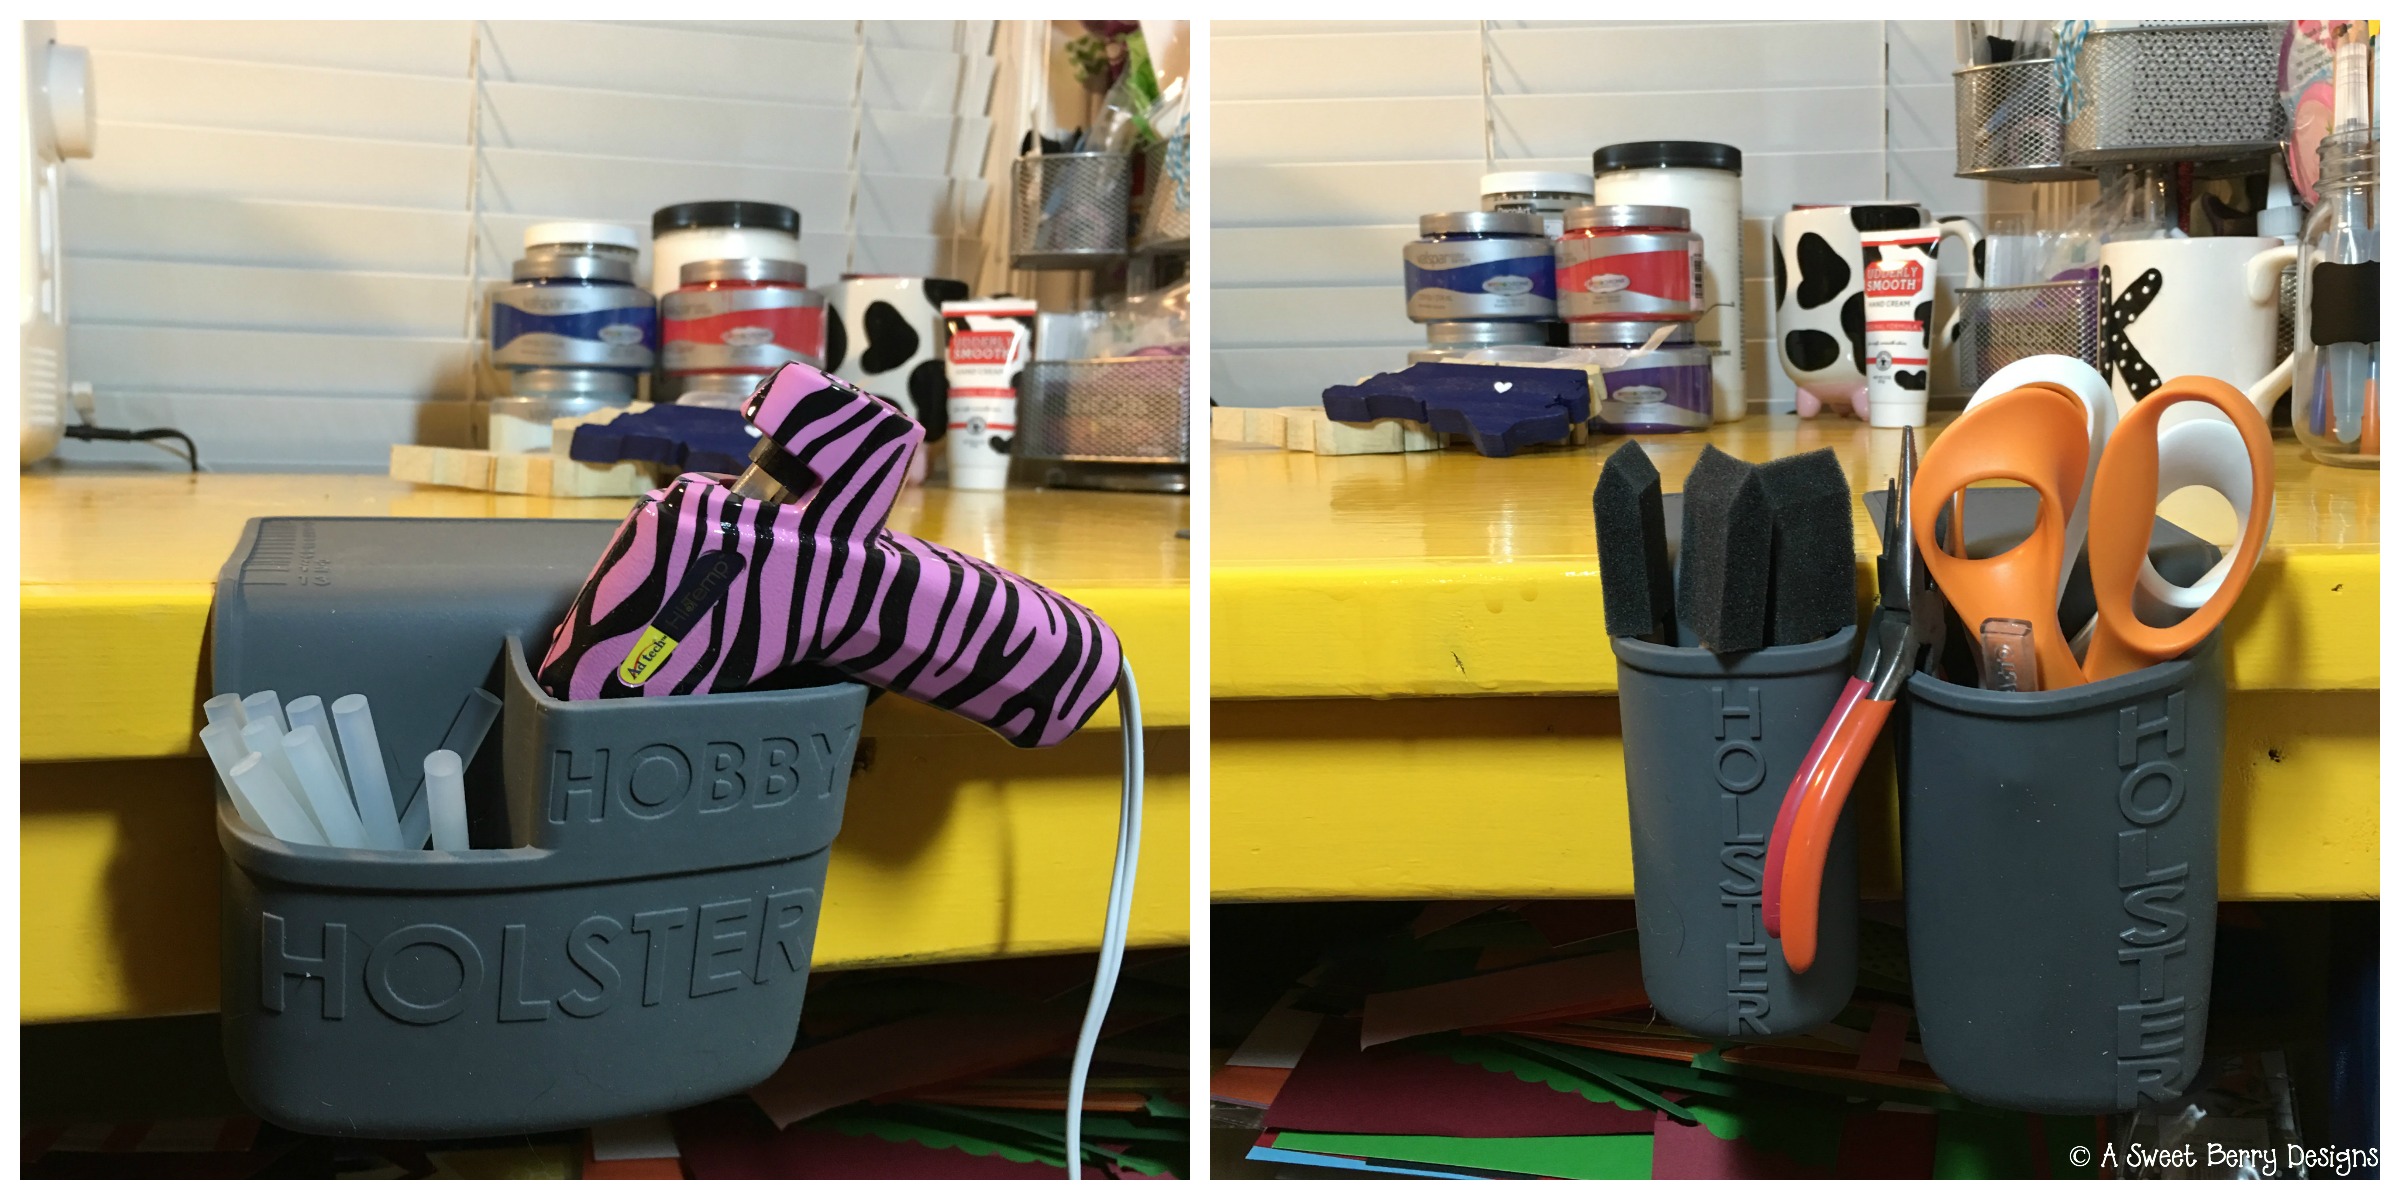
Oh my word!!!  Just let me tell you about these awesome products that I got to try out from Holster Brands!  They have the niftiest little craft and kitchen supply holders around!   There are different sizes for different products but can be used for just about any of those craft supplies that somehow end up in a place that you don’t know where they are!

holsters

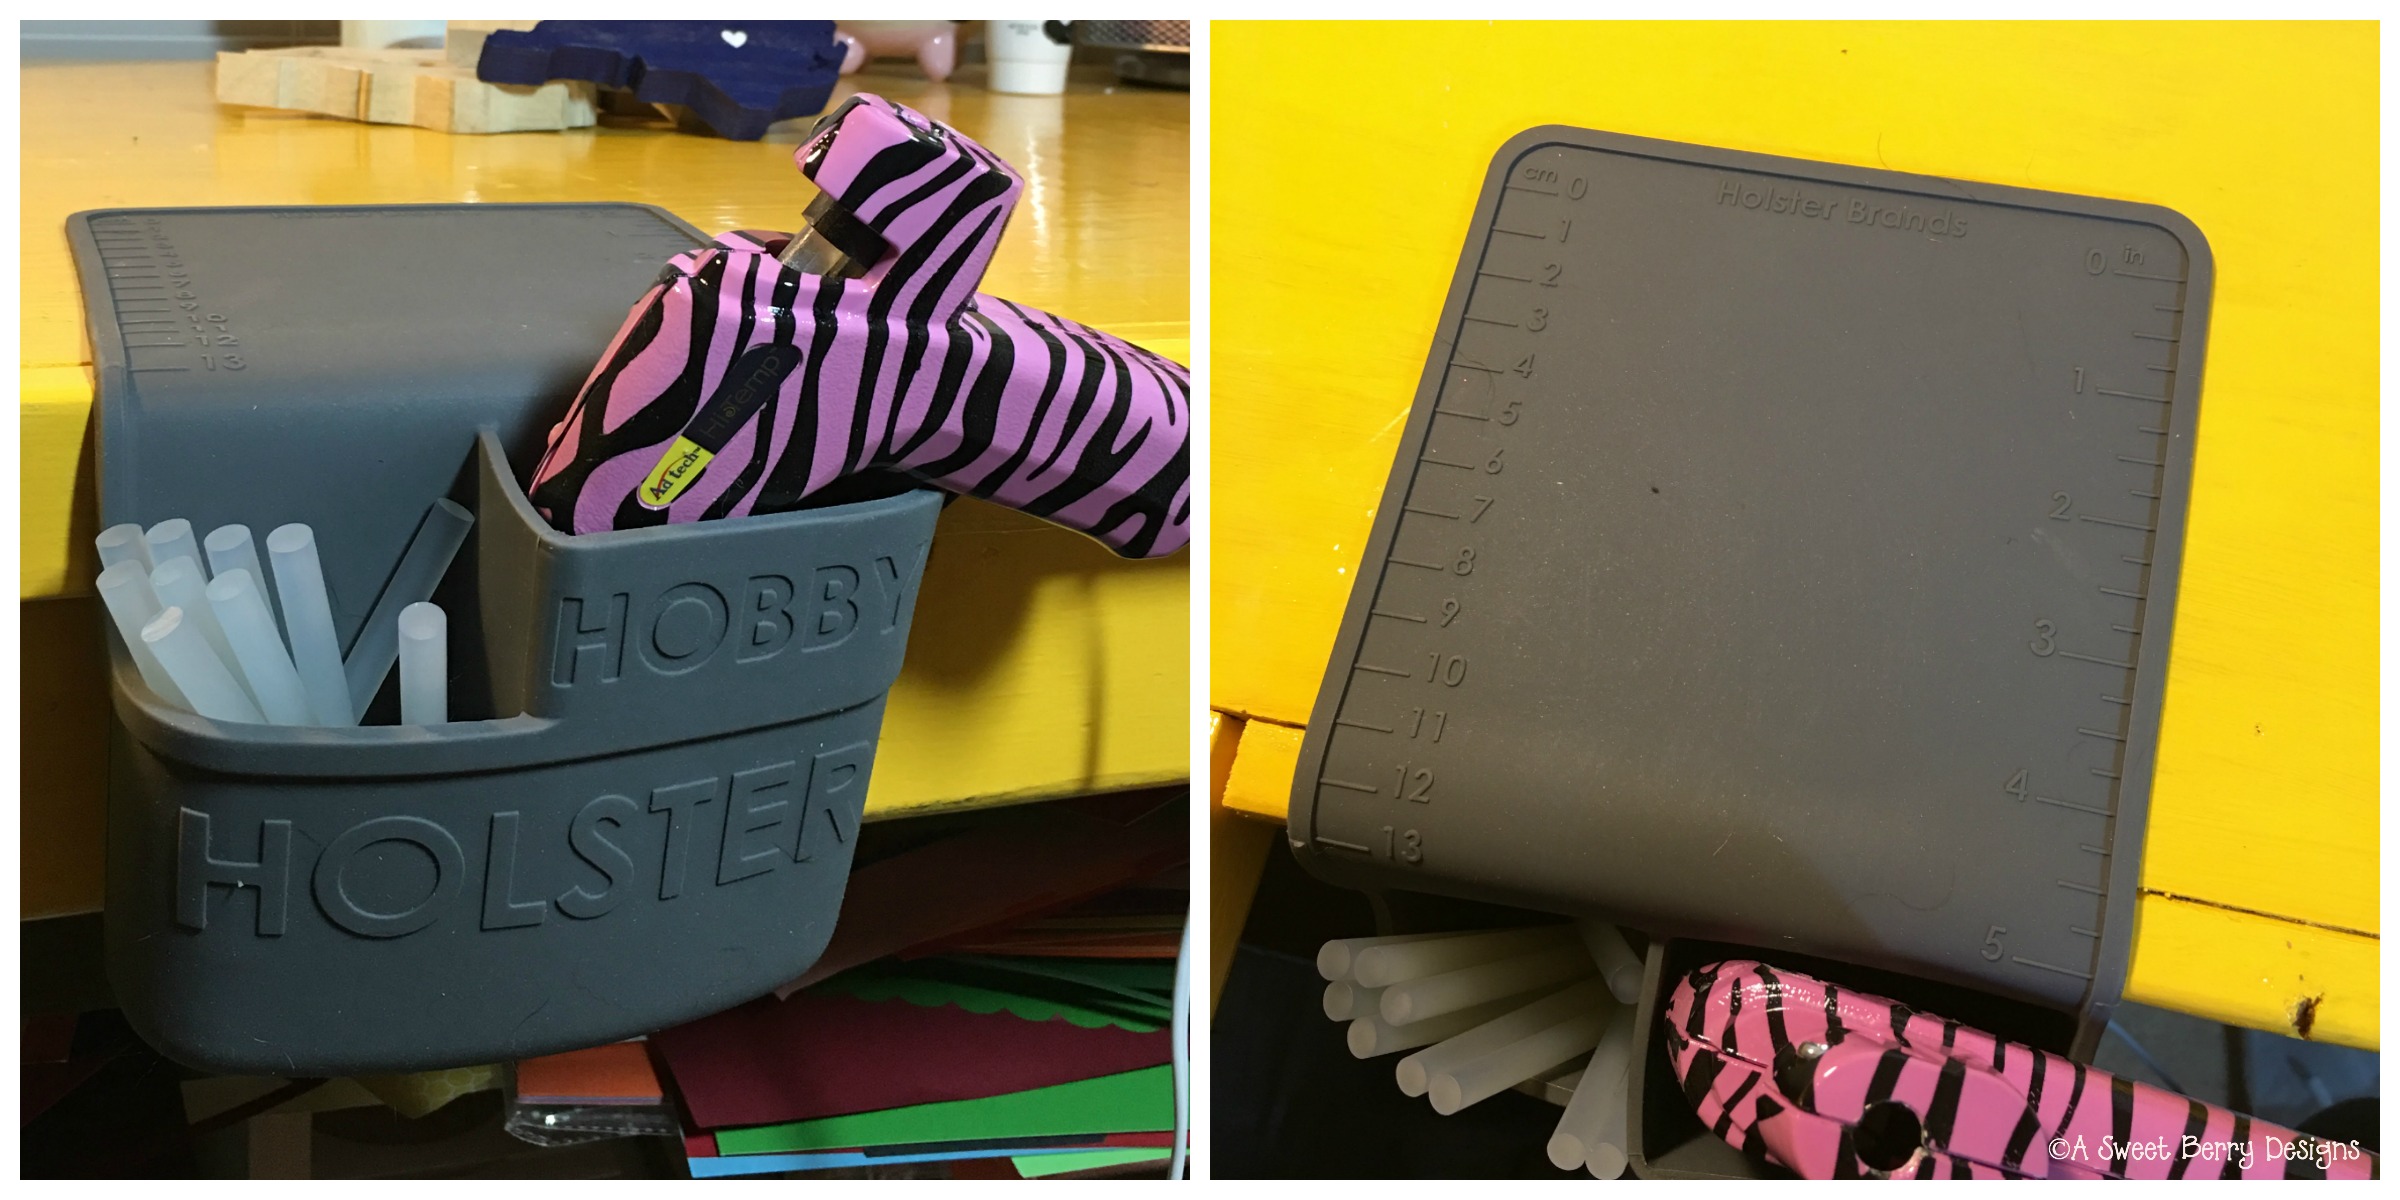
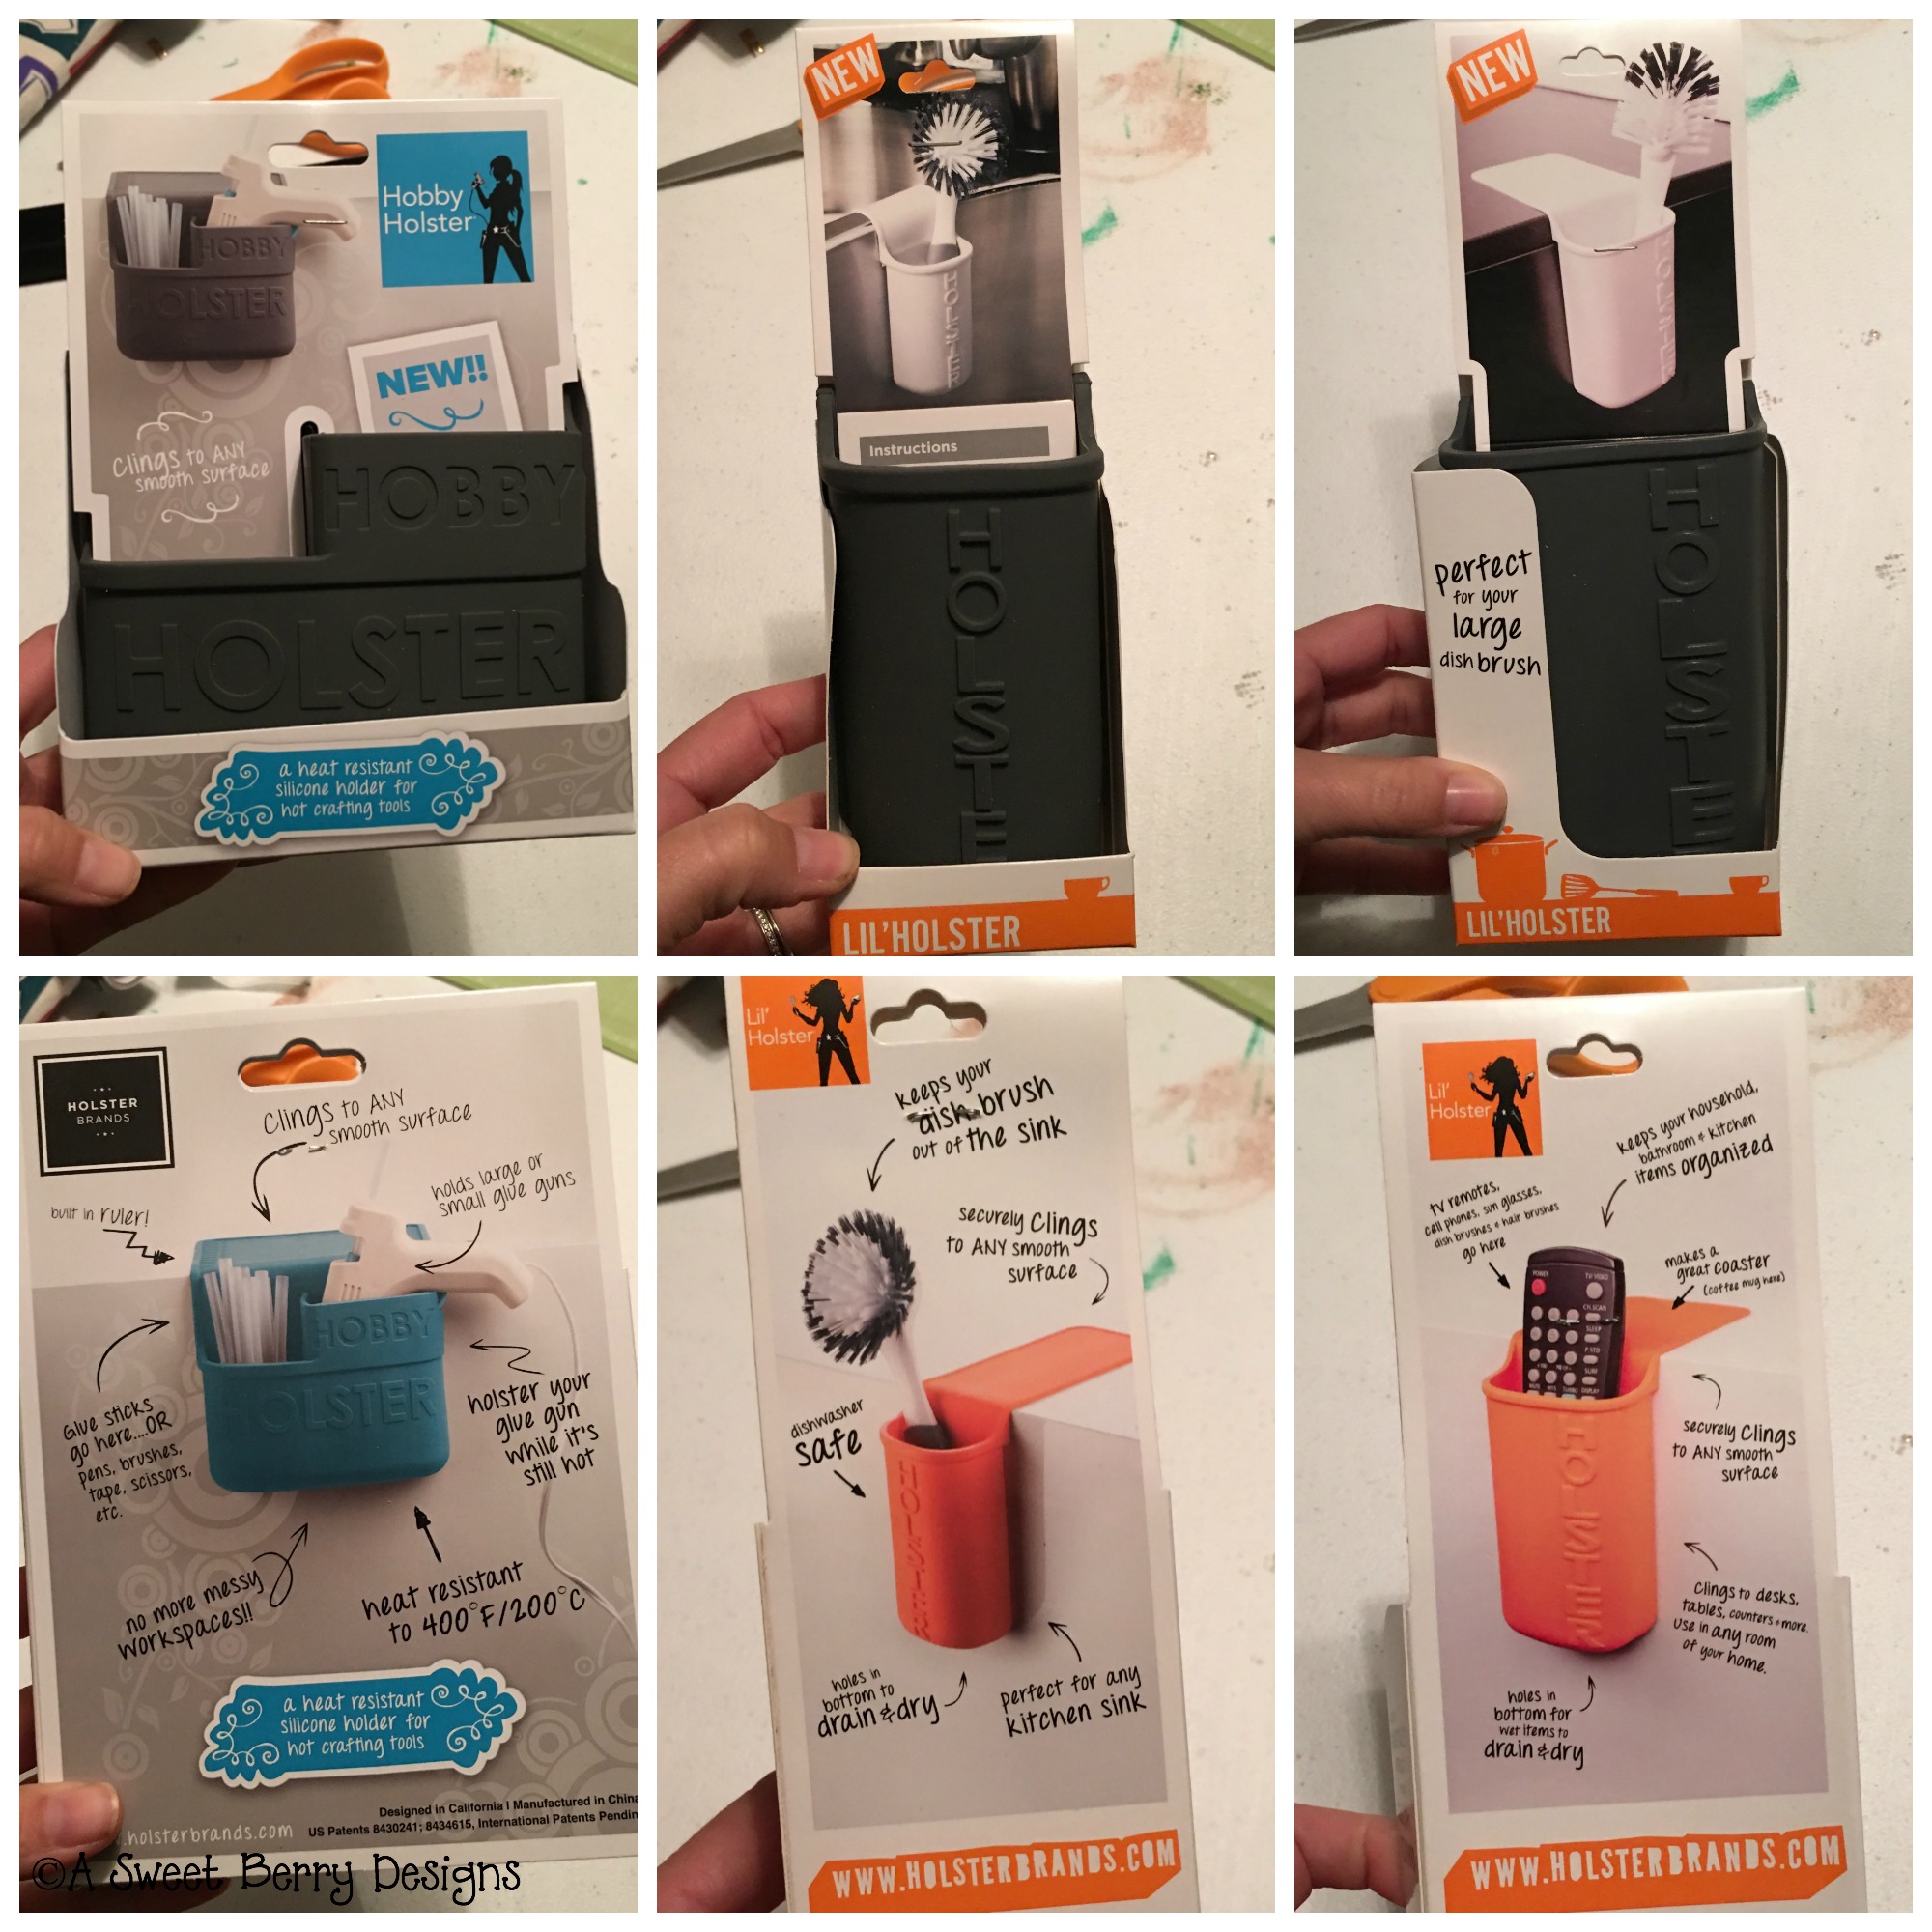
My favorite Holster Brands product is the Hobby Holster!   It is basically a resting station for your hot glue gun and glue sticks while you are crafting!   

Here are a few reasons why this product is awesome and one of my favorites:

  • It will cling to any clean, smooth surface without the help of sticky products.
  • Heat Resistant to 400 degrees.
  • Holds hot crafting tools while in use.
  • Keeps work area safe and organized.
  • It has a spot for your hot glue sticks!
  • Comes in green, blue, pink and gray!

hobby-holster

Another product that Holster Brands has is the Lil’ Holster!   It can be used for a gazillion different items!

Here are a few awesome things about the Lil’ Holster:

  • Attaches to any smooth, non-porous surface
  • Easy to place, move and clean
  • There are small holes in the bottom, if you want to use it at the sink.
  • Heat Resistant to 250 degrees.
  • Dishwasher safe.
  • Three sizes:   Mini, Skinny and Any

packaging

There is one more product from Holster Brand.  Click HERE to find out more about the Hot Iron Holster!

This company all started when a busy working mom found herself in the bathroom juggling a curling iron and a flat iron and not having a place to set one while she used the other.  There was just no where to put them on the pedestal sink where she got ready every morning.  So, she came up with an awesome product that could stick to any smooth surface and hold one of the two hot irons she uses every day!   Holster Brands Products Rock!   

You can check them out on social media too!

Facebook      Pinterest      Instagram     Twitter

Be sure to enter to win this awesome giveaway!

a Rafflecopter giveaway

Thankful Burlap and Felt Banner

Disclosure:   As a member of the Laura Kelly Design Team, I received product from Sizzix/Ellison for use in my blog posts.  The opinions are my own.  This post may contain affiliate links.

Thanksgiving is upon us.  And I’m feeling really thankful this season.   I’m thankful for my family and my friends.  I’m thankful for a house to live in, food to put on the table and a bed to sleep in.  I’m thankful for a car to drive.  I’m thankful for my husband’s job and for my job.  I’m thankful for my church and church family.  I’m thankful that my children go to a great school.  And I’m thankful to be healthy!  My list of thankfulness could go on and on and on.

banner-final

Lately I’m obsessed with banners!  I love to make them as much as I love hang them in my house!  They are easy to make and you can make them any ways that you want!   They can really make a difference in your home, even if it’s just for a little color!

Just recently Sizzix sent me this amazing banner die designed by Lori Whitlock.  I used it, along with some of my favorite dies by Laura Kelly, to create this amazing Thankful banner!  This banner die might be one of my favorite dies ever!

Materials used:

Directions:

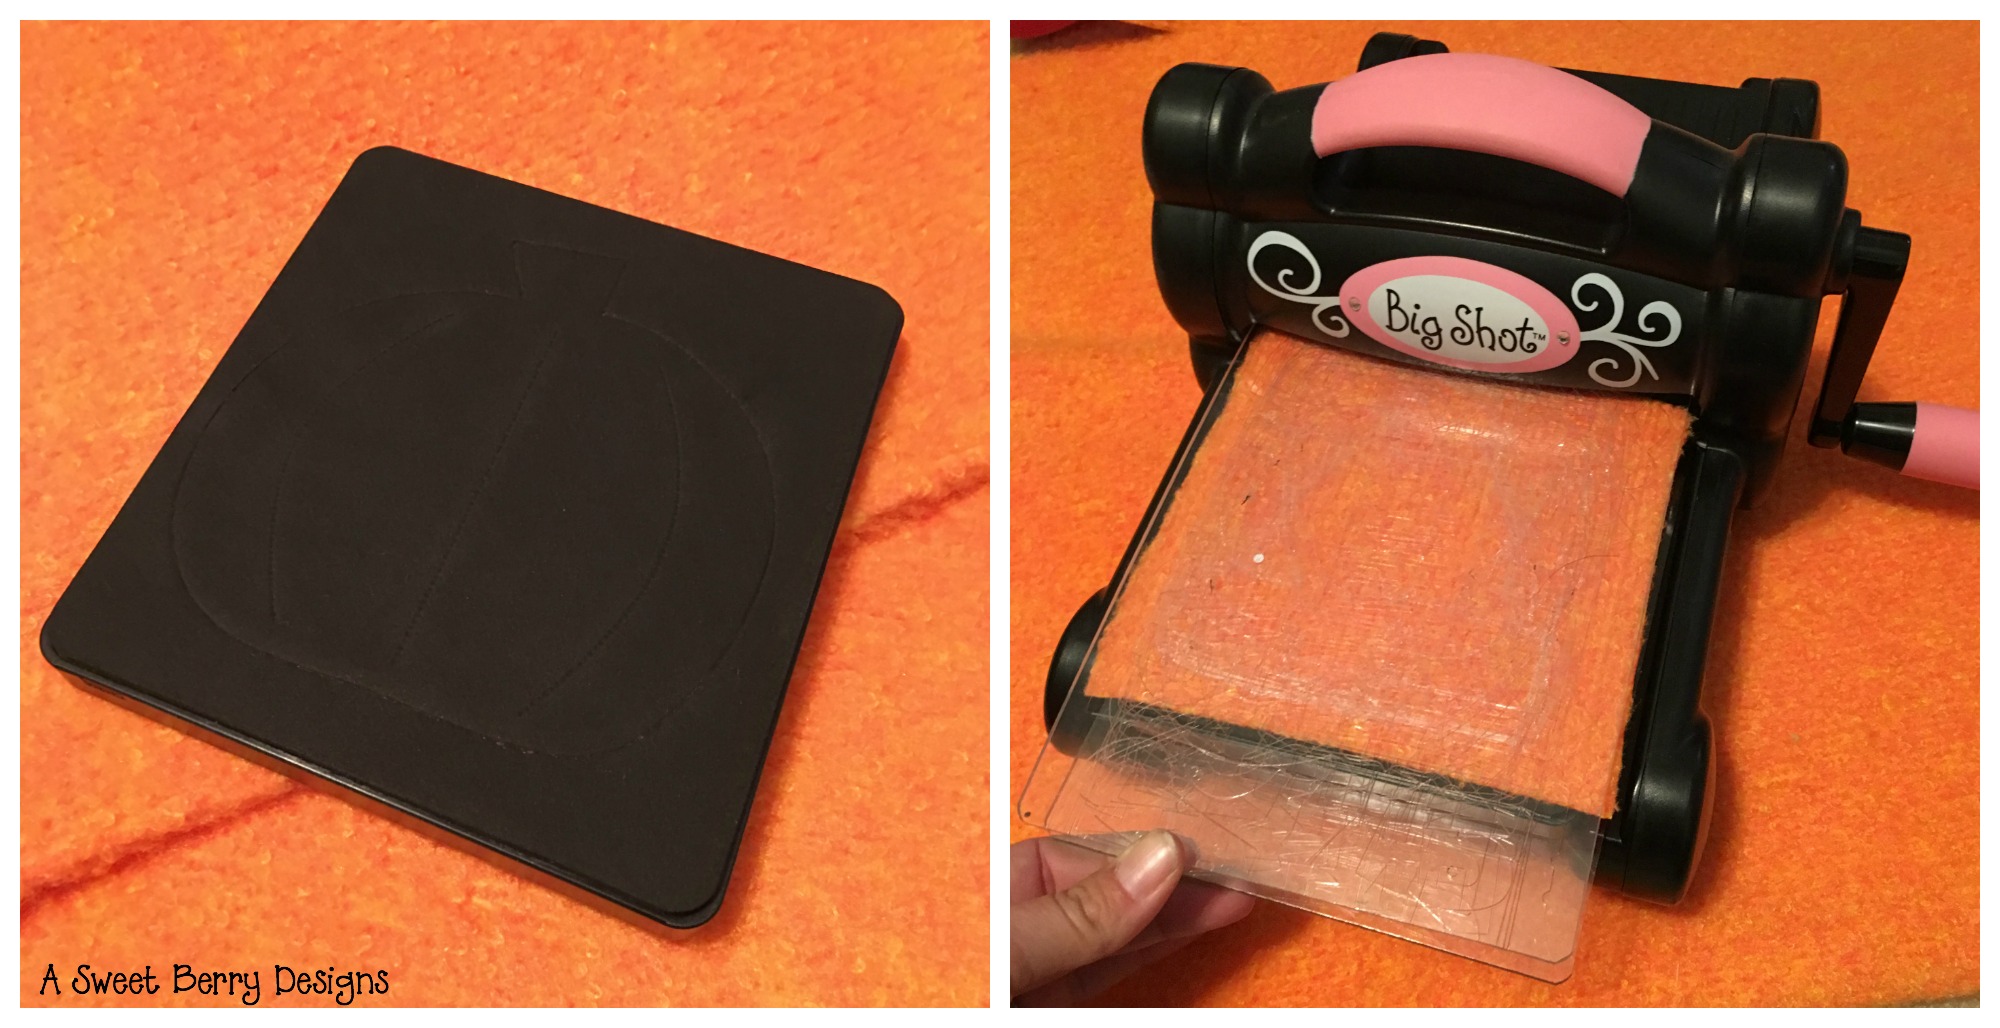
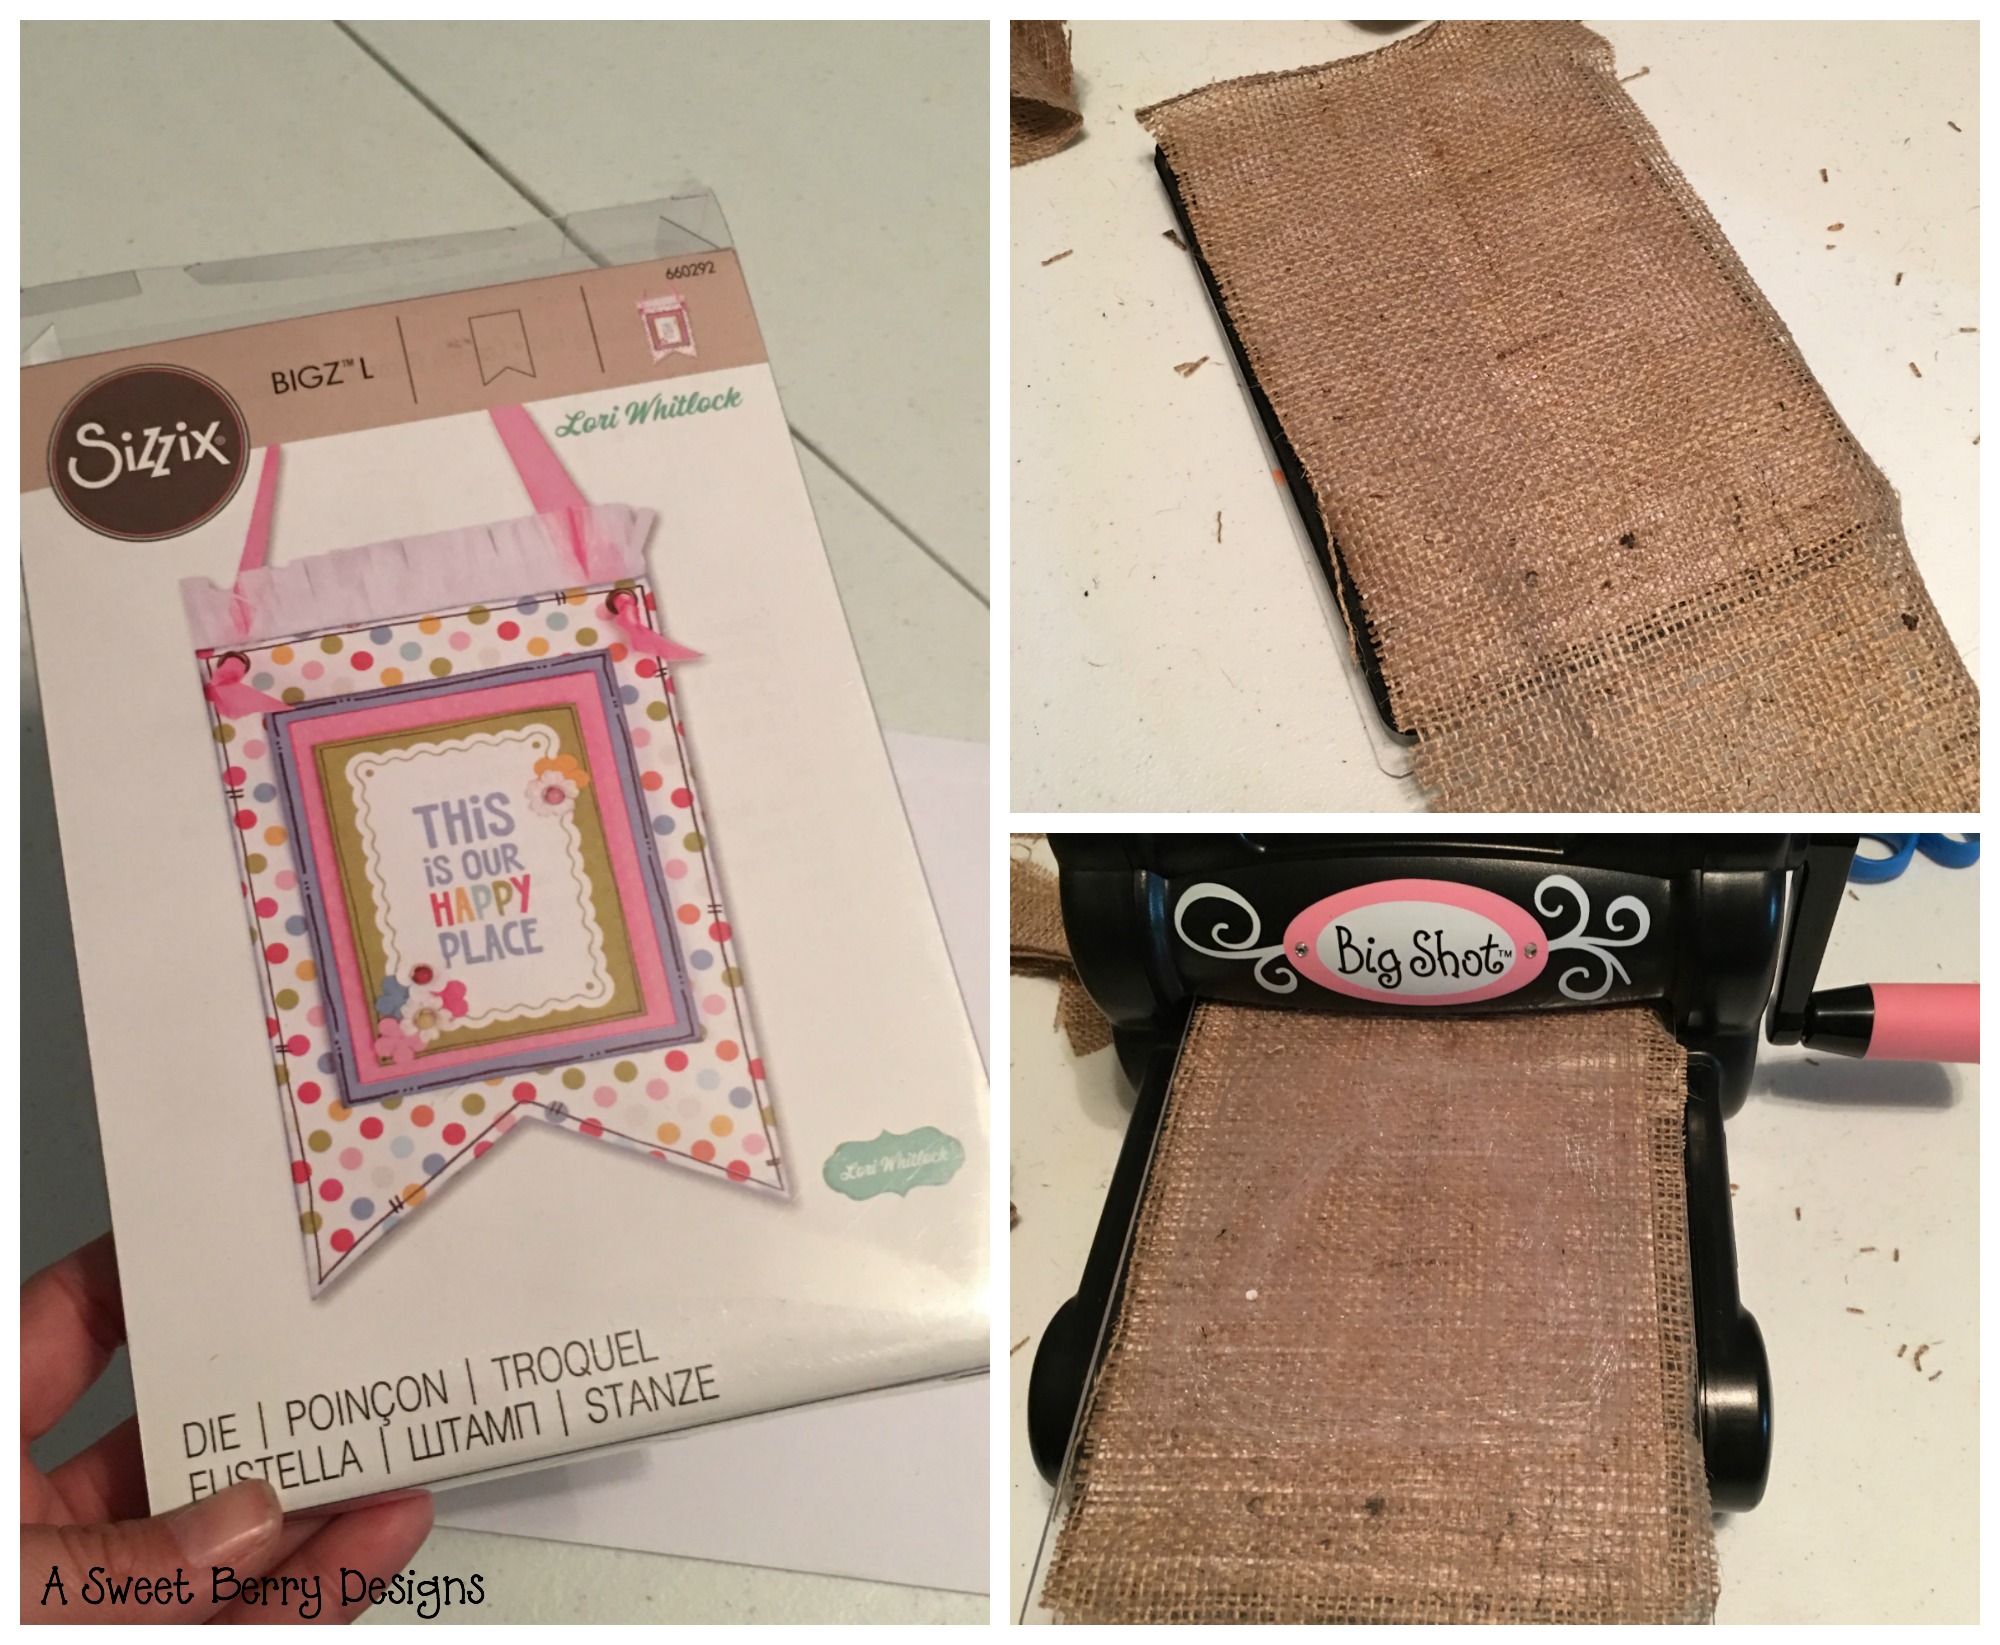
  1. First, I cut out all of the pieces needed for the banner.   The ShaggiChic felt is a little thicker so I cut them individually.  Sometimes you can cut multiple pieces in one run through of the Big Shot. 

pumpkin-die

With the burlap I placed a piece of paper underneath the burlap each time I did a cut.  I didn’t want the fibers of the burlap to get all over the die.   Putting the paper underneath really helped.

banner-die

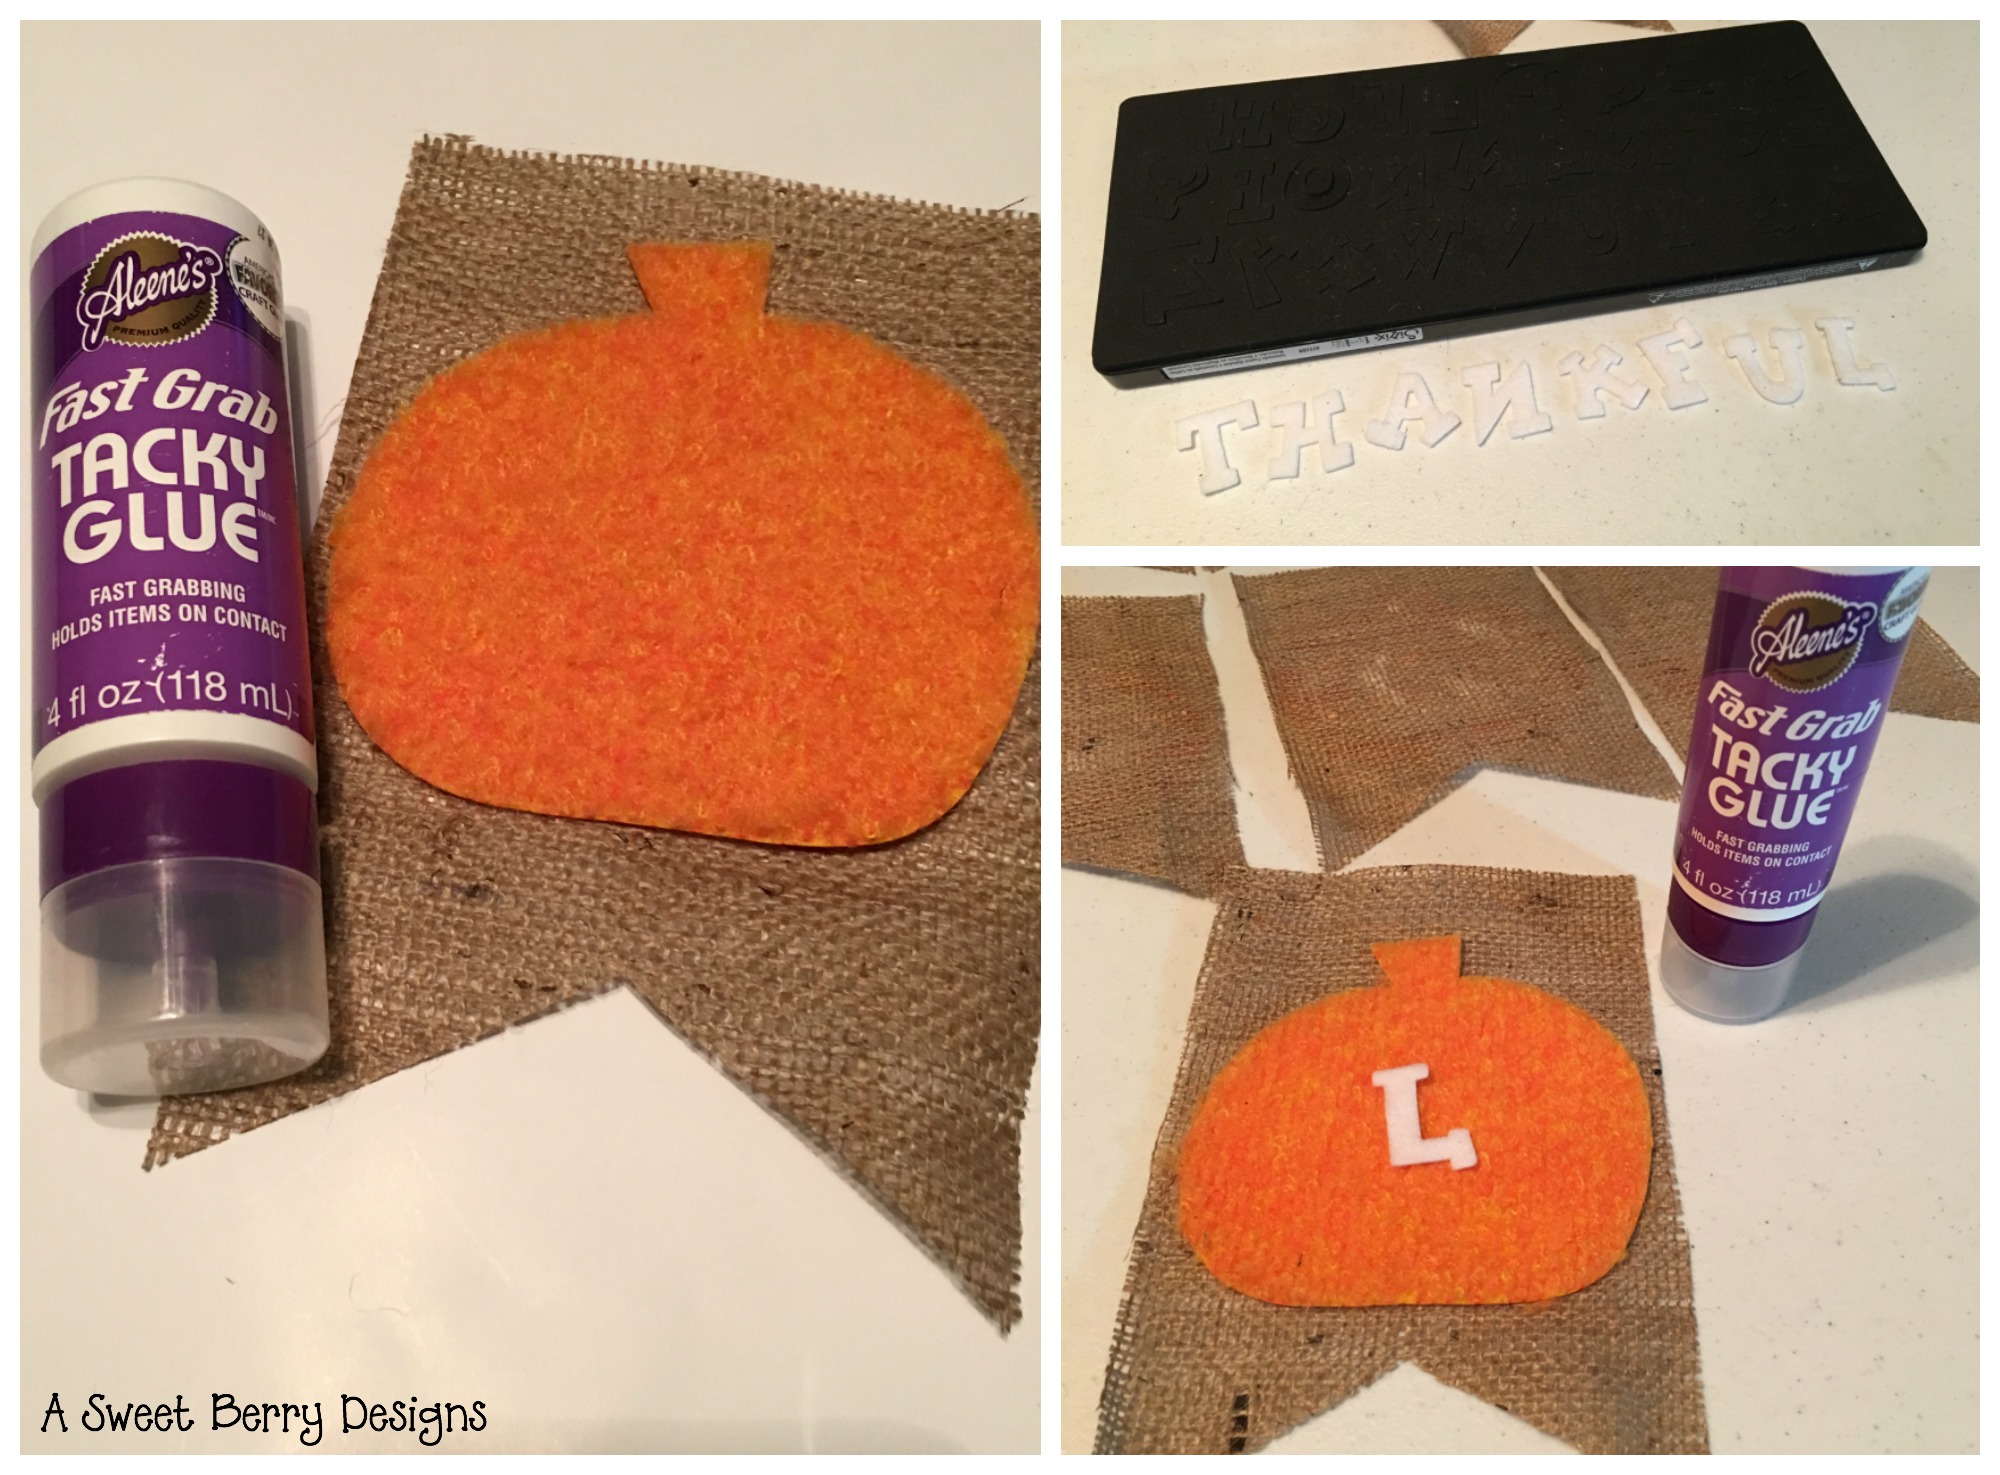
2.  Once all of my pieces were cut out, I started putting the banner together.  I glued the pumpkins to the burlap banner pieces.  Then I added the letter and the stem.

letters-and-gluing

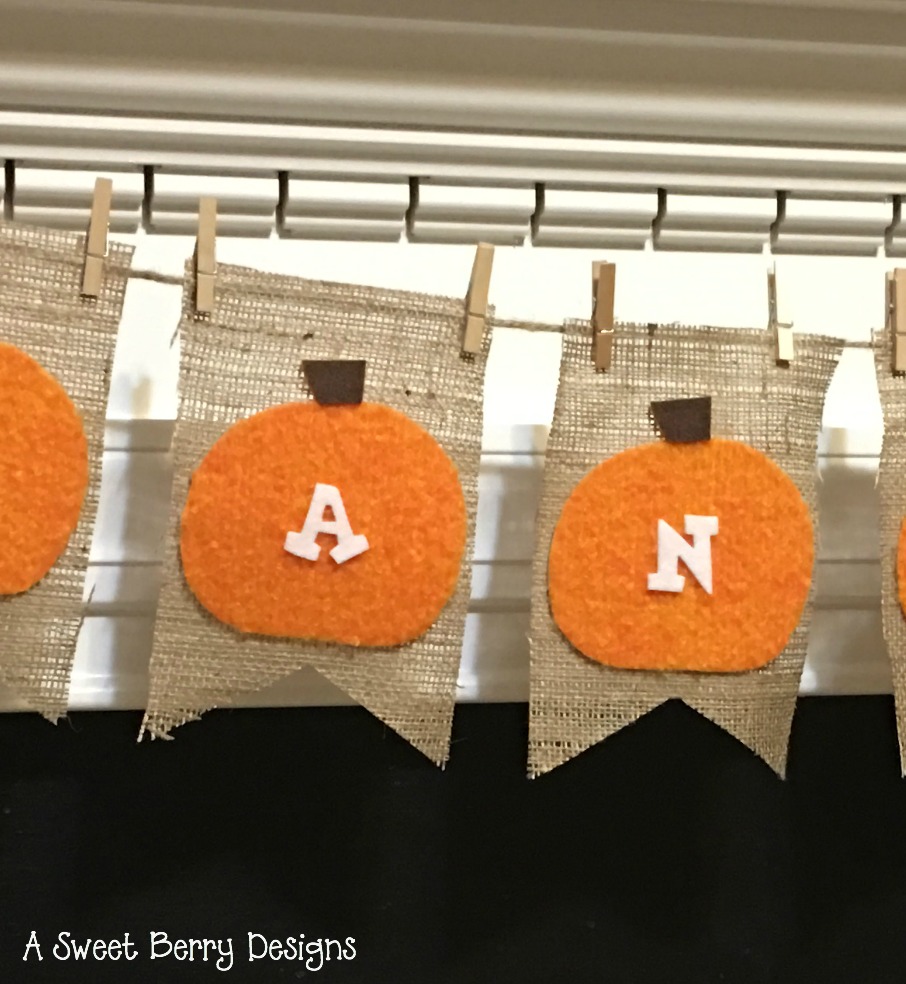
3.   Usually I like to use ribbon for my banners, but lately I’ve liked using jute rope.  Jute rope goes really well with the burlap!  And I love the natural look of the jute rope!

unclose

I hope you like my Thankful burlap and felt banner.   I love it so much that I want to keep it out longer than just the Thanksgiving season.  I hope that you and your family have a Happy Thanksgiving!

Katie-Signature-2

Mason Jar Lid Fabric Wreath

Yay!  It’s Craft Lightning time again!   And this one is Christmas and Holiday crafts!  Christmas is one of my favorite times of the year!  Especially now that I have kids!  This Mason Jar Lid Fabric Wreath could even be done with the kids! final
Materials:
Green Fabric
Mason Jar Lid
Fiskars Scissors
Ad-tech Hot Glue Gun
Holly Berries (I got these from A.C. Moore)
Ribbon
materials
The steps for this Mason Jar Lid Fabric Wreath are pretty easy!  And it only took about 15 minutes to do!
putting-it-together
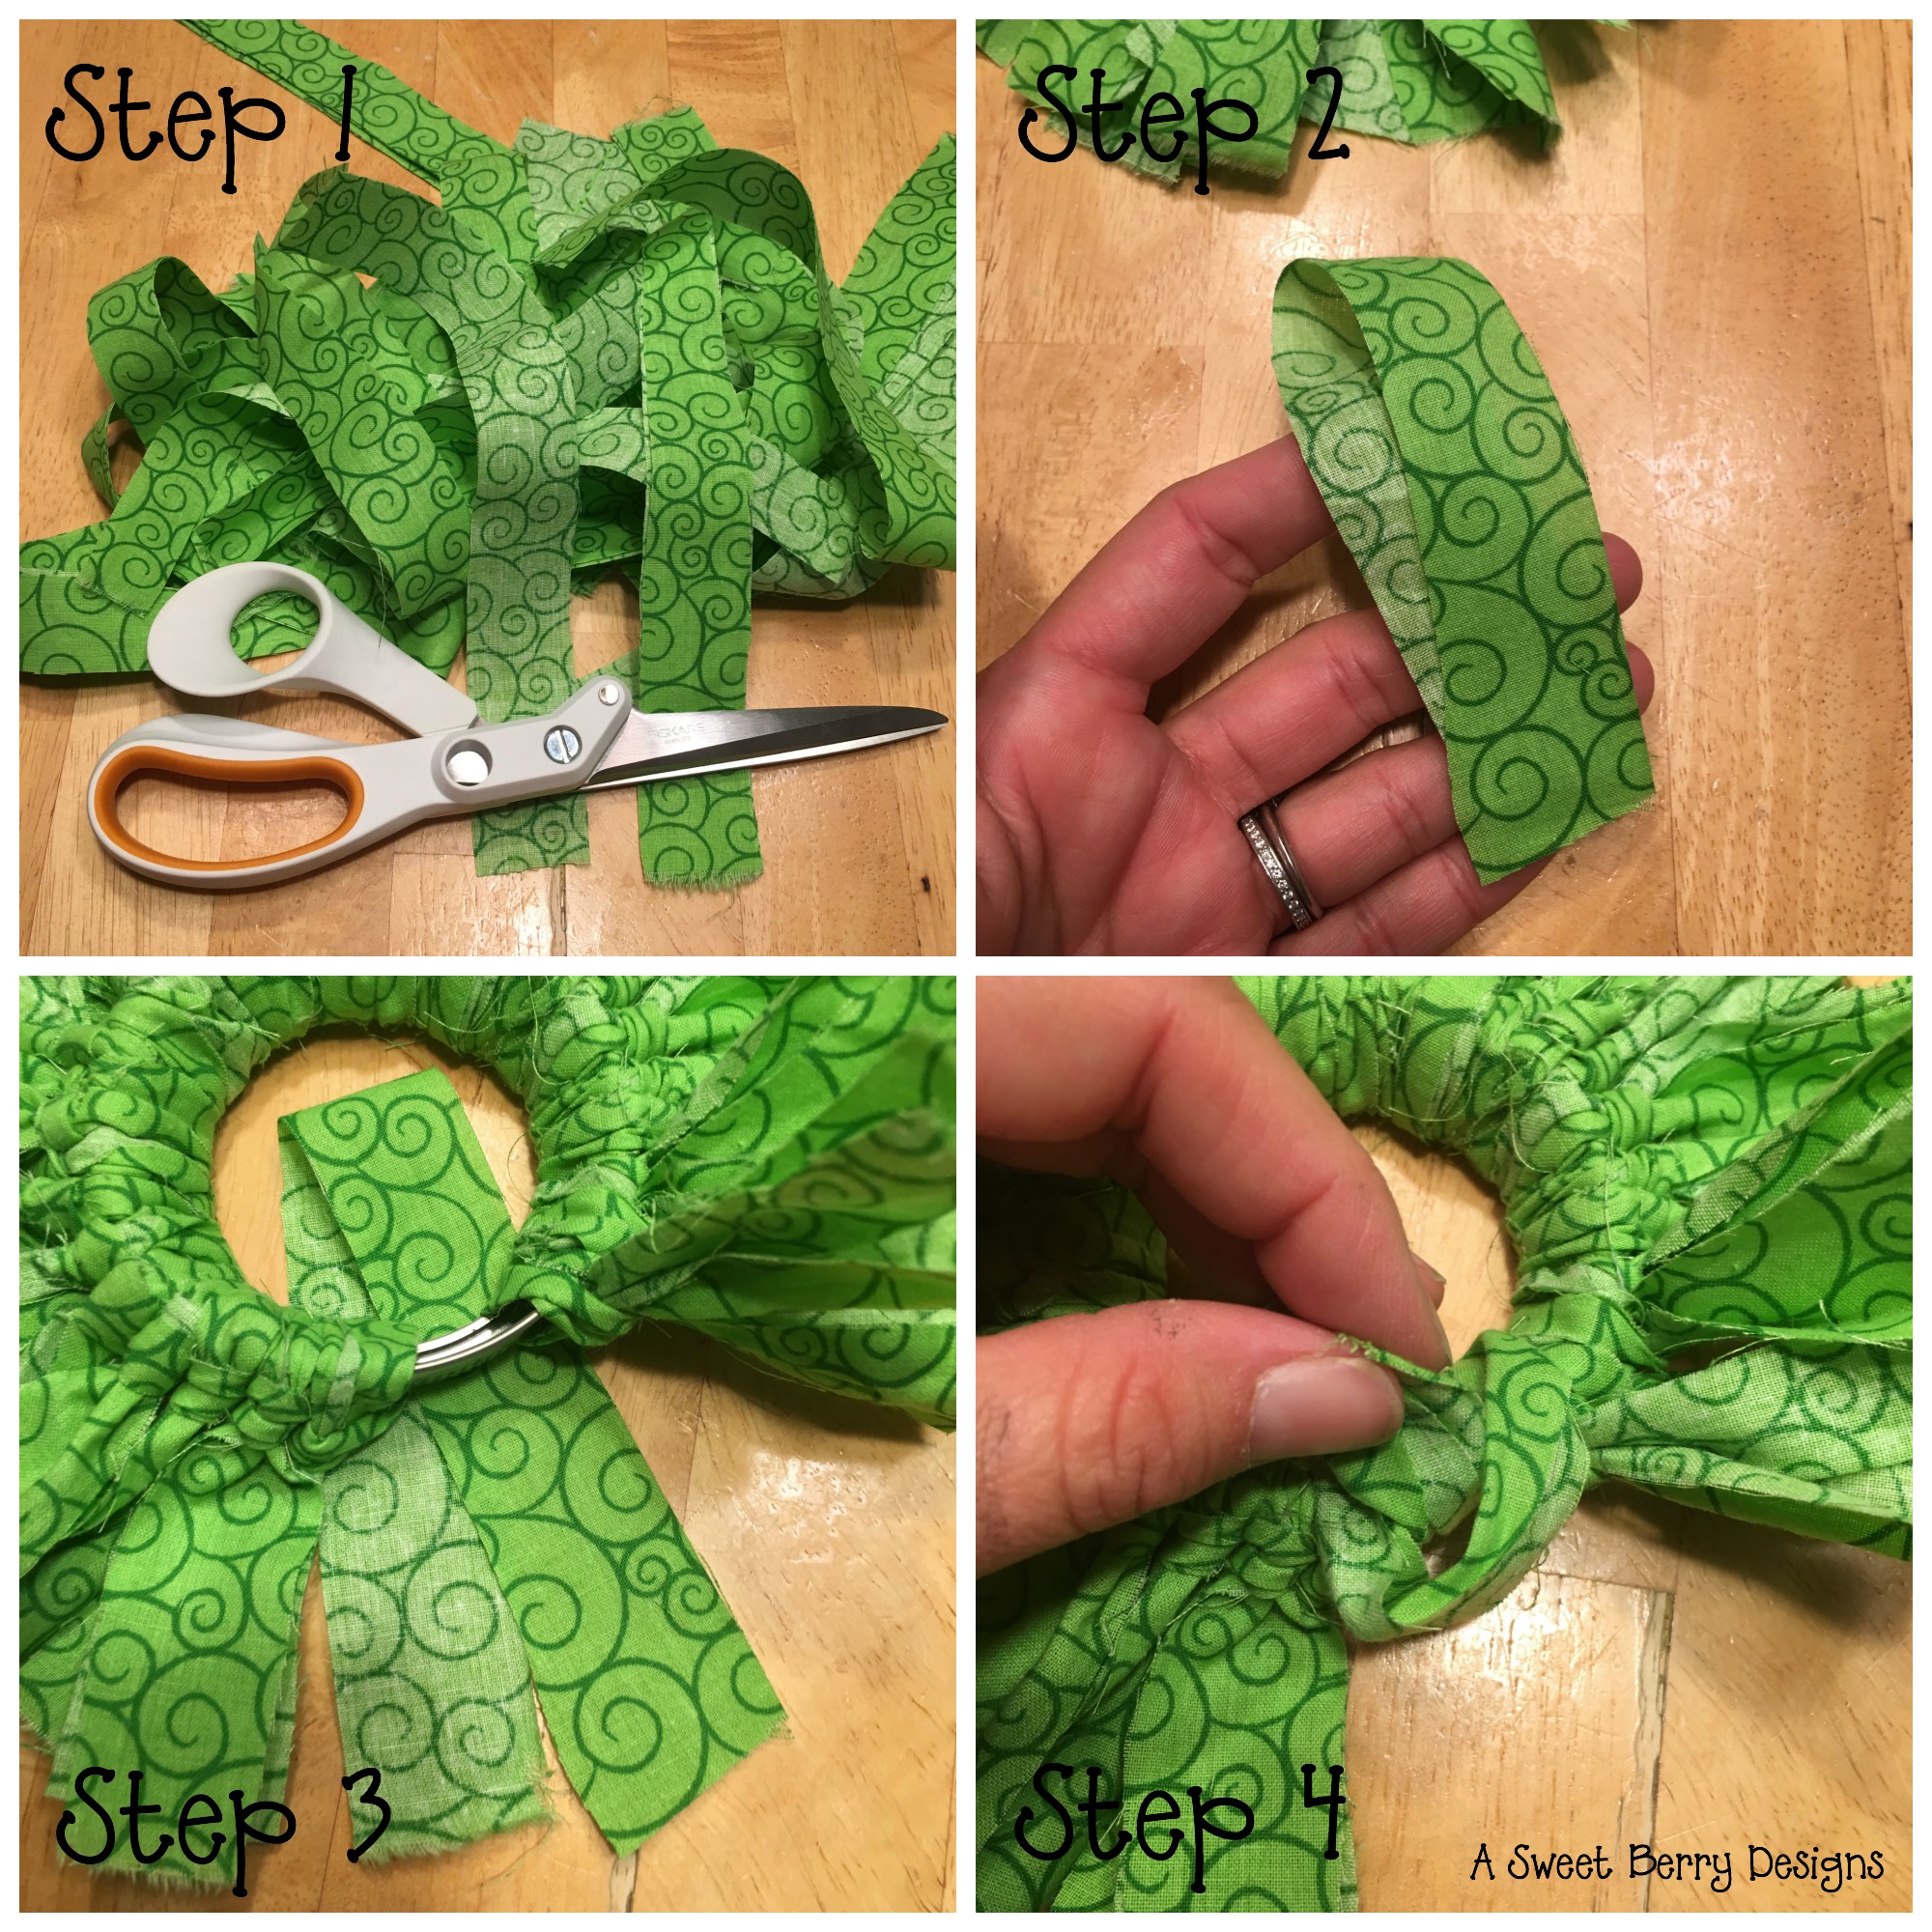
Step 1 – Cut your fabric into strips.  I just did a rough cut making the strips about 10 inches long and .75 – 1 inch wide.
Step 2 – Fold the pieces in half.
Step 3 – Place the folded strip under the lid.
Step 4 –  Feed the lose ends through the folded end and pull tight.
last-steps
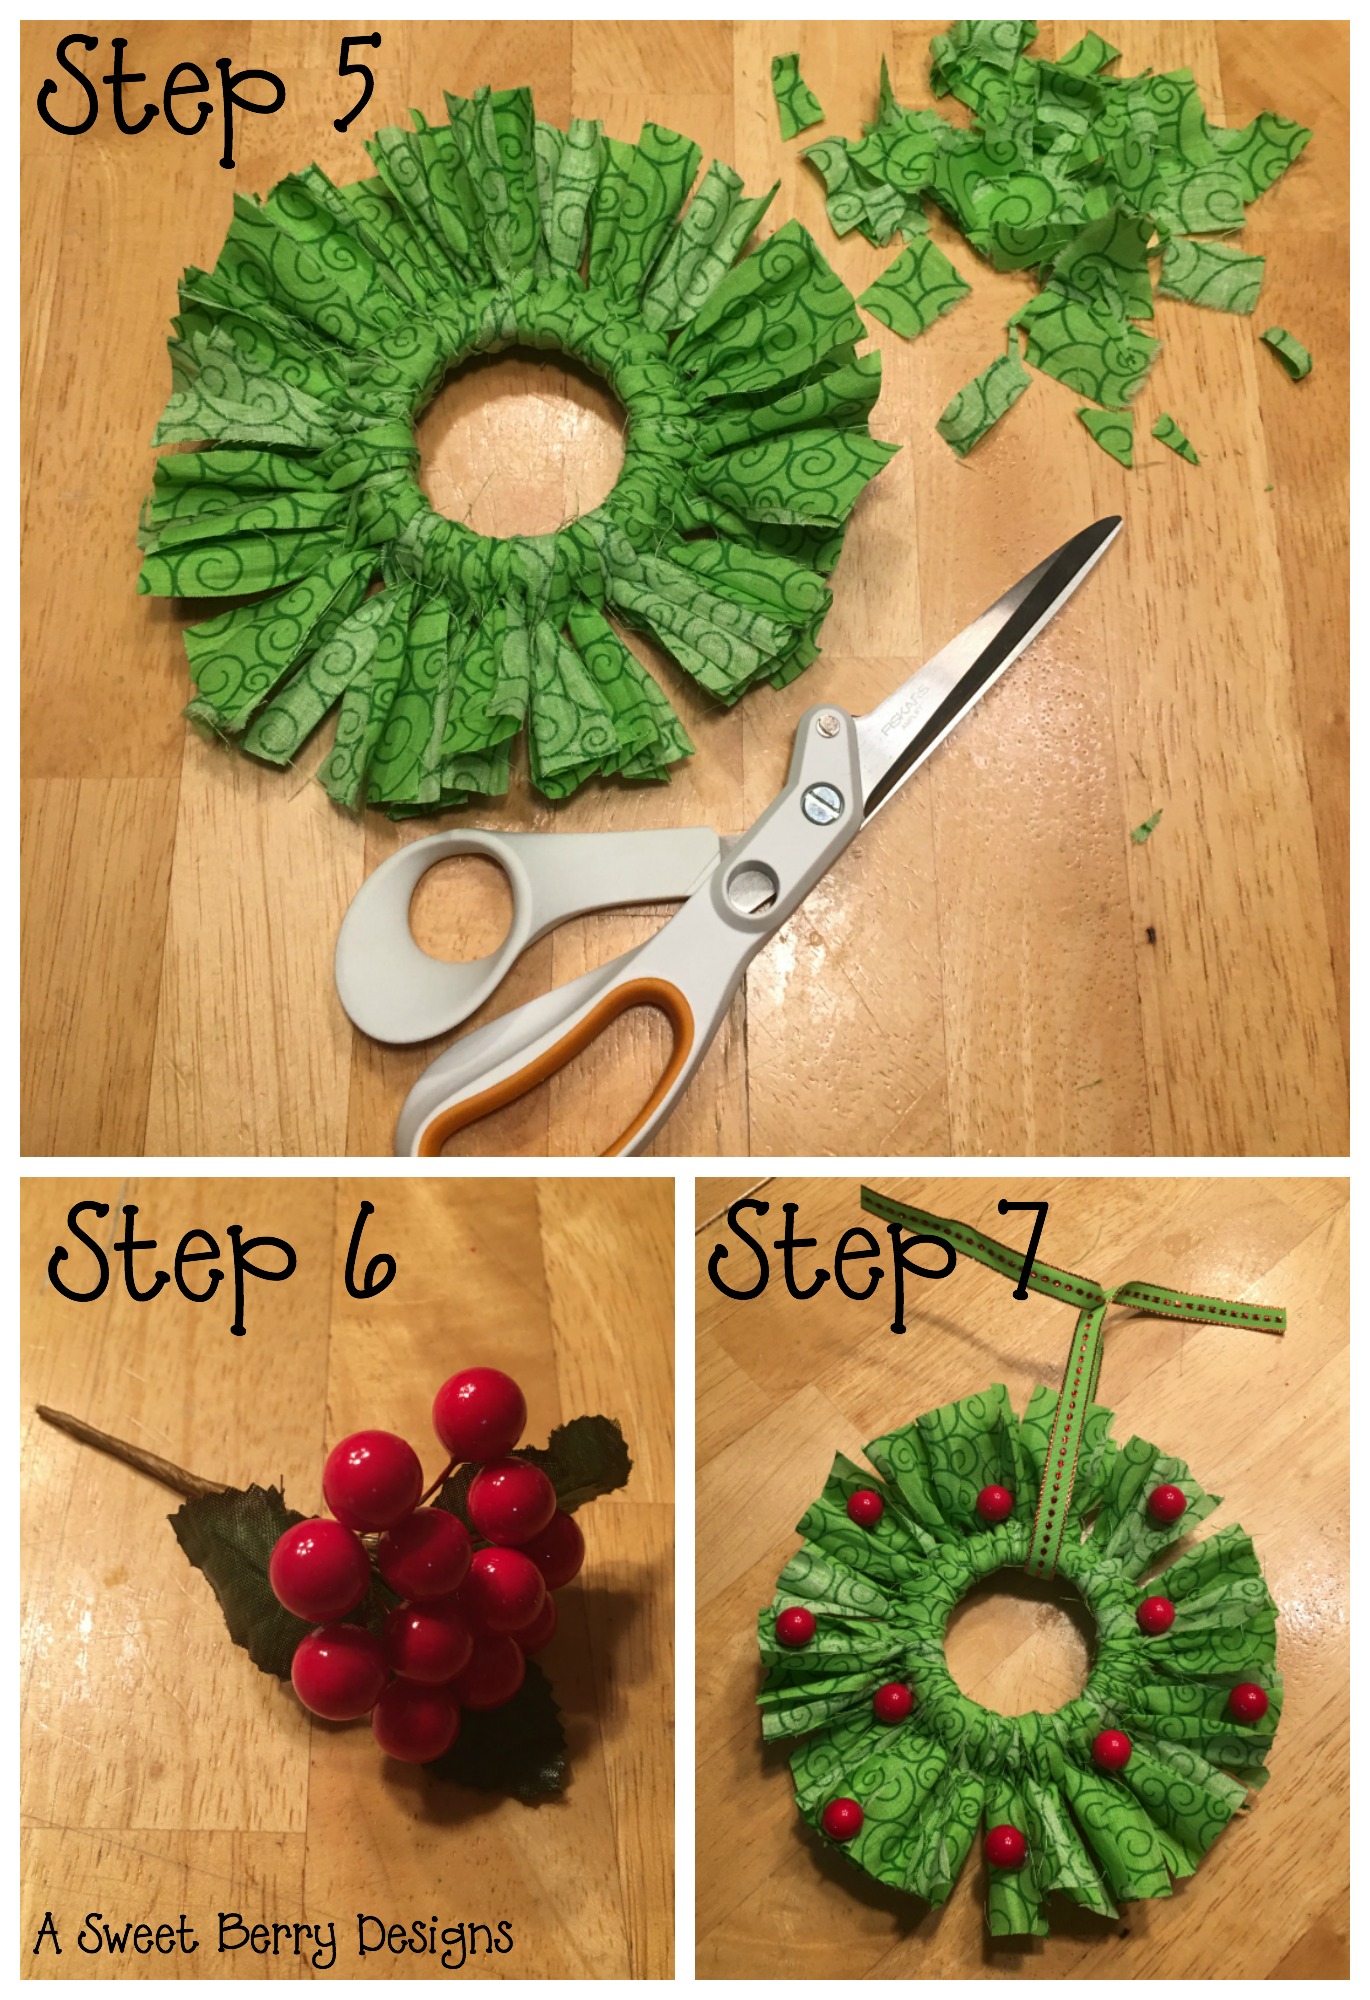
Step 5 – Trim your wreath to your liking!  I trimmed my wreath so that it wasn’t so big.
Step 6 – Remove the berries from the stem.
Sept 7 – Hot glue the berries onto the wreath!  Parents, do this if you are doing this project with the kids.

I added a piece of ribbon to hang it on the tree!
wreath
I hope you enjoyed my Mason Jar Lid Fabric Wreath!

Be sure to click below and check out other Craft Lightning Crafts!

Until next time……
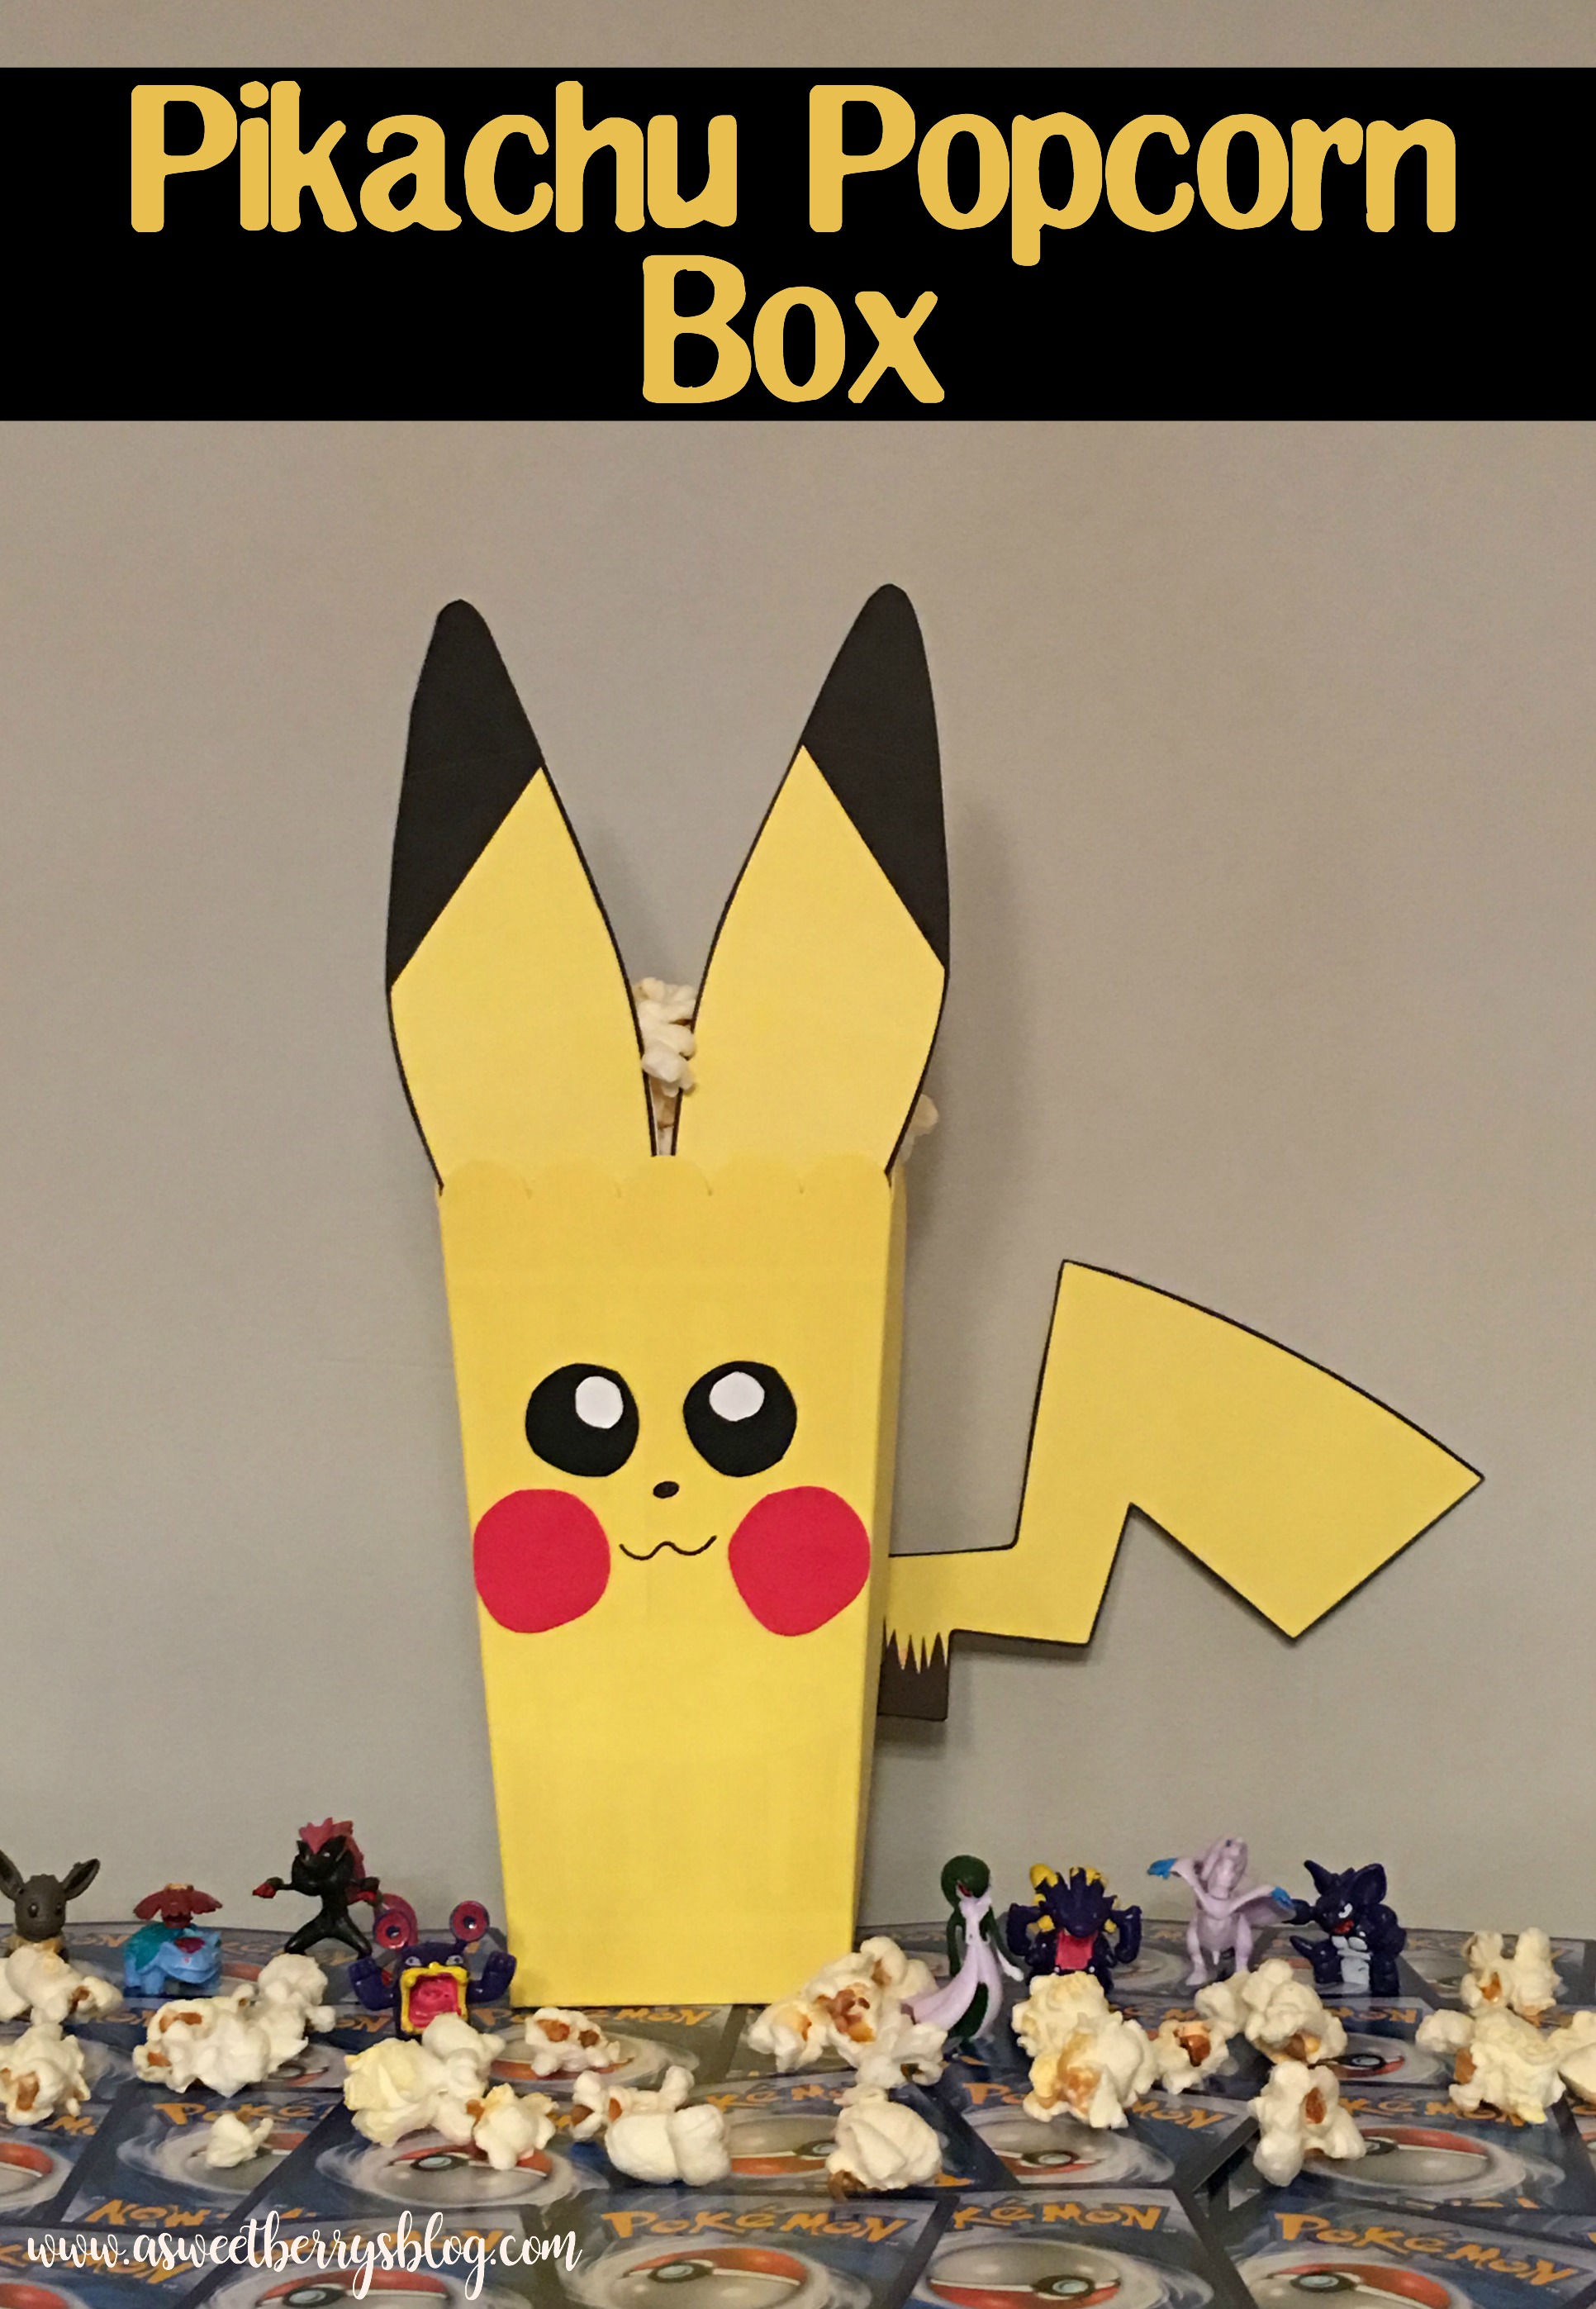
Pikachu Popcorn Box

It’s time for Laura Kelly’s annual Popcorn Box Blog Hop!  Pokemon has been really popular in our house this year, especially with the release of the PokemonGo app.  My youngest son just had a Pokemon themed birthday party.  So, for this years blog hop, I thought I’d dress my popcorn box up as Pikachu!
box-final
Materials:
Popcorn Box from Cost Plus World Market
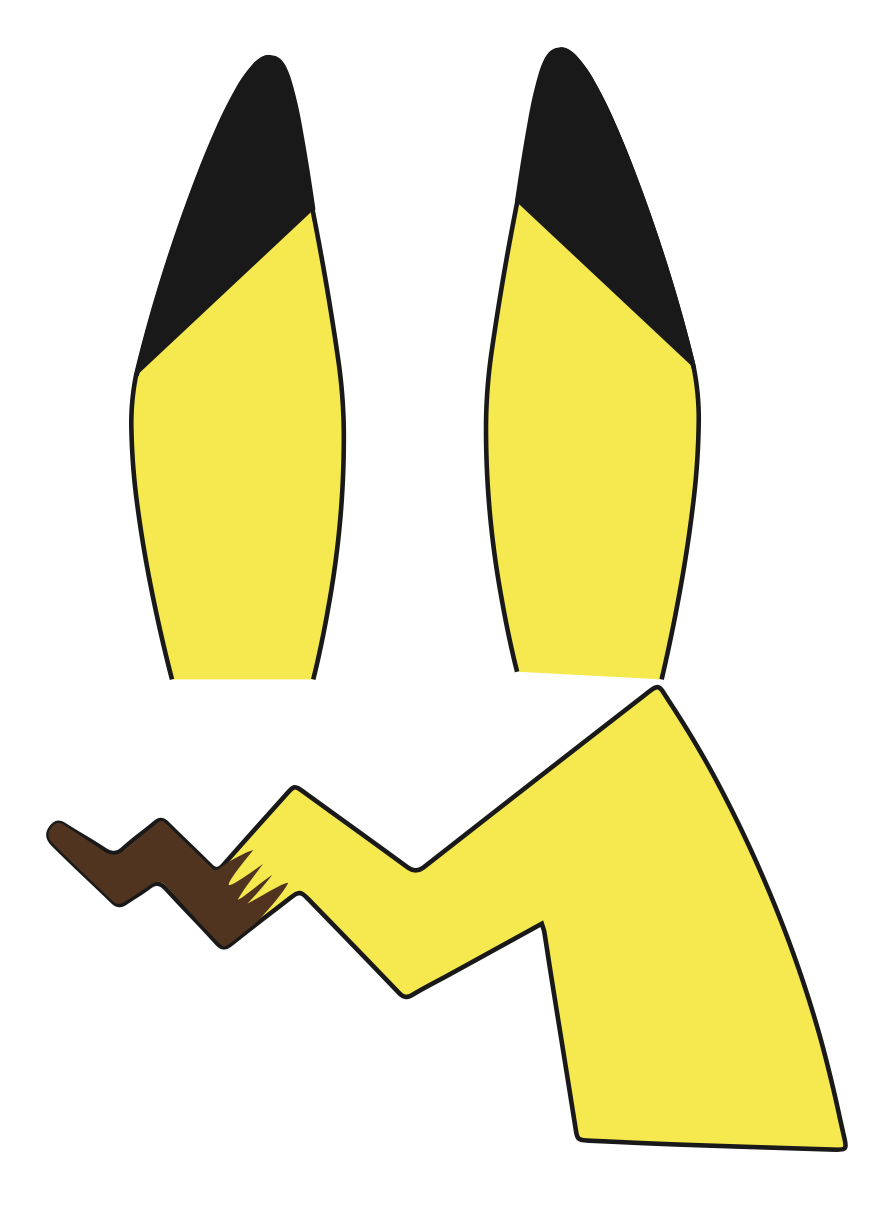
Pikachu Ears and Tail PDF (I created the tail and ears pdf, so click the photo below to print your own!)
Yellow Paint (I used DecoArt Americana Sunny Days)
Paint Brush
Red, black and white scrap paper
Scissors
Marker (I used a Tomboy Mono Twin Marker)
Glue (I used Aleene’s Fast Grab Tacky Glue
screen-shot-2016-10-16-at-8-54-31-pm
First, you need to paint the popcorn box.  I did three layers to cover the red lines really good.  Once it was dry, I cut out the ears, tail, cheeks and eyes.   When everything was cut out, I glued everything to the box and then I had an adorable little Pikachu Popcorn Box!
instructions
I hope you enjoyed my Pikachu Popcorn Box!  It was super quick and easy!

Be sure to click below to check out other awesome 2016 Popcorn Box ideas!


<!– end InLin>kz script —
Also, enter to win
a Rafflecopter giveaway