Author Archives: Katie

Accordion Circle Pumpkin Banner

It’s time for Craft Lightning again and I had the chance to join in the fun!   For the Halloween 2016 Craft Lightning, I made this quick Accordion Circle Pumpkin Banner!  I love making Accordion circles!  They are so fun, easy and are perfect for decorating!

banner

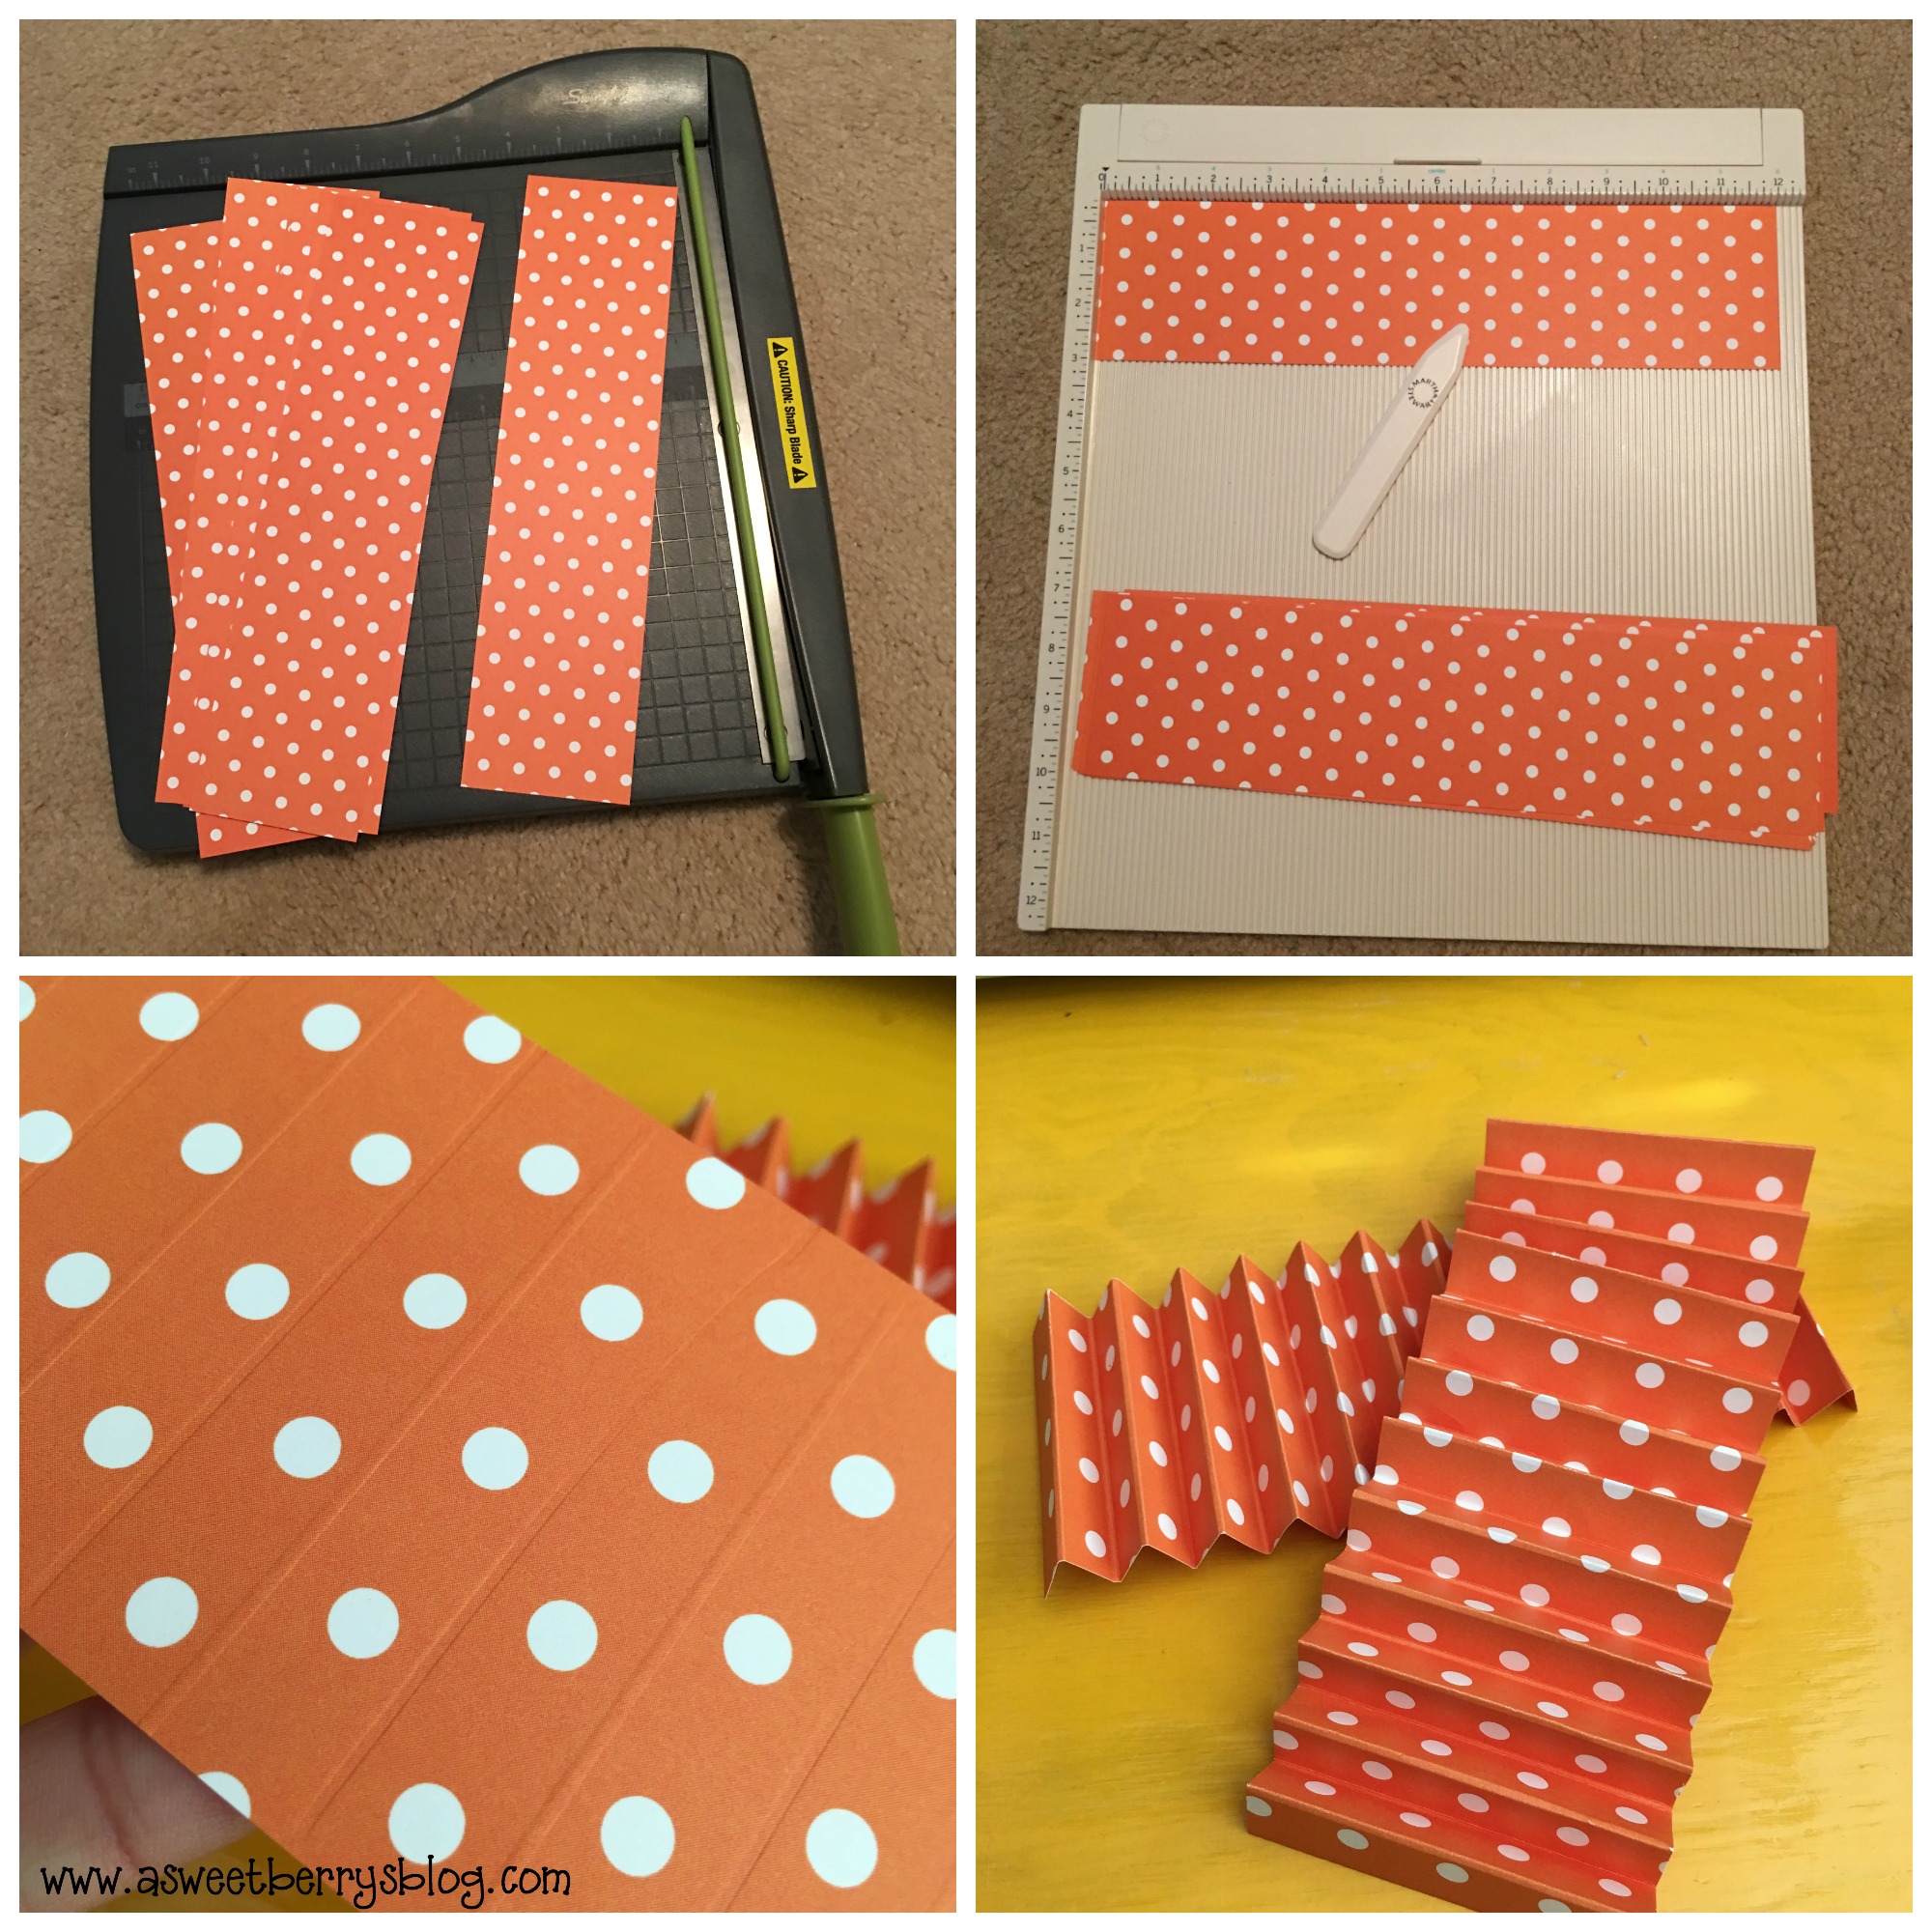
Using scrapbook paper that I got at A.C.Moore, I cut my paper down to 3 inch strips.  Then, using my paper scoring kit, I scored both sides, alternating every half inch.  After the scoring was done, I created the accordion fold.

cutting-and-folding

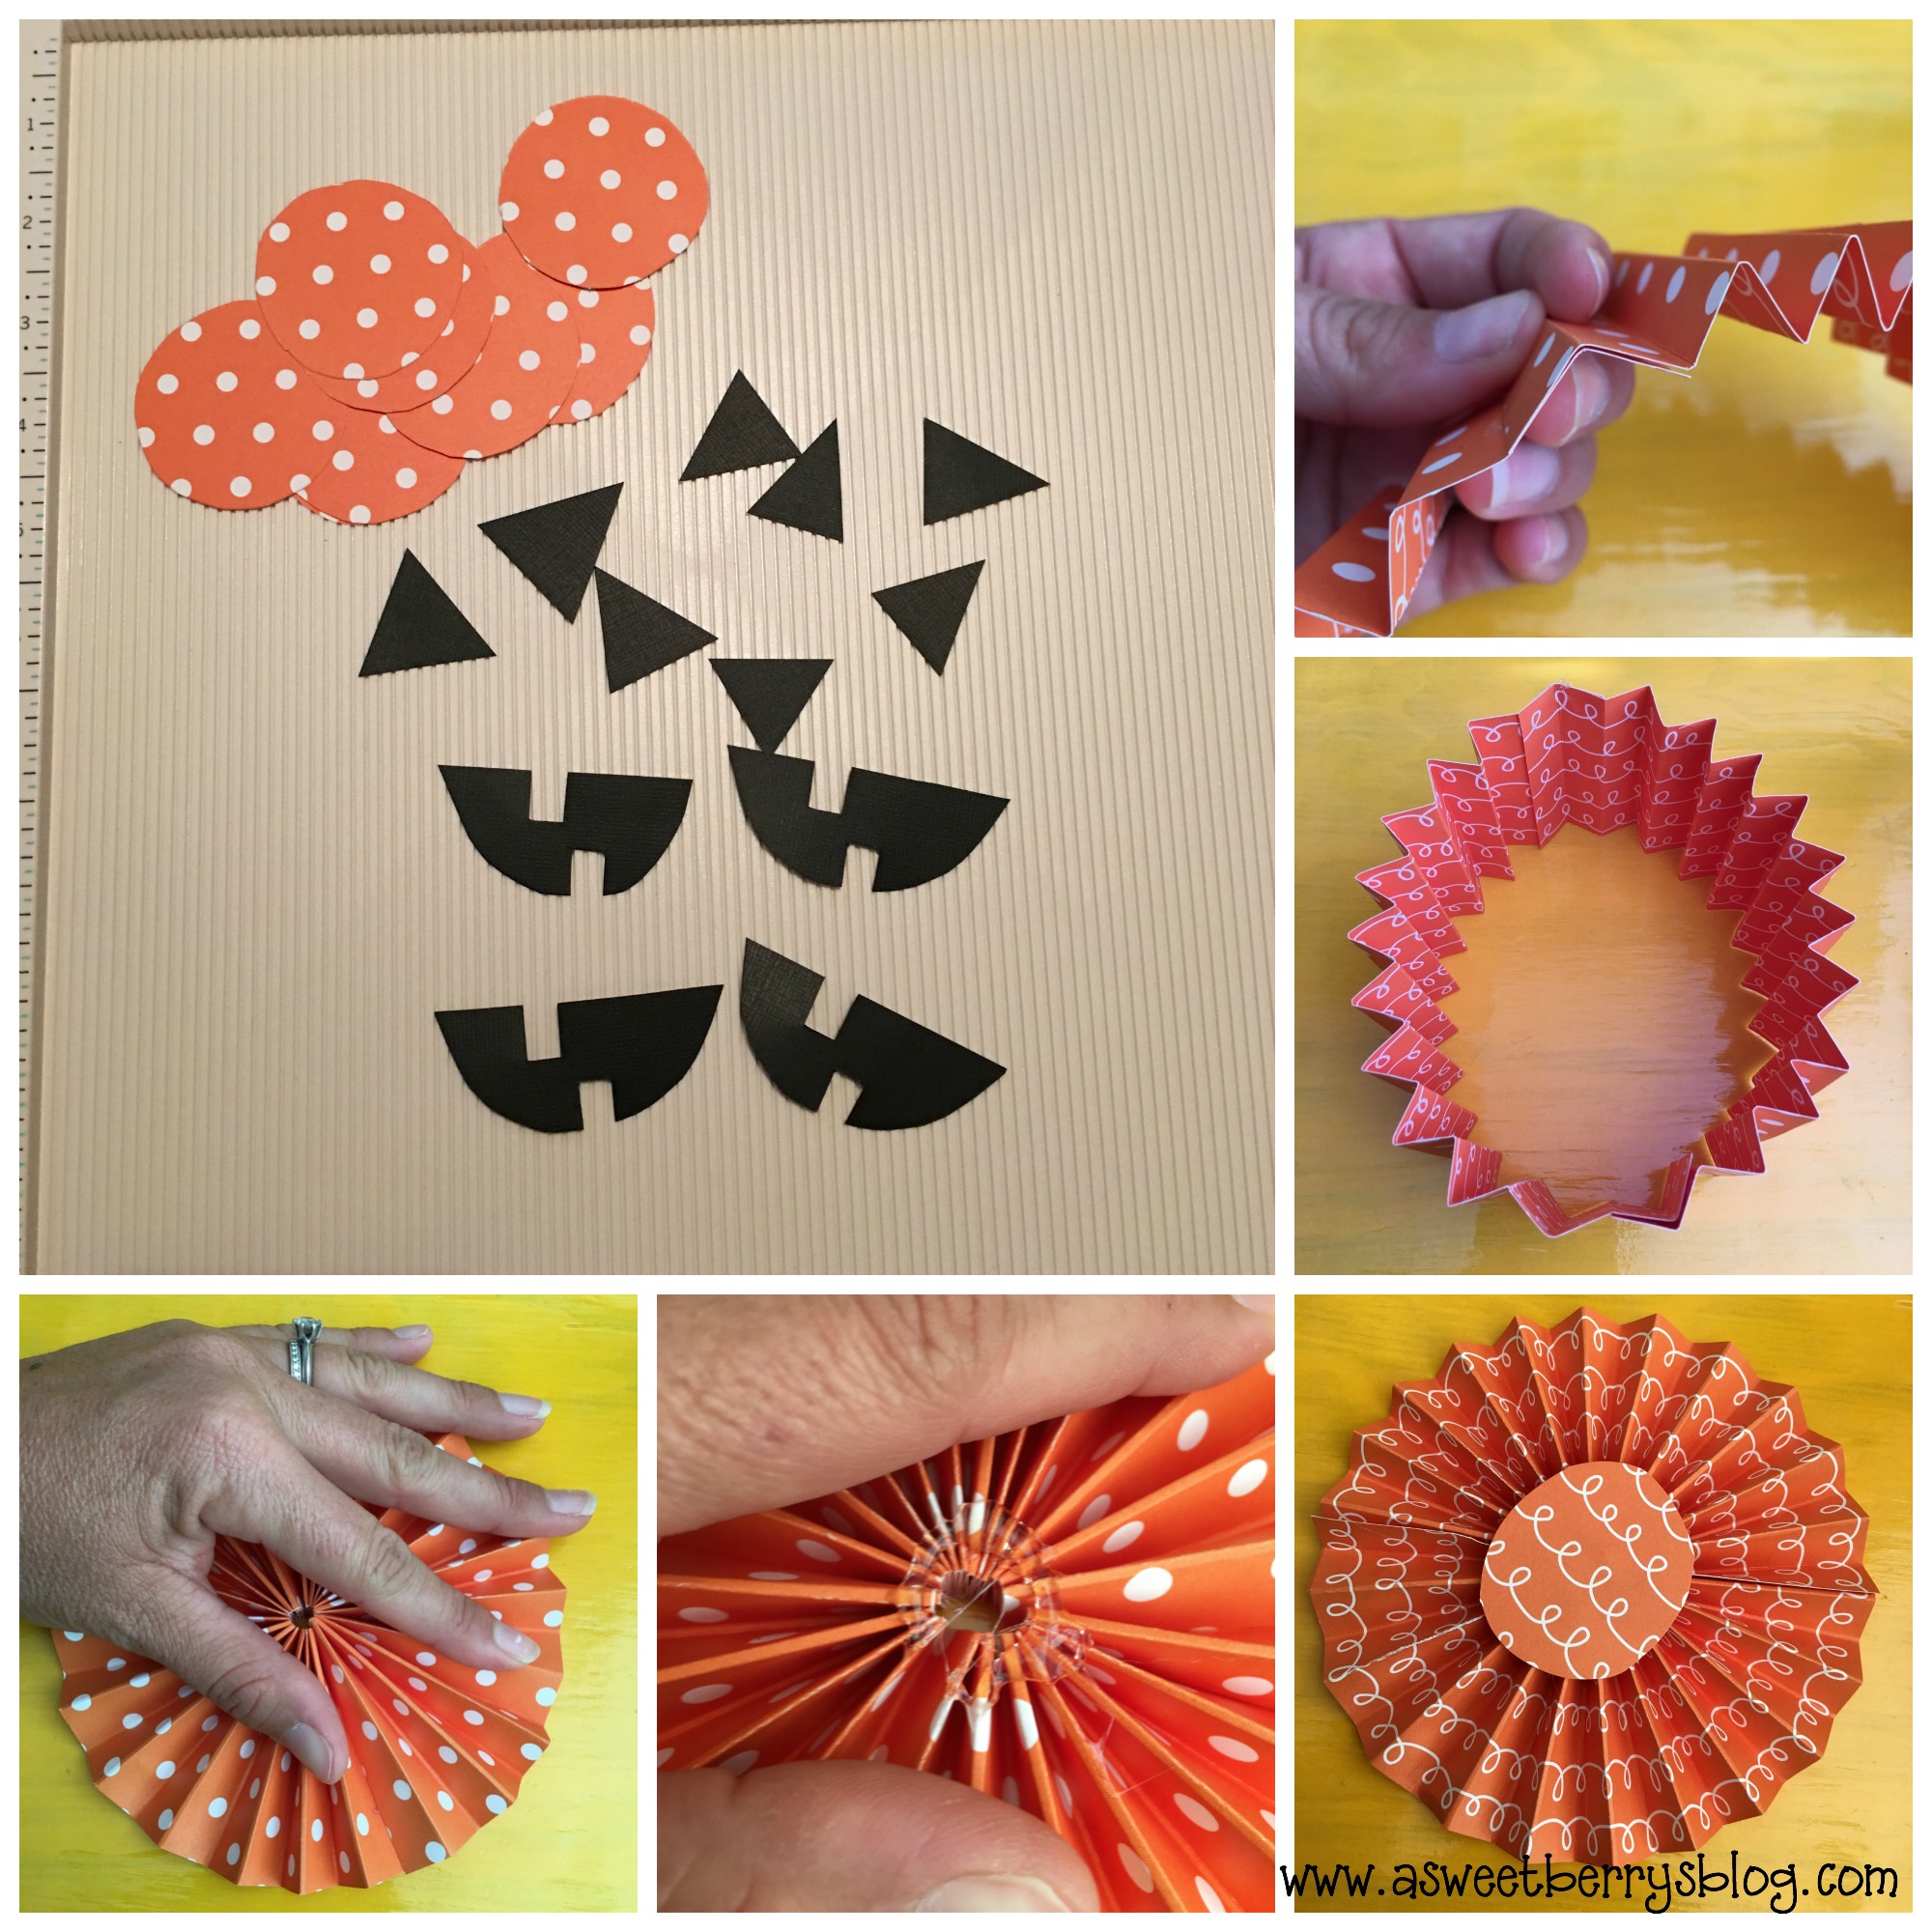
Because you need a way to hold the accordion fold down and together, I cut circles from the same paper.  I also cut my pumpkin face pieces from black paper.   To put together the accordion circle, I first glued the ends of paper together, creating a circle.  A hot glue gun works best for this.  Once the ends were glued together, I laid it on its side and pressed down, causing the middle opening to close and the paper to lay flat.  Using my hot glue gun, I glued a circle in the center of the front and the back of my accordion circle.  Then I glued the eyes, nose and mouth to each accordion circle!

putting-it-together

Once all of my pumpkins were created, I added a piece of green paper for the stem and clipped it to a piece of burlap string using little black clothespins!  It’s perfect for my mantel.  You could create different faces for each one or you could make more accordion circles and add letters.  You could make them bigger or smaller, depending on what you want to do with them!

I hope you like my Accordion Circle Pumpkin Banner!

Be sure to click the button below to check out other Halloween Craft Lightning projects!

The Berry family cleans up with E-Cloth!

Chemical Free Cleaning!

e-cloth

Do you hate cleaning with harsh chemicals?  Do you hate the smell of cleaning products? I know that I do, especially with kids in the house.  A lot of times, the chemicals smell awful and they can do more damage to furniture and counters than good.  

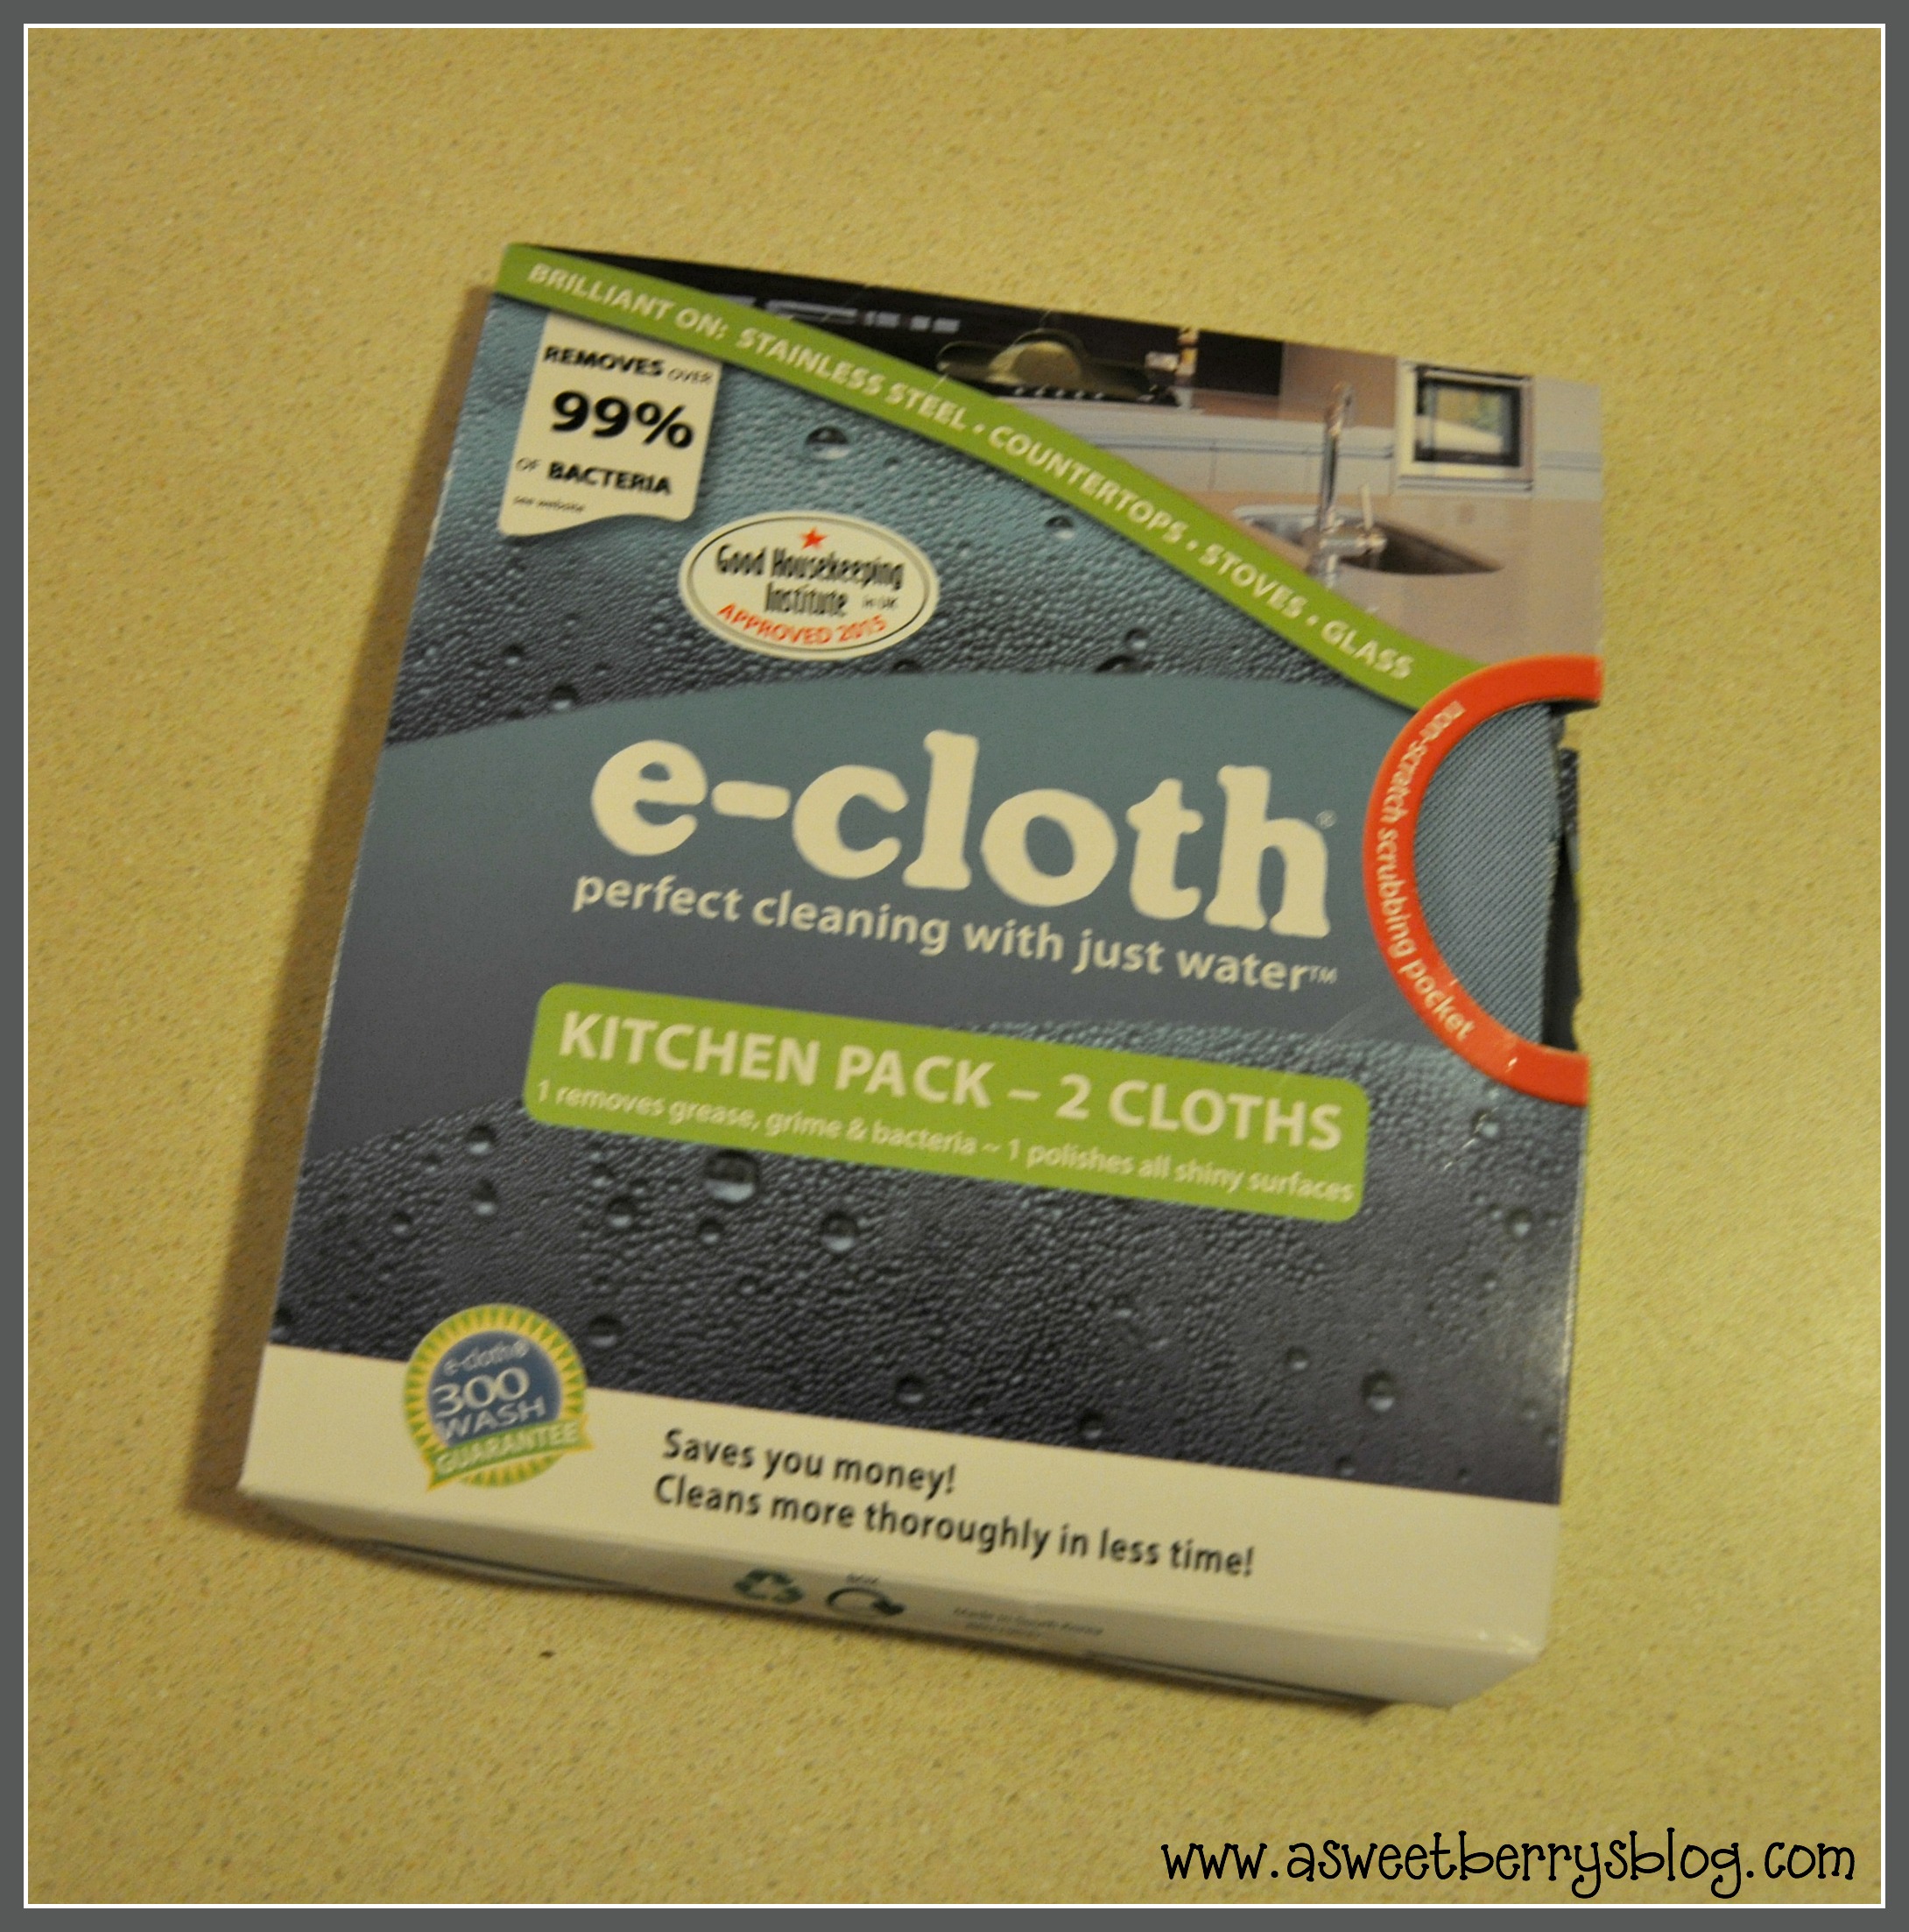
Well if you hate using harsh smelly chemicals, then E-cloths are for you!  E-cloth is a cleaning cloth that you can use with just water.  The cloths are made of microfibers and removes over 99% of bacteria.  

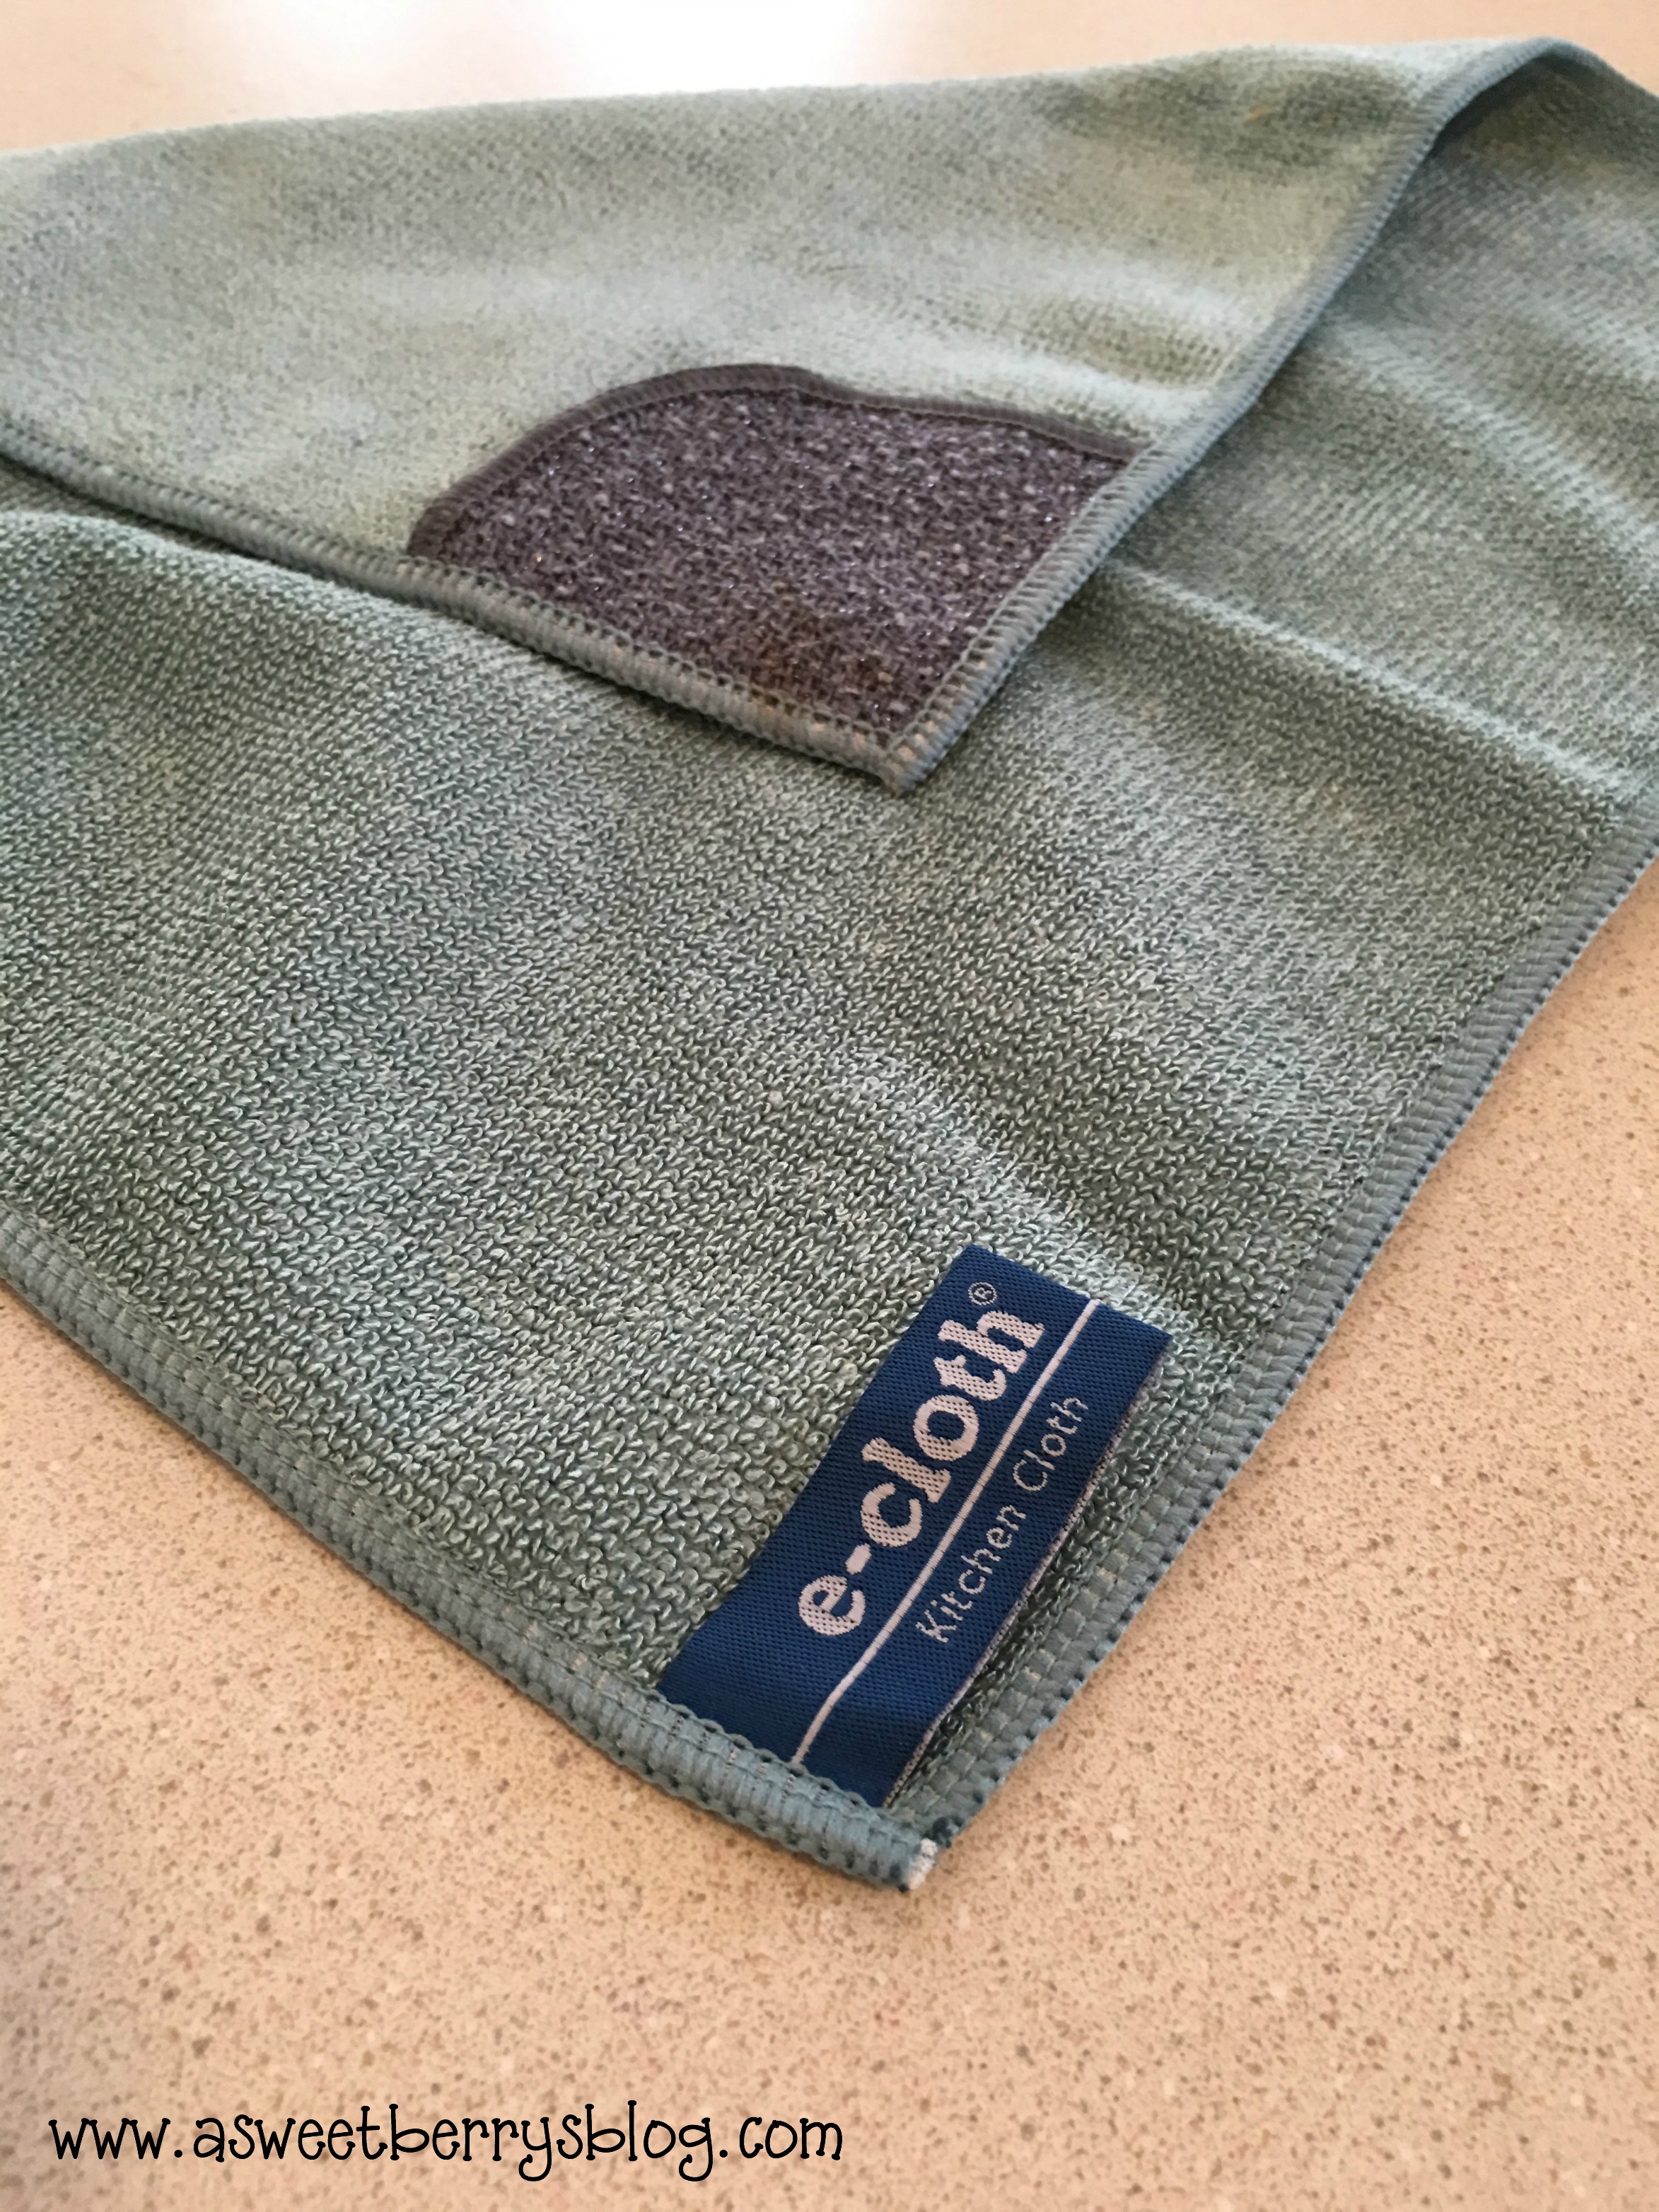
I got the chance to try the E-cloth Kitchen Pack.  This pack included one Kitchen Cloth and one Glass and Polishing Cloth.  The Kitchen Cloth has a little non-scratch scrubbing pad on one of the corners.   I absolutely love this cloth.  It works great for cleaning up a mess created by the kids.  And it works great on stubborn, stuck on foods.  

kitchen cloth

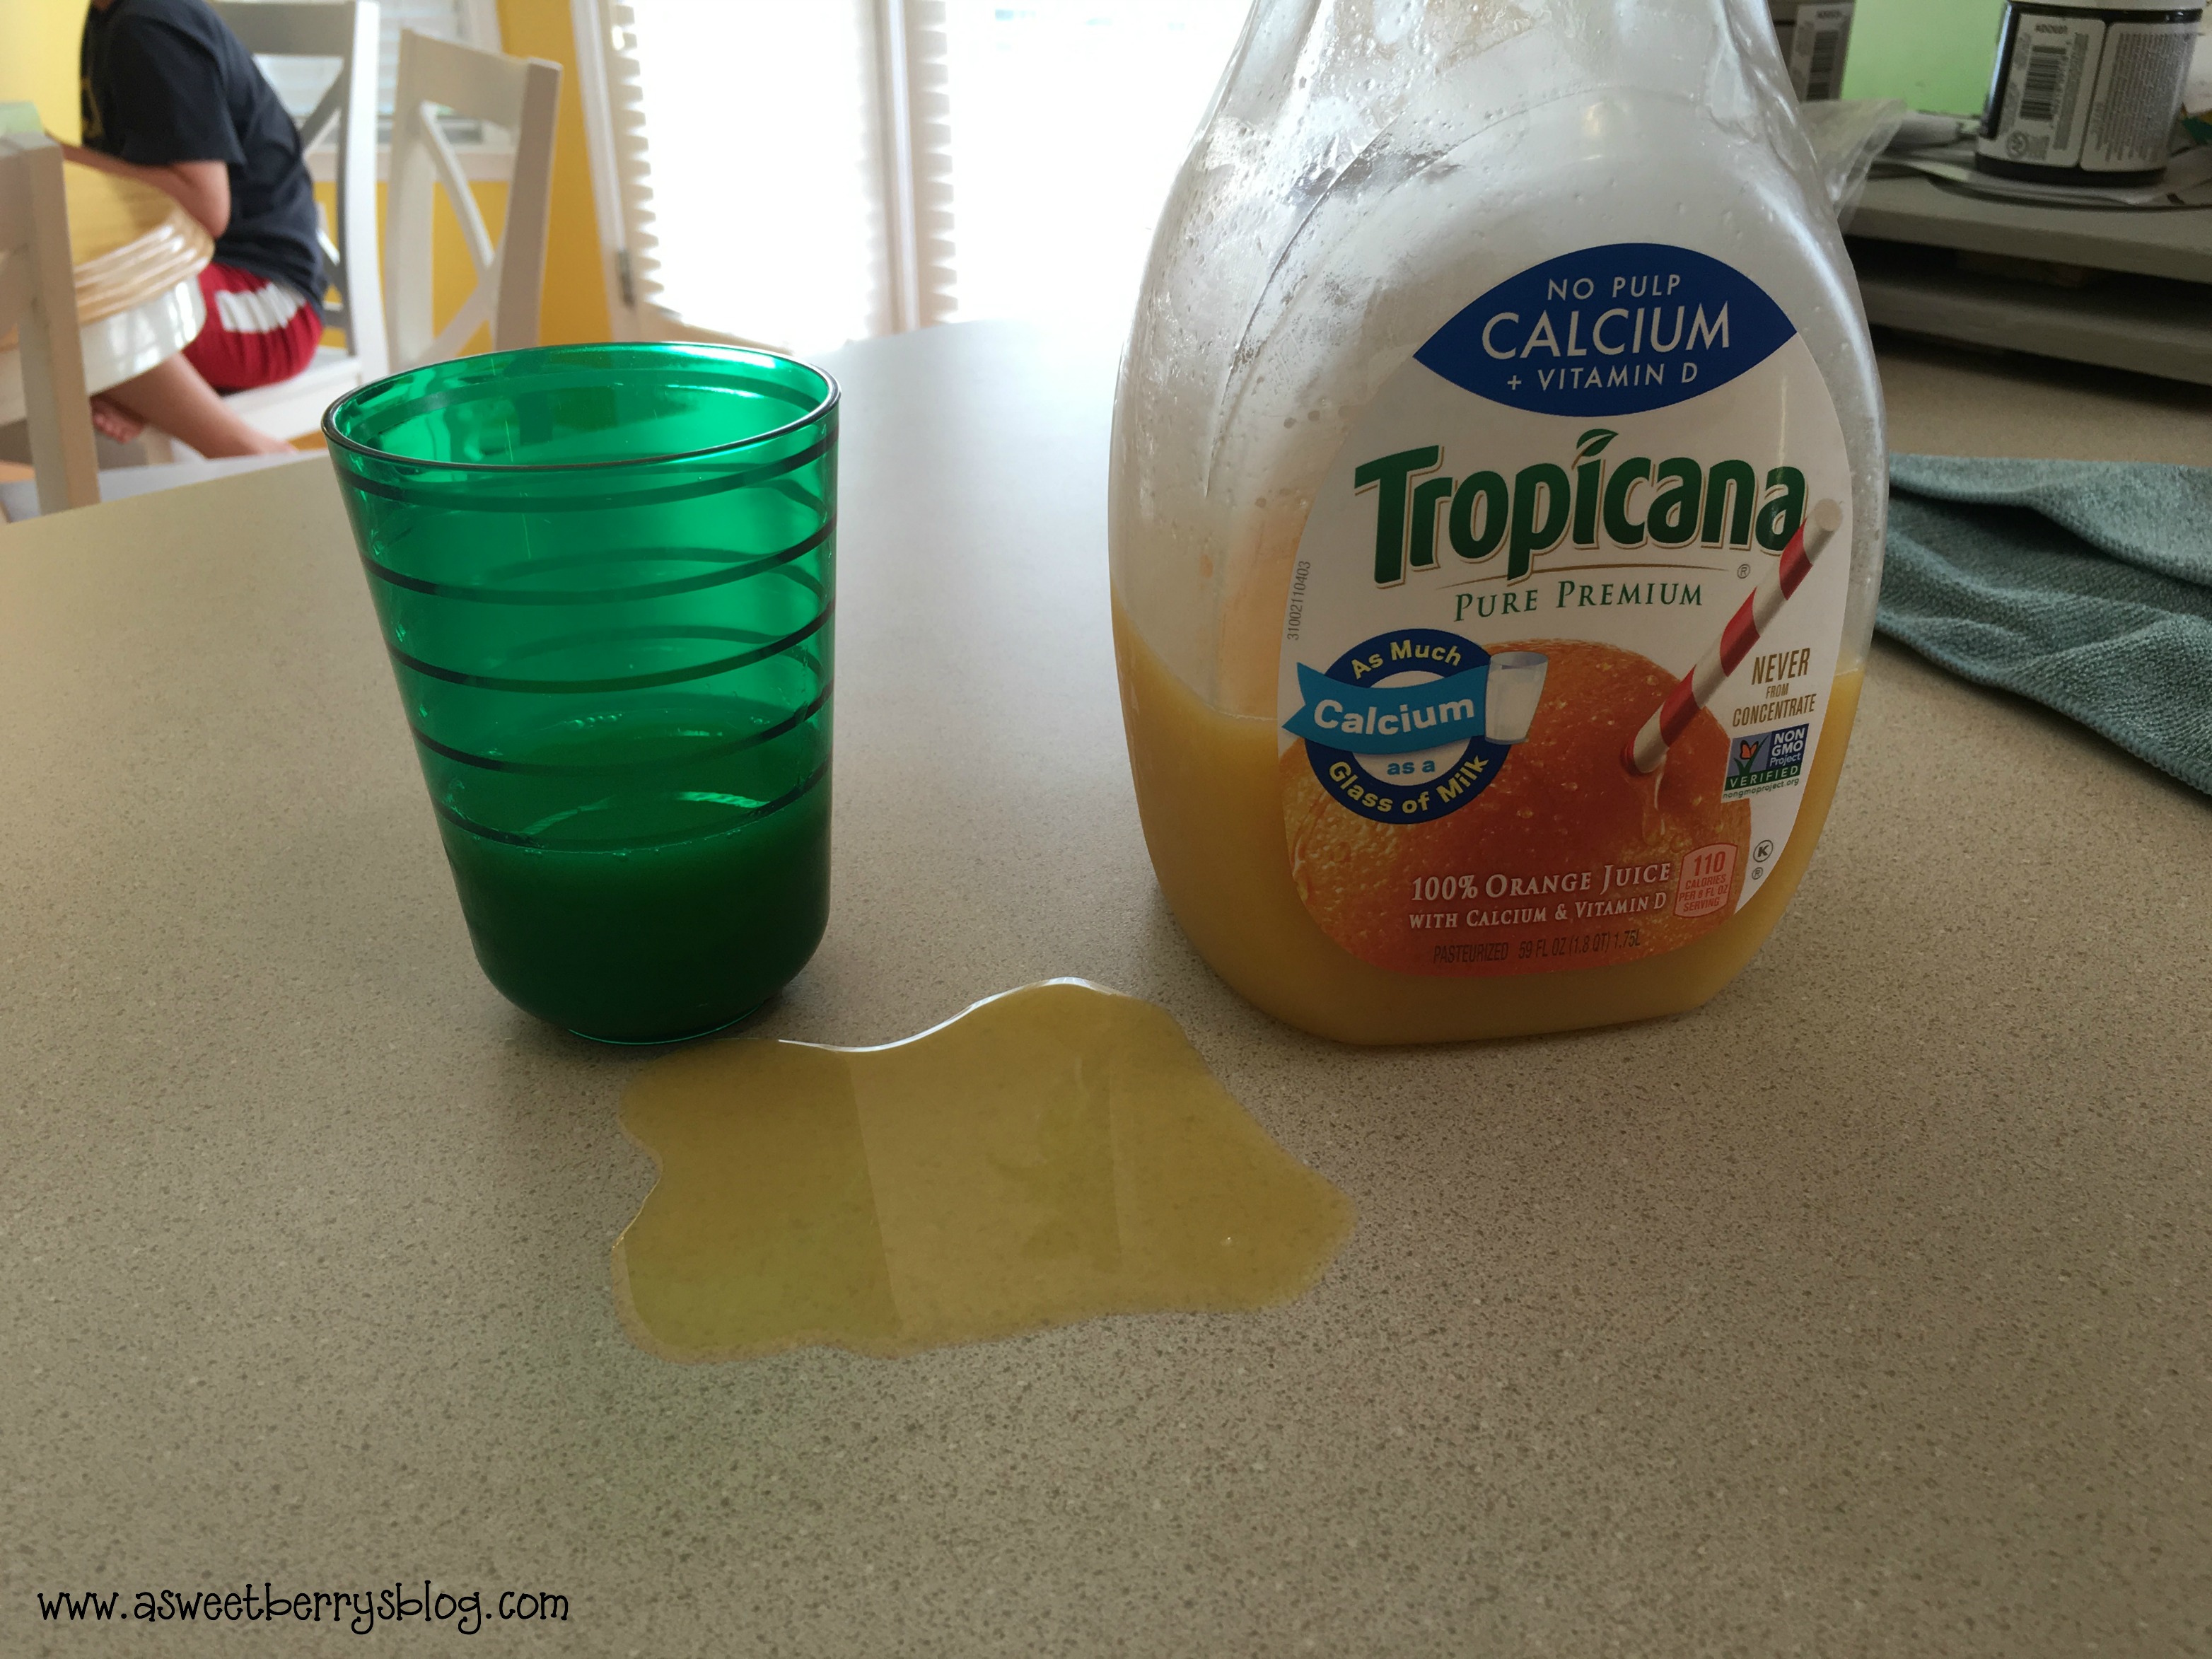
I have a 6 year old and a 9 year old and they are always spilling something, especially my super independent 6 year old!   Example below!   I love letting the kids use the Kitchen Cloth because they don’t have to spray chemicals to clean up their messes.

spill

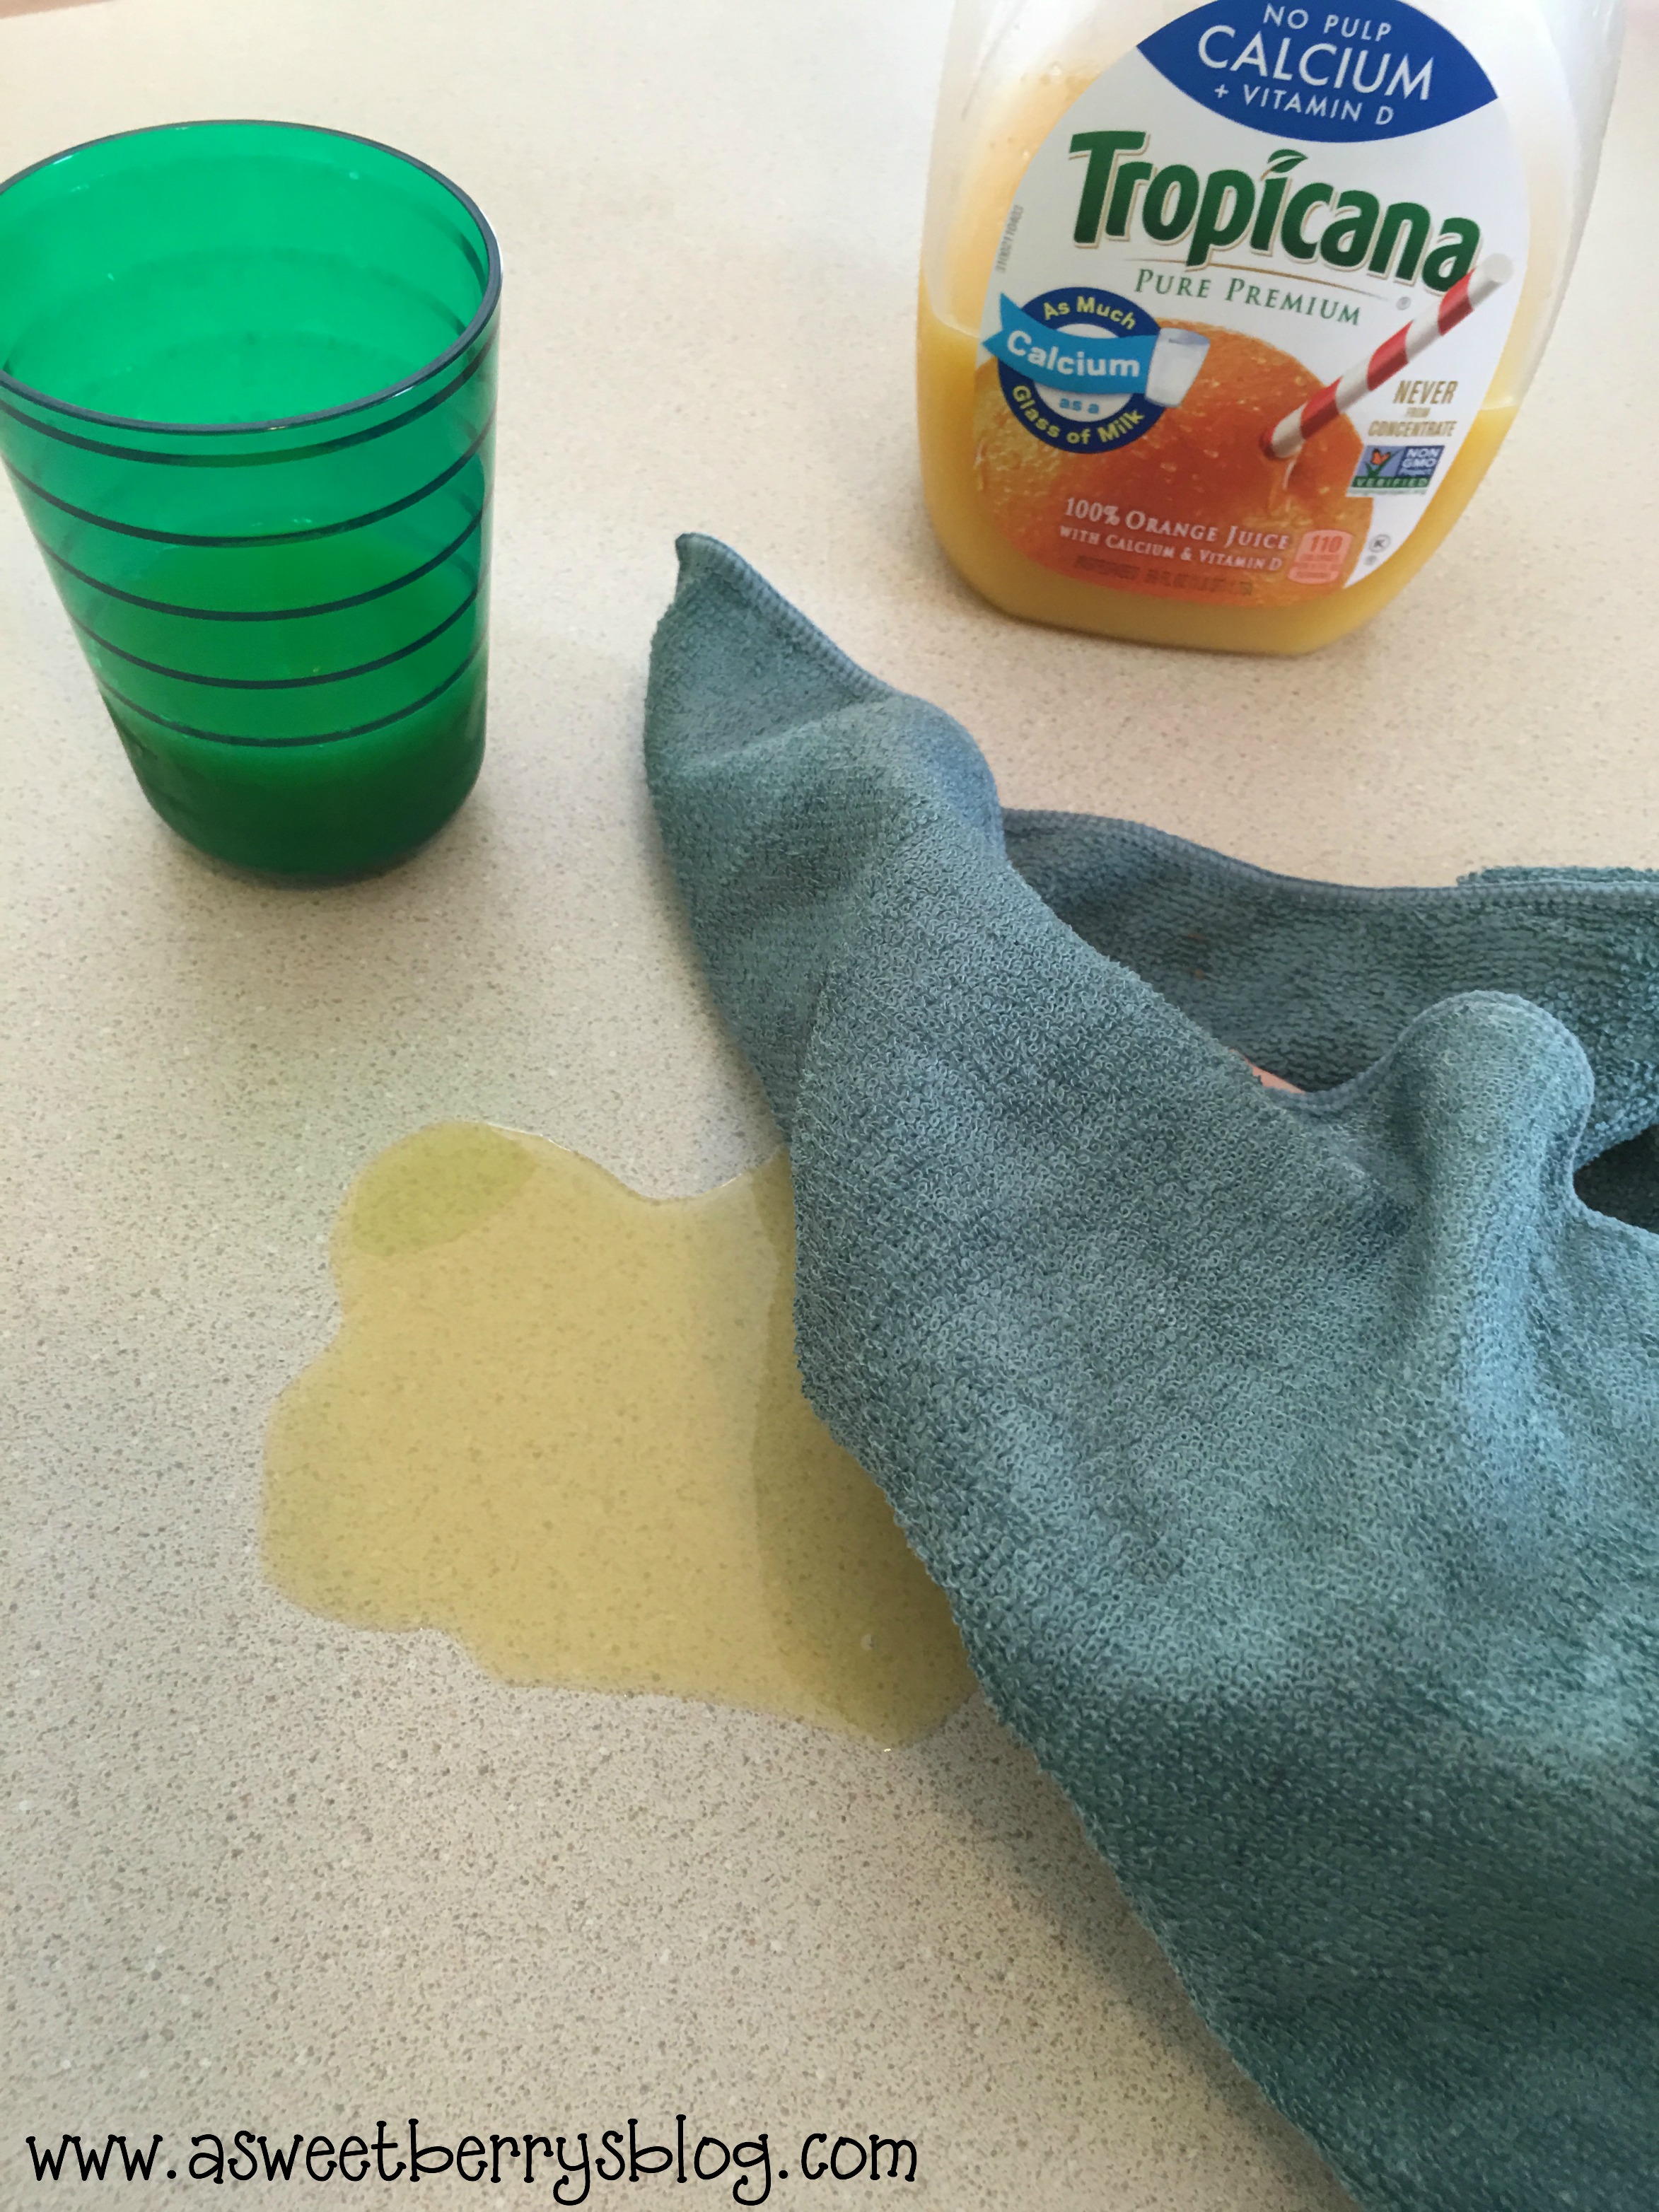
Clean up was easy with a damp Kitchen Cloth.  After using, just rinse it out!   These clothes can be washed in the washing machine for up to 300 washes and still work great.   

clean up

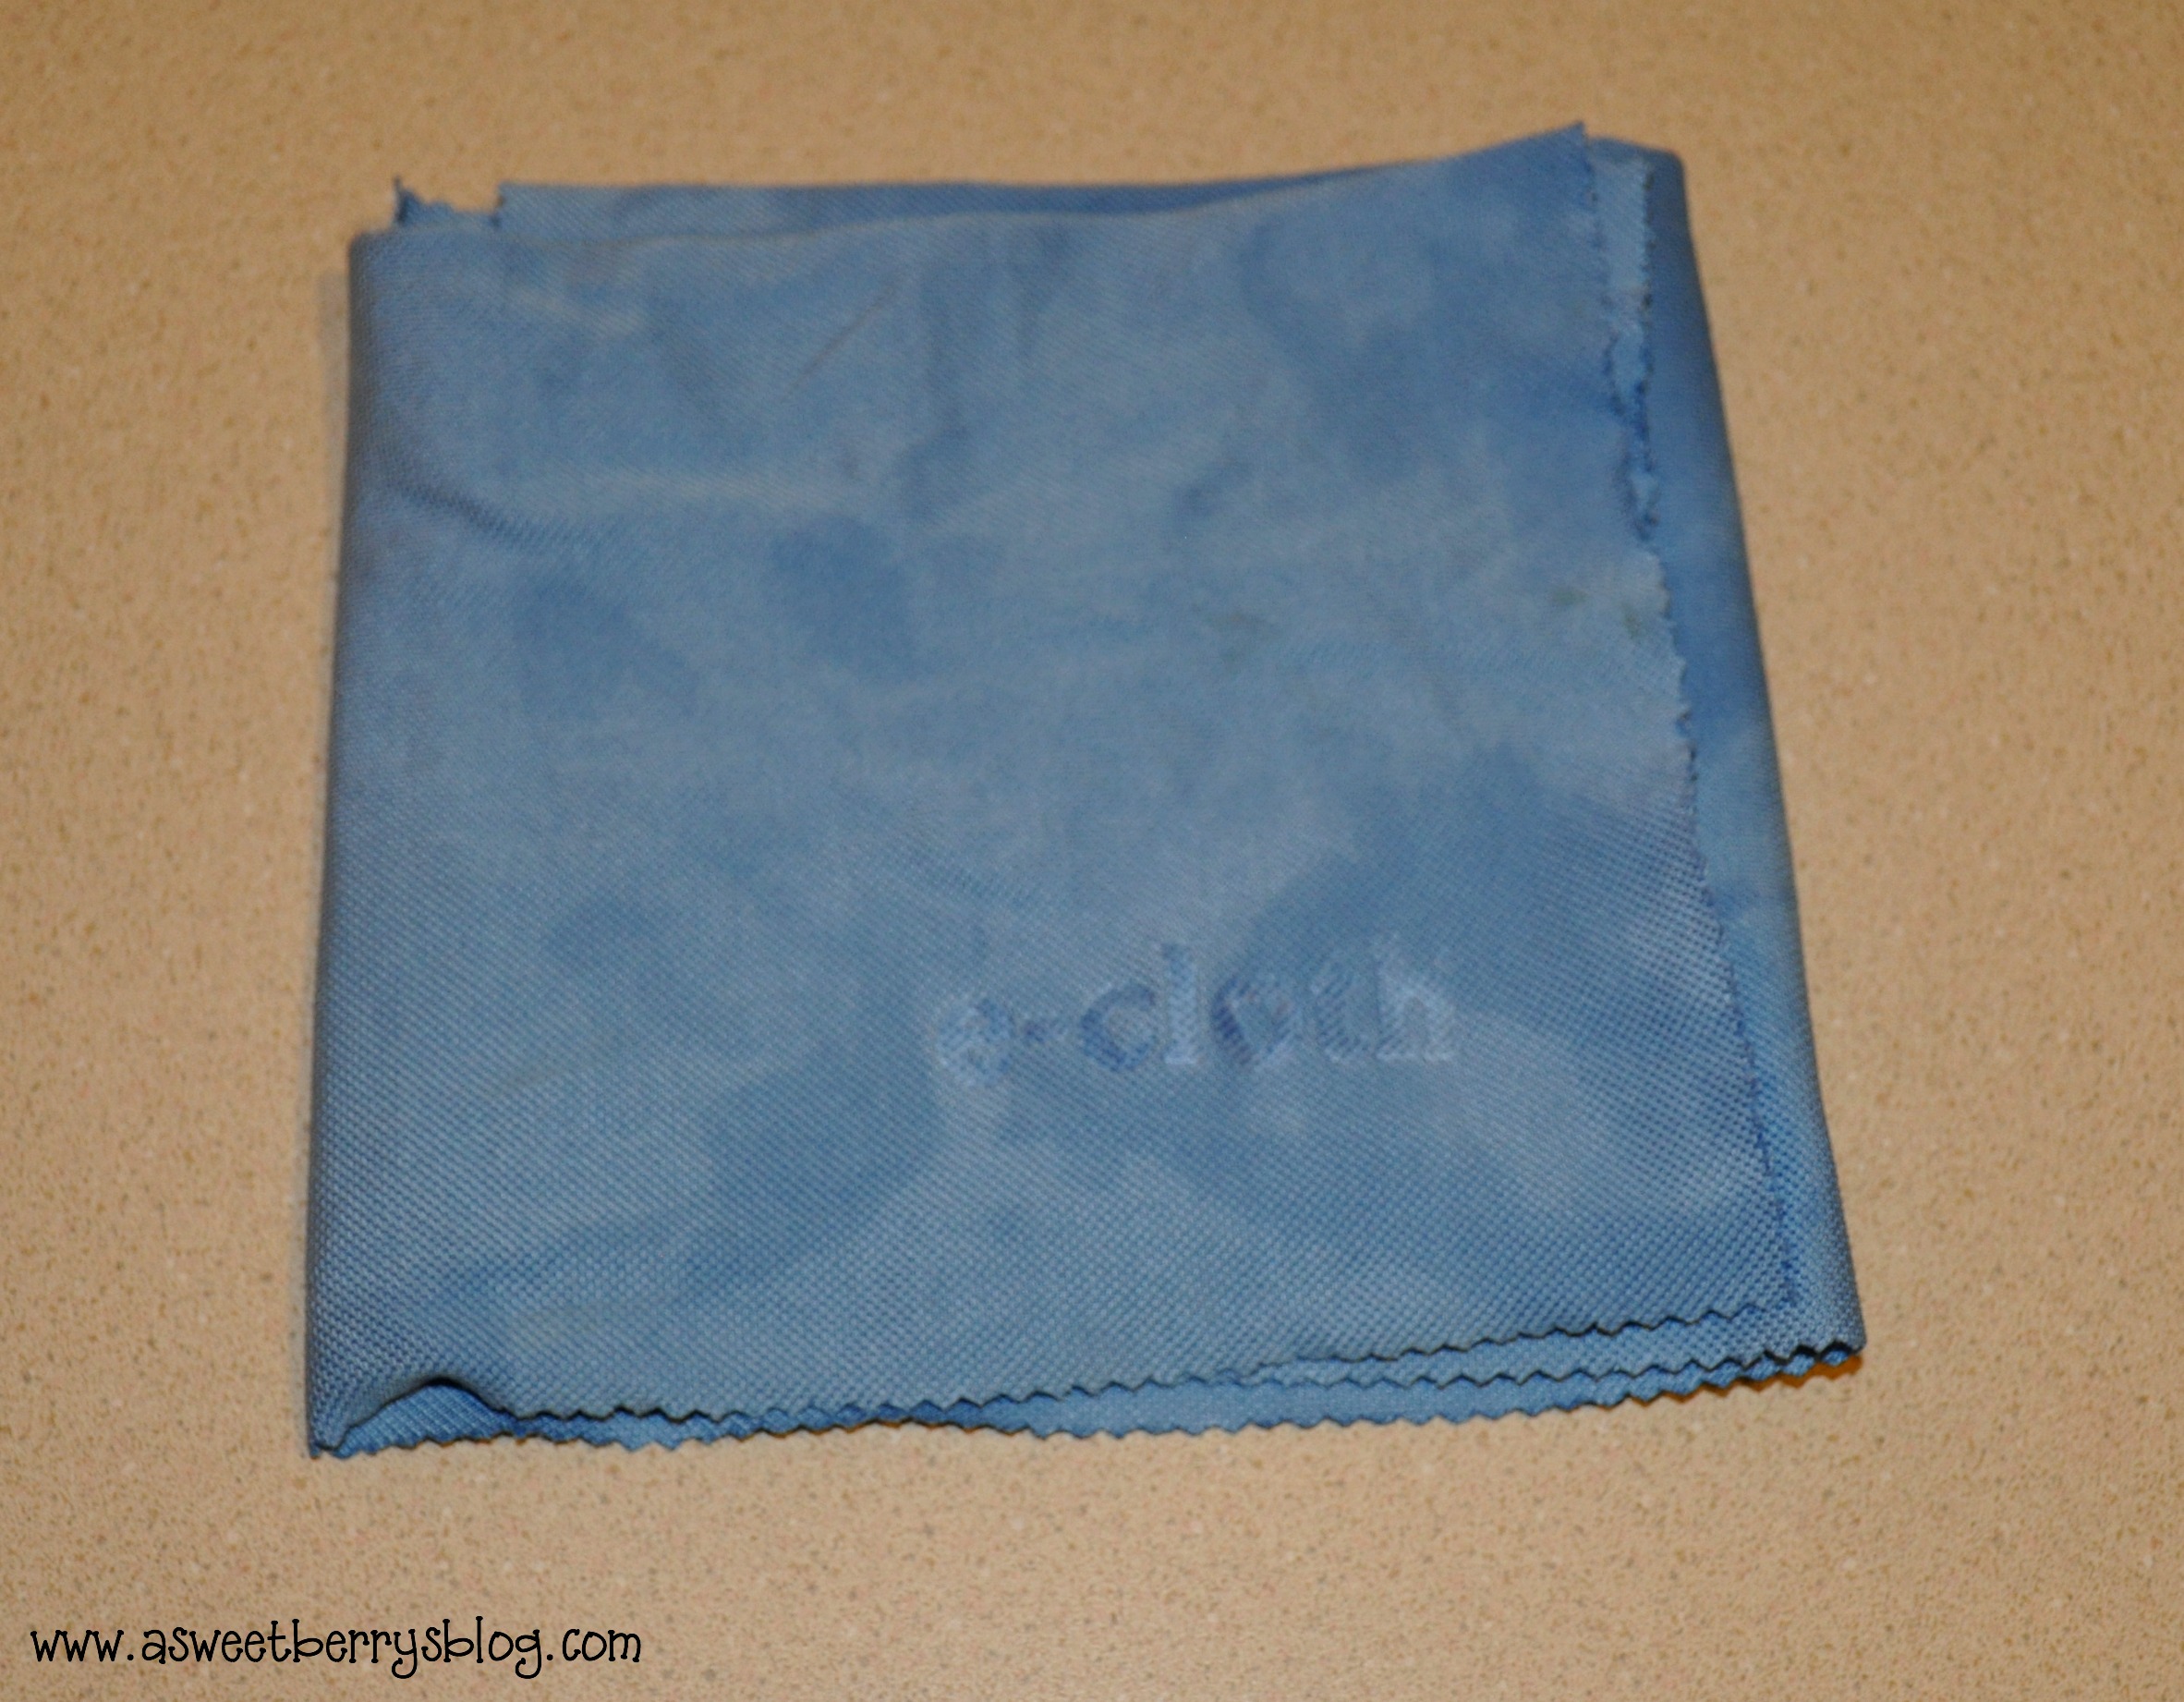
The Glass and Polishing cloth leaves a streak free shine on most surfaces.  

buffing cloth

I just love that you can use this Kitchen Cloth with just water and it gets rid of messes and bacteria!  

You can find more information on E-cloths on their website at http://www.ecloth.com/ecloth-perfect-cleaning-with-just-water.html

Please consider joining their email list.  They promise to only send emails a couple times a month to let folks know about their promotions and you can opt out at any time. They will never sell your email addresses and will only use it for internal marketing.  You can also check them out on Facebook ( www.facebook.com/eclothUSA ), Pinterest (  www.pinterest.com/eclothUSA ), YouTube ( http://www.youtube.com/eclothCleaning ), Instagram ( @eclothUSA ) and Twitter ( @ecloth ). 

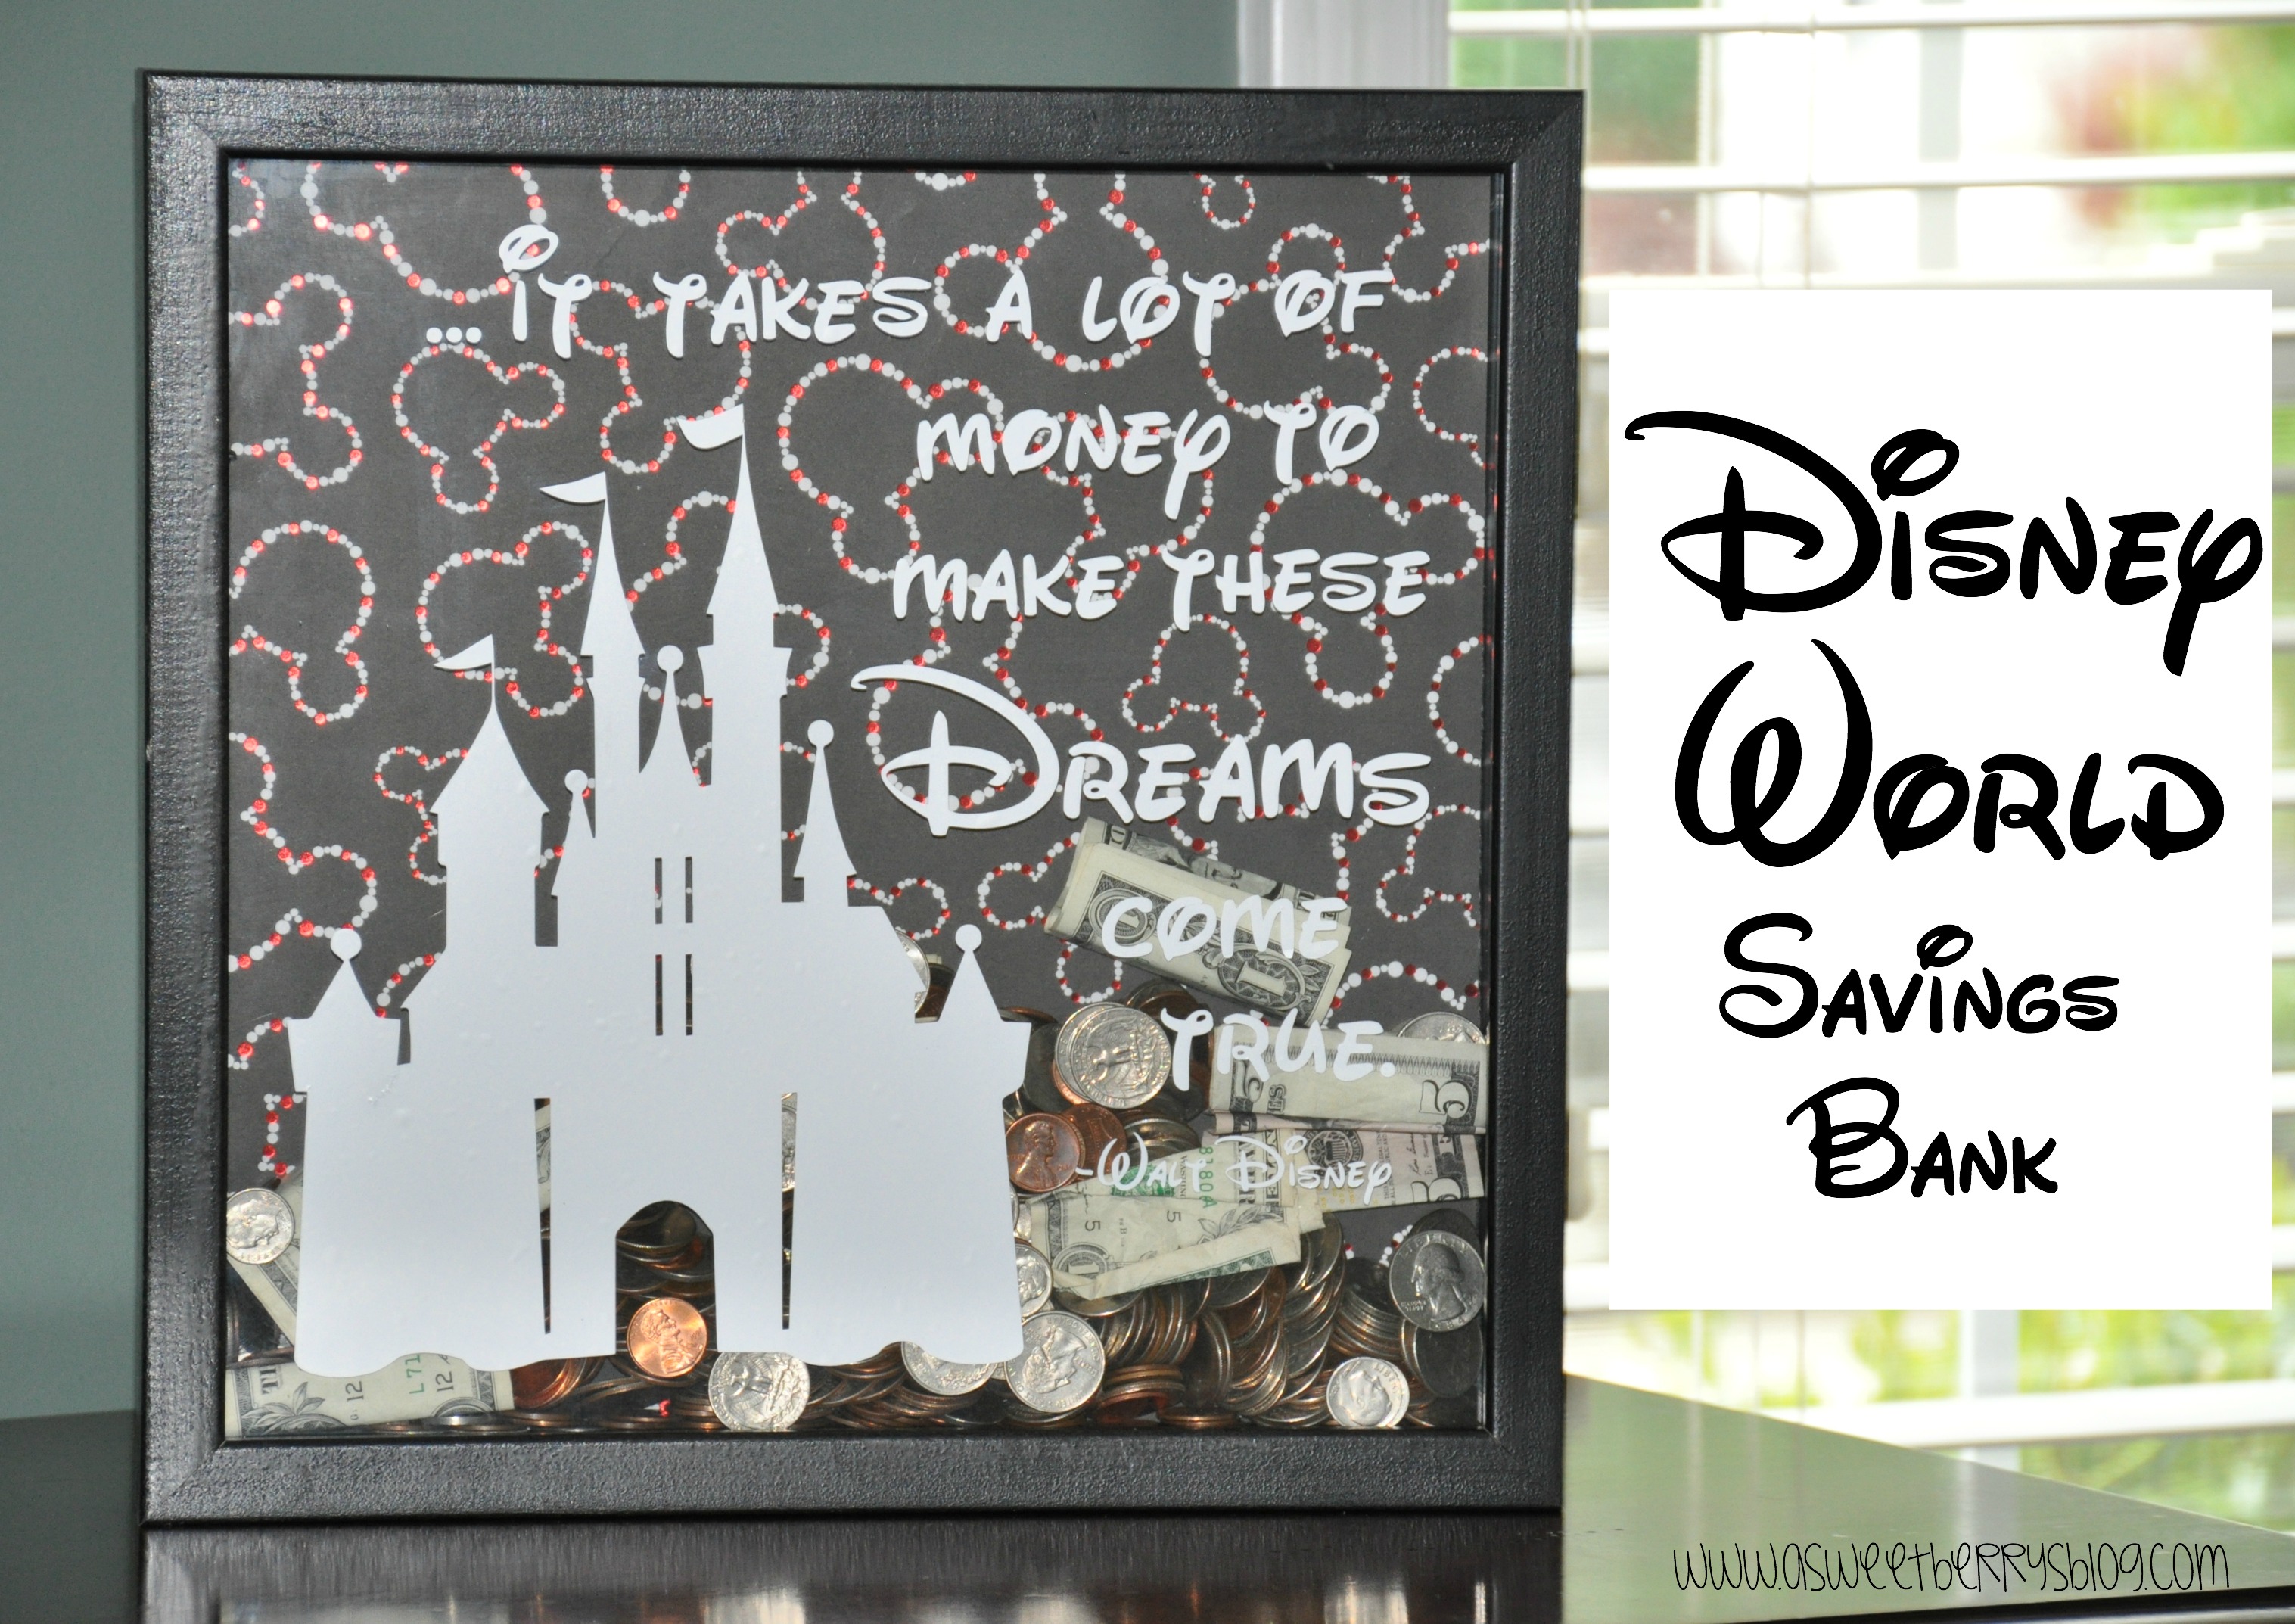
Disney World Savings Bank

Disney Bank Final

Kids just do not realize how much Disney World costs, especially when you don’t live there and you have to get a place to stay.   And if you are like us, we like to stay on the Disney property.   We have worked really hard to help our children learn about saving and spending money.   They’ve learned that if they want something, they have to save their money for it.  

Well, in preparation for an upcoming trip to Disney, I decided to make my boys a Disney World Savings Bank!  Aside from their allowance money, we’ve decided that every cent or dollar that we have will go into our Savings Bank.   We will use this money for fun things like souvenirs and extra treats!   So, the more they save, the more money they have to spend!  We are fortunate that we are going at a time that they offer the free dining plan.  That is helping to save A LOT of money!

Now, I will tell you the steps I took to making this fun and easy Disney World Savings Bank!

Materials needed:

-A Shadow Box Frame

-A fun piece of scrapbook paper (I used this cute Mickey paper, but you could use any kind that you want if you are making it for something other than Disney!)

-A drill

-Black Paint and a paint brush

-Glue Runner

Vinyl (affilate link)

-Electronic Cutting Machine (I used the Sizzix Eclips2 (affiliate link)

-Design/Cutting Software

-Money!!!!!!

Steps:

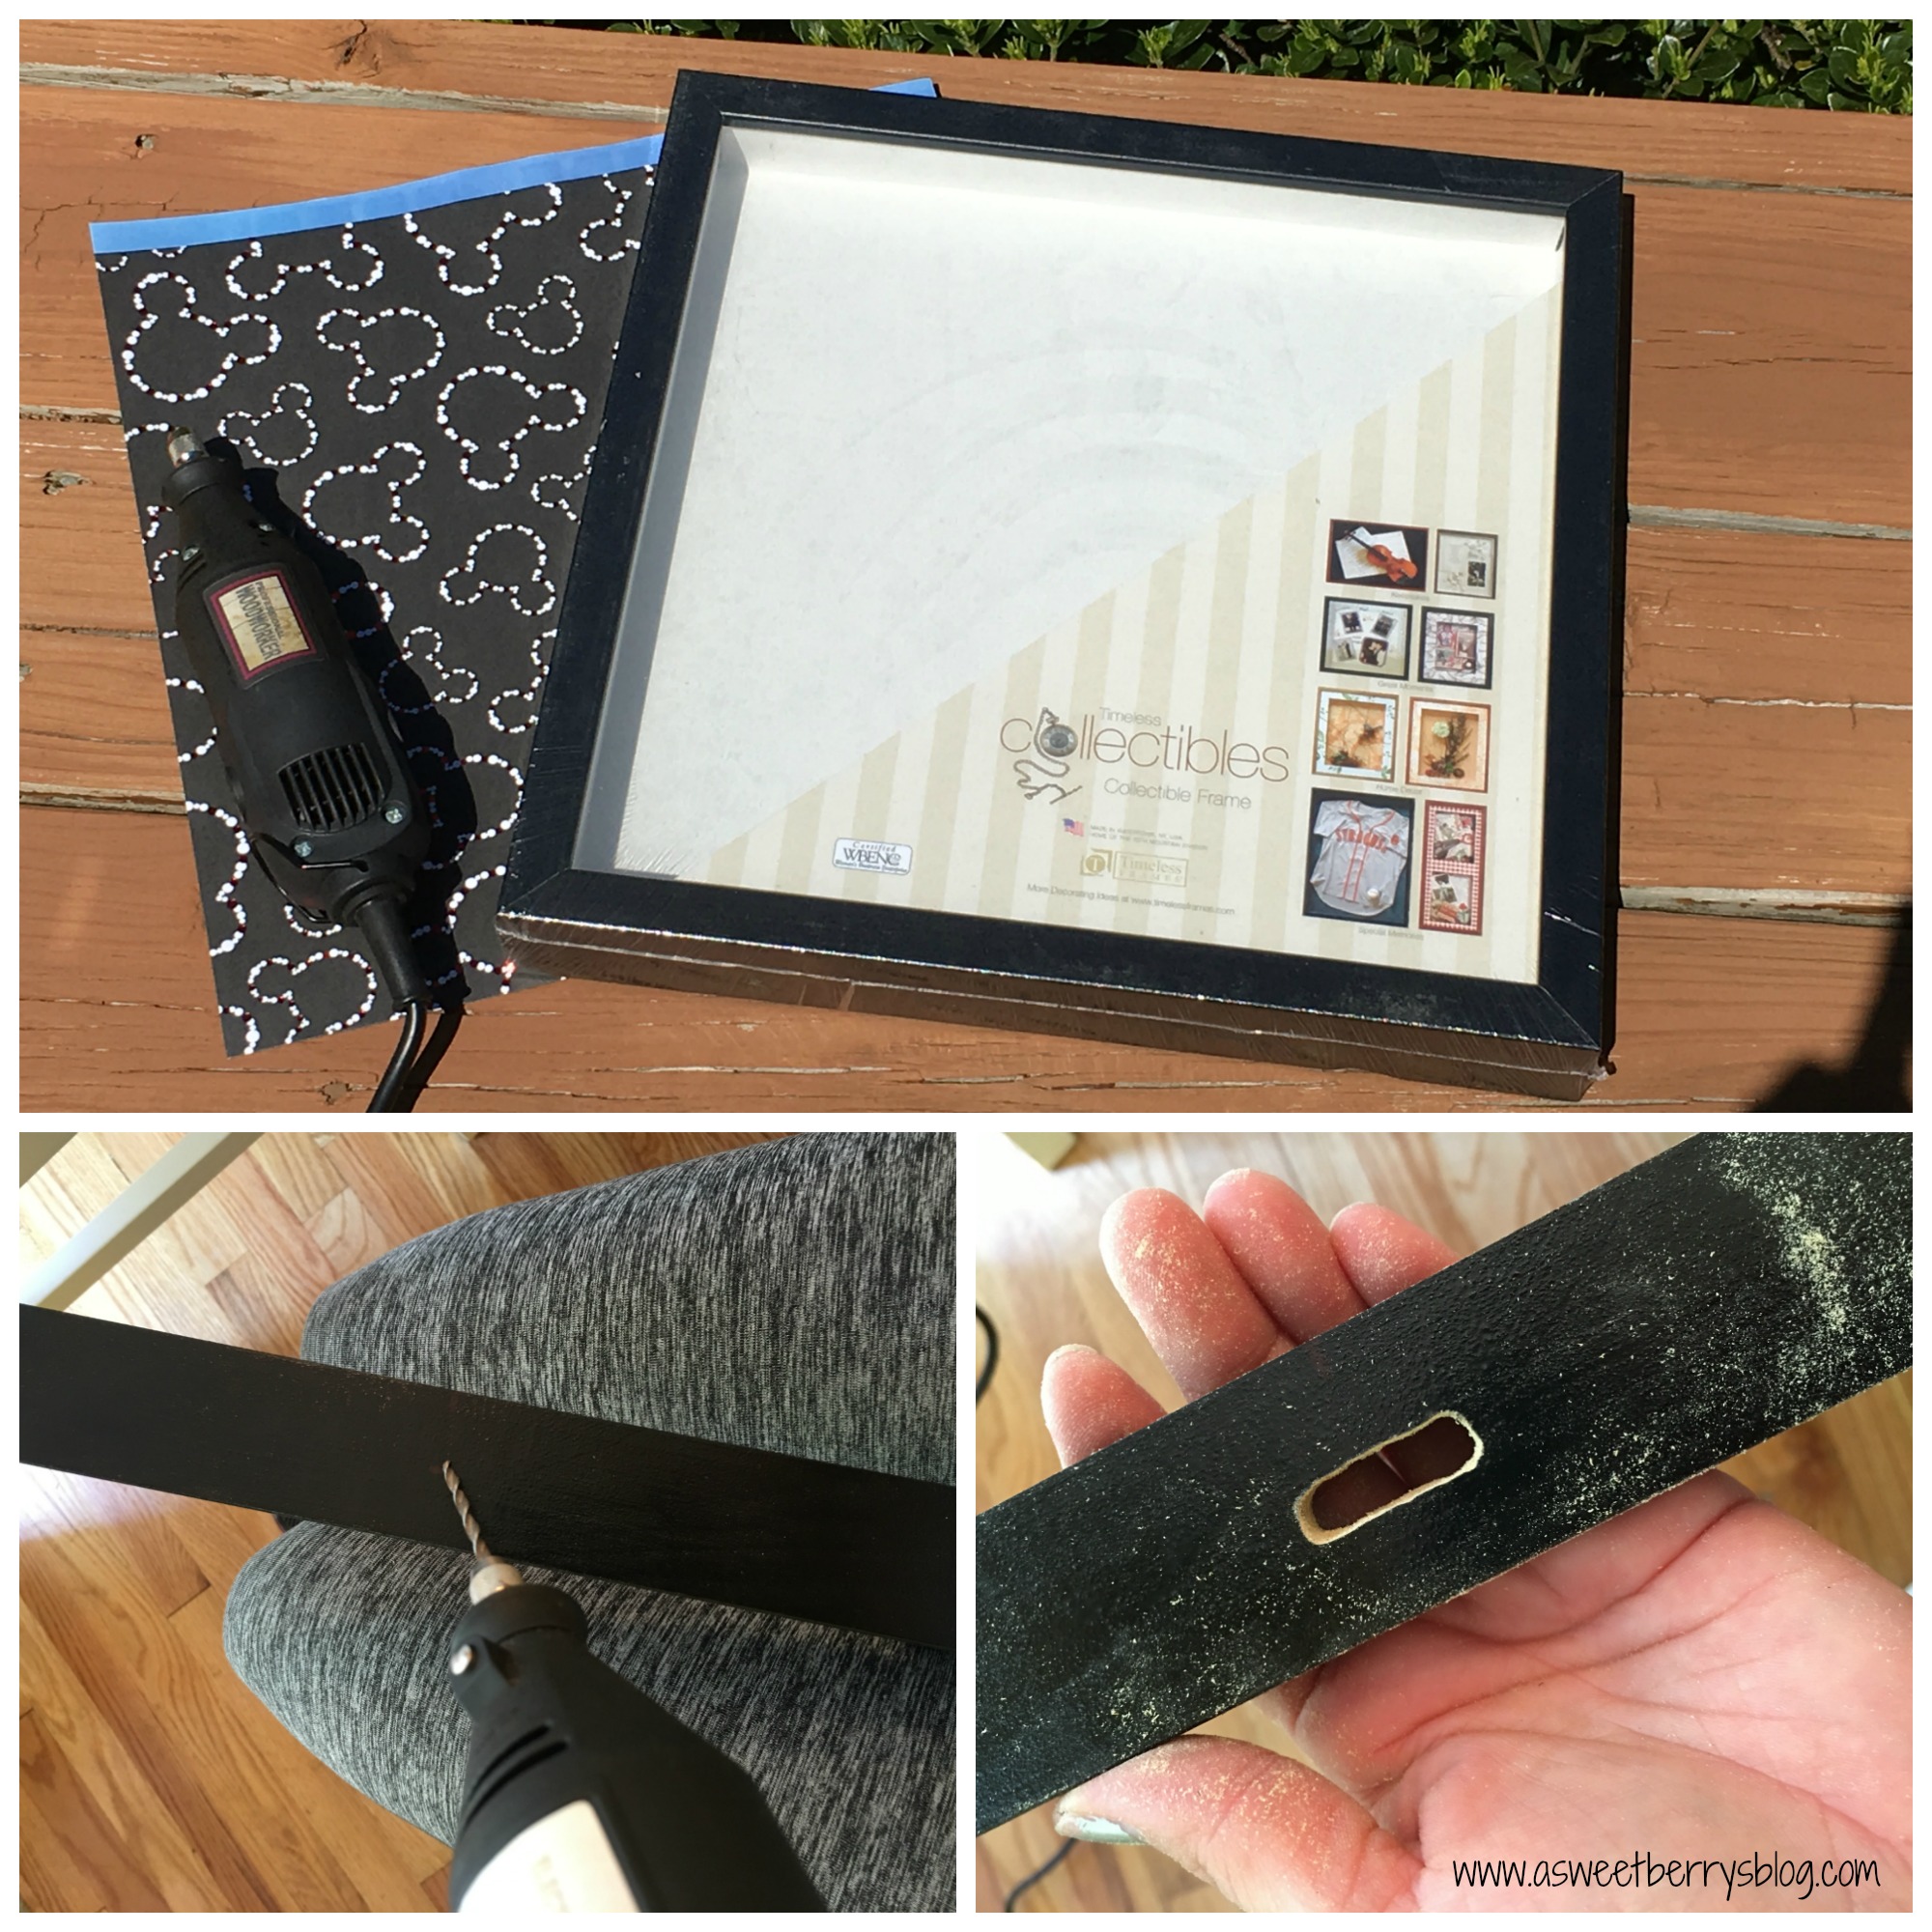
  1.  I removed the glass and cardboard backing from the frame and then drilled a hole in the top big enough for money to fit through.

Frame and Drill

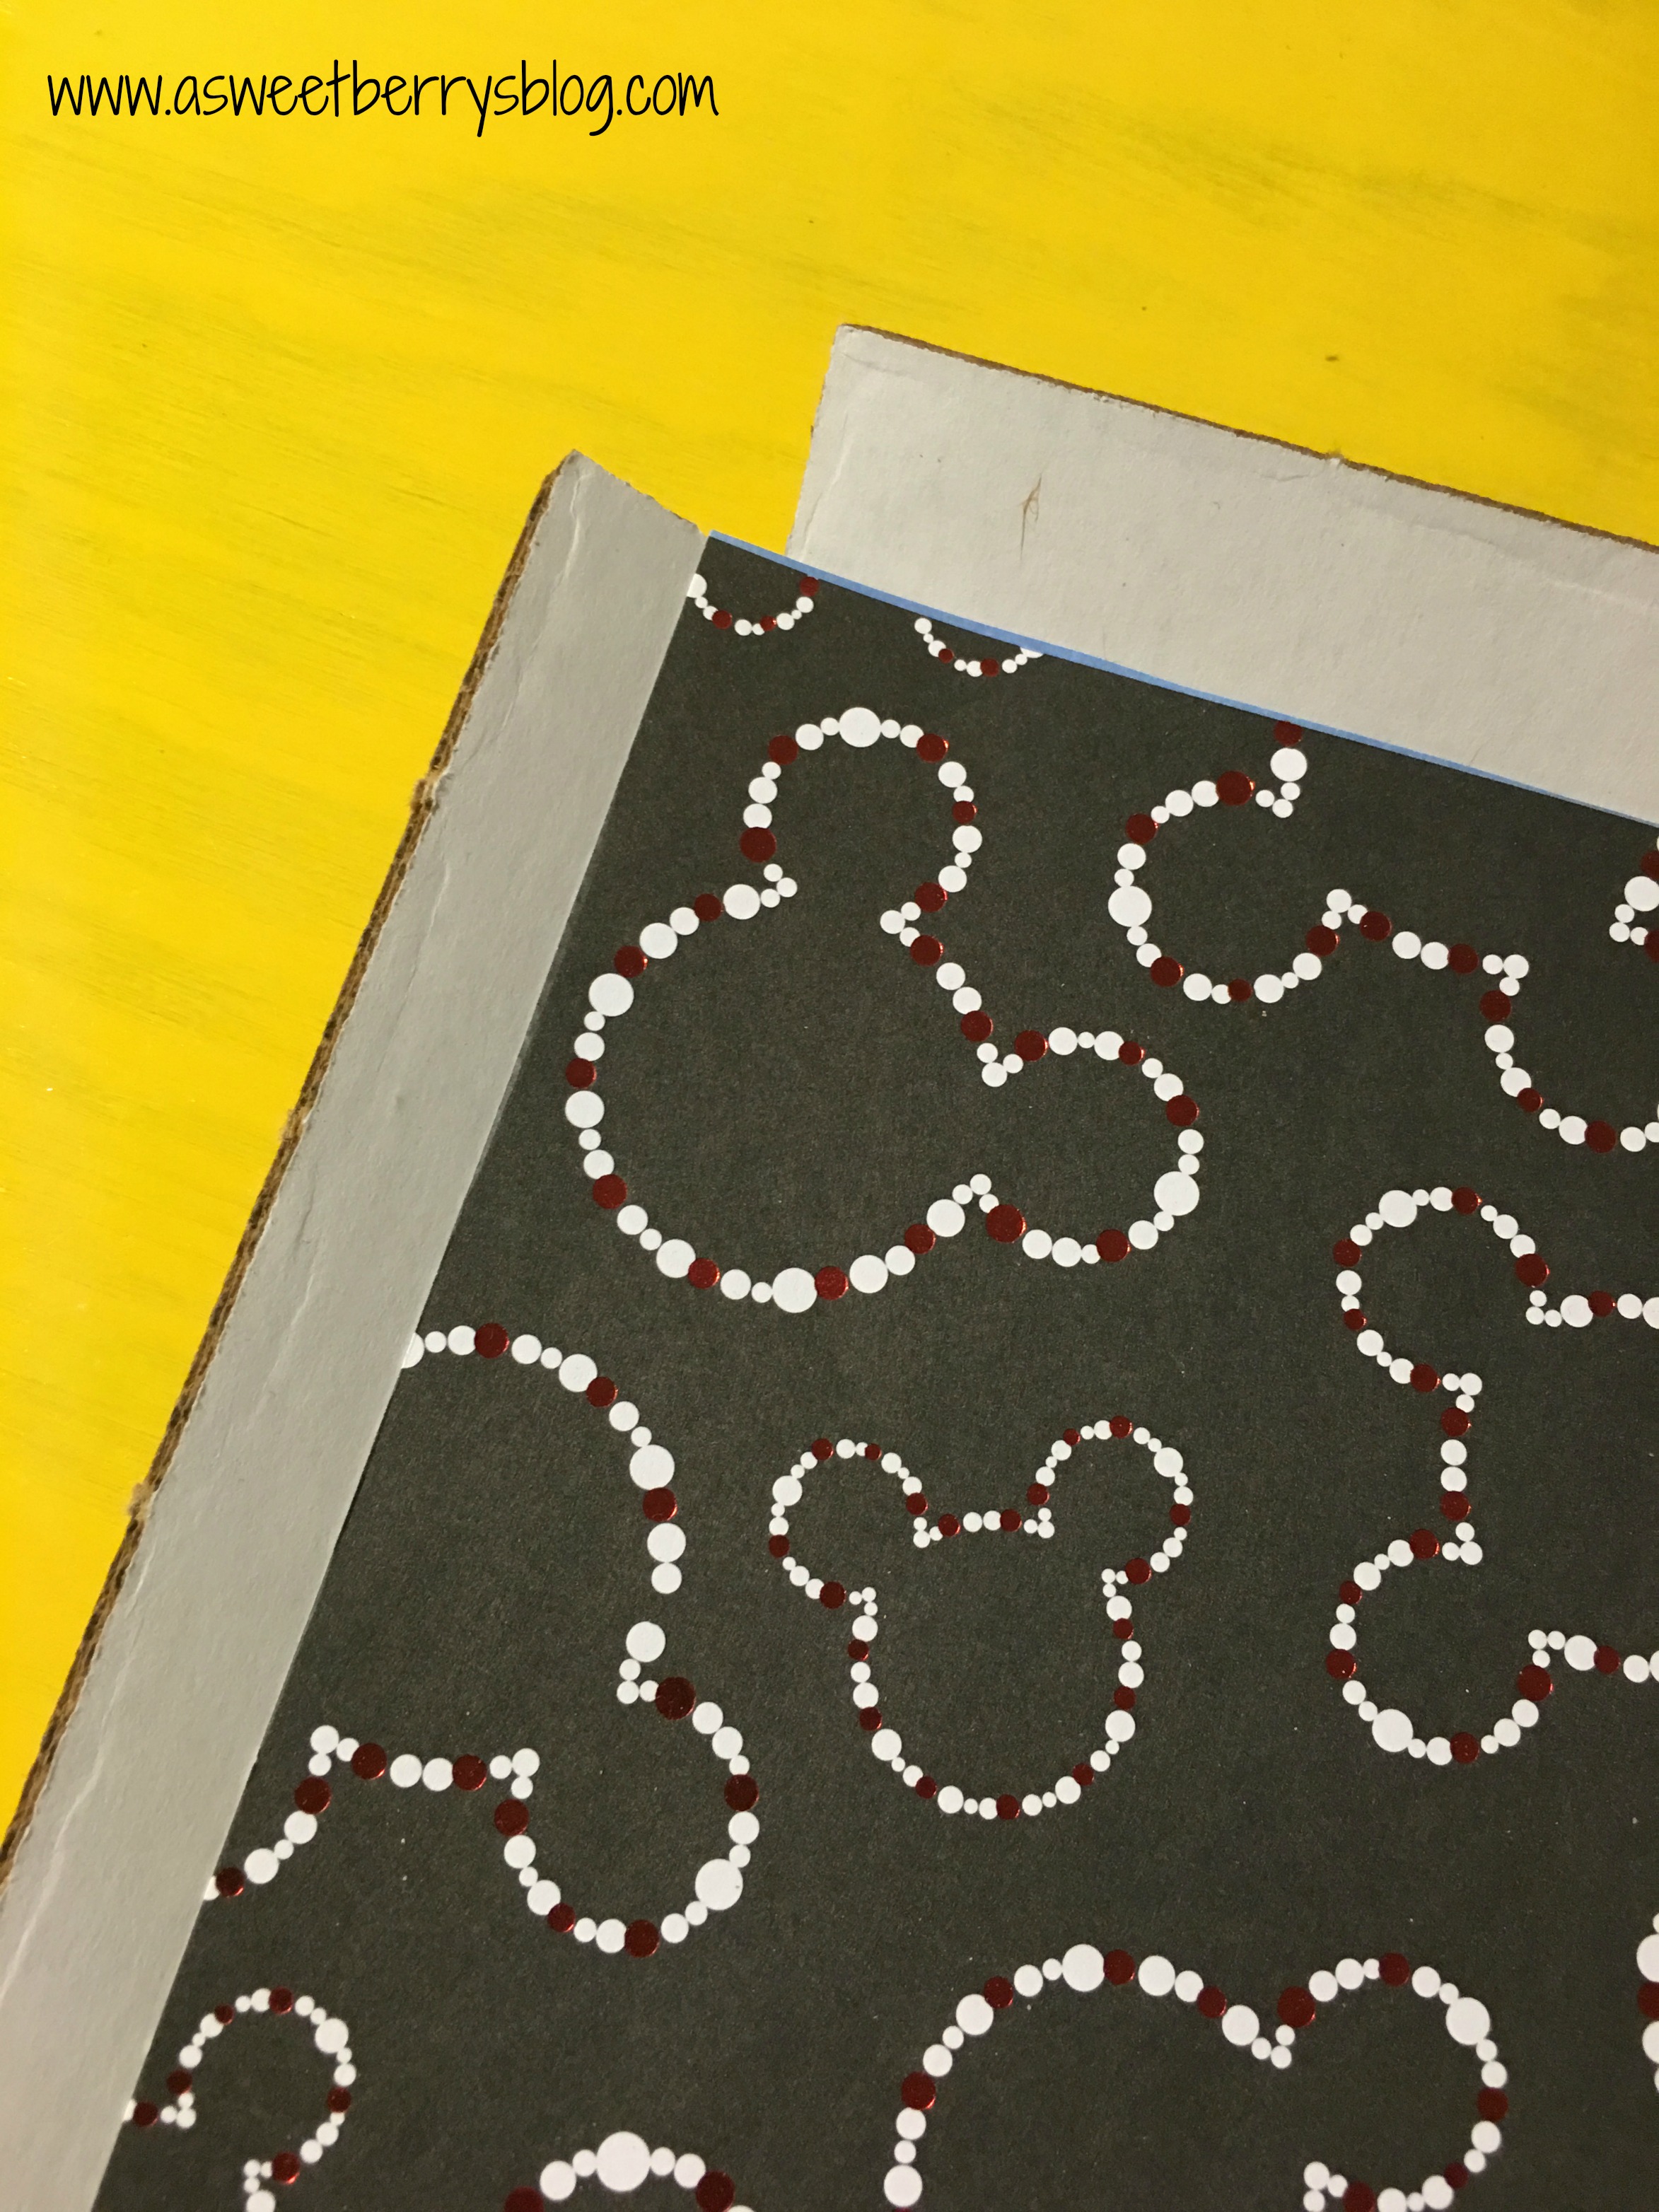
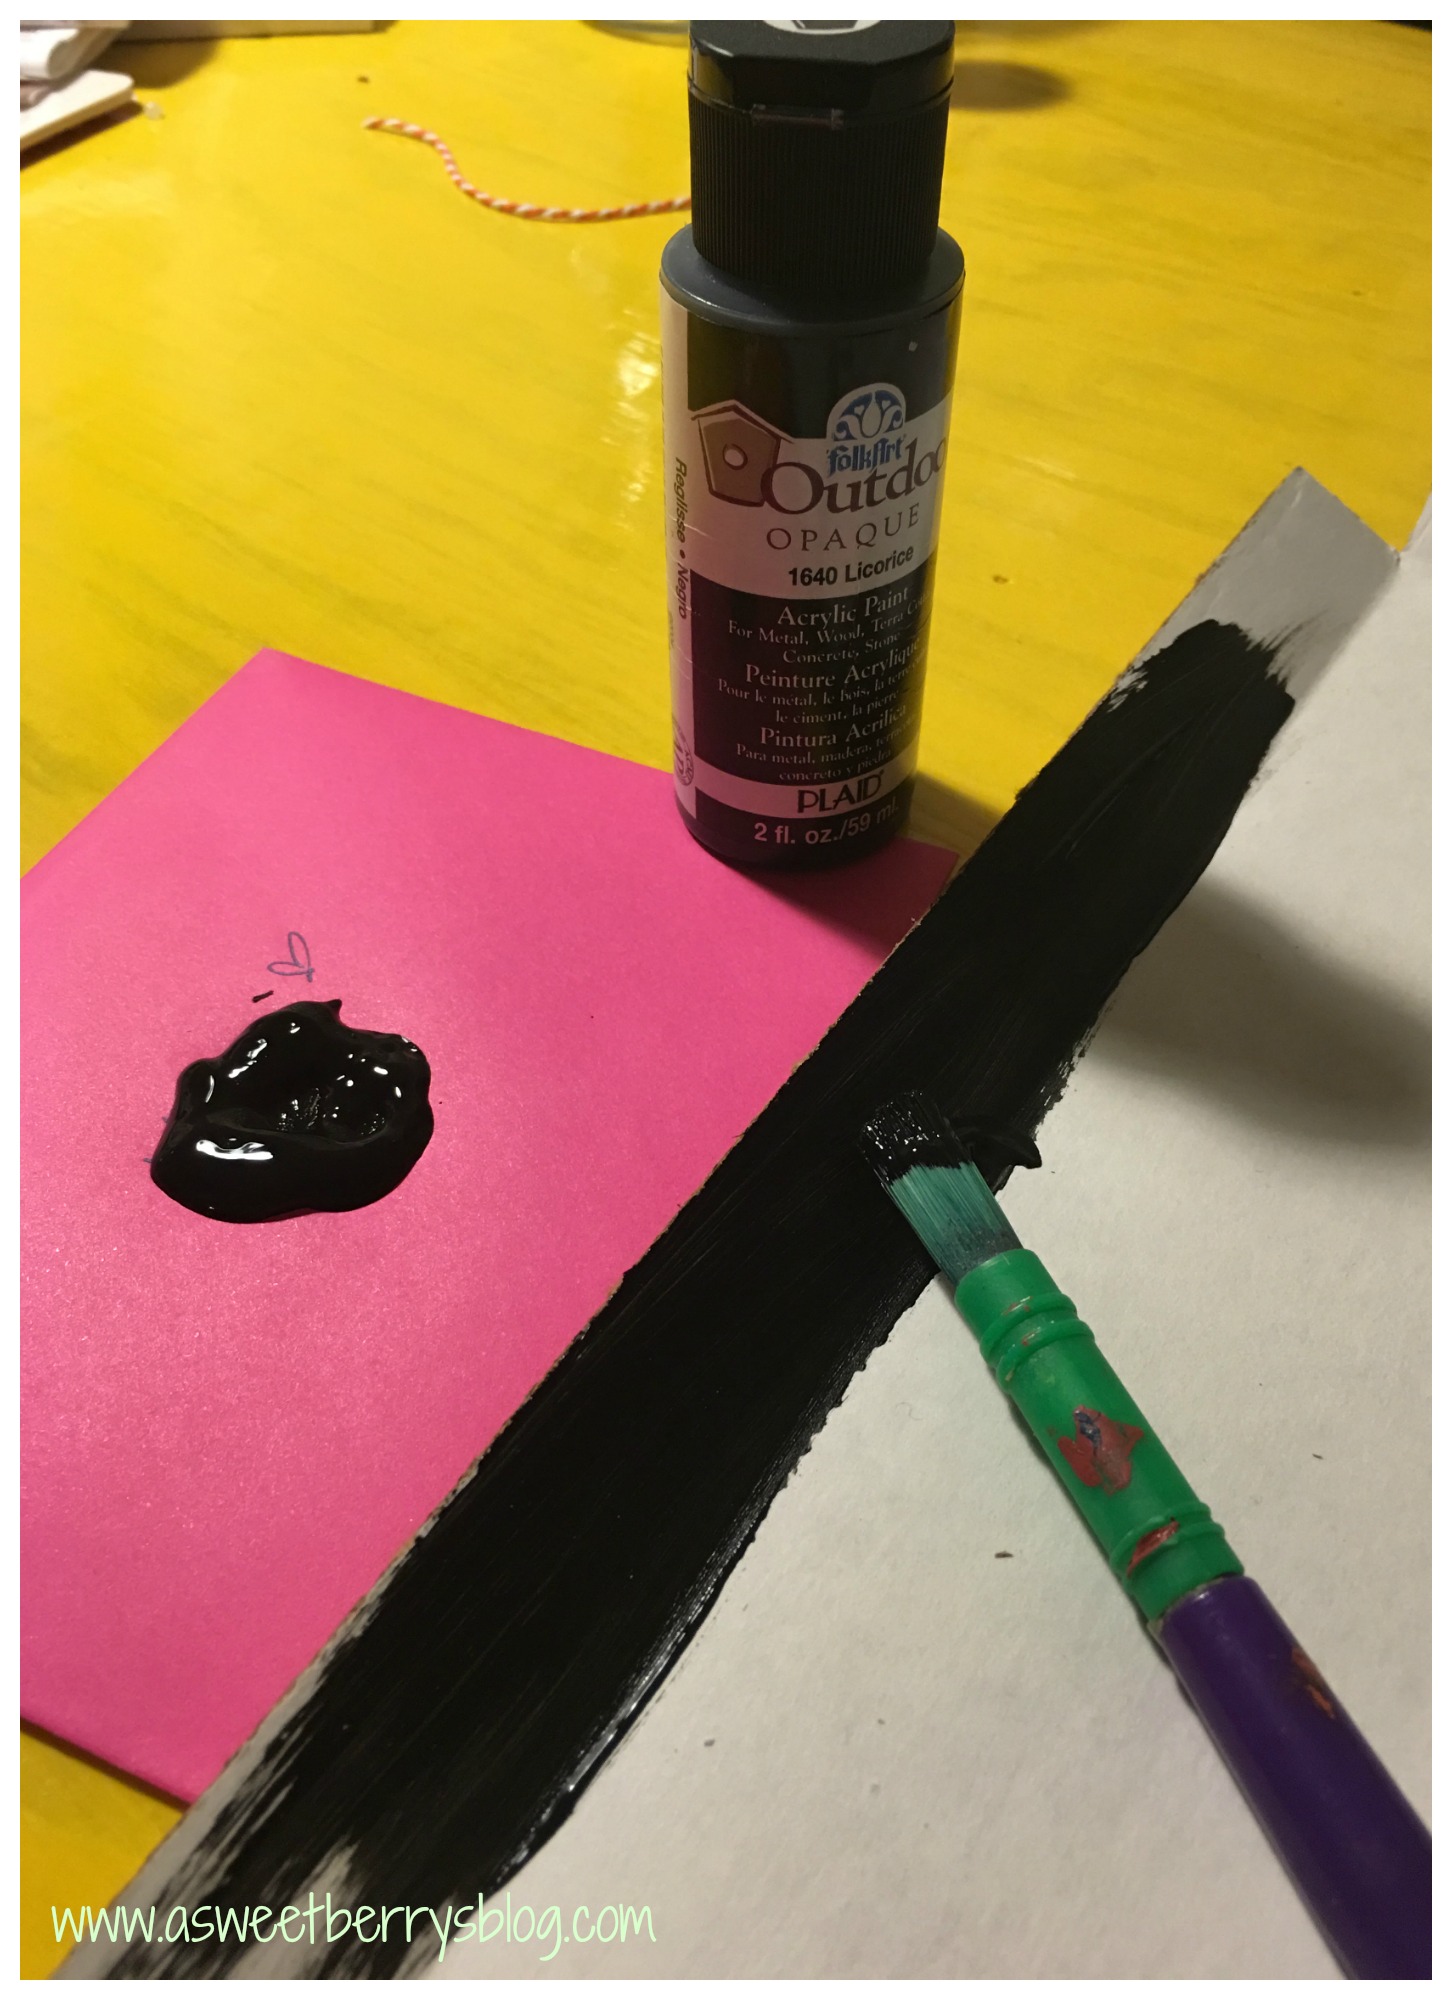
2.  I measured my scrapbook paper to fit to the cardboard backing.  Then I painted the edges of the cardboard backing with the black paint.   Once the paint was dry, I put the cardboard backing into the frame and used a pencil to trace the hole that I cut from the frame.  I removed the cardboard backing and drilled a hole making it a little bigger than the lines.   

adding paper         painting cardboard

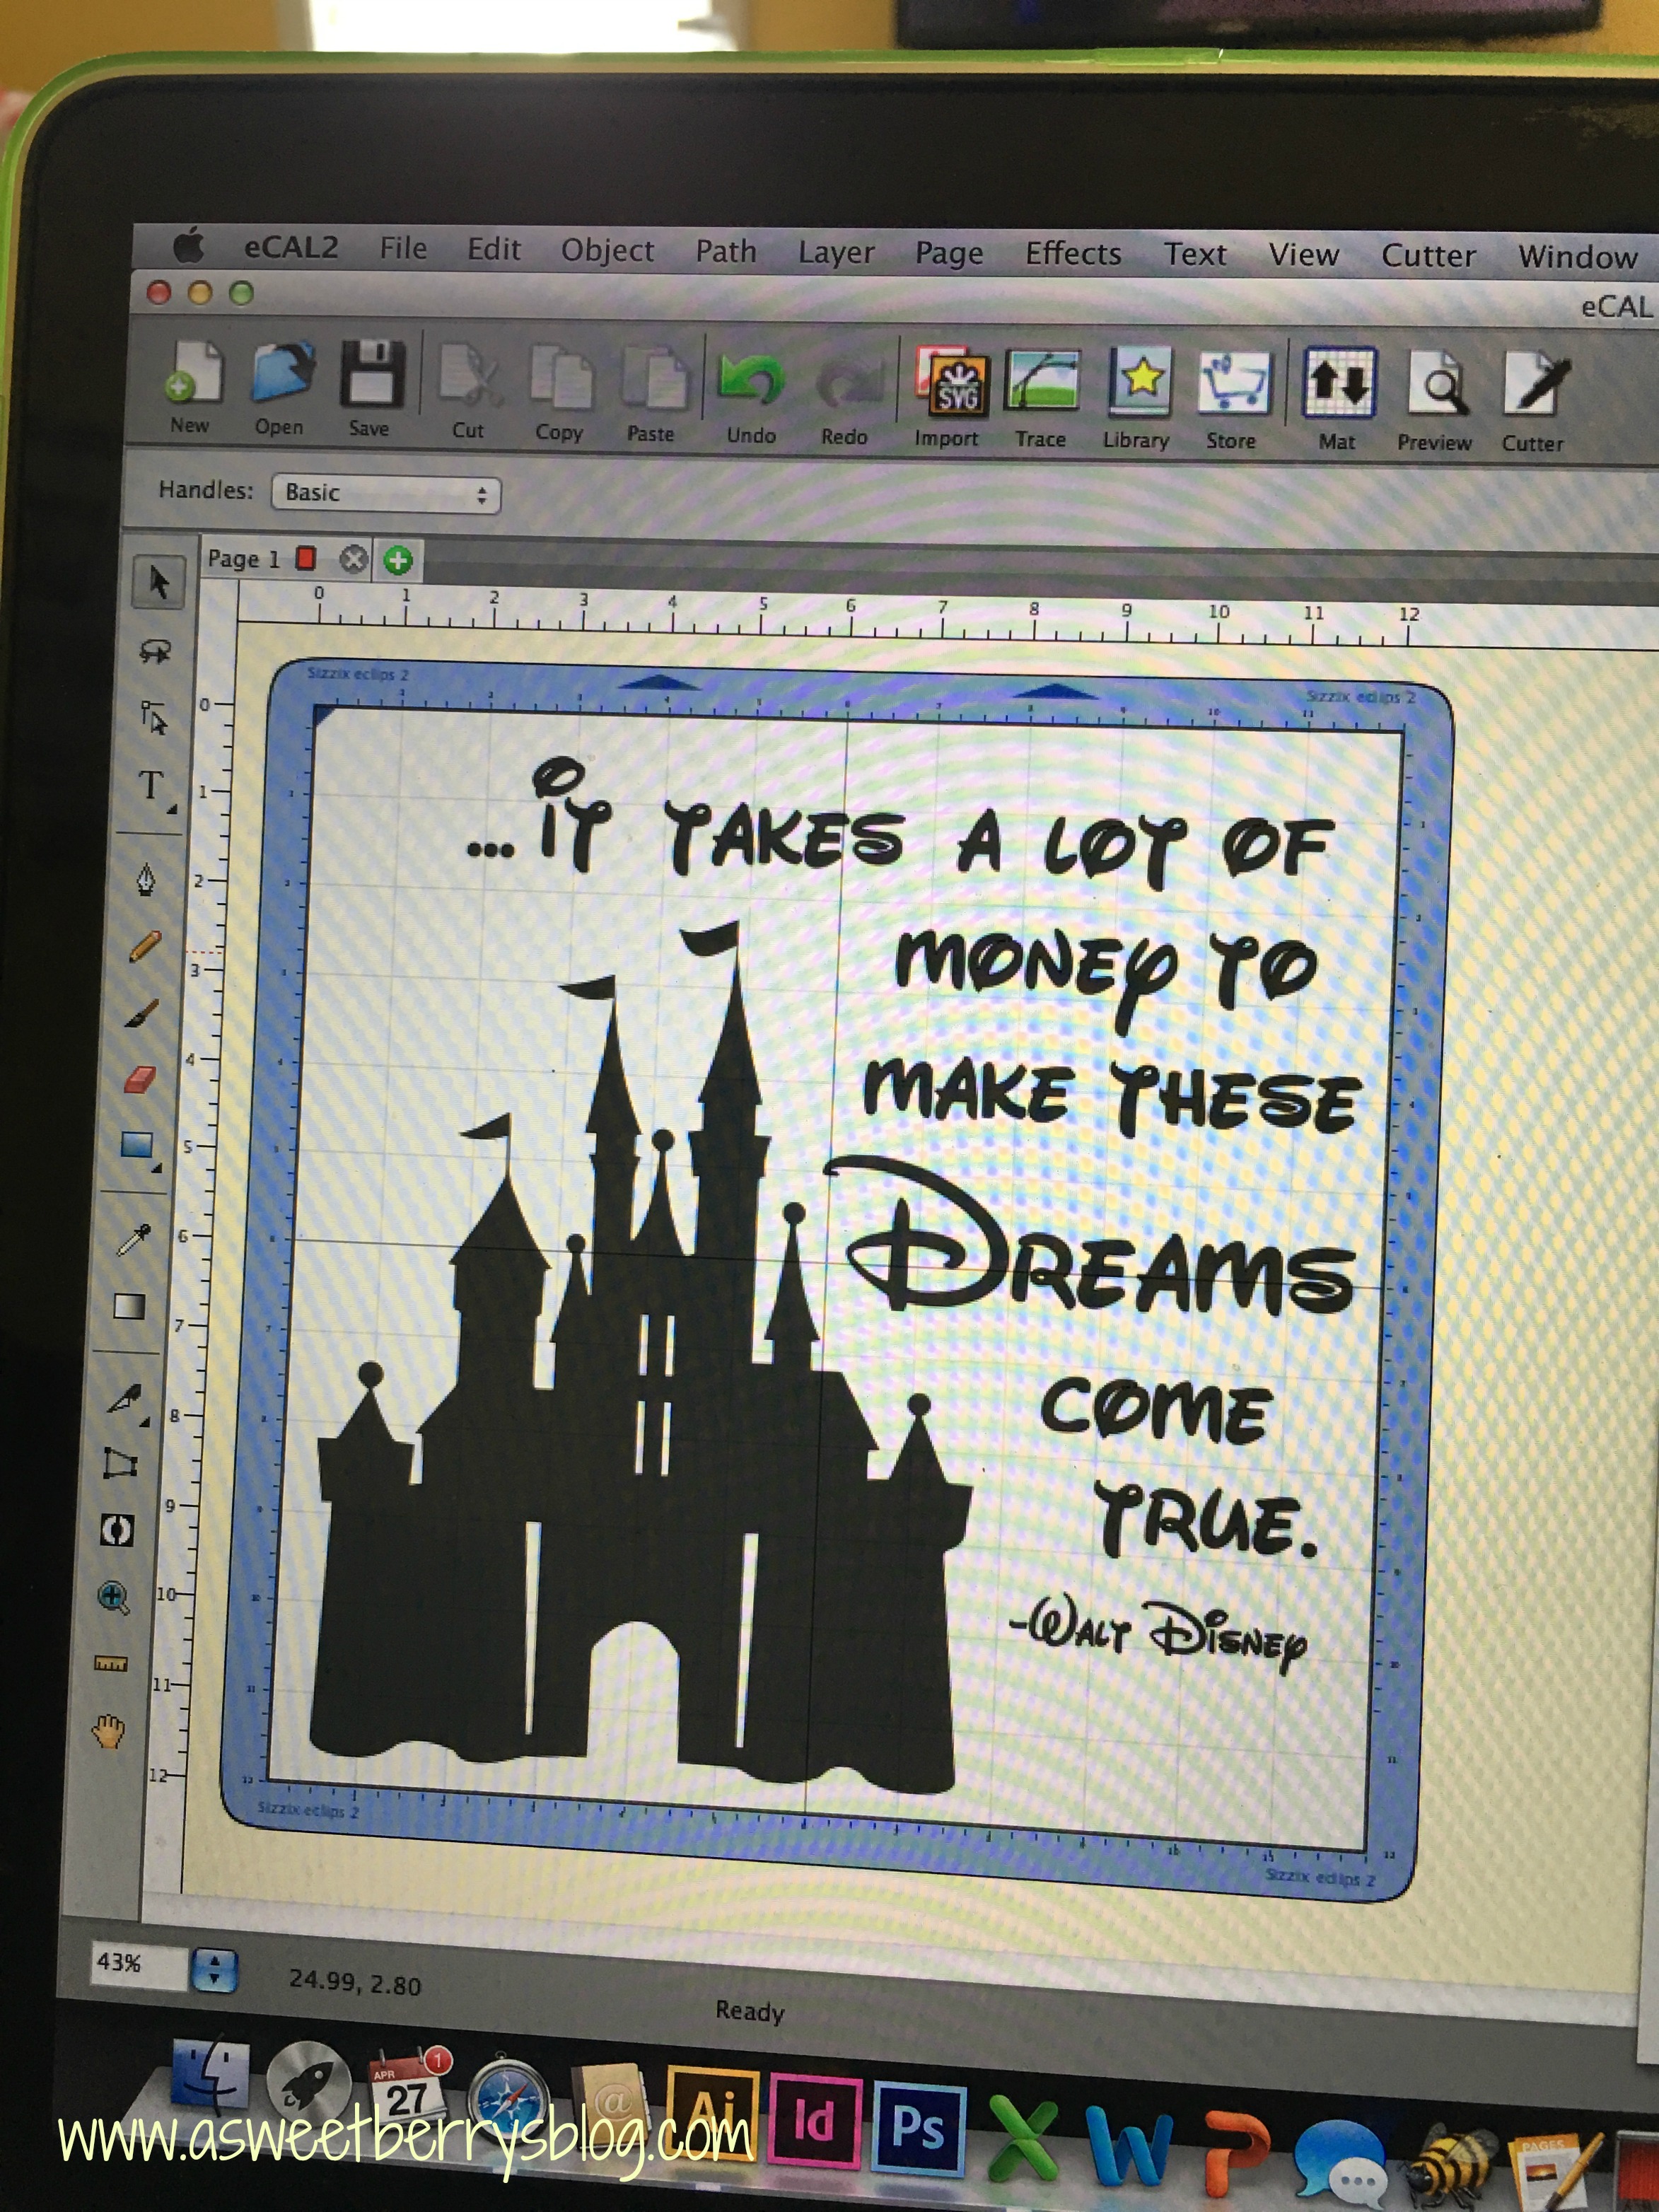
3.  Using eCAL2, I used a castle .svg file and a quote about money from Walt Disney.  I know that the quote had a different meaning than the saving of money for a trip to Disney, but I still like the quote and well……”It takes a lot of money to make these Dreams come true.”  That quote helps put into perspective for the kids that it does indeed take a lot of money to go to Disney!   I then cut it out with white vinyl.

eCal2

4. After the vinyl was cut, I weeded the excess vinyl.  I have to say that there is something very relaxing about weeding vinyl!   Using the hinge method, I placed the vinyl on the glass.

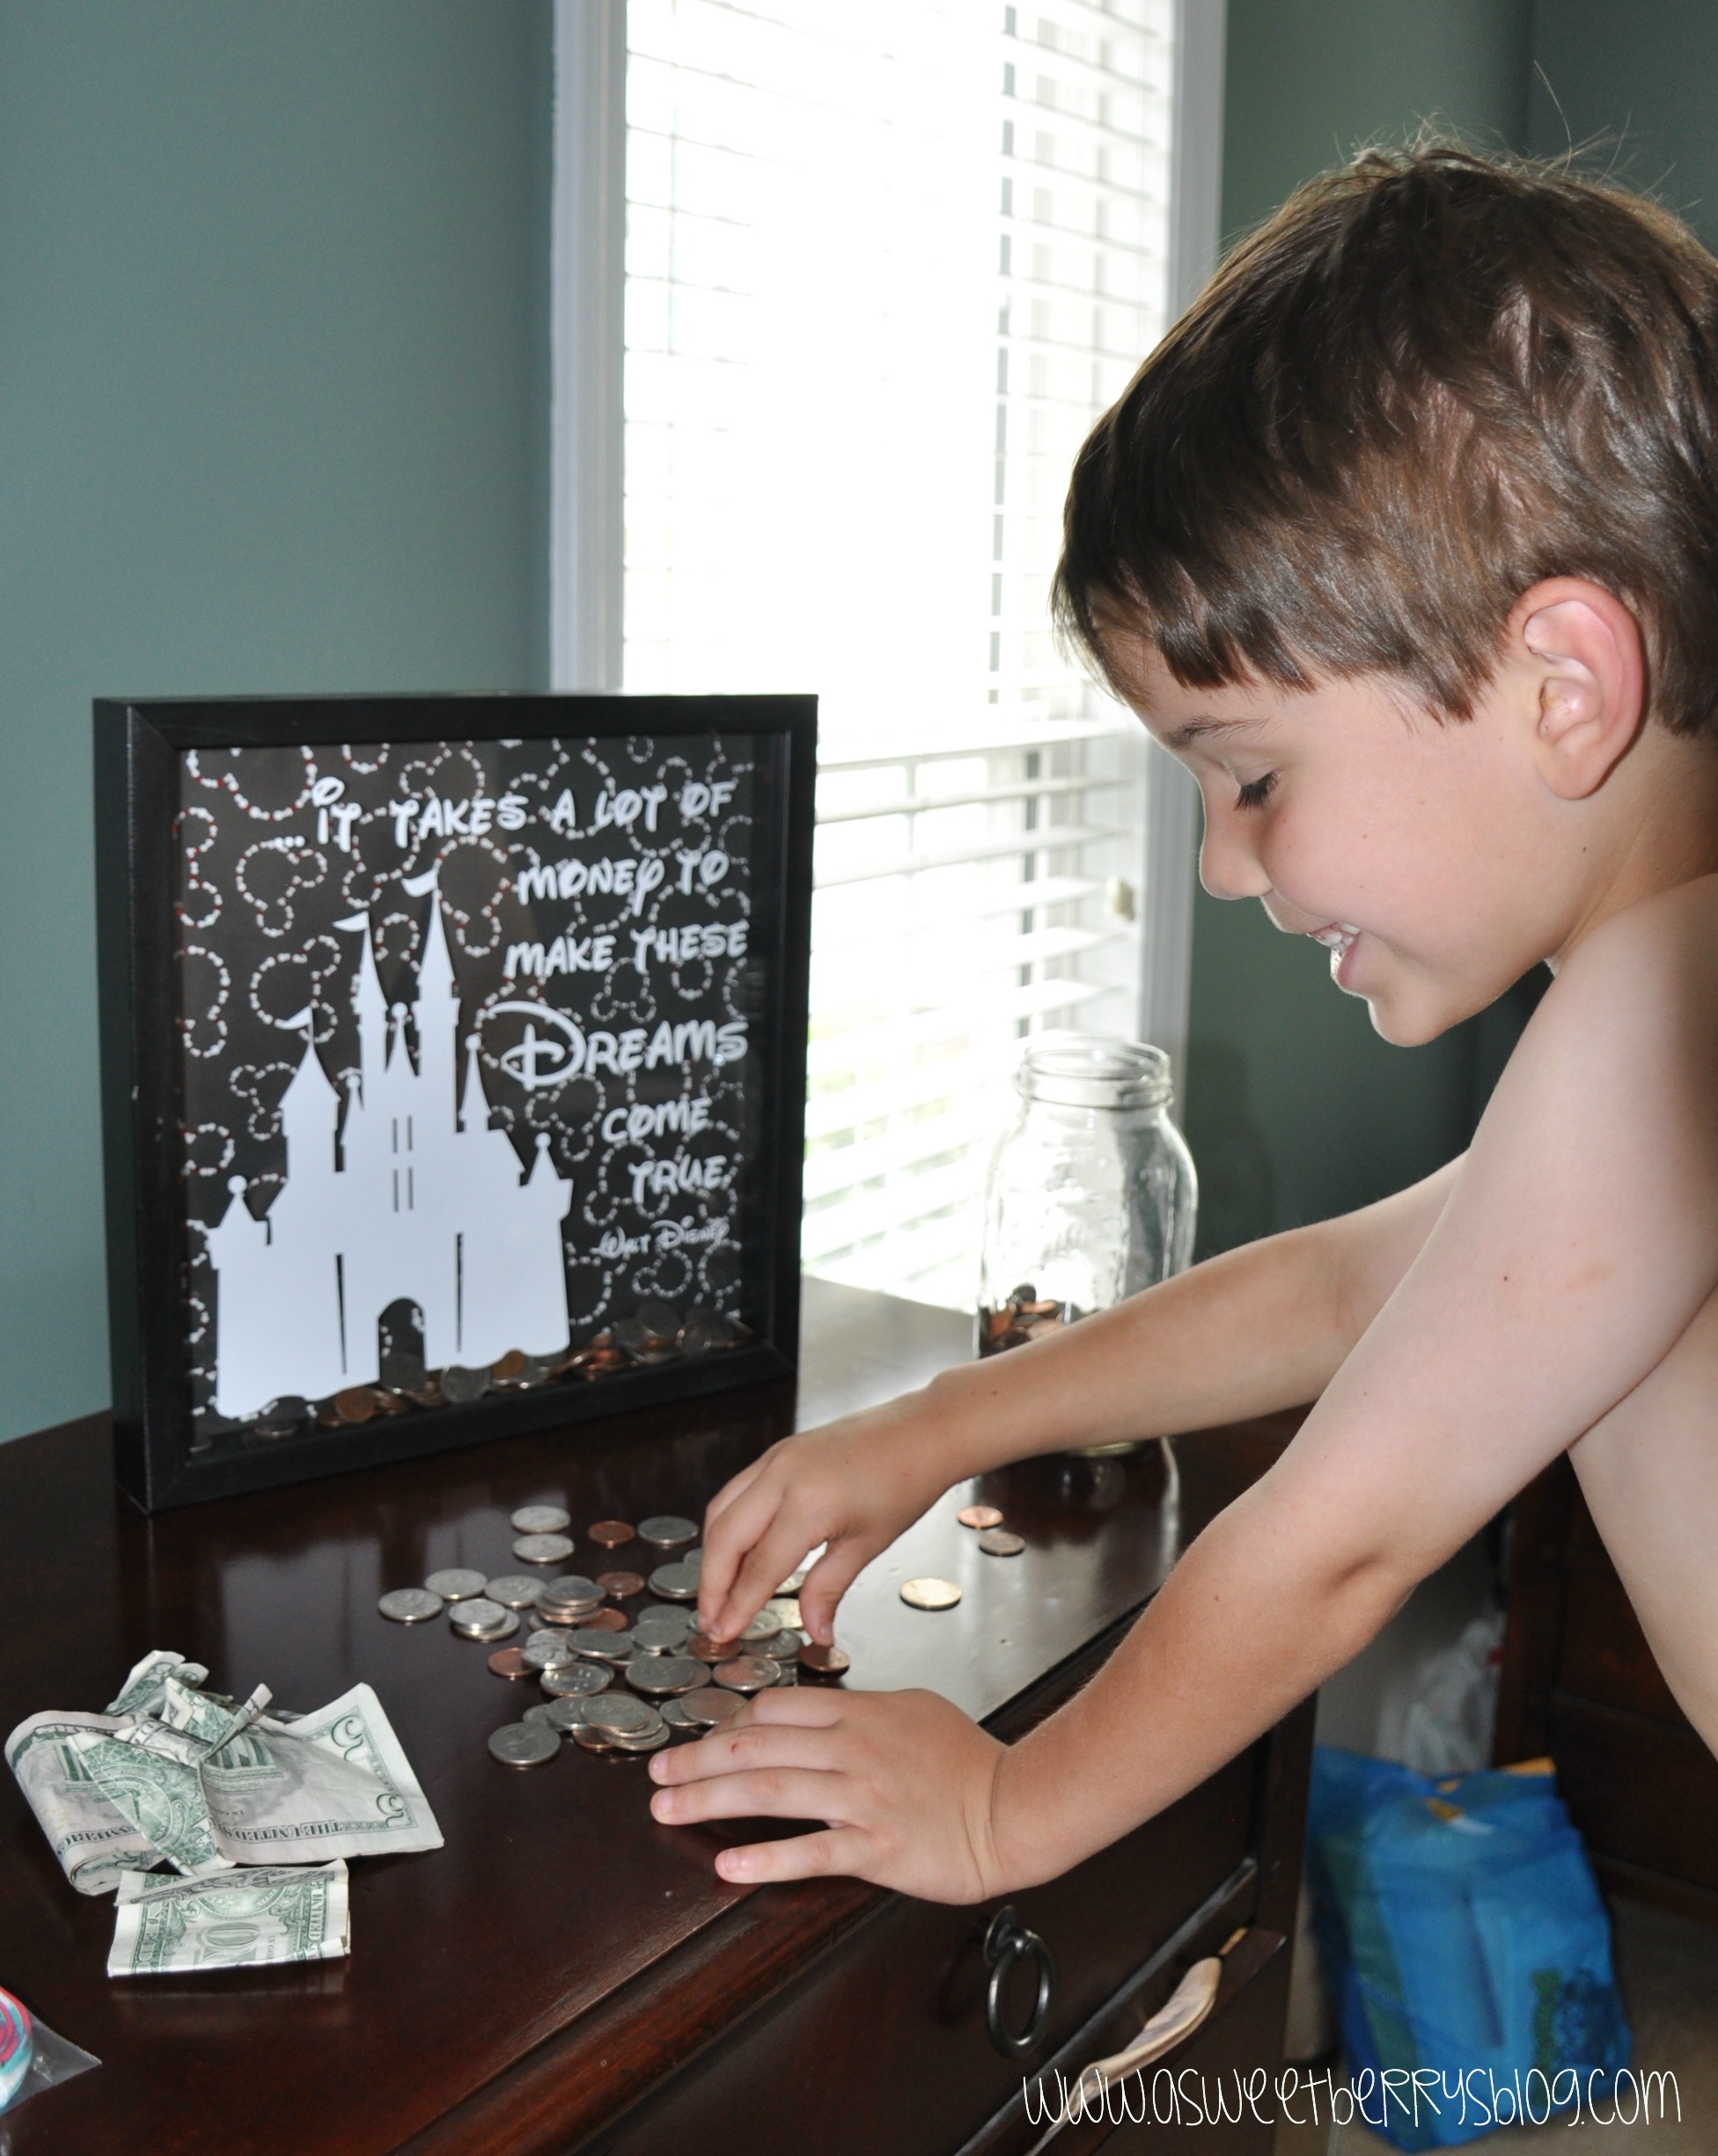
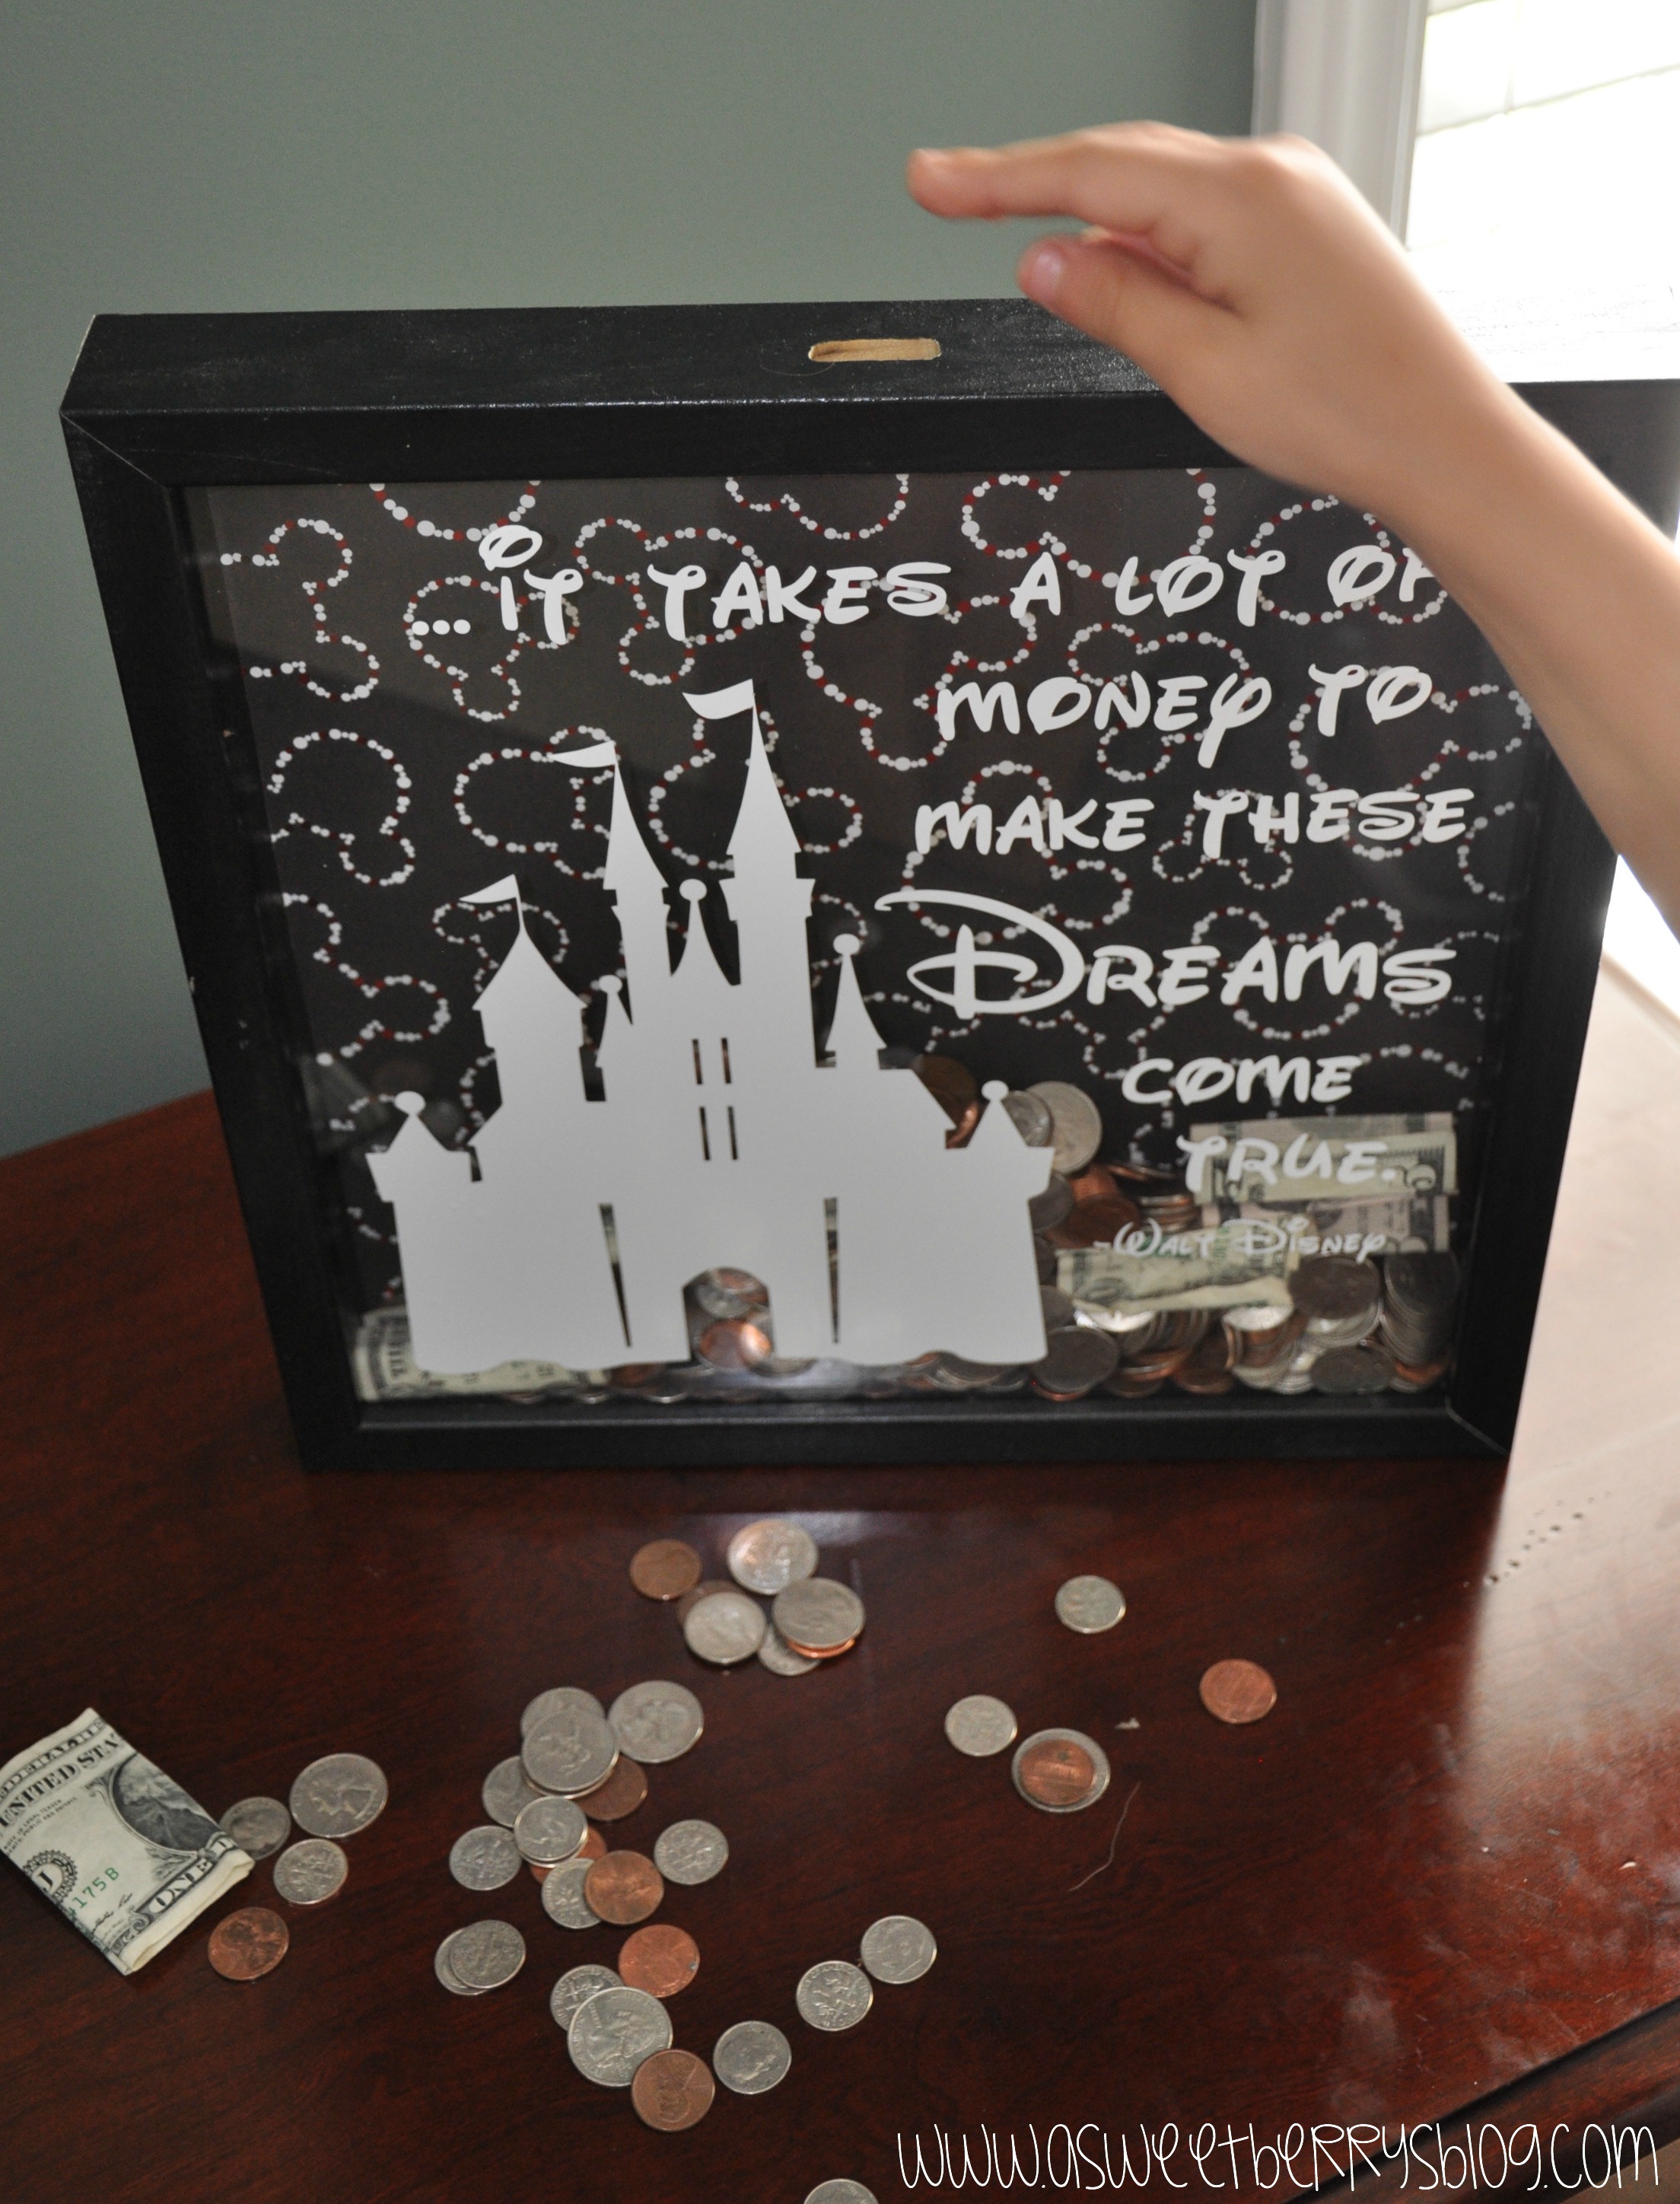
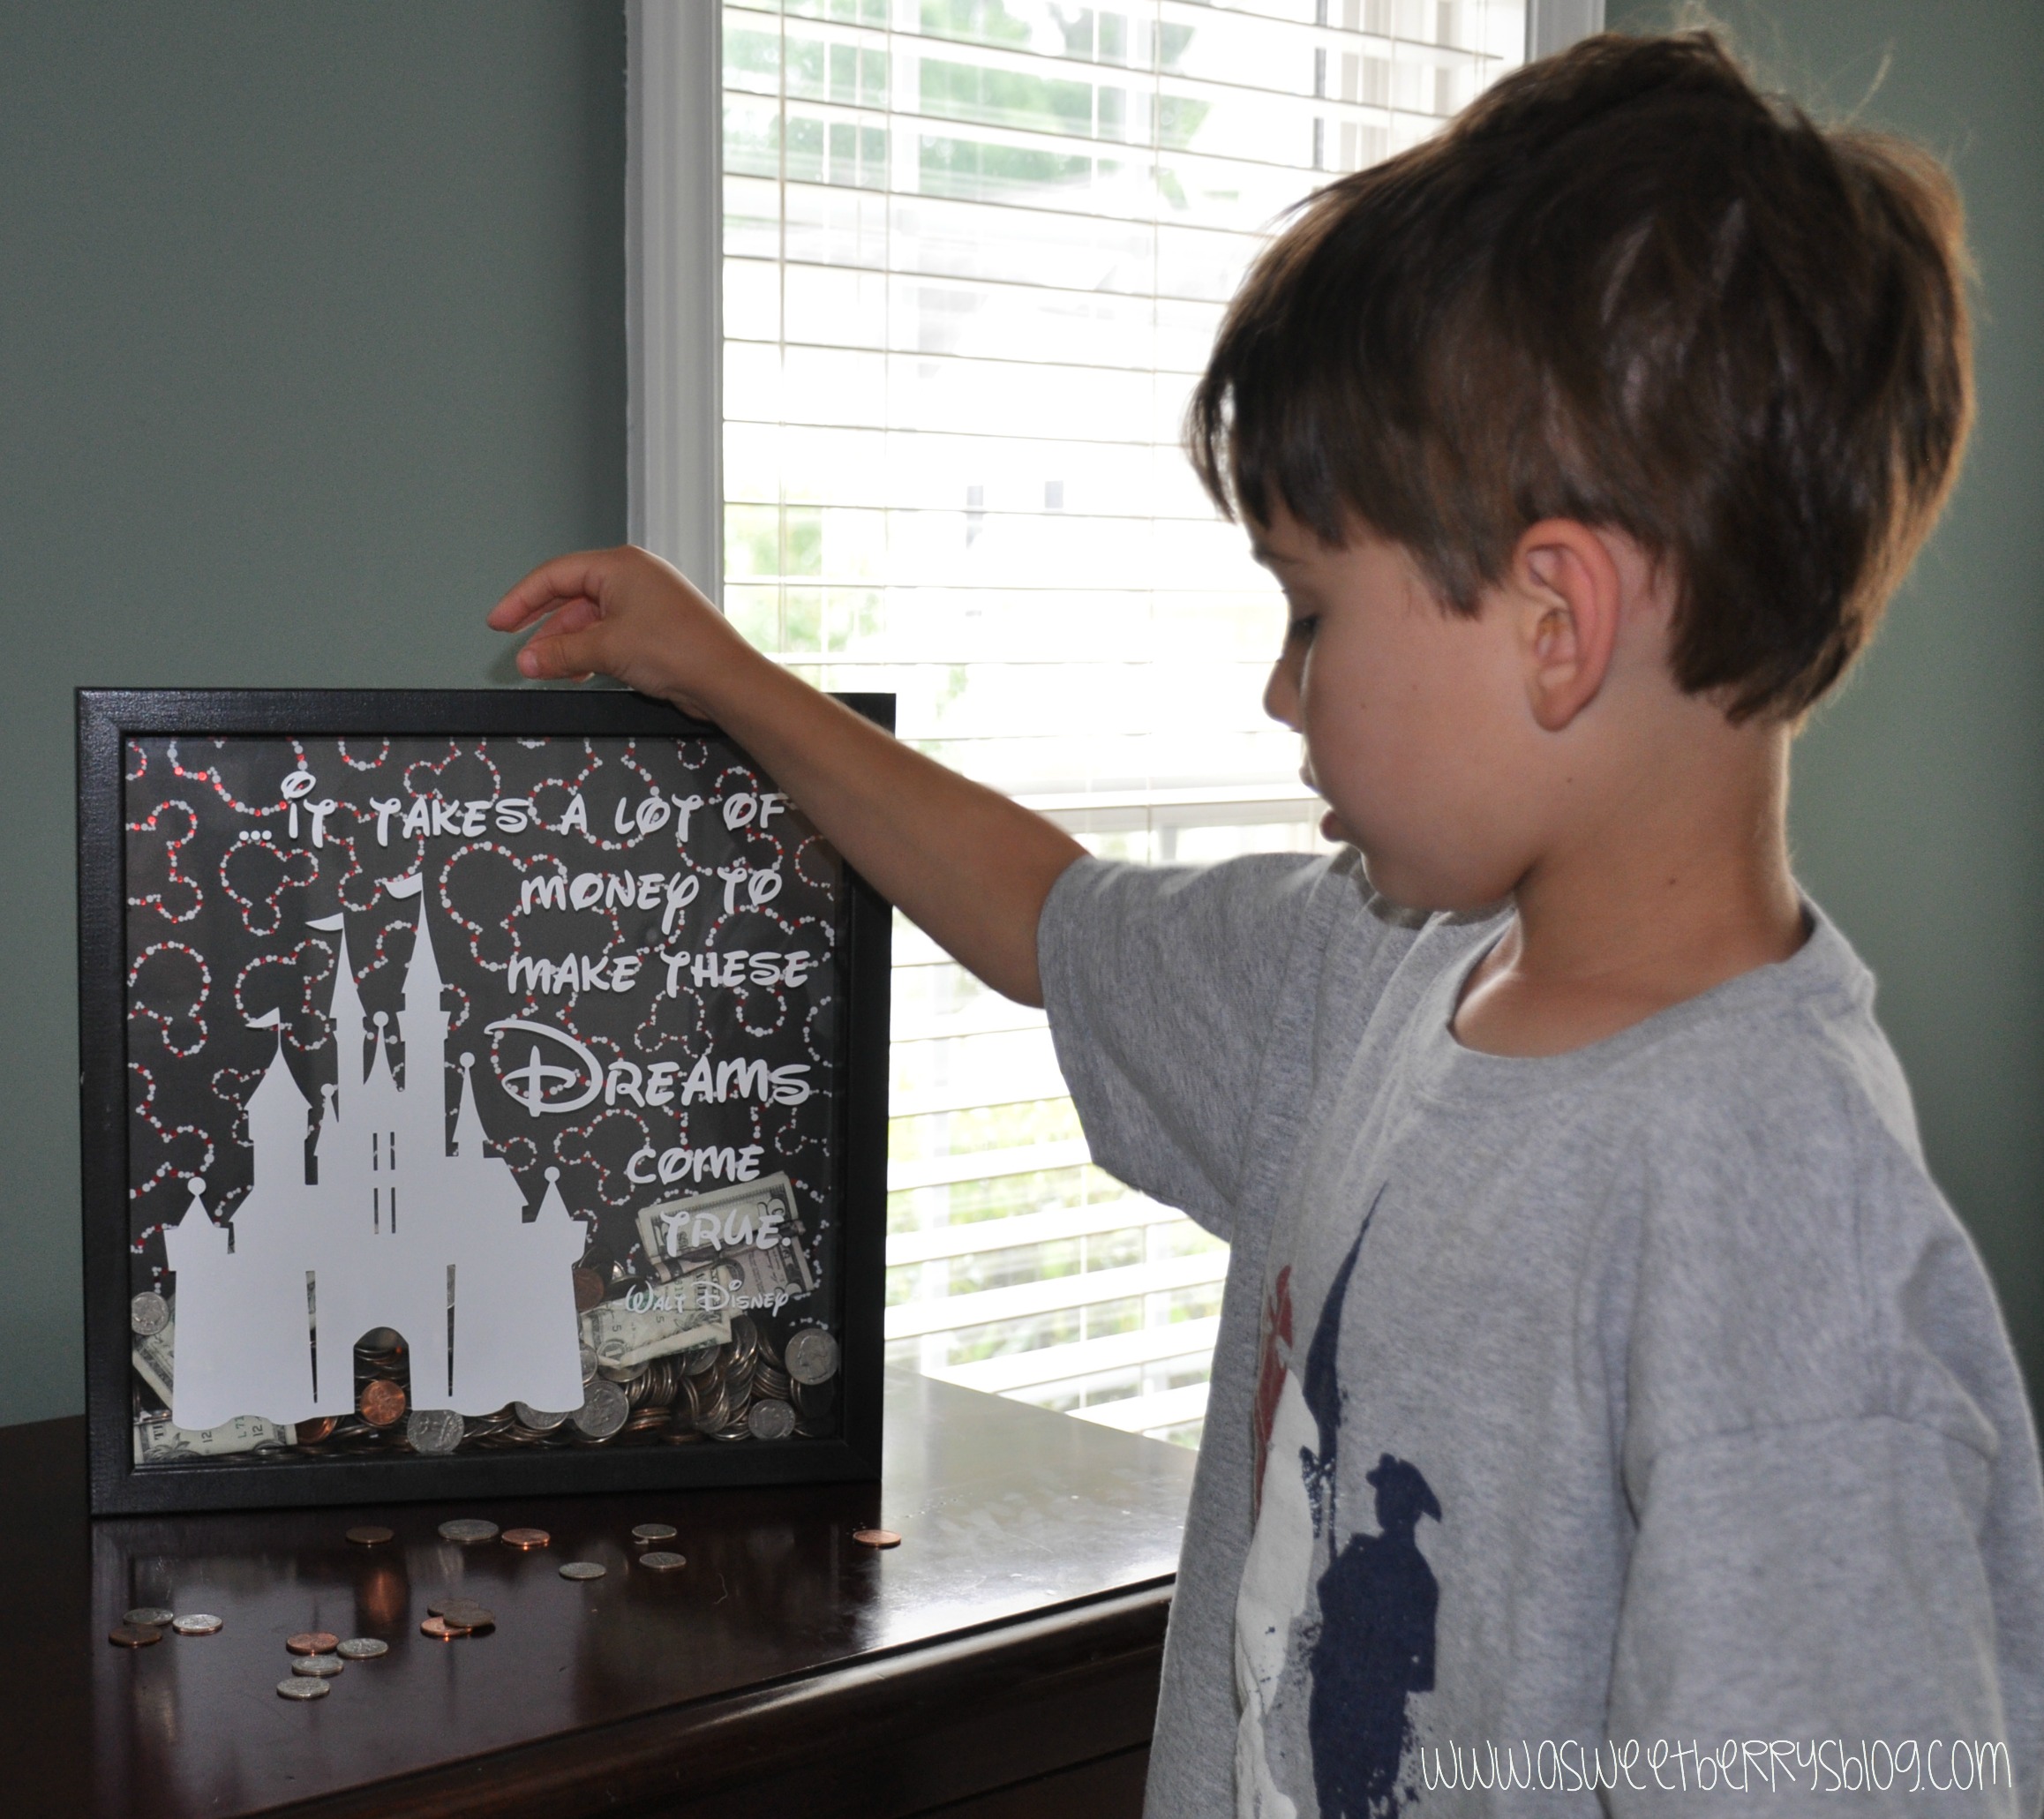
5.   I put everything together, making sure that I lined the holes up.  Then, I gave Benjamin all of the money that was in our change jar.   He went to town on putting all of the money in the Disney World Savings Bank!  

     Benjamin filling frame          filling high

Benjamin

Hope you like my Disney World Savings Bank idea!!!   It was fun to make and the boys love putting their extra money in there.   Every so often, they want to count the money to see how much is in it and then they have fun putting the money in it again!   

Until next time…….


Meet eClips2

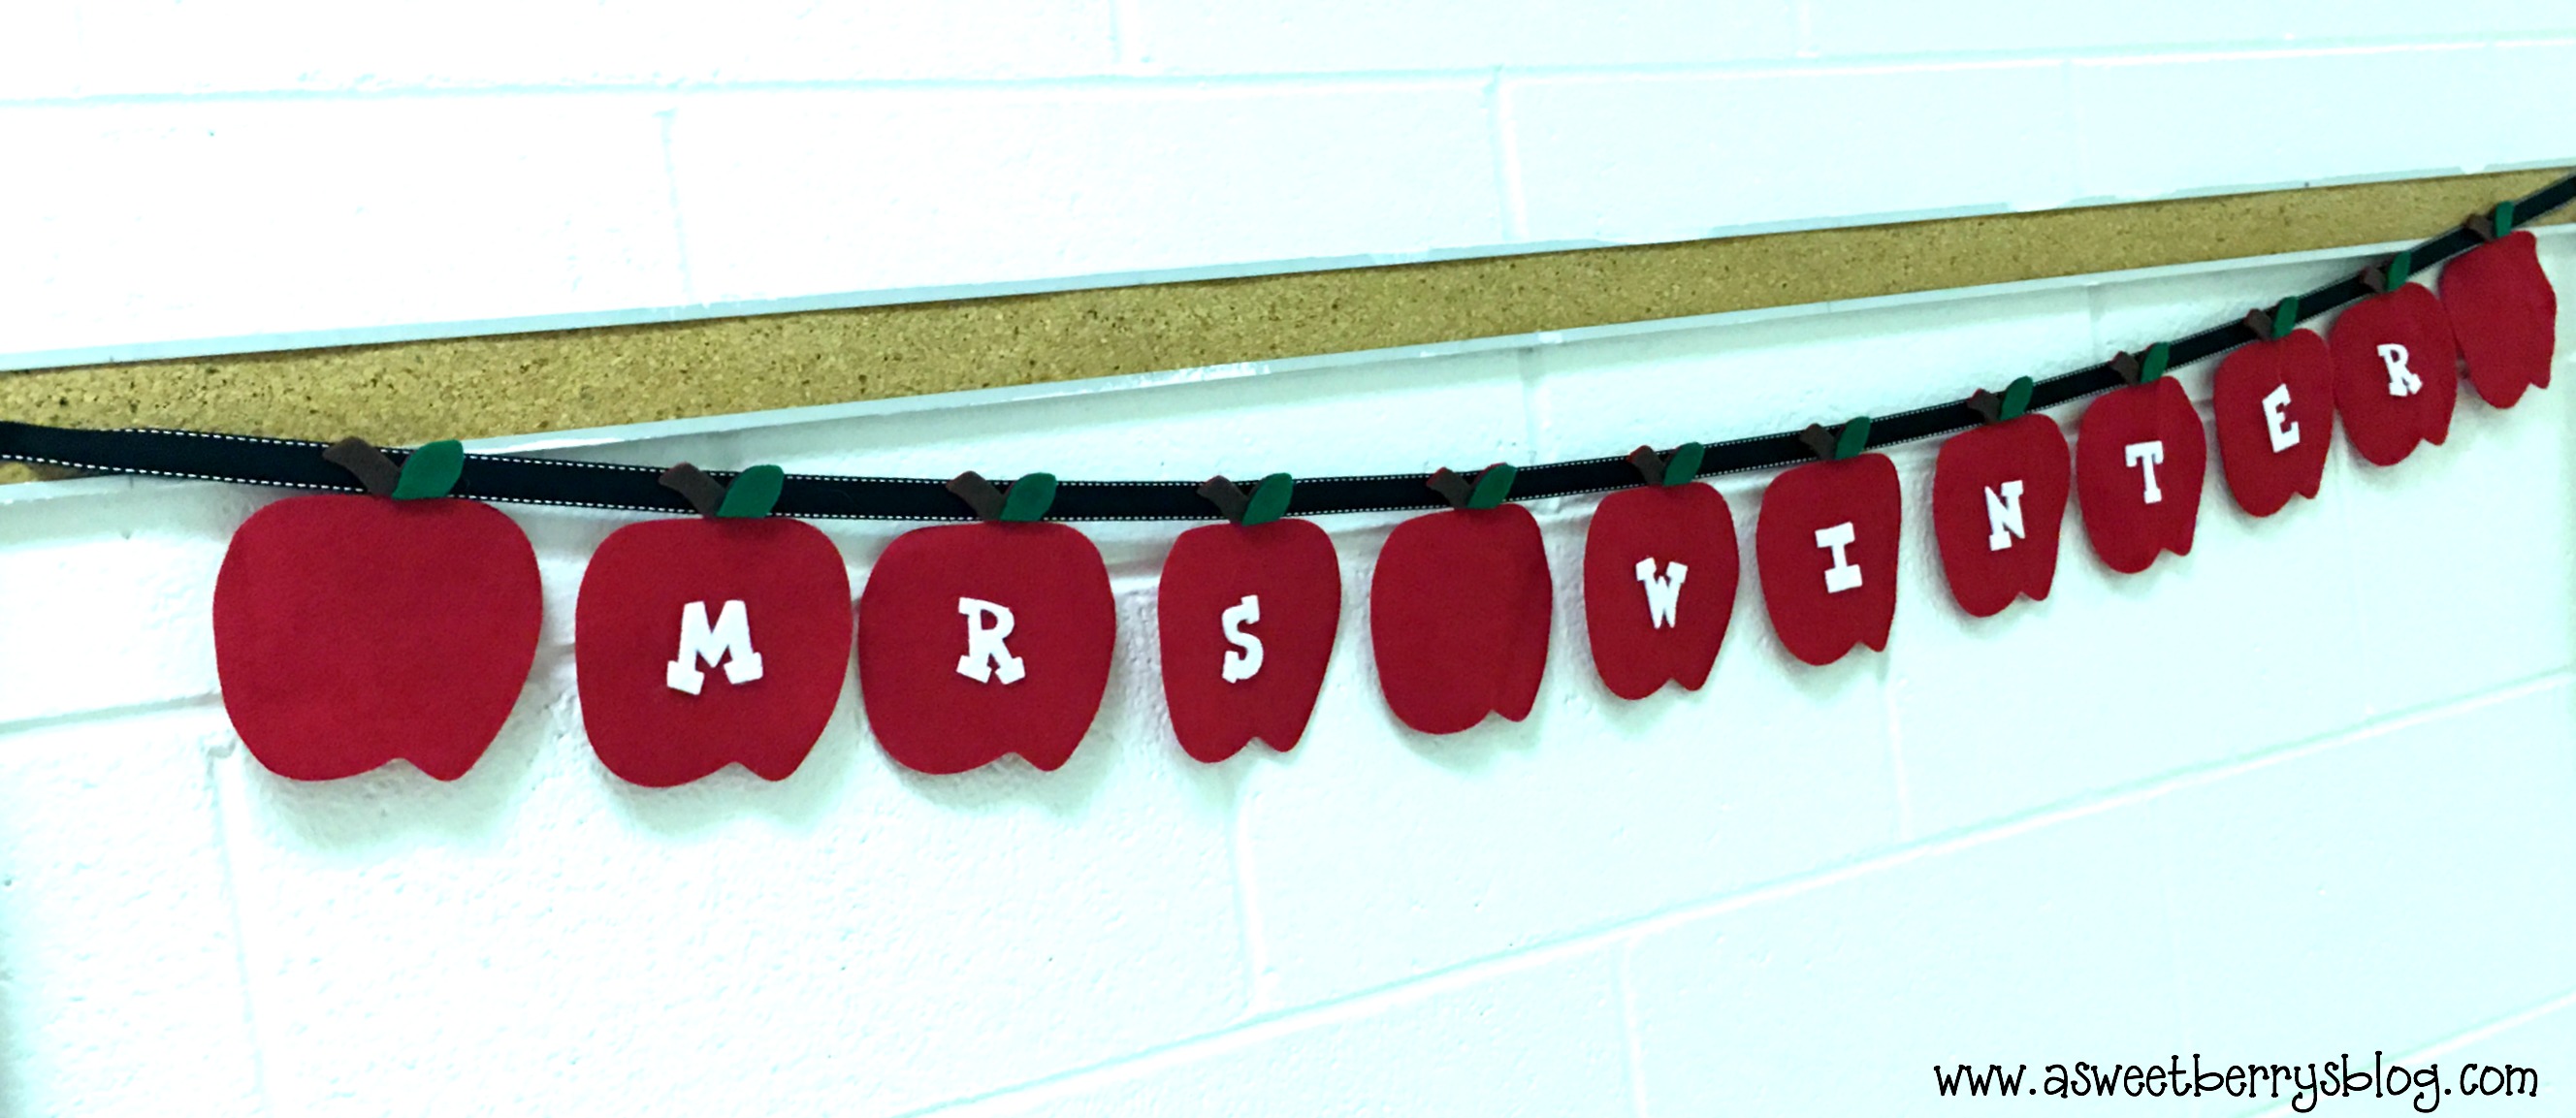
Teacher’s Name Banner featuring Laura Kelly’s Apple #2 Die from Sizzix

Disclosure:  I am a member of the Laura Kelly Design Team and received product to provide product reviews and to write about in blog posts.  

 
Final
If your children aren’t in year round school like mine, it’s time for yours to go back to school!   I am excited to share this Teacher’s Name Banner that would be perfect for a teacher to hang in their classroom or right outside of the classroom.   It’s super simple and is a no sew project!  Your children could even help with cutting out the pieces!   I love making homemade crafts for my children’s teachers.  

Materials used:

Sizzix Big Shot
Laura Kelly’s Apple #2 Die from Sizzix
Laura Kelly’s Lemonade Capital Alphabet Die from Sizzix
Cutting Pads  (short and long)
Kunin Felt
Ribbon
Ad-tech Hot Glue Gun and Glue Sticks
Fiscar Scissors

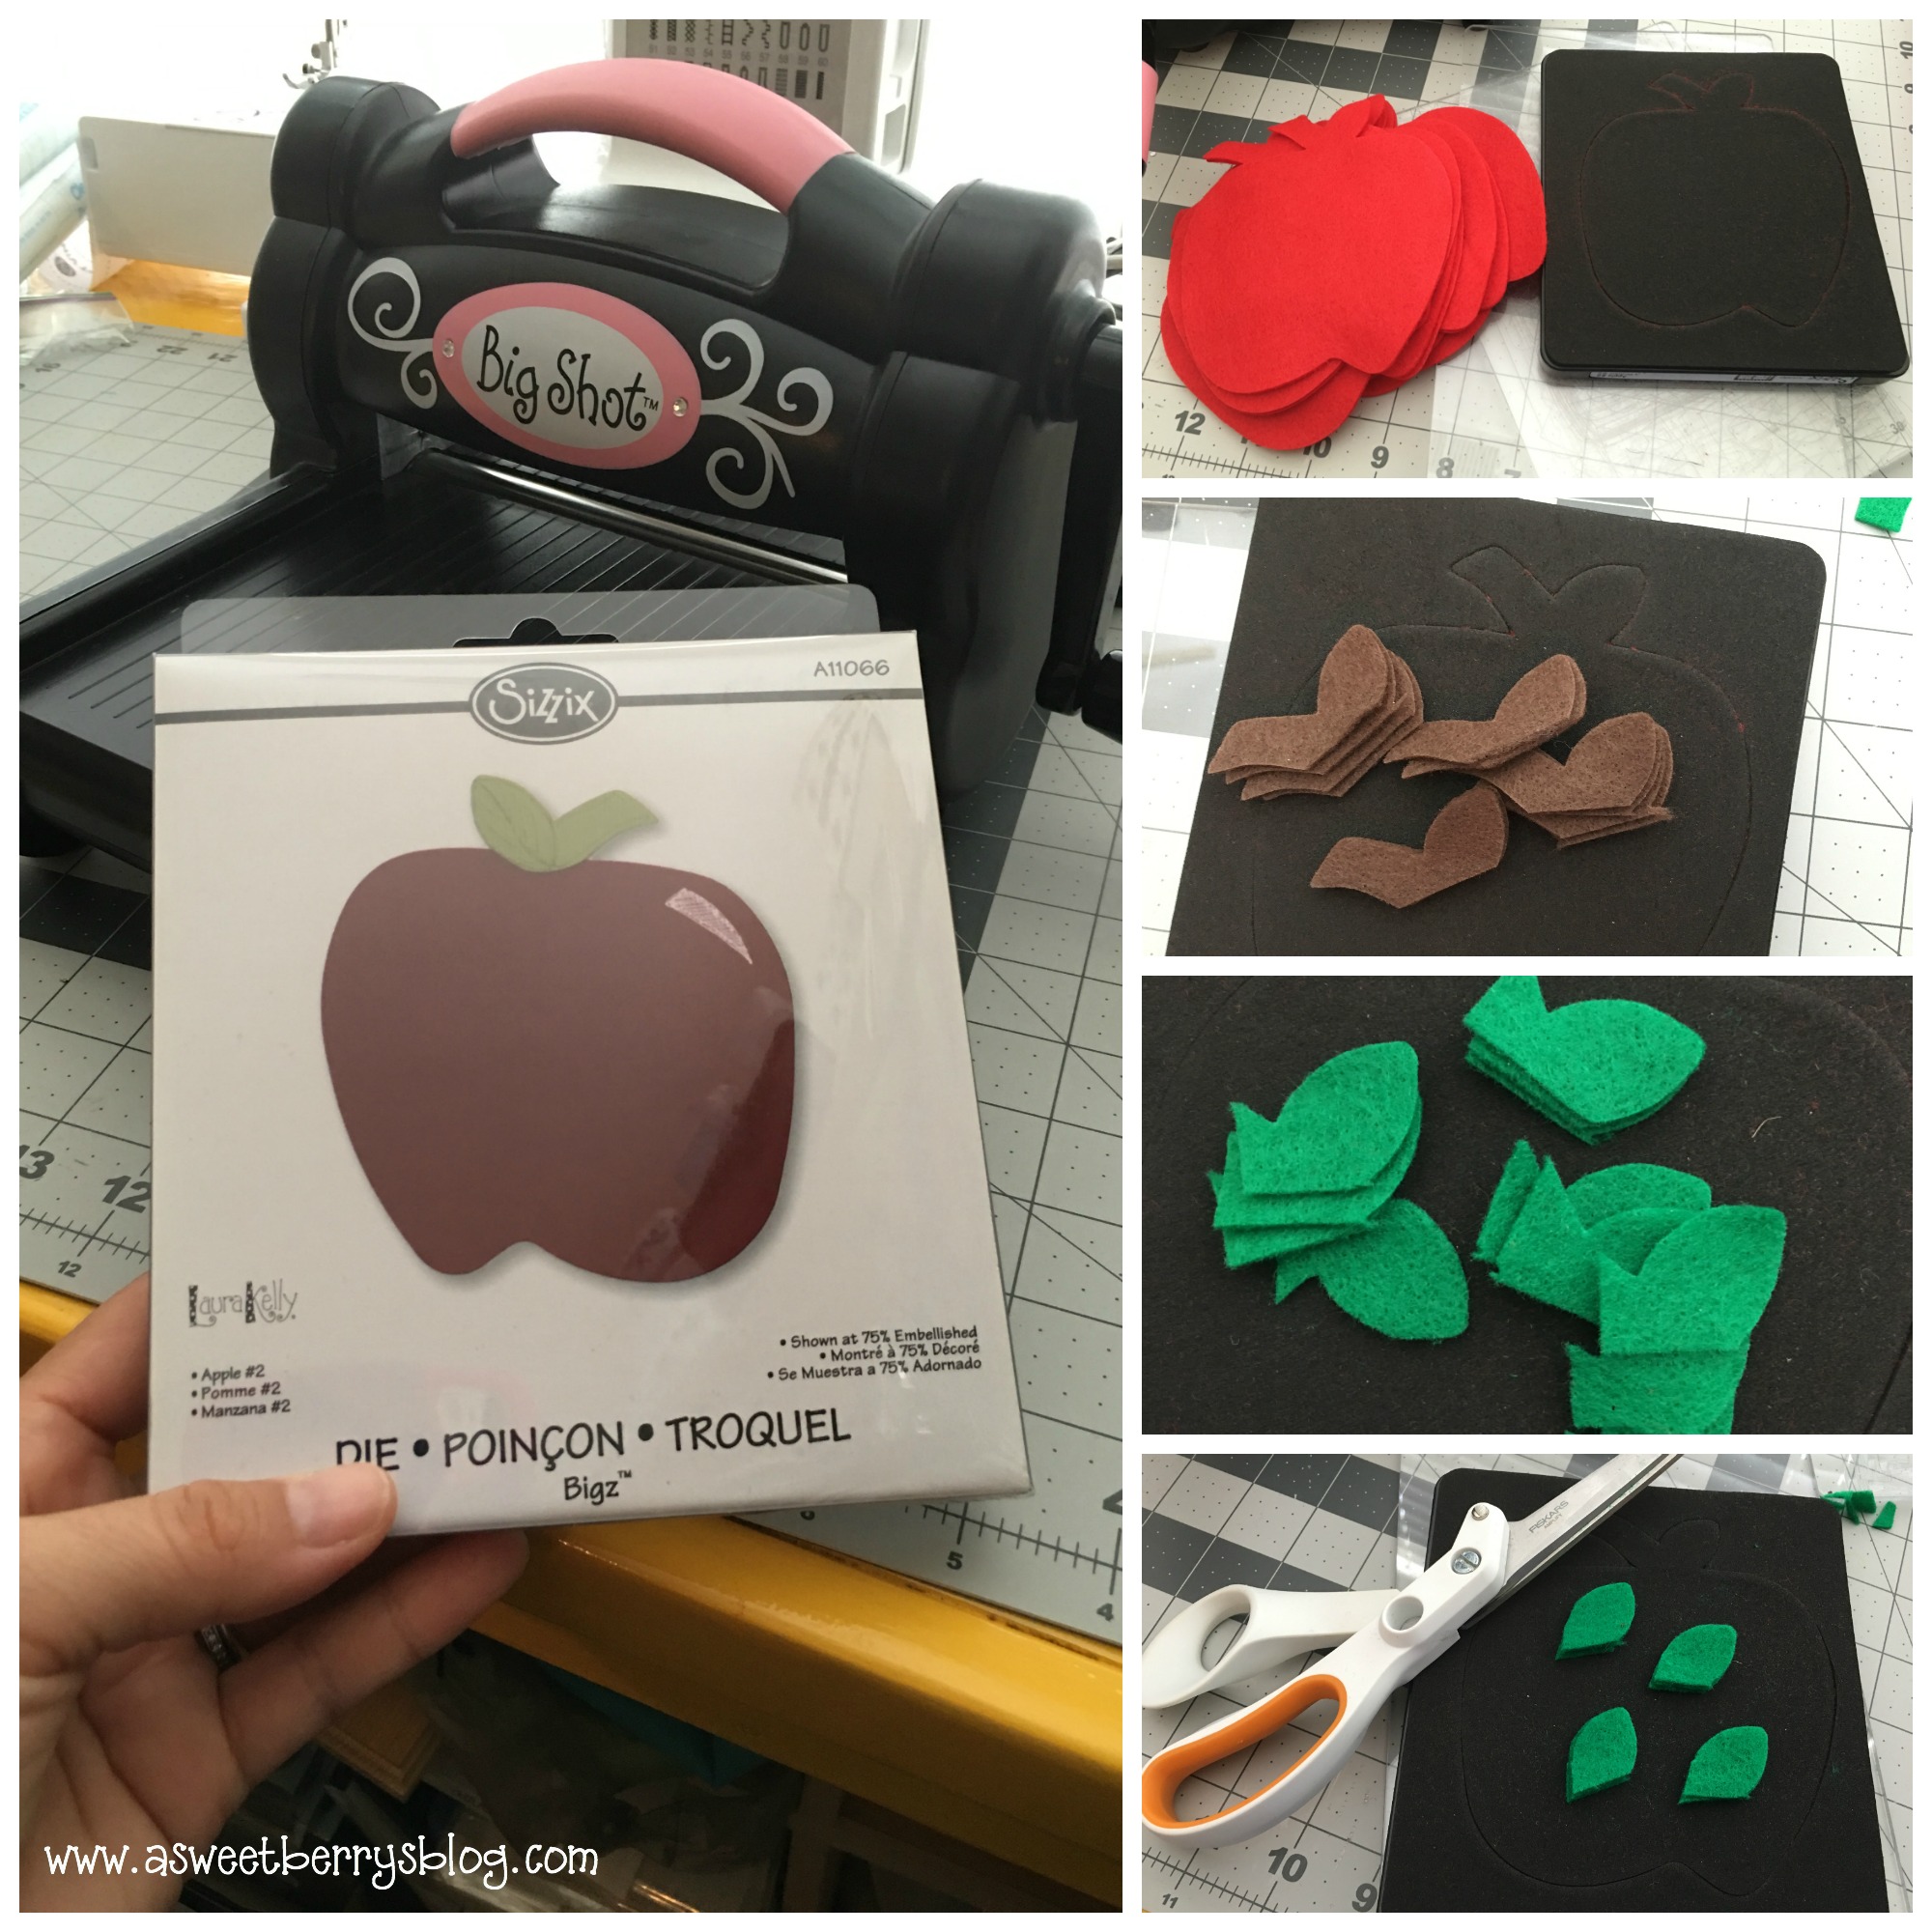
Die Cuts 1.  First, I use the Sizzix Big Shot, Cutting Pads, Felt and Apple Die to cut out all of my pieces.  I did a full cut for the apple and then for the stem and leaf, I just placed my felt over the steel blade and ran it through the Sizzix Big Shot.  

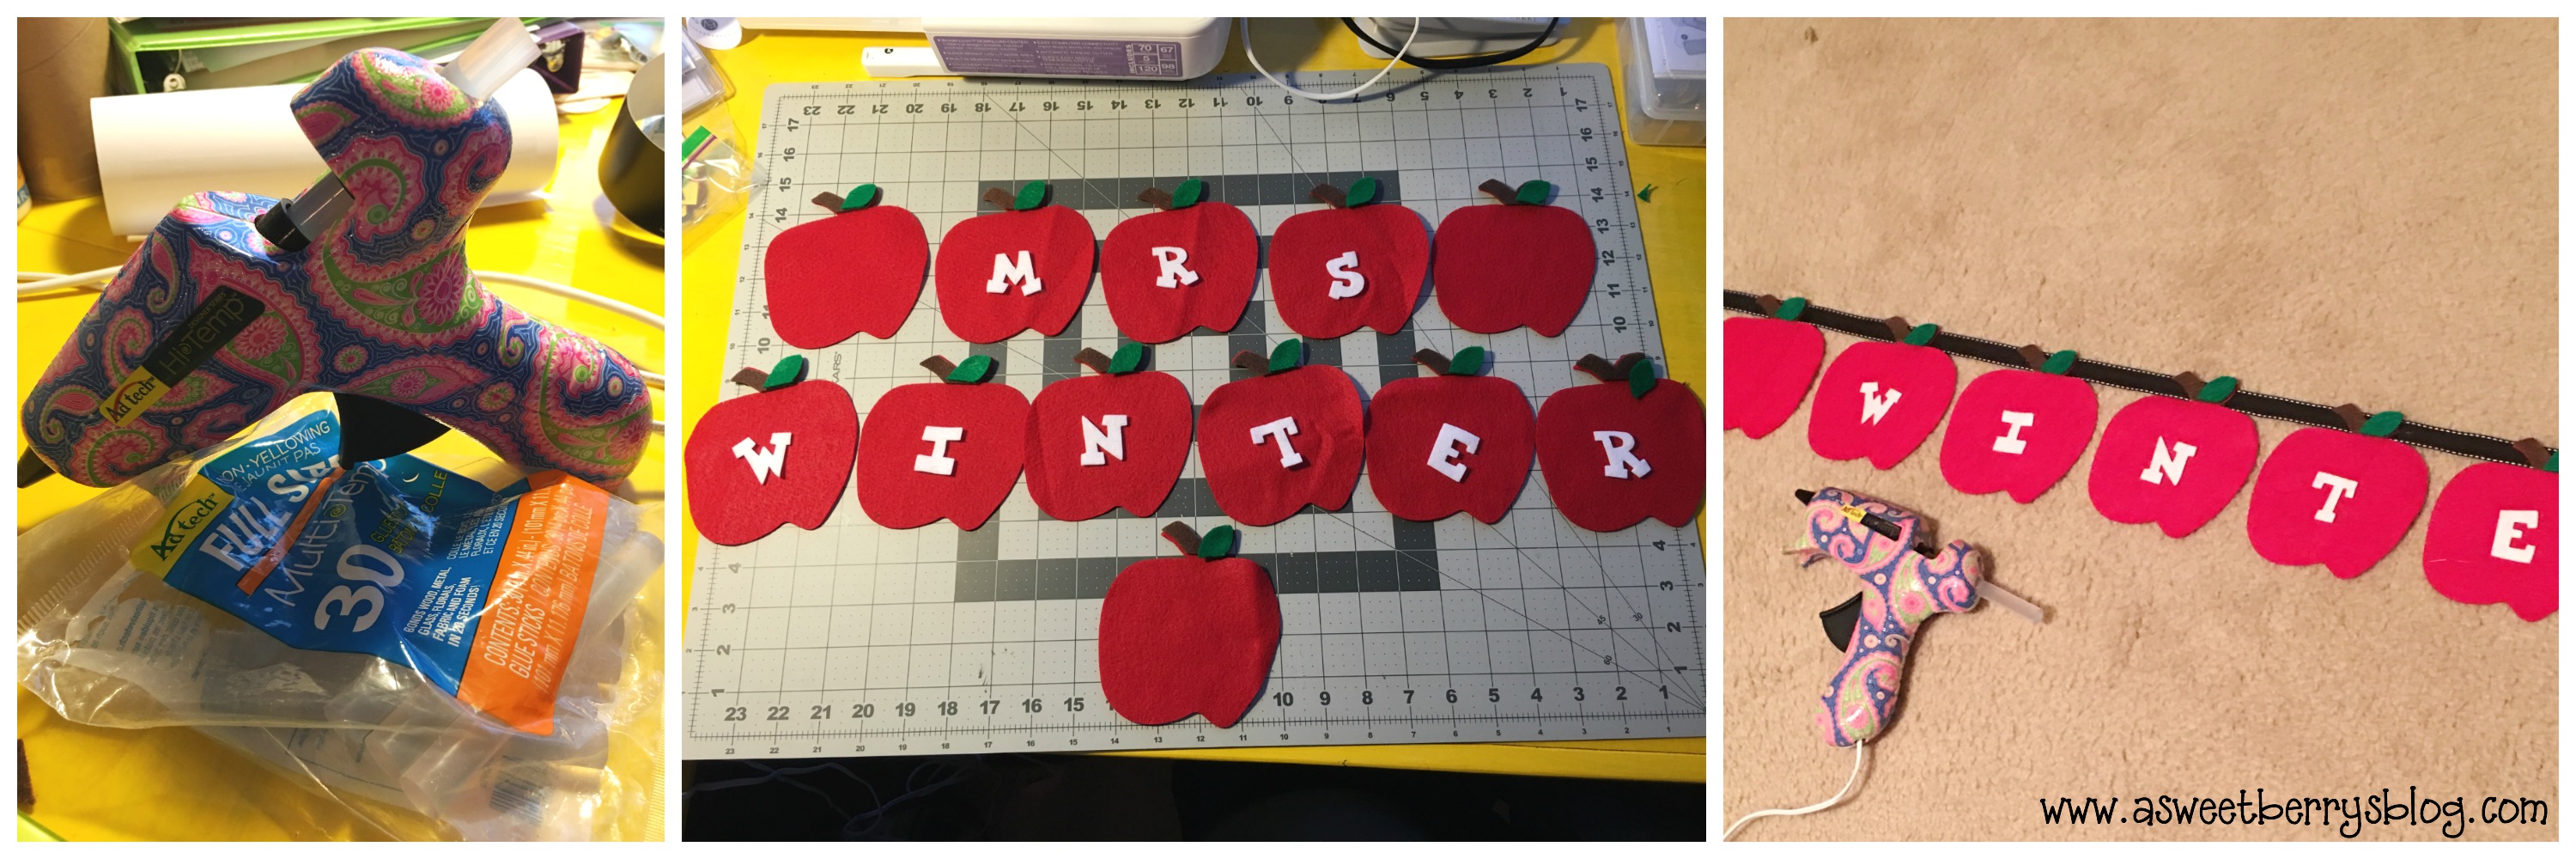
2.  Then, I used Laura’s Lemonade Alphabet Die and Long Cutting Pads to cut the letters (Mrs. Winter, one of our favorite teachers!!) Adtech 3.  Once everything was cut out, I used my Ad-tech Hot glue gun and glue sticks to glue the stem    and leaves down to the apples.  

4.  I then glued them to a long piece of ribbon. Hallway

I hope you like my Teacher’s Name Banner featuring Laura Kelly’s Apple Die #2.   I had so much fun making it.  

Until next time…..

Katie-Signature-2

Sculpey BakeShop Harry Potter Wand

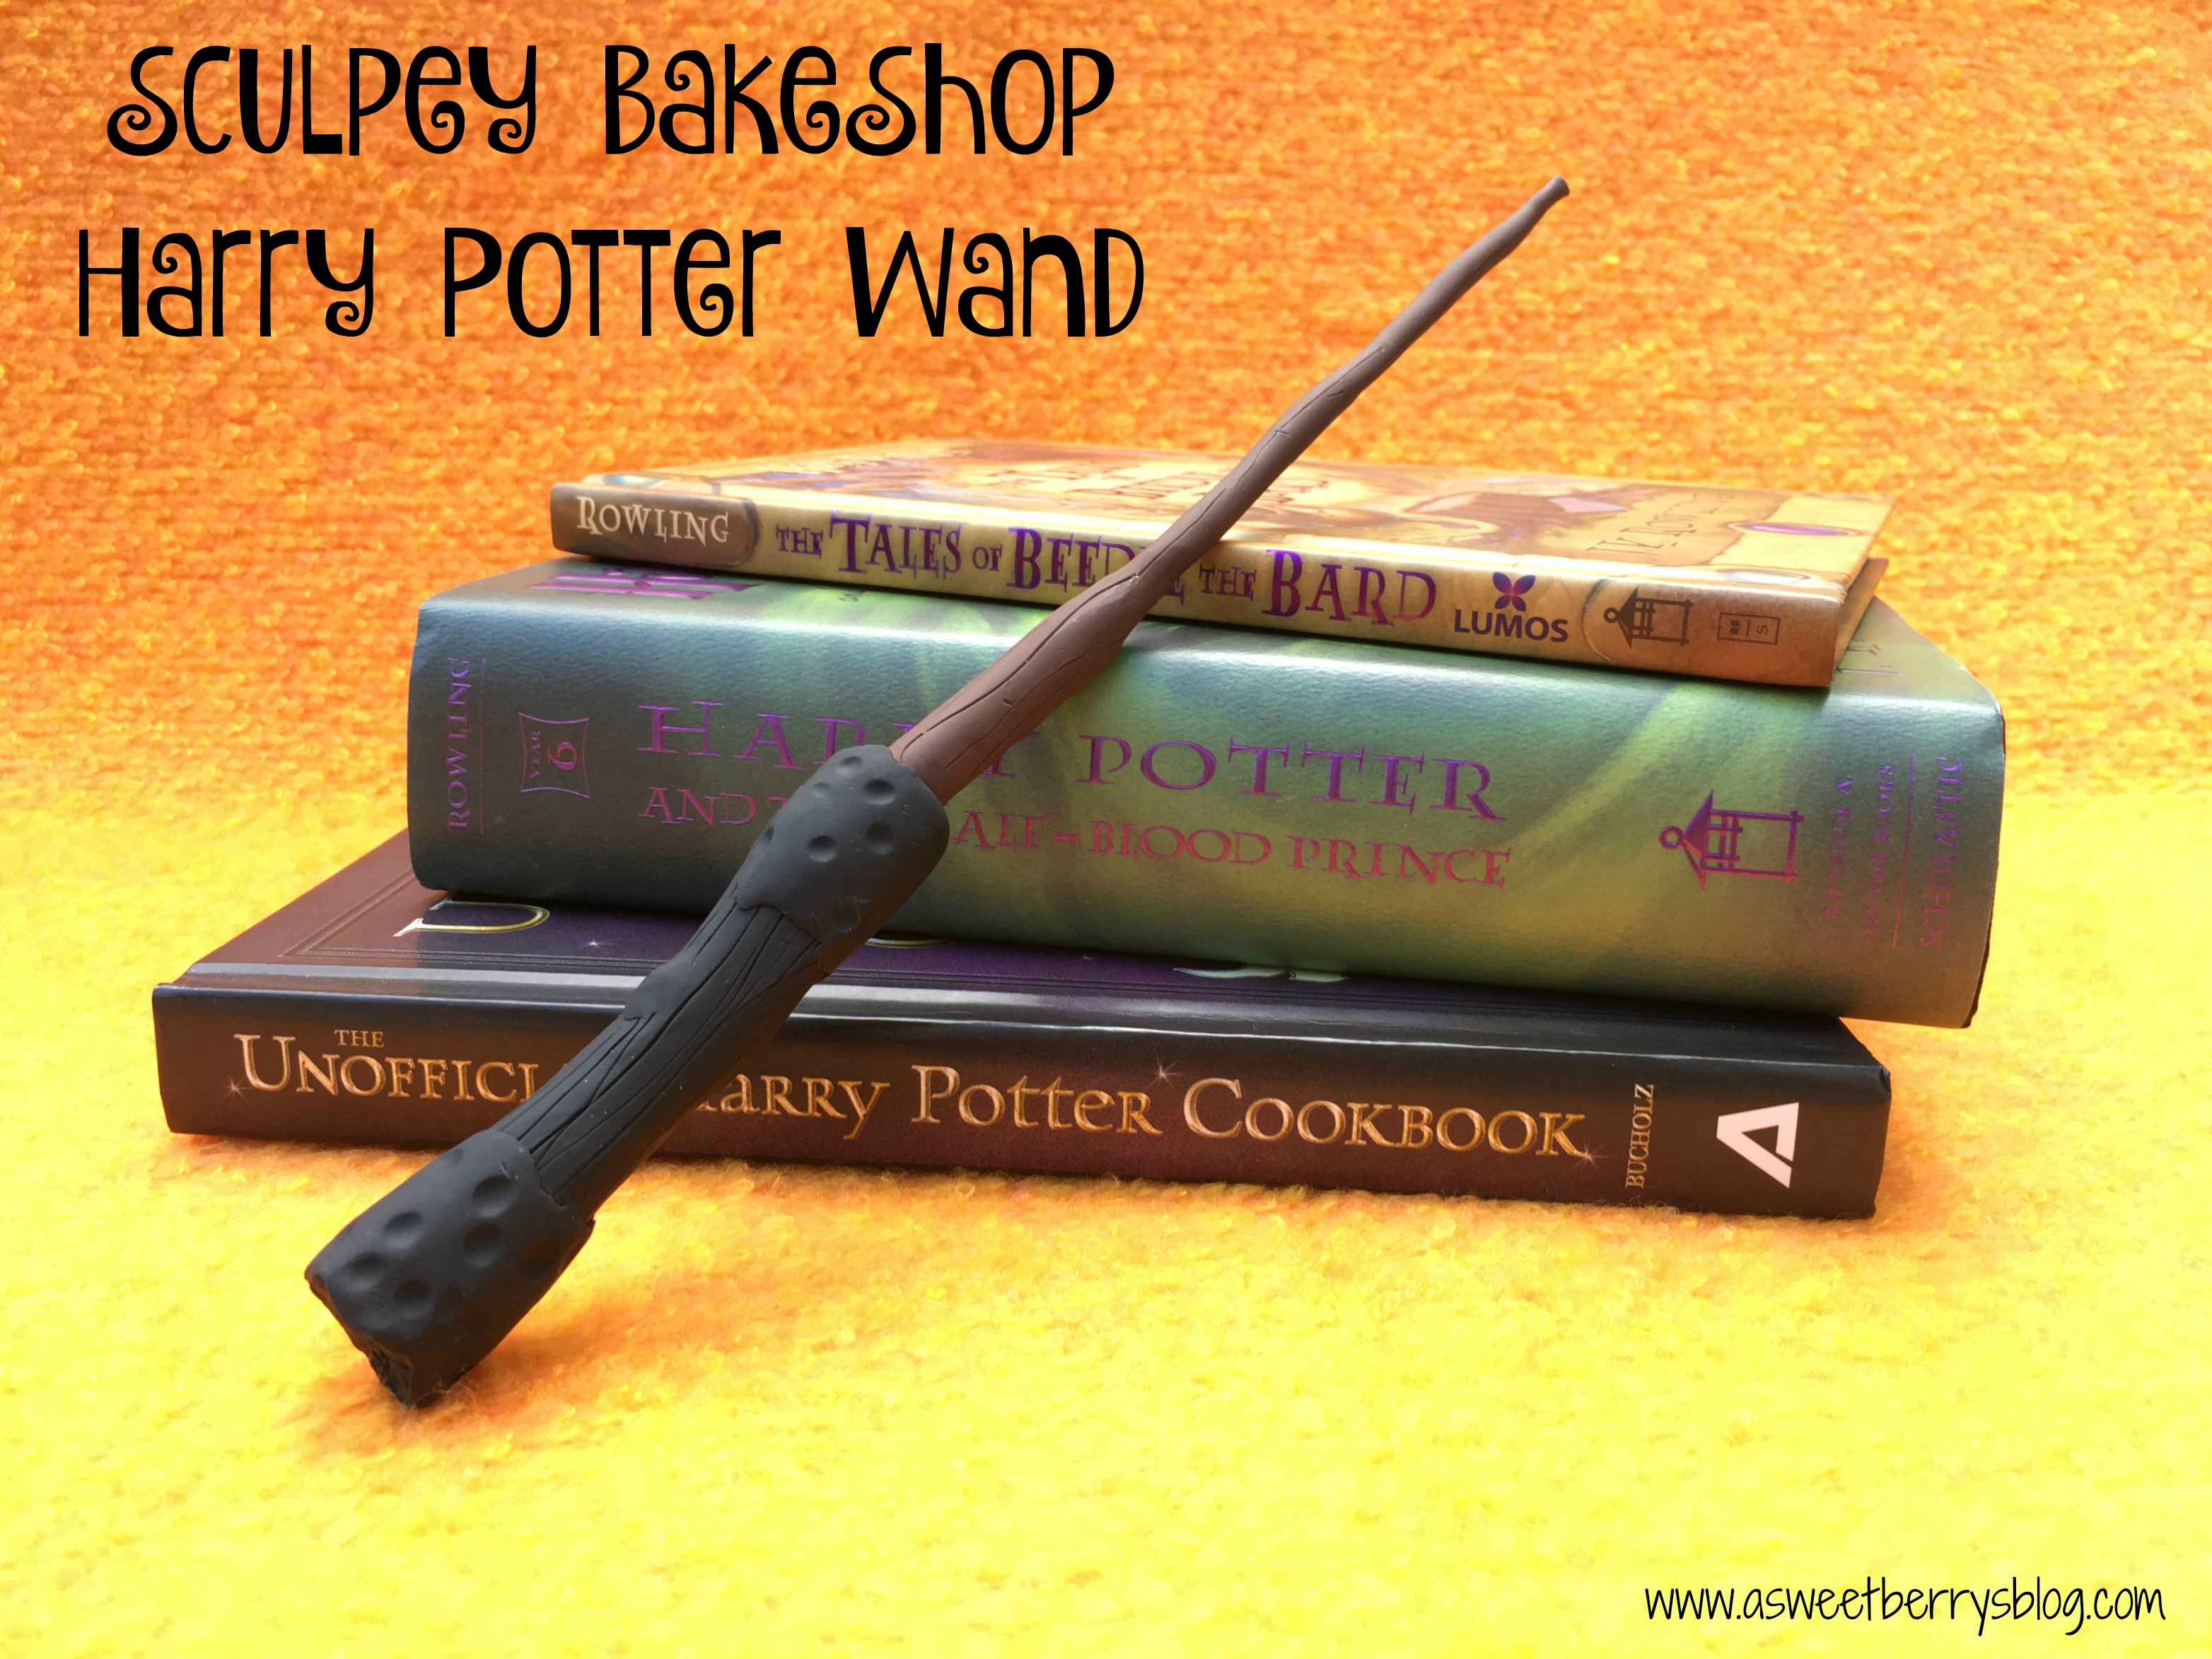
I got the chance to participate in a Happy Harry Potter Blog series! This happens every July in preparation for Harry Potter’s Birthday!  And since we are headed to Universal Studios in the fall, Harry’s Wand is the big topic of discussion in our house quite frequently.   So, I decide to make my own Harry Potter Wand using Sculpey BakeShop clay and I am super excited about how it turned out!
Sculpey HP Wand
Materials needed:
Sculpey Bake Shop Oven Bake Clay
Clay tools
Oven (I just use our toaster oven) rolling clay
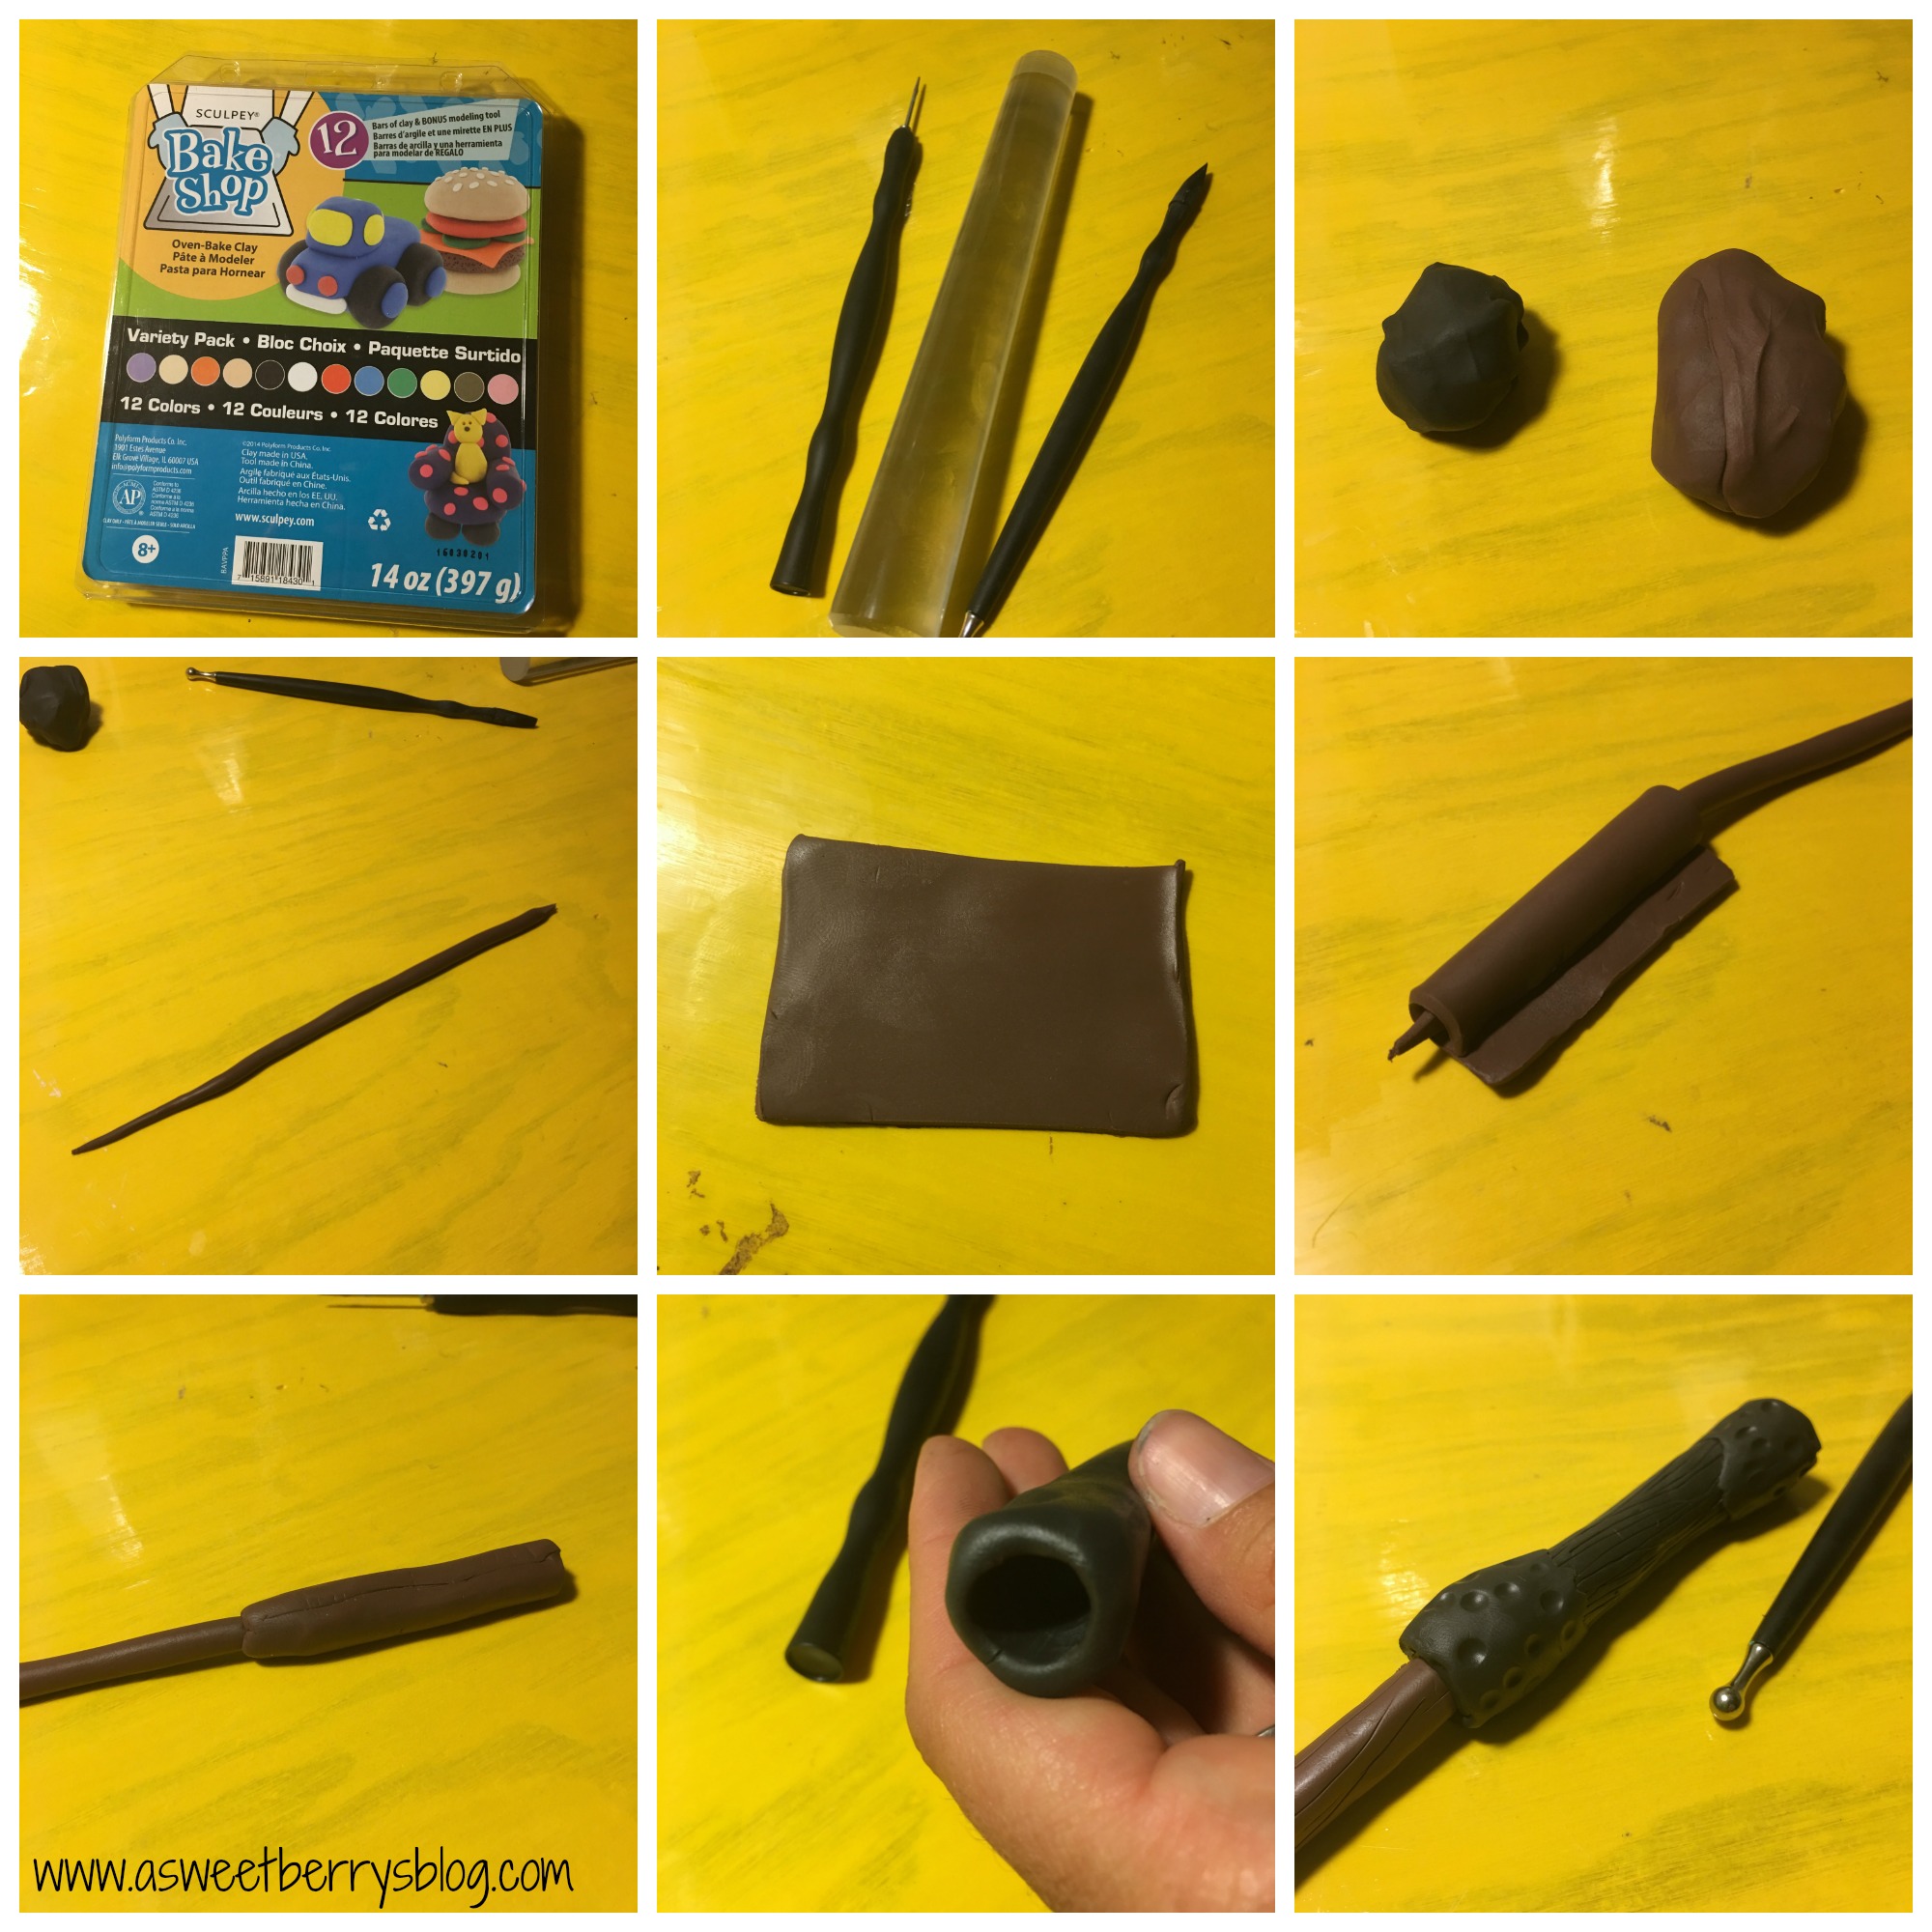
I decided to use black and brown clay, so I kneaded the two colors until they were soft and easy to work with.  I rolled out the wand part first, making it thin but not too thin.  I didn’t want it to break easily or be floppy.  Then, I added rolled an additional piece of clay that I rolled flat to widen the wand a little towards the bottom.  Using my black clay, I rolled it using my hand until it was cylinder like.  Then, I took one of the tools and pressed one end in to create a hole. I then put my thin piece of wand into the black piece and then pressed them together slightly.
time to bake
Once my wand was together, I used my tools to add detail to my wand.  I wanted it to have more of a piece of wood feel.

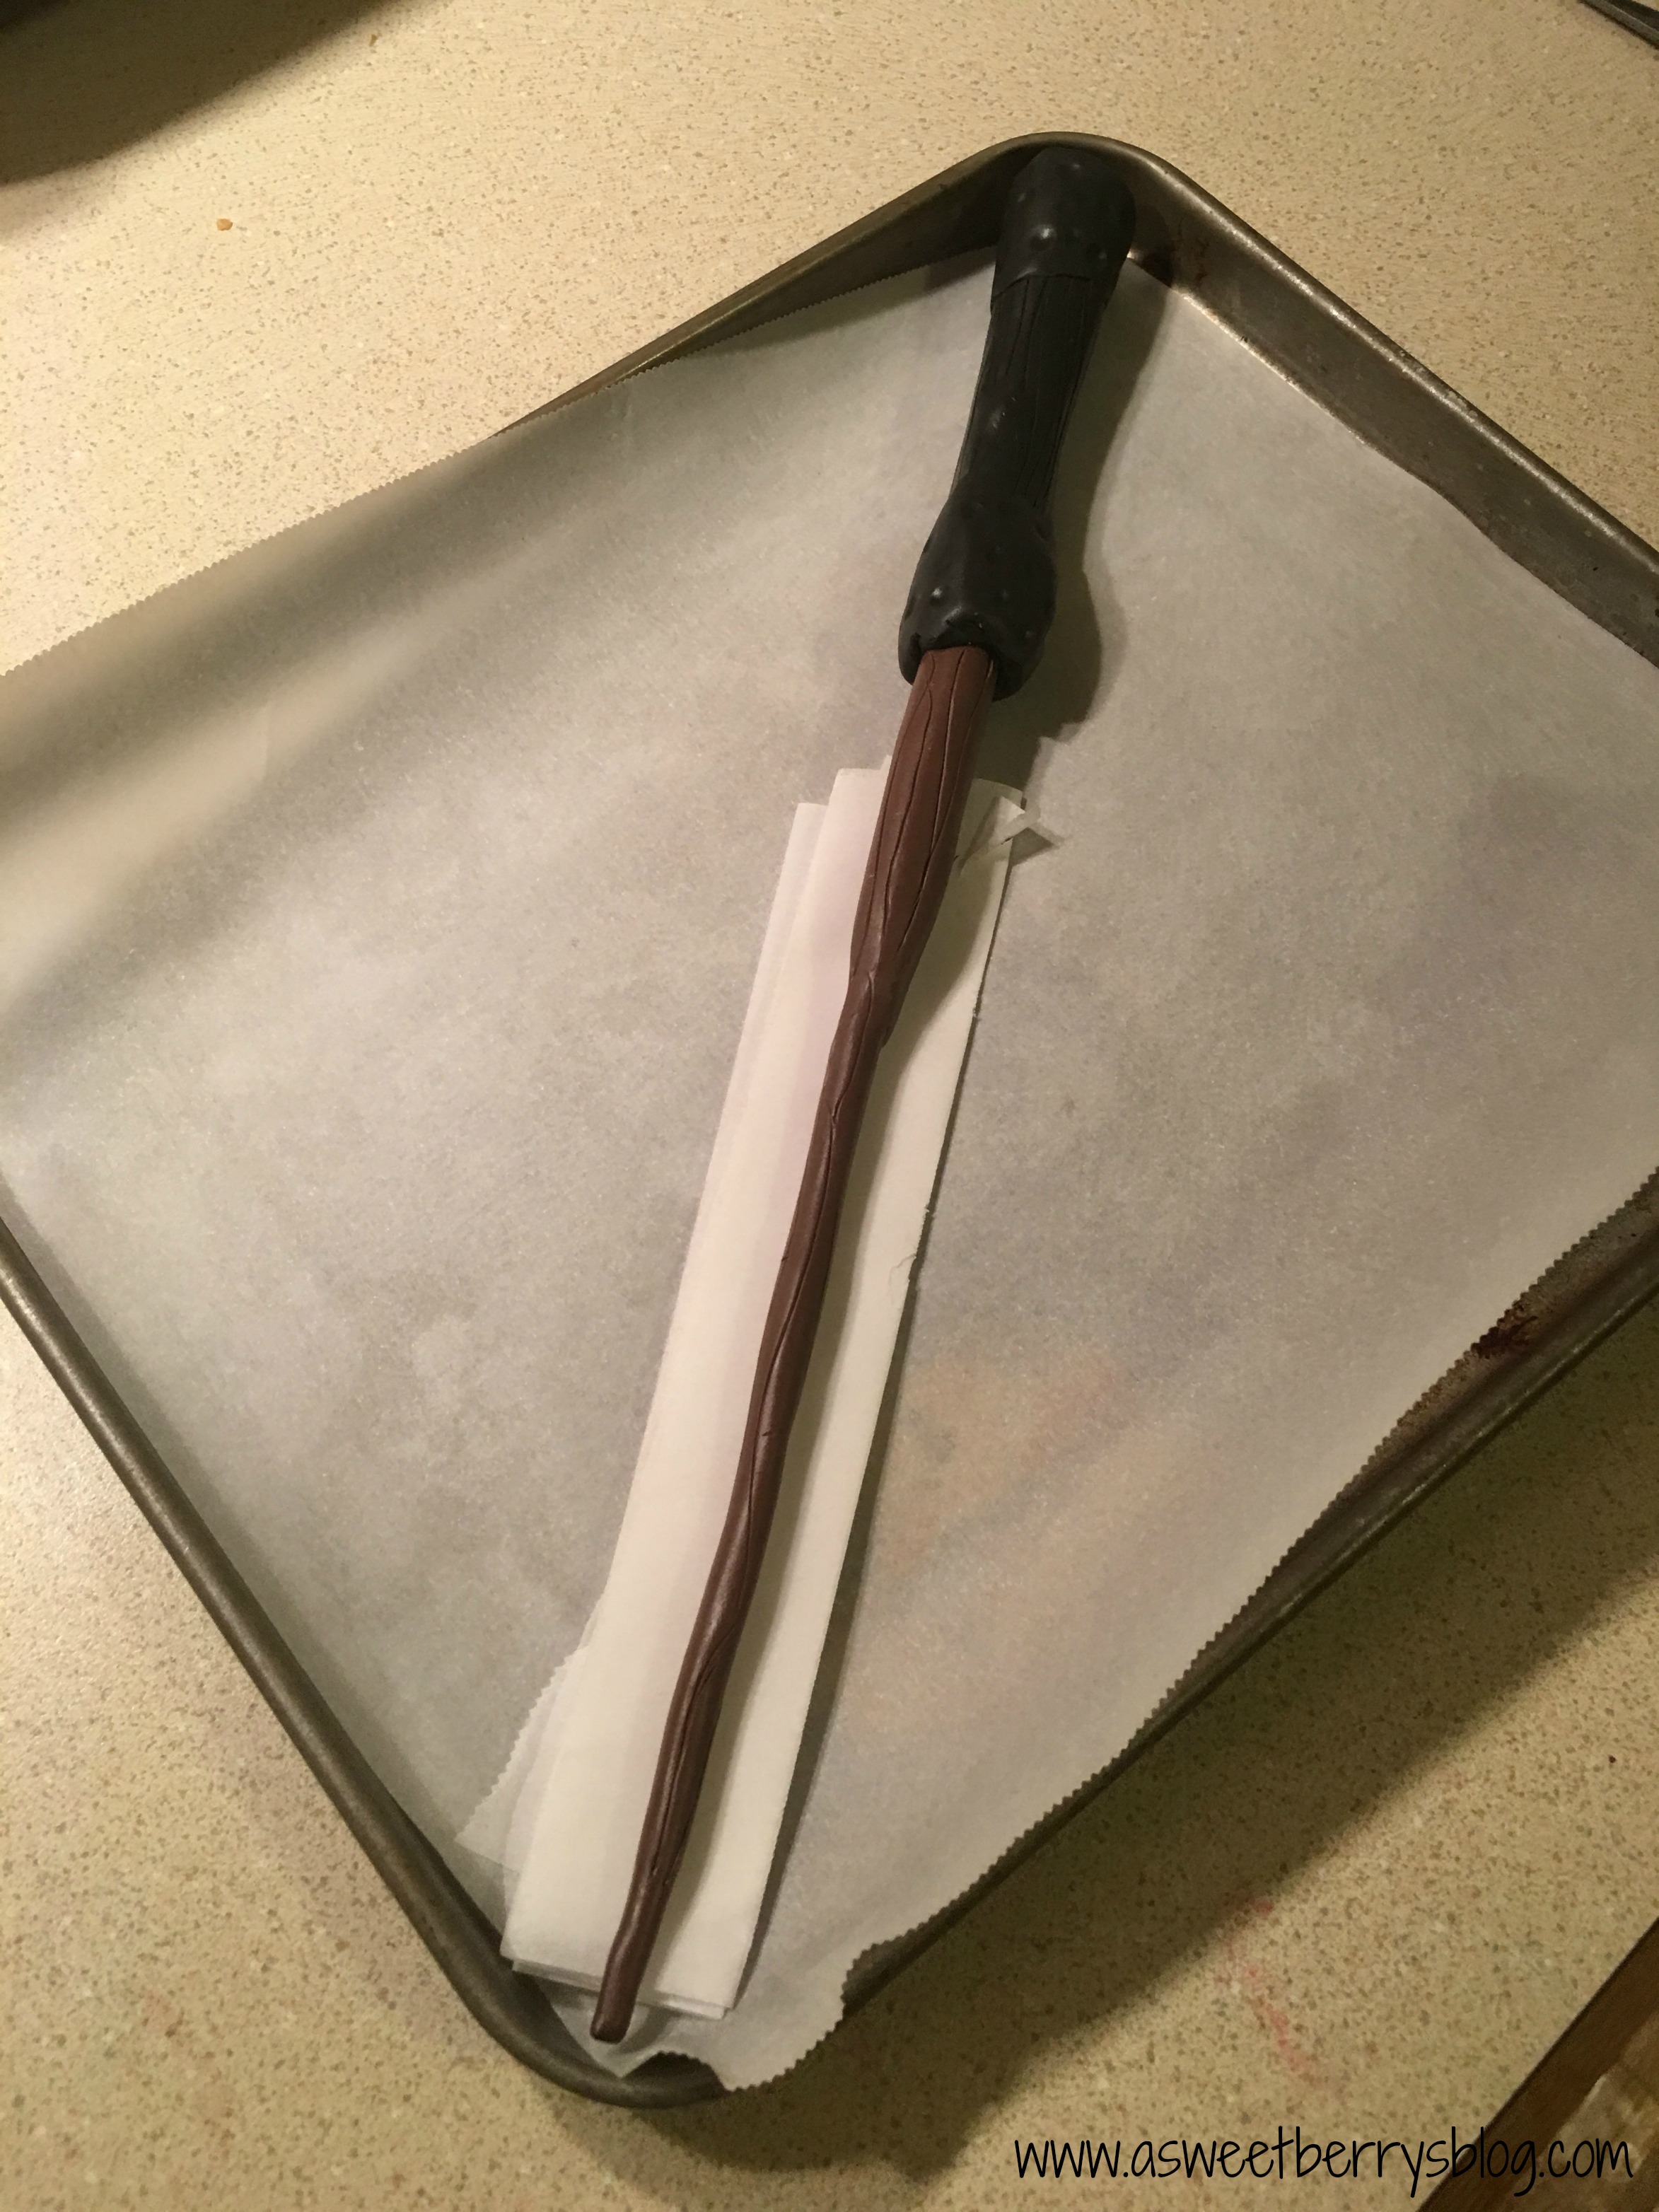
When I was done with the details, I baked it following the instructions for the clay, making sure that I put a piece of folded parchment paper under the thin end to keep it even.
detail
The good thing about DIY wands is that you can make them anyway that you want to.  You can add as much or as little details as you’d like.

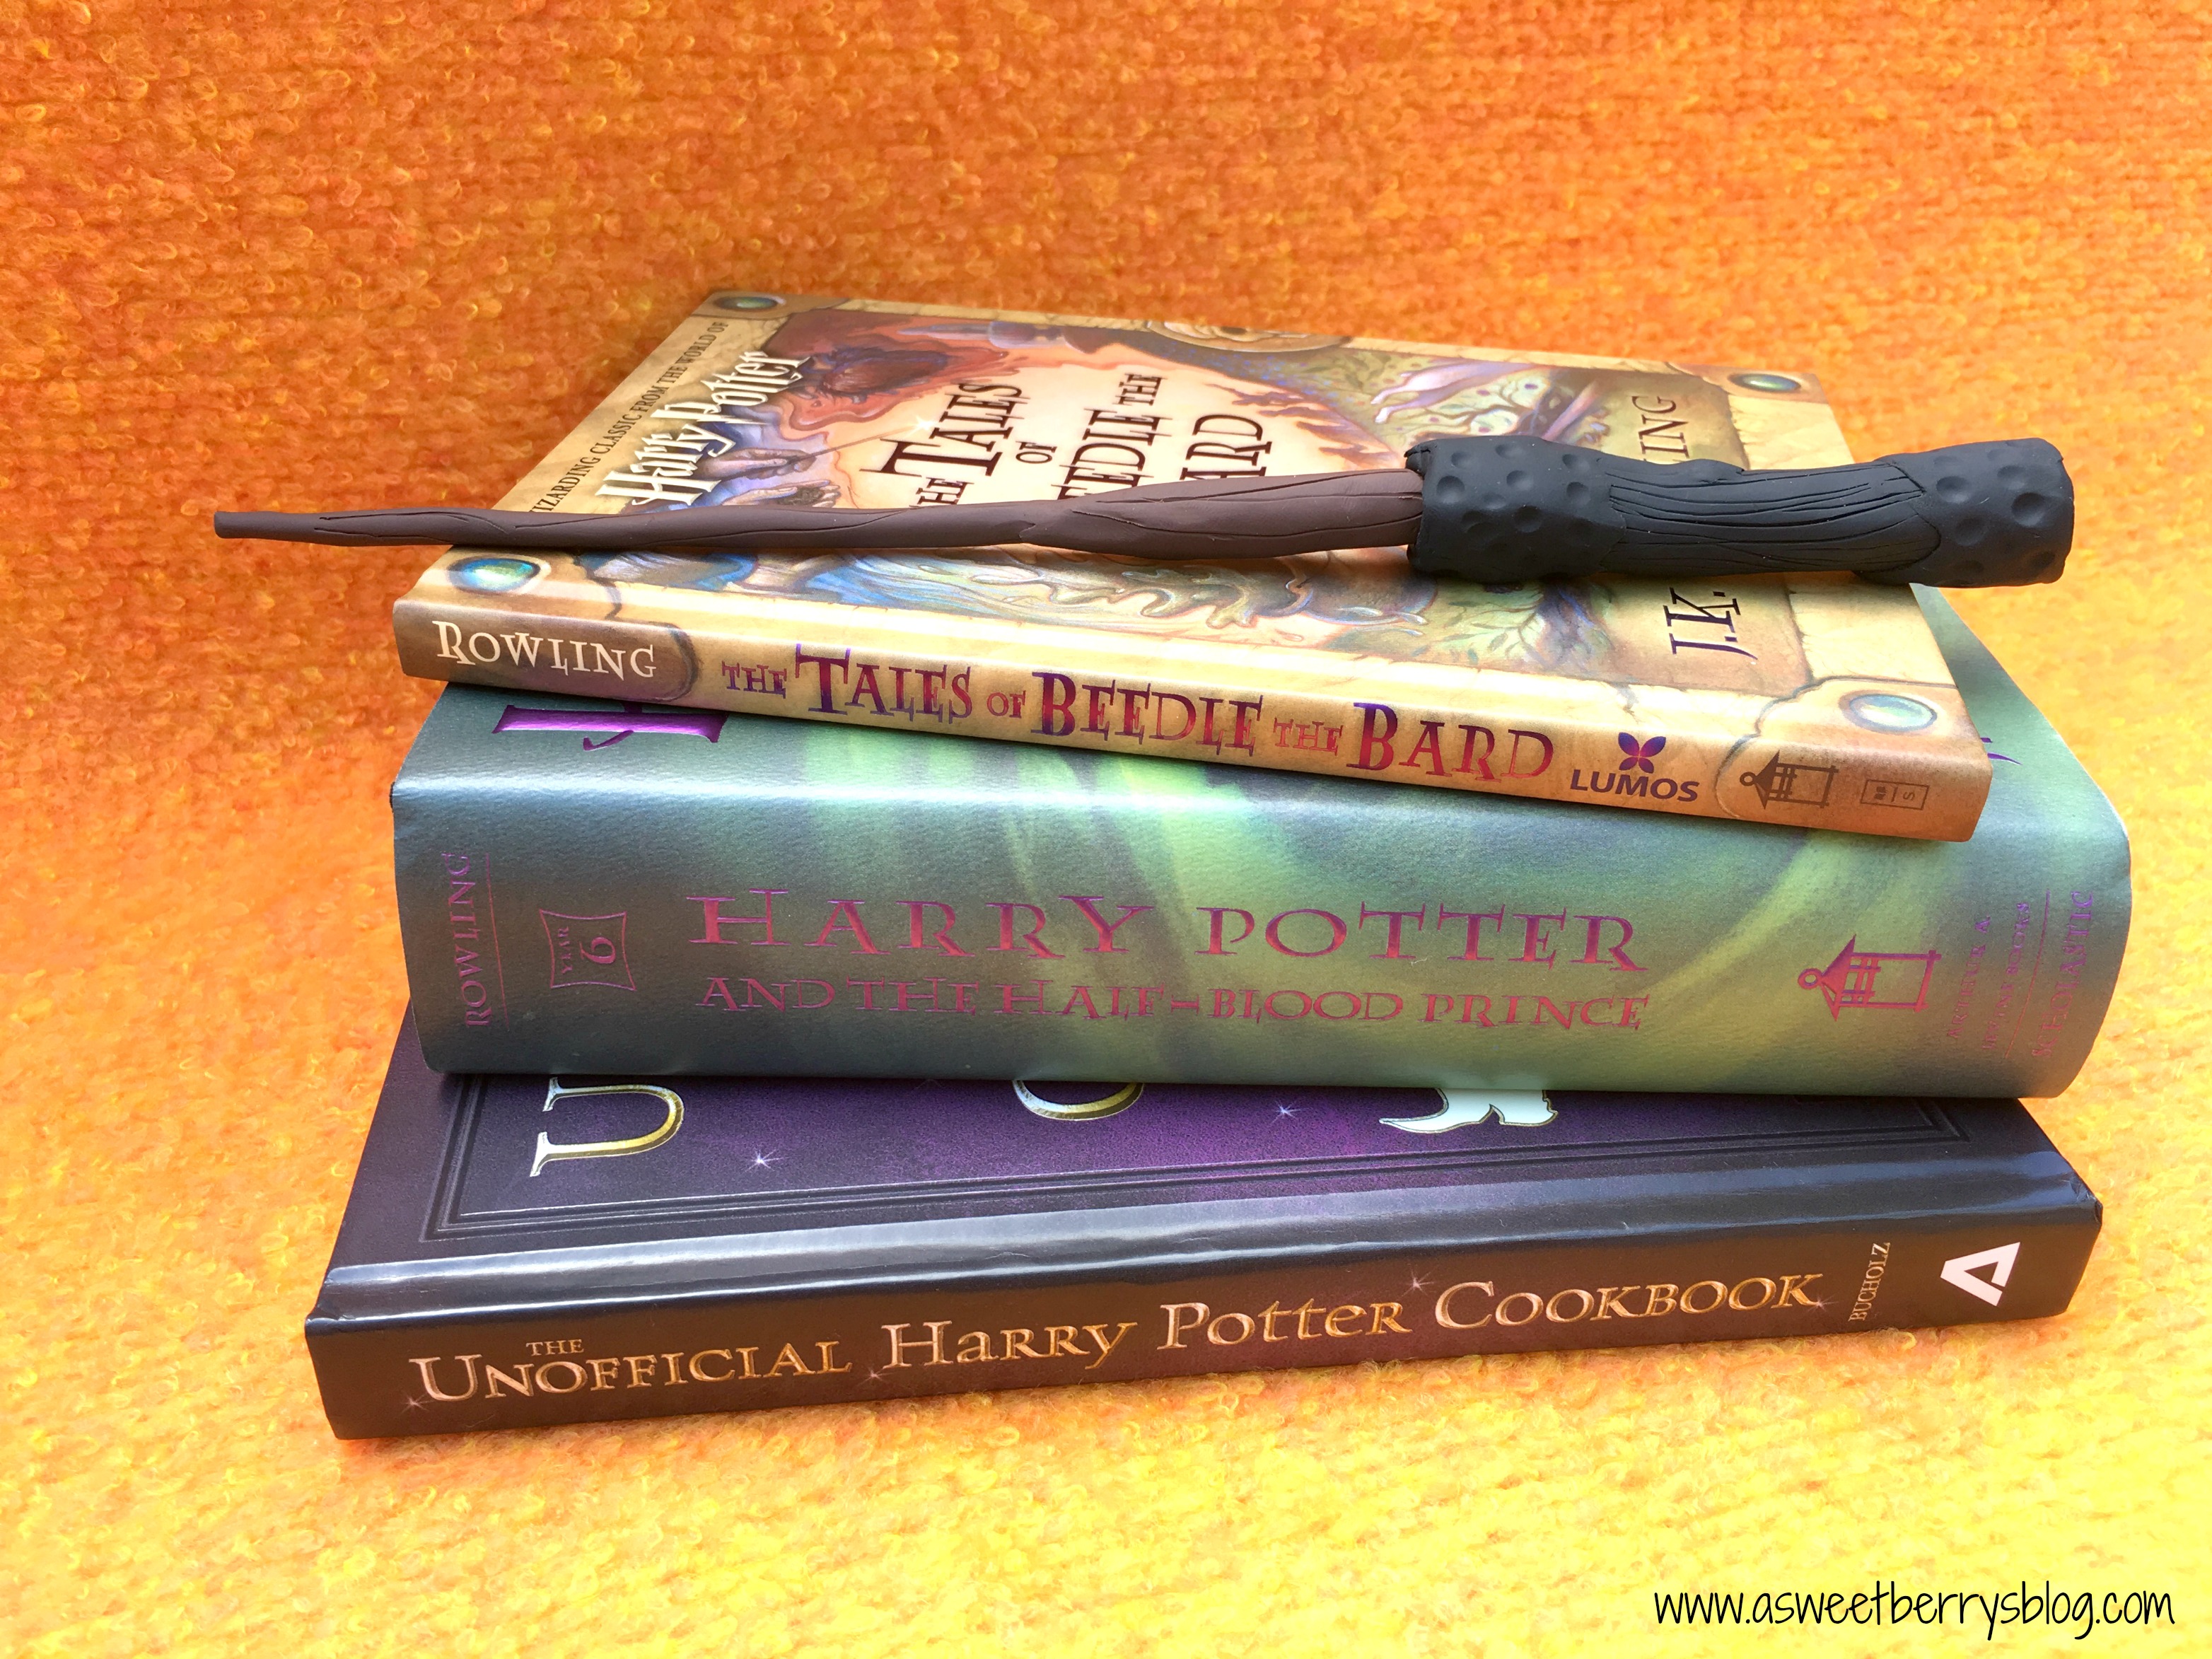
I am extremely happy with how my wand turned out.   My kids love it and want it for themselves.  Of course, I will let them make their own!  They love working with Sculpey Clay and they are obsessed with Harry Potter.   We can’t wait to go to Harry Potter world soon!
another angle
I hope that you like my Sculpey BakeShop Harry Potter Wand!

Click HERE to check out other great Harry Potter crafts and ideas!

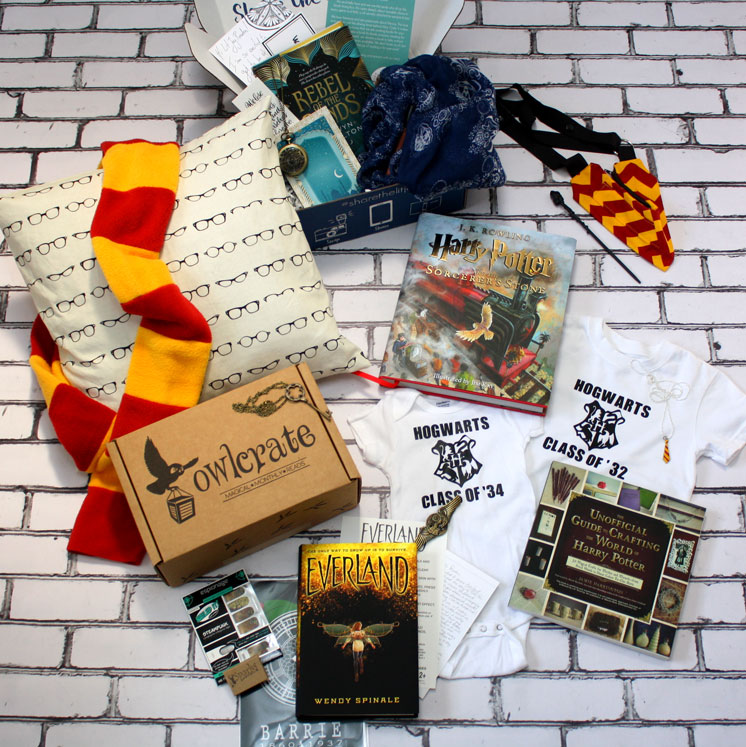
There are two awesomely amazing prize packs!  Make sure you enter to win!

Chance #1 to win:

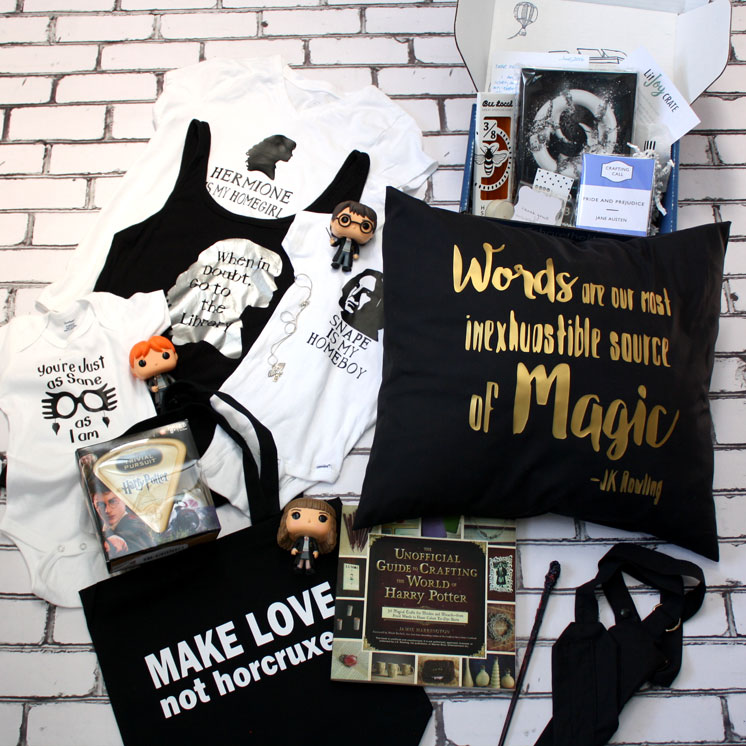
Harry Potter everything. Great book nerd gifts and book swag.

Prize Pack #1

See more about each prize and sponsor at this giveaway post and be sure to enter the other equally awesome prize pack while you’re there! Winner must have a US address or be willing to pay for international shipping.

a Rafflecopter giveaway

Chance #2 to win:
So many awesome Harry Potter gift ideas. Great for readers

Prize Pack #2

See more about each prize and sponsor at this giveaway post and be sure to enter the other equally awesome prize pack while you’re there! Winner must have a US address or be willing to pay for international shipping.

a Rafflecopter giveaway

Until next time……..

Kunin Felt Boy Scout Bottle Carrier

Boy Scouts are always out in the hot sun doing something fun!   What better to keep them hydrated?   A DIY bottle carrier that they can carry over their shoulder to keep their water bottle close to them and not have to worry about setting it down and forgetting it!

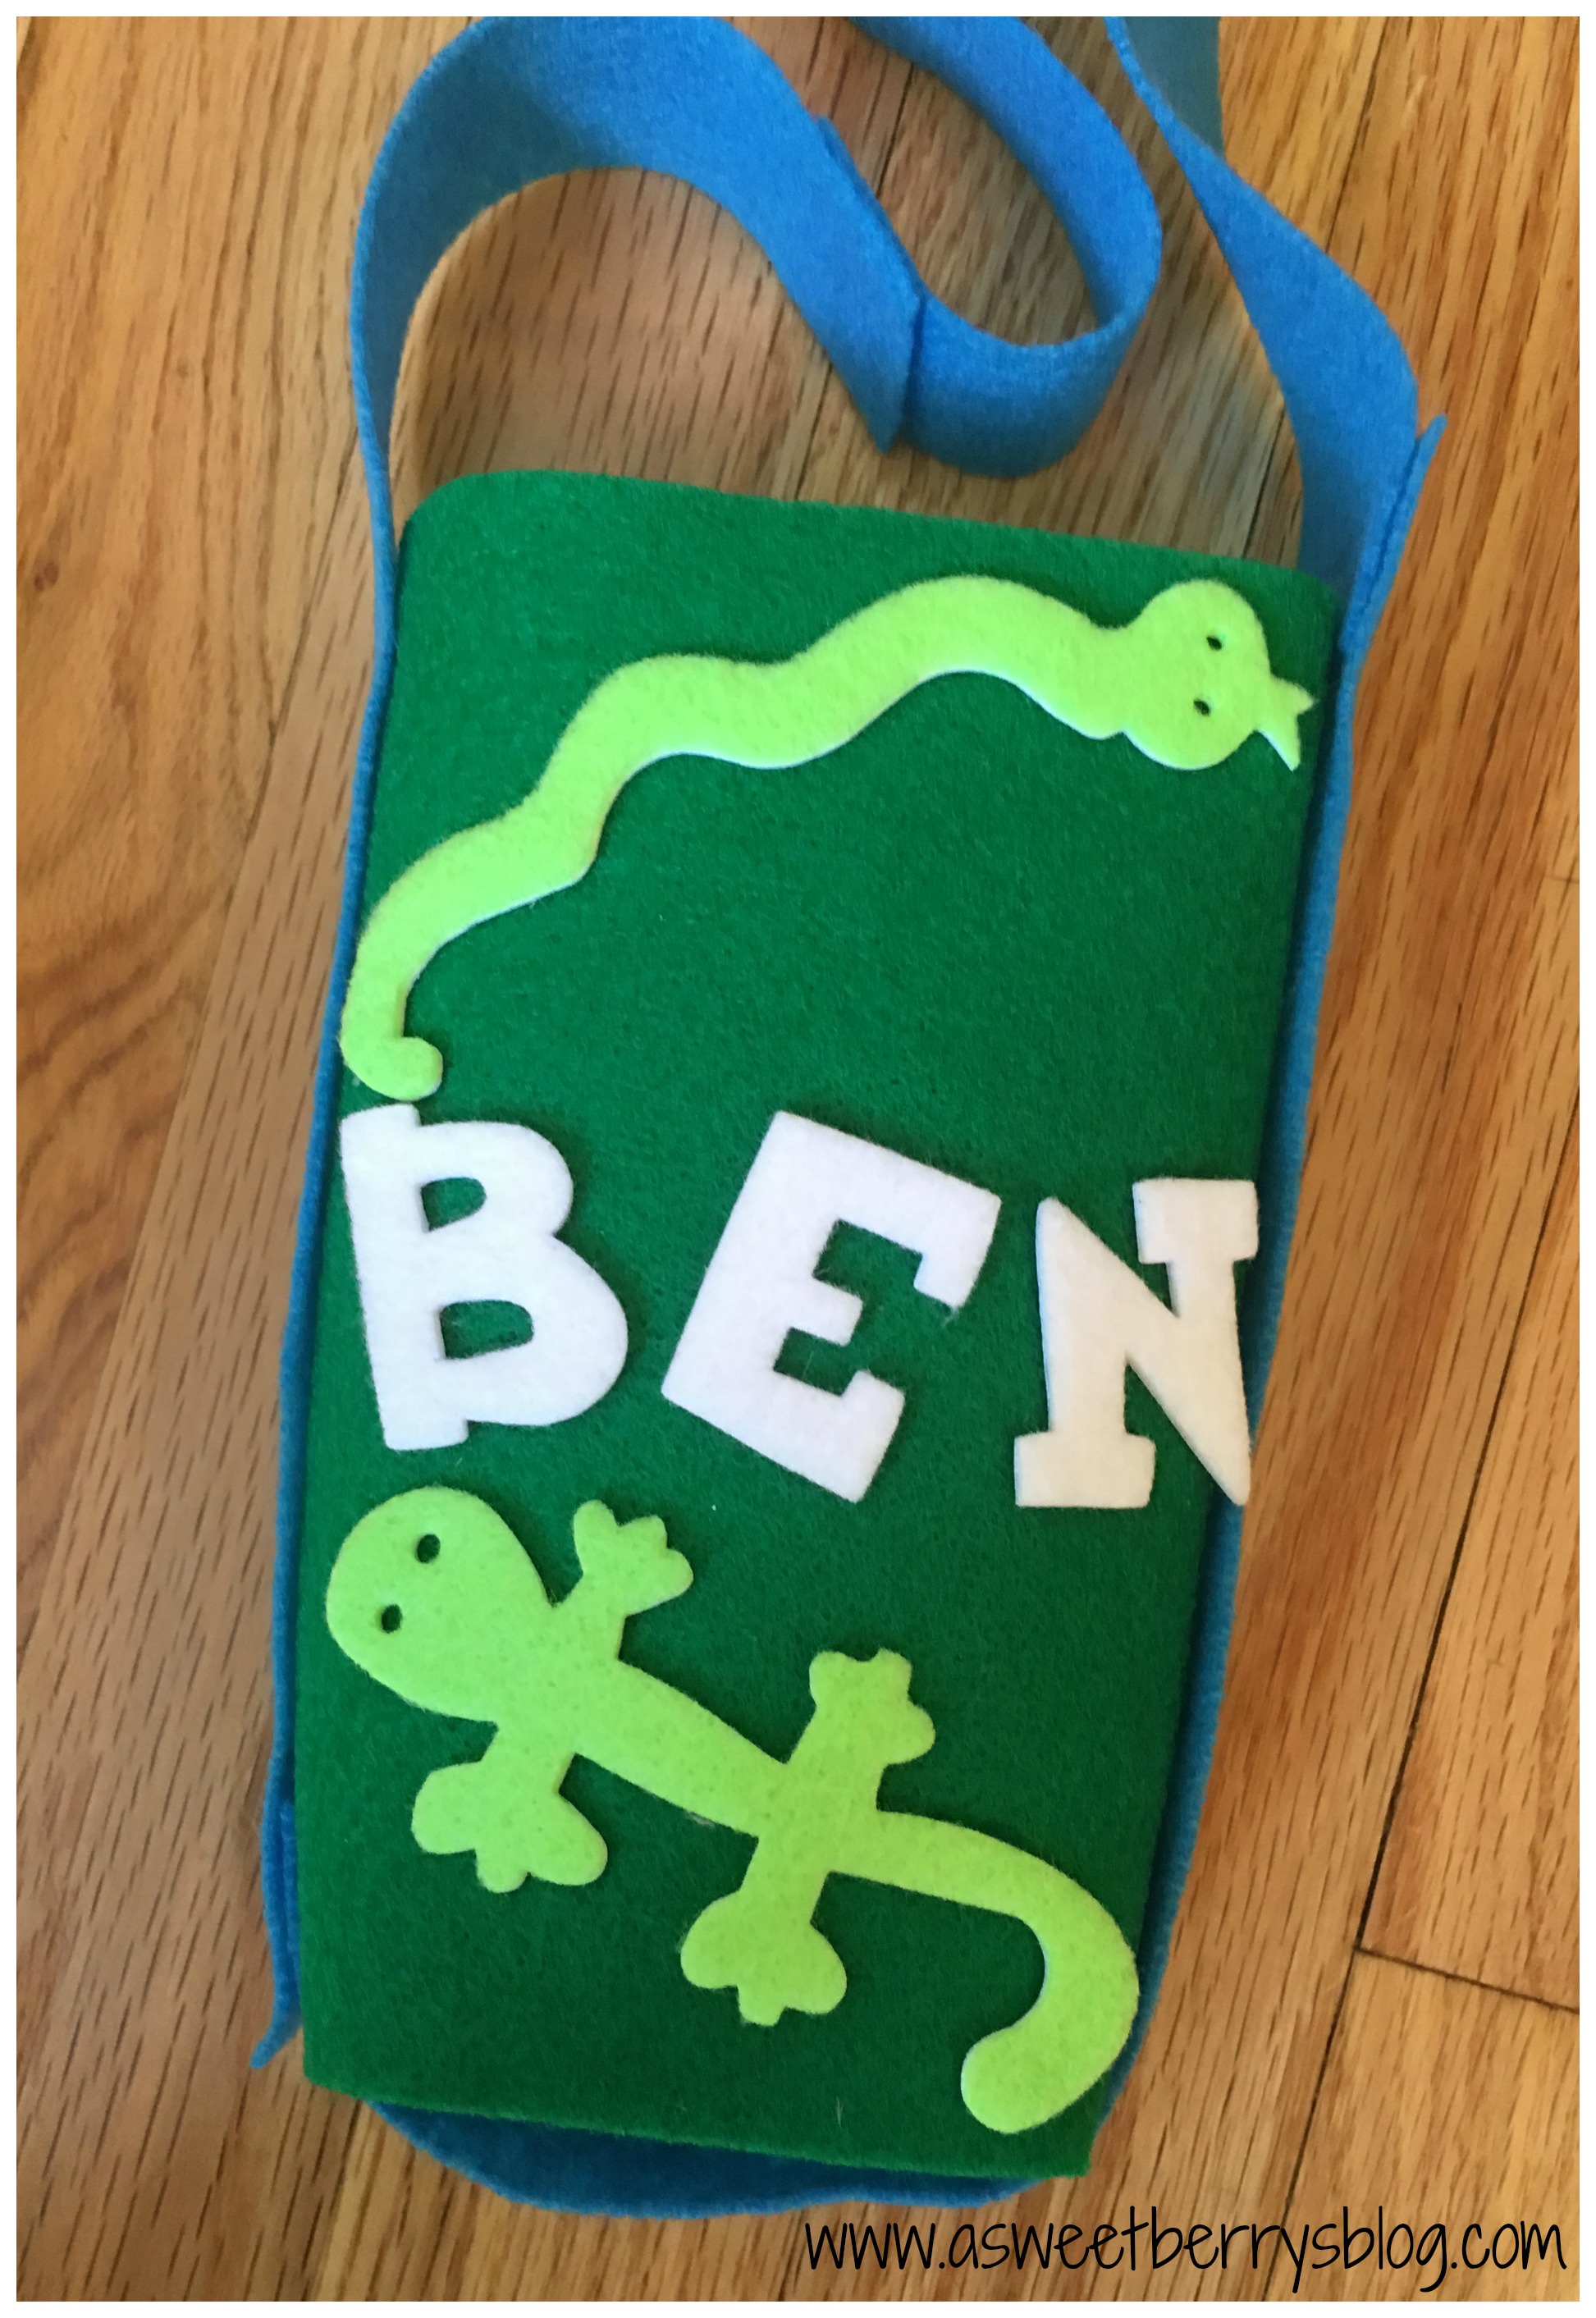
Final

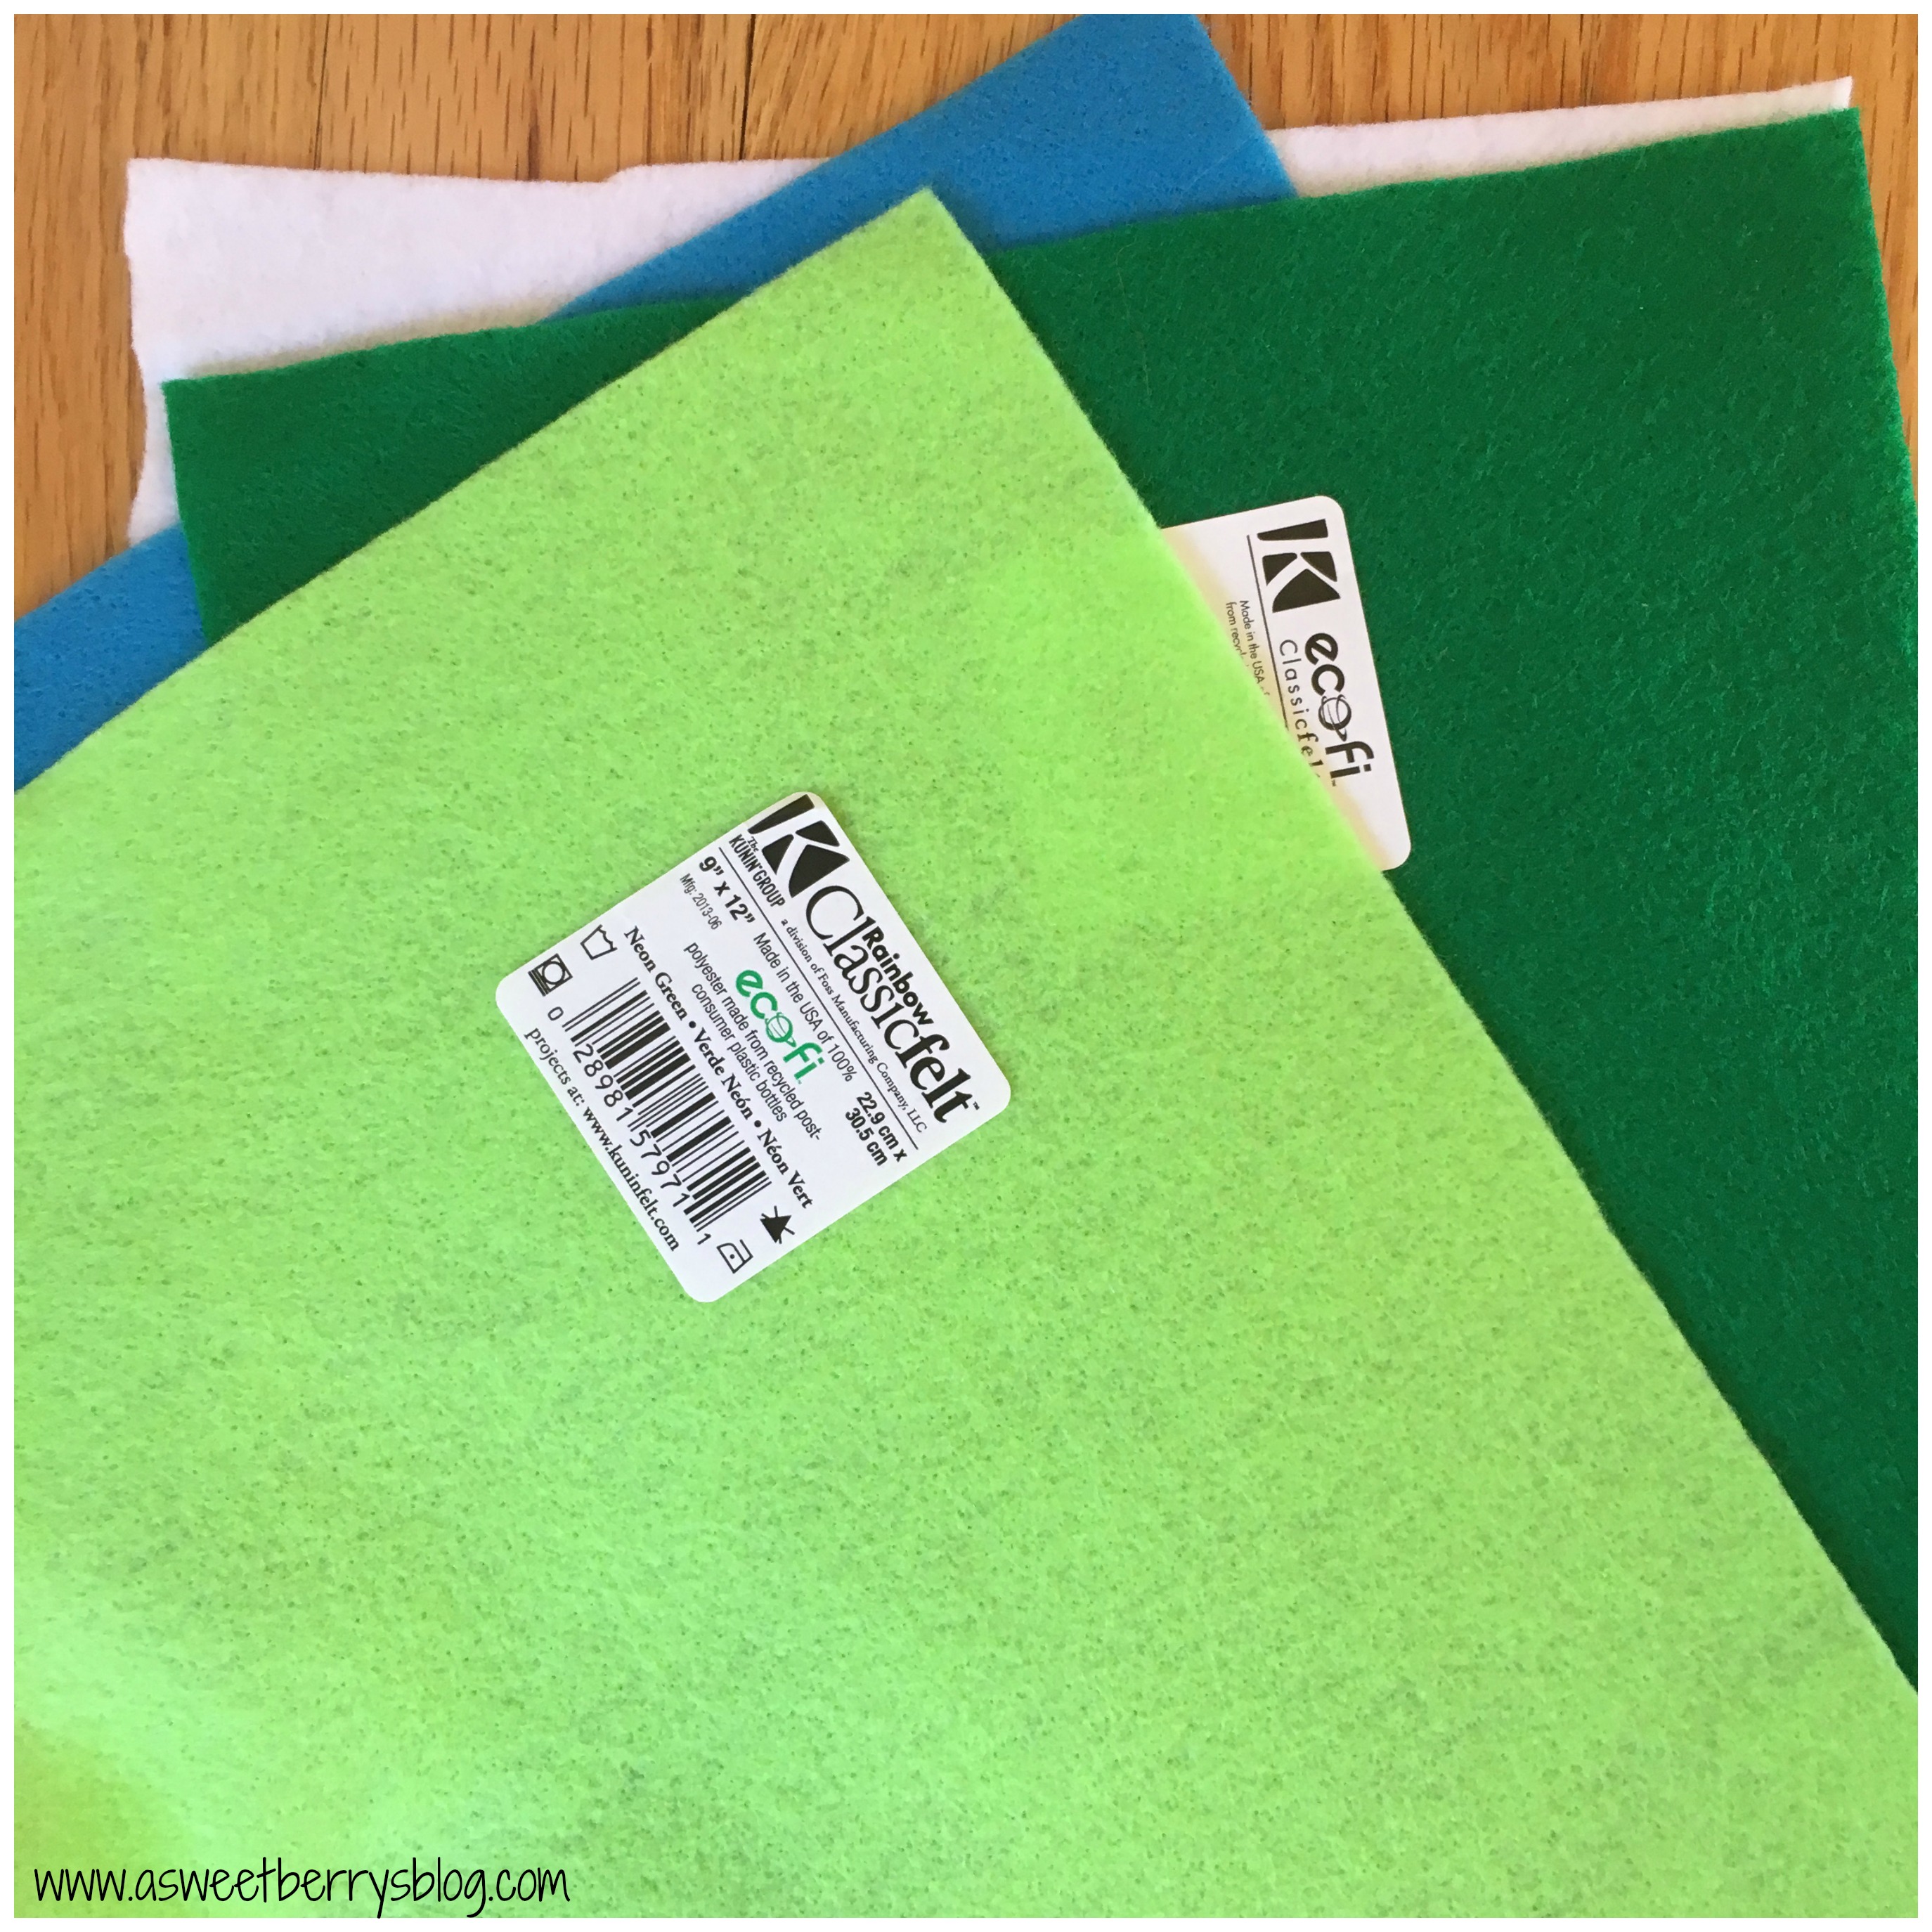
This super easy Bottle Carrier was made using Kunin Felt and Aleene’s Fabric Fusion, as well as a few other products!

felt

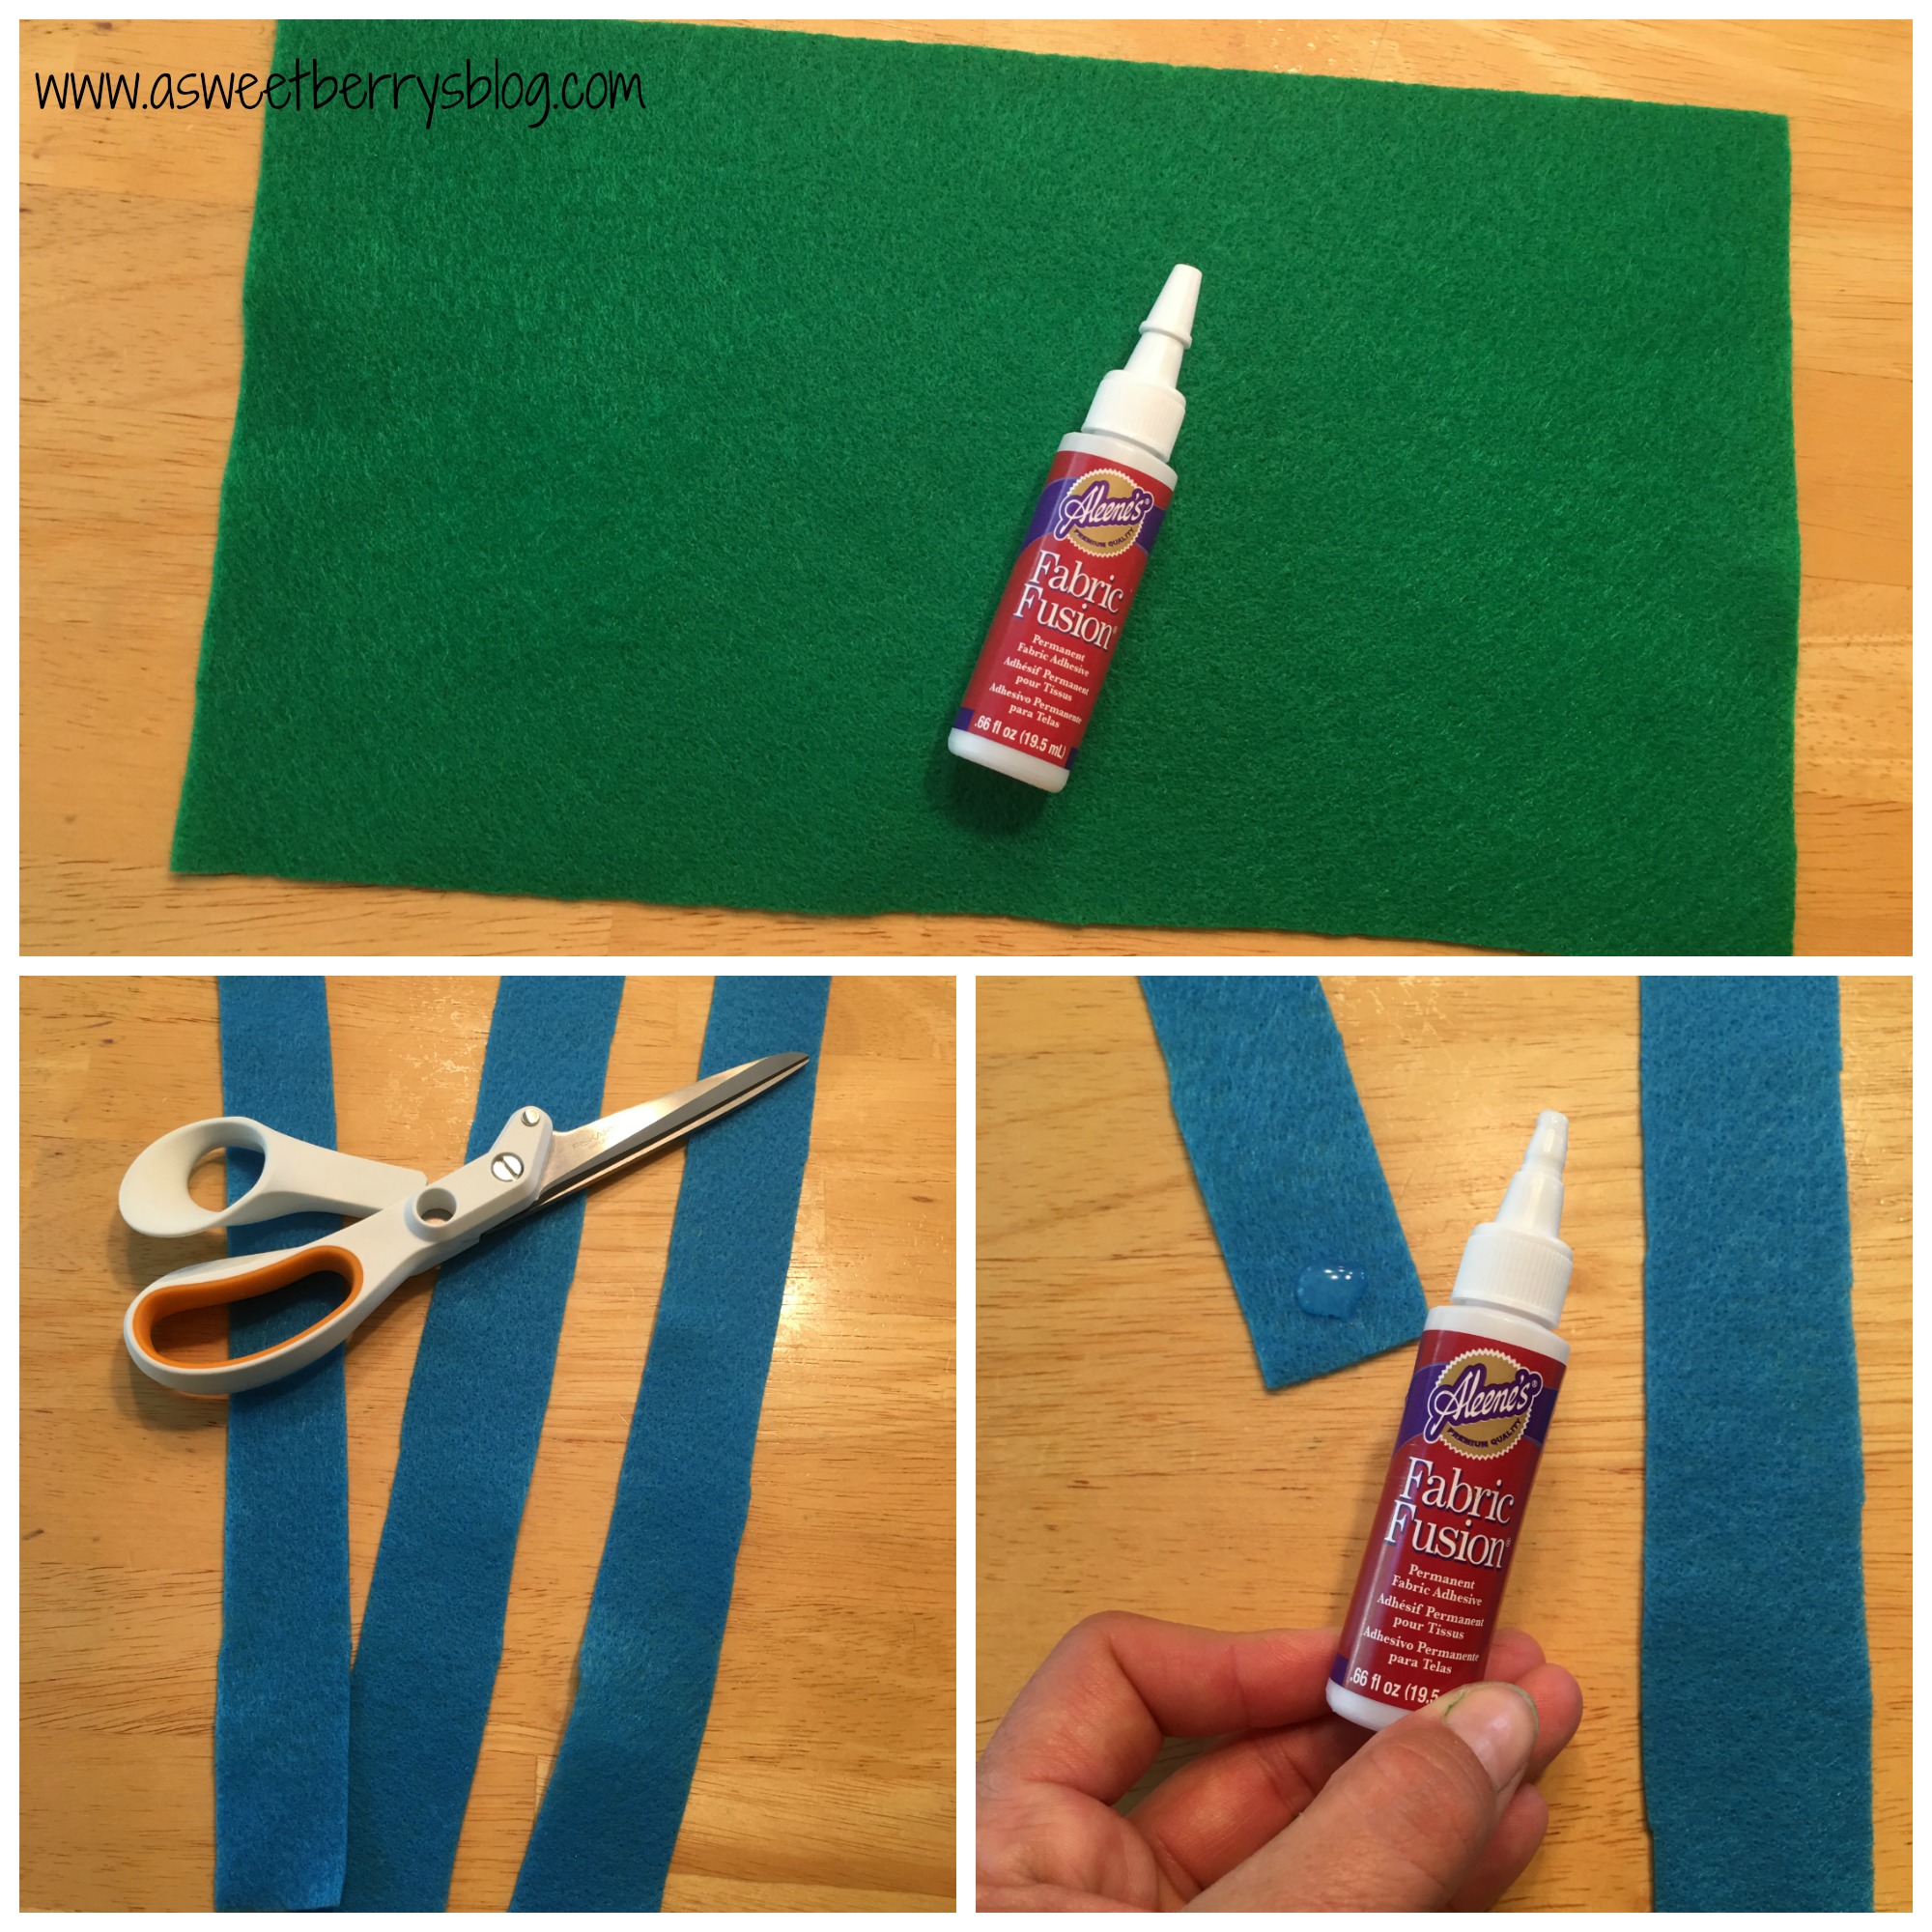
Once I decided which color felt that I wanted for my base, I did a rough cut, making sure that it was tall enough to hold my water bottle.  I glued the ends together so that it created a tube.  Then I chose the color for my strap.  I cut the blue felt into strips and glued them together at the ends creating one long strip.  

cut felt

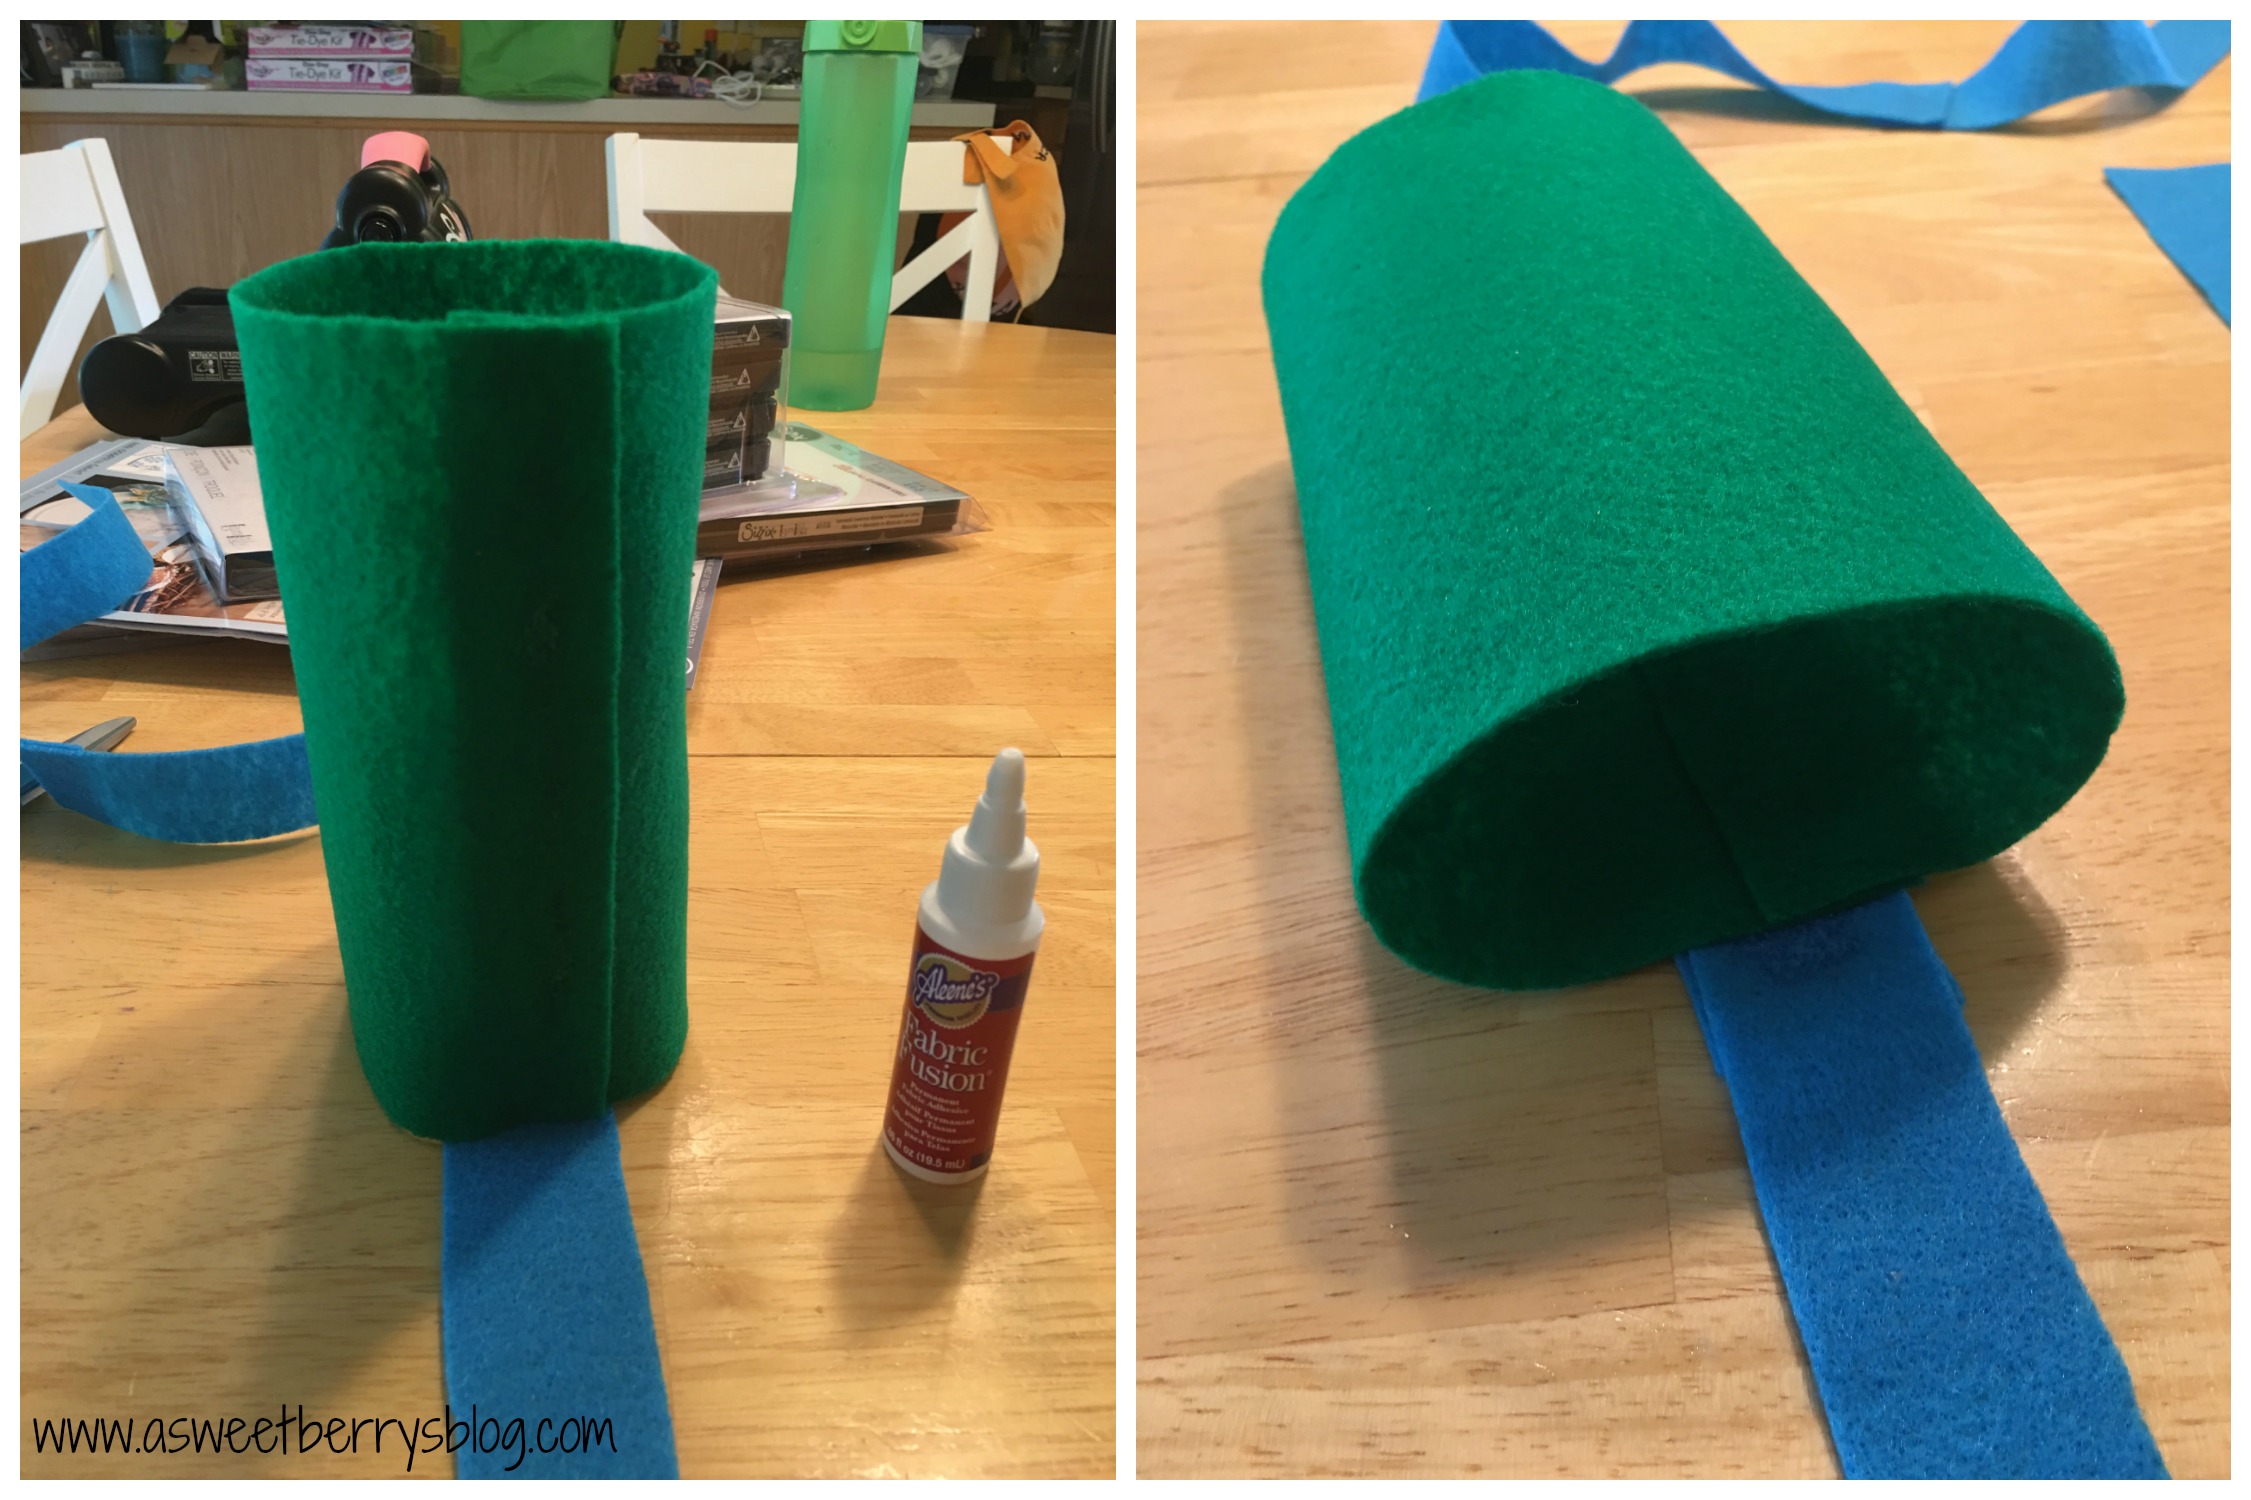
Because my green tube has open ends, I placed the strap along the bottom and pulled the straps up the sides of the tube and glued them using the Fabric Fusion.  That way, my water bottle wouldn’t fall out of the bottom!  Then, I set it out in the sun to dry quicker.  

gluing together

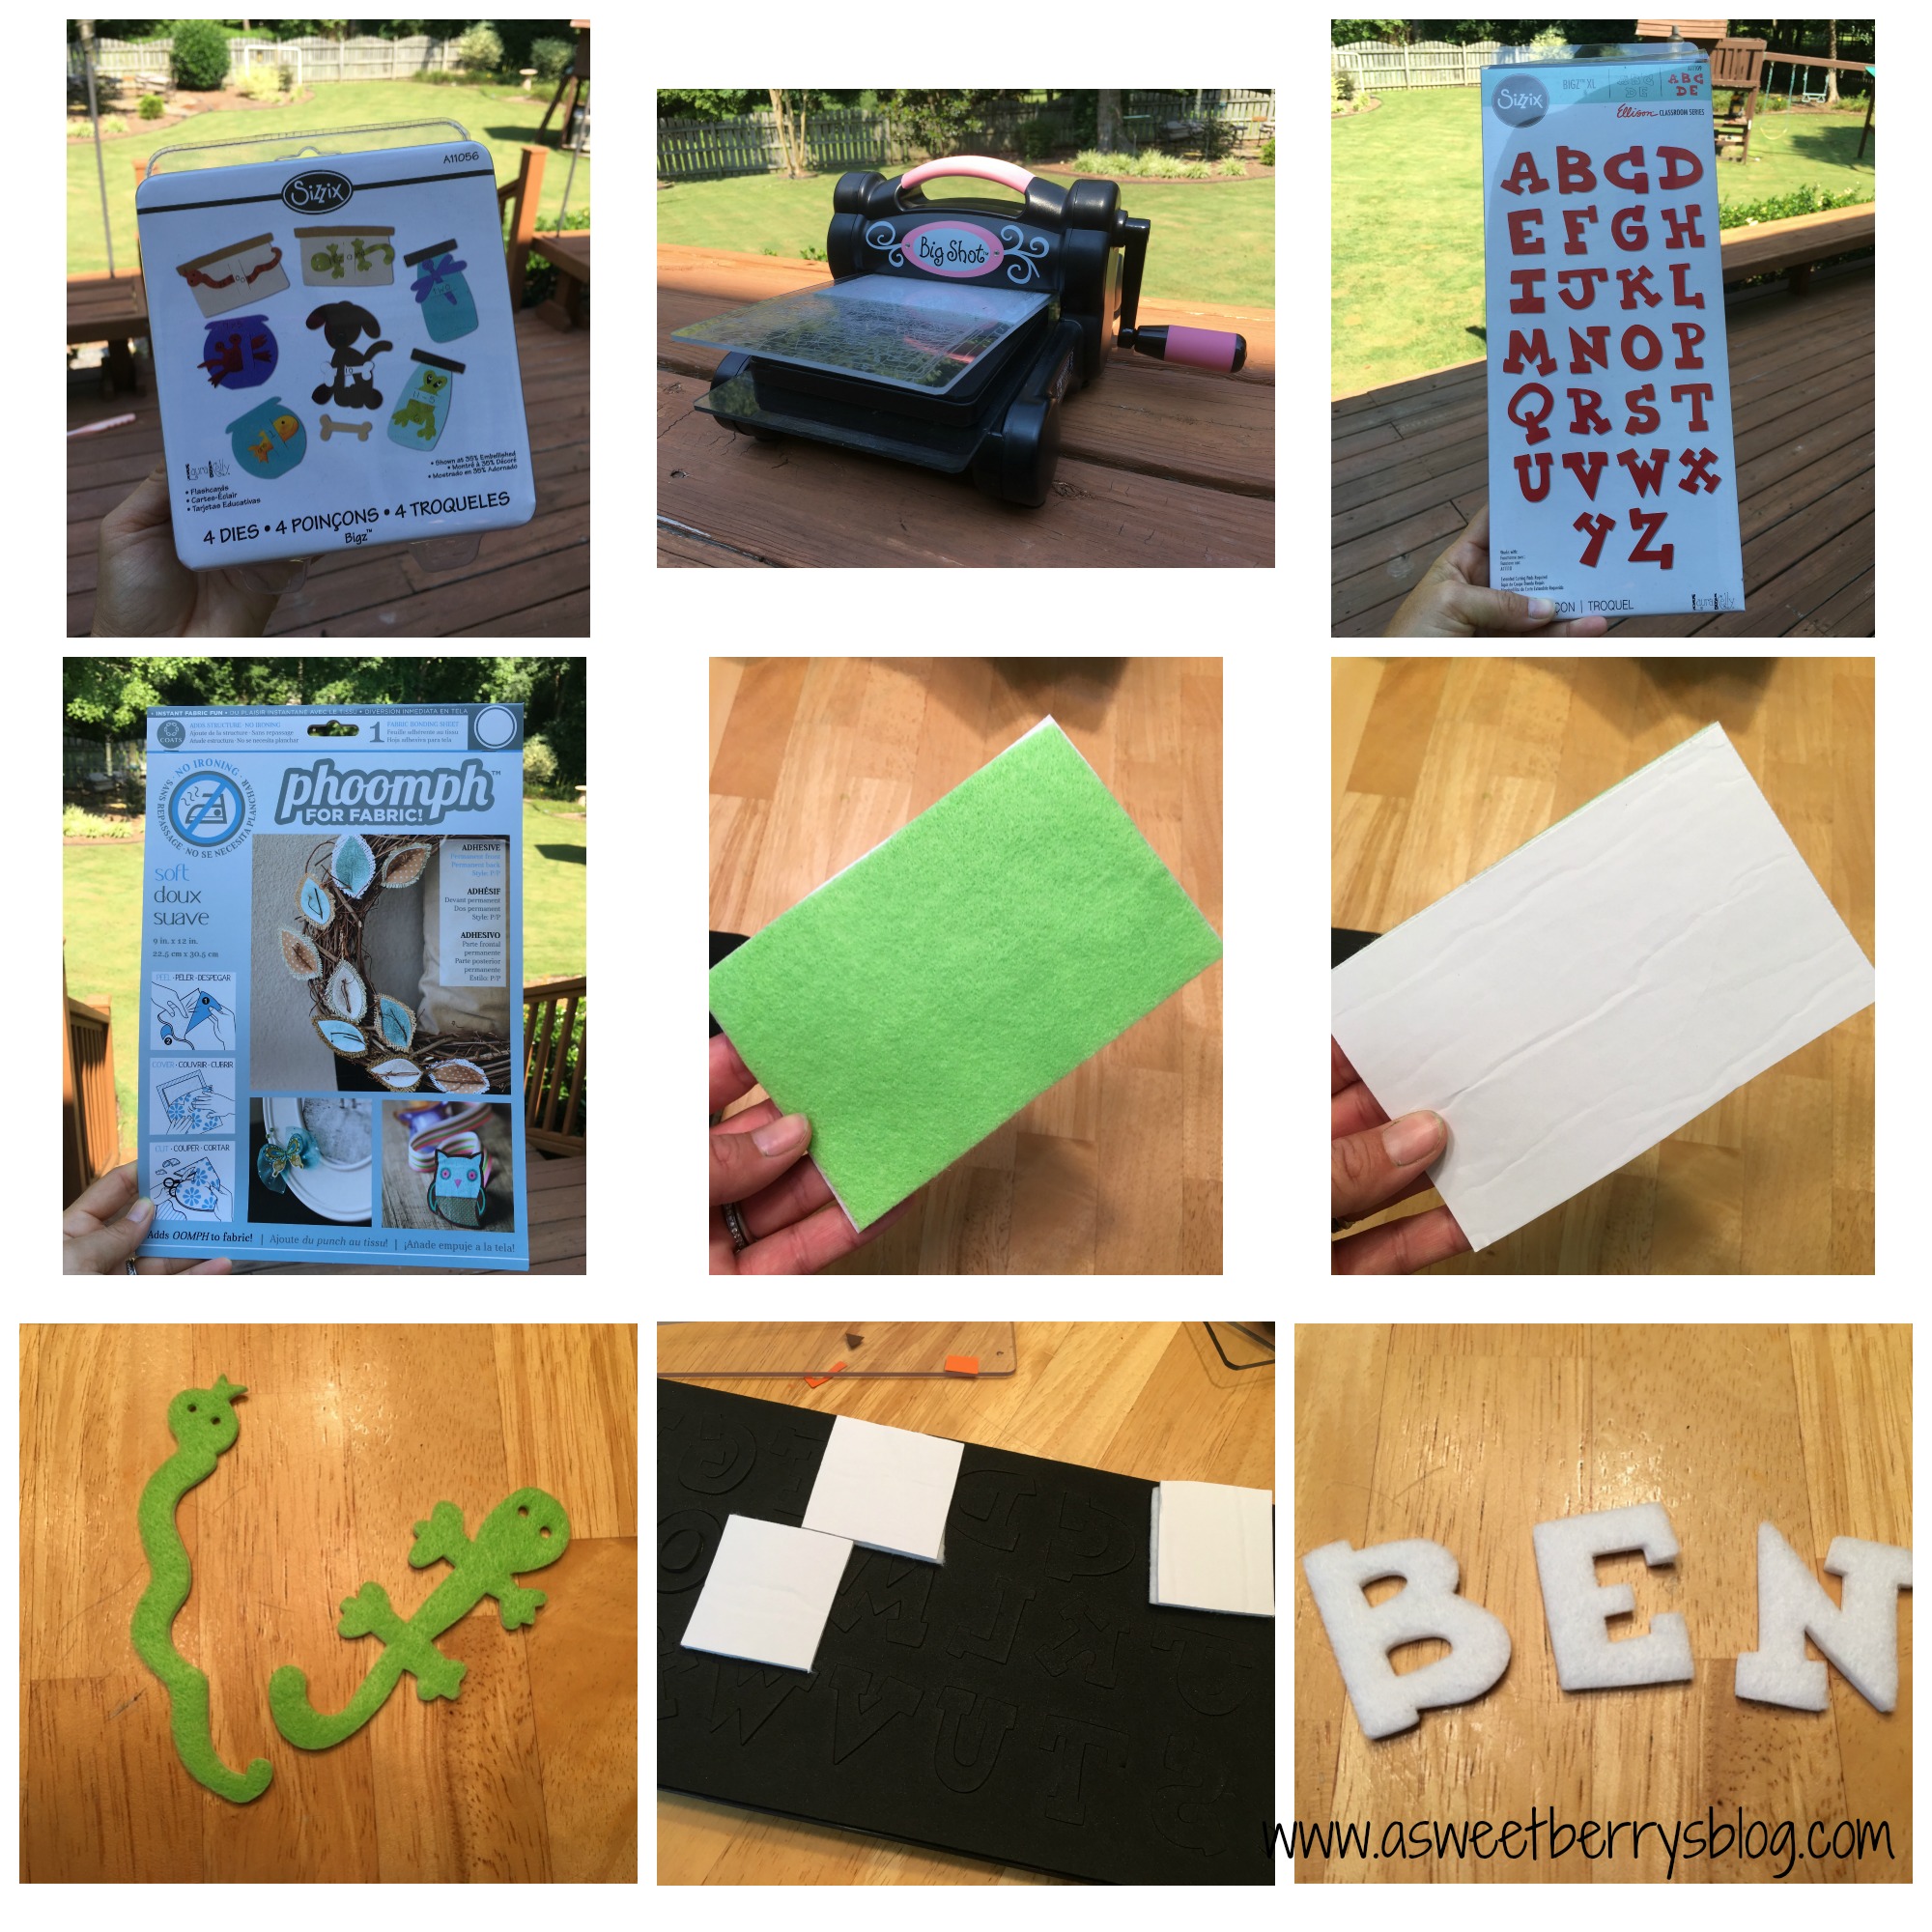
I didn’t want the bottle carrier to be plain, so I used different color felts, Sizzix dies designed by Laura Kelly, Coats Phoomph for Fabric, and my Sizzix Big Shot to cut out a name and some little critters!

LK Sizzix Dies

Once my glue was dry, I attached the name and the critters.  And then it was ready for my bottle!

Adding decorations

This craft could also work for girl scouts and anyone that just wants to create their very own bottle carrier!

This project is a part of the Craft Lightning Scout Crafts co-hosted by The Country Chic Cottage, 30 Minute Crafts and Laura Kelly Designs. Be sure to click the button below to check out other Craft Lightning Scout Projects!

Until next time…….

Katie-Signature-2


Cherry Man Cherry Cream Cheese Rolls with Cherry Cream Cheese Frosting

Final

Disclosure:  This blog post is compensated and I also received product from CherryMan/Seneca Foods for this blog post.  All opinions are my own.  This recipe is also my own recipe.   This post is a part of the Laura Kelly Design Team.   There is also an Expressionery.com affiliate link in this post.

Cherries are very popular in our house with the boys, especially Maraschino Cherries.   And CherryMan has the best!   I am so excited to share this yummy recipe with you.   It is great for a special breakfast or for an afternoon snack!   It could also be for an after dinner dessert!  It’s a super easy recipe, only consisting of a few ingredients and is a great recipe for the children to help with!

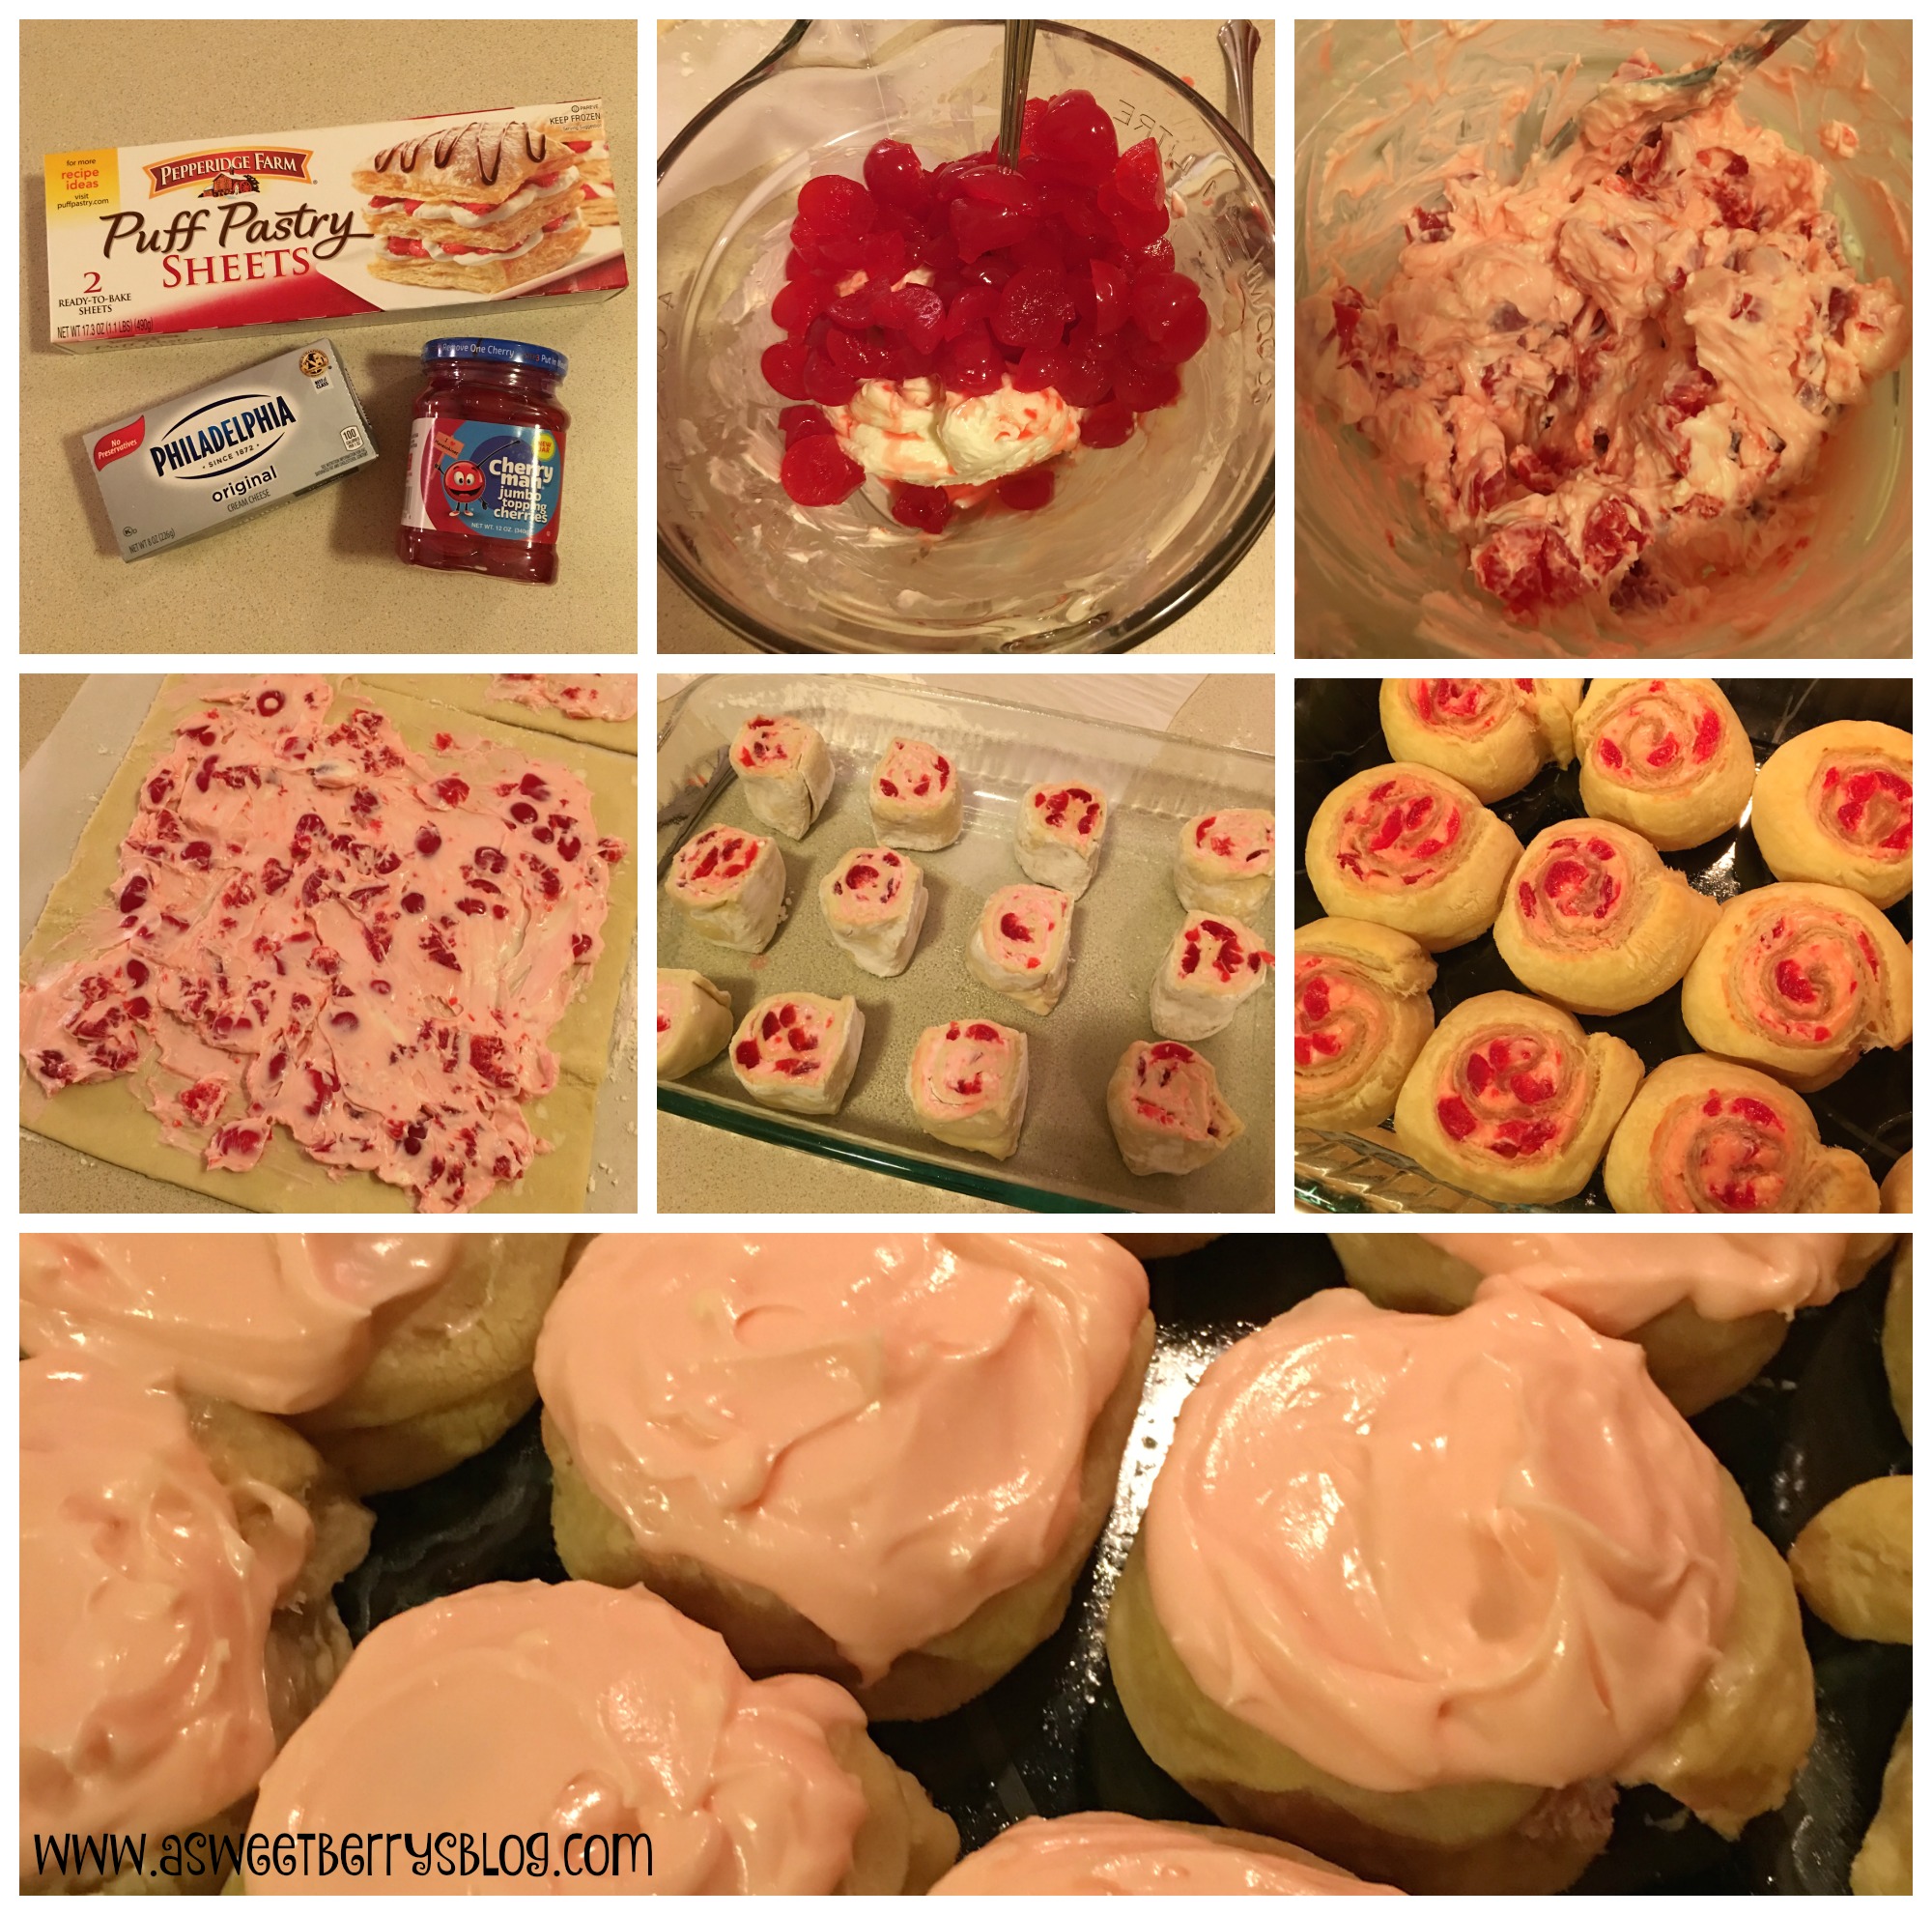
making of

Cherry Man Cherry Cream Cheese Rolls with Cherry Cream Cheese Frosting

Ingredients

  • Pepperidge Farms Puff Pastry Sheets (you will need 2 sheets)
  • 16 oz of Cream Cheese
  • 1 jar of CherryMan Maraschino Cherries with juice
  • 1.5 cups of Powder Sugar
  • 4 tbsp butter

Instructions

  1. Chop the cherries into quarters. You can save a few to add to the top on your frosted rolls. Make sure to save the jar of juice.
  2. Mix the cherries in with 8 oz of cream cheese.
  3. Roll the pastry sheets out onto a piece of parchment paper that has been lightly sprinkled with flour.
  4. Spread the Cherry Cream Cheese Mix out onto the pastry sheets.
  5. Roll the pastry sheets up and slice into rolls. I cut mine at about 1.5 inches, getting 6 out of each roll.
  6. Place in a lightly greased baking dish or pan.
  7. Bake at 400 degrees for 30 minutes.
  8. Let cool.
  9. In a mixing bowl, mix together 8 oz of cream cheese with butter until smooth.
  10. Add in the 1.5 cups of Powder Sugar.
  11. Add in 7-8 tsp of the cherry juice. You can add more or less, to your liking.
  12. Spread on cooled rolls.
  13. If you saved cherries for the top, add one to each roll.
Schema/Recipe SEO Data Markup by Yummly Rich Recipes
http://www.asweetberrysblog.com/2016/06/15/cherry-man-cherry-cream-cheese-rolls-with-cherry-cream-cheese-frosting/

You could also give these sweet treats out to friends or family.  Using my Sizzix Eclips2, I cut out a cute little square box with a lid that I purchased from the SizzixShapeStore.  Using a Tombow tape runner, I put it together with the instructions provided with the cutting file.  I cut out cherries, leaves and stems and added them to the sides of my box!  Once the box was complete, I used my Expressionery.com self-inking stamp designed by Laura Kelly to make a label for the top of my box.  You can get your own self-inking stamp here!!! box

I hope you decide to try this delish dessert!  It was adult and kid test and approved!  

Katie-Signature-2

As this post was a part of the Laura Kelly Design Team monthly post, there are many other CherryMan Cherry Recipes by some really great bloggers!  Be sure to check out those below.  Also, be sure to enter to win a CherryMan Prize Pack and $100 Gift Card!!!
a Rafflecopter giveaway


Until next time….


Shrink Film Father’s Day Key Chain

KeyChain
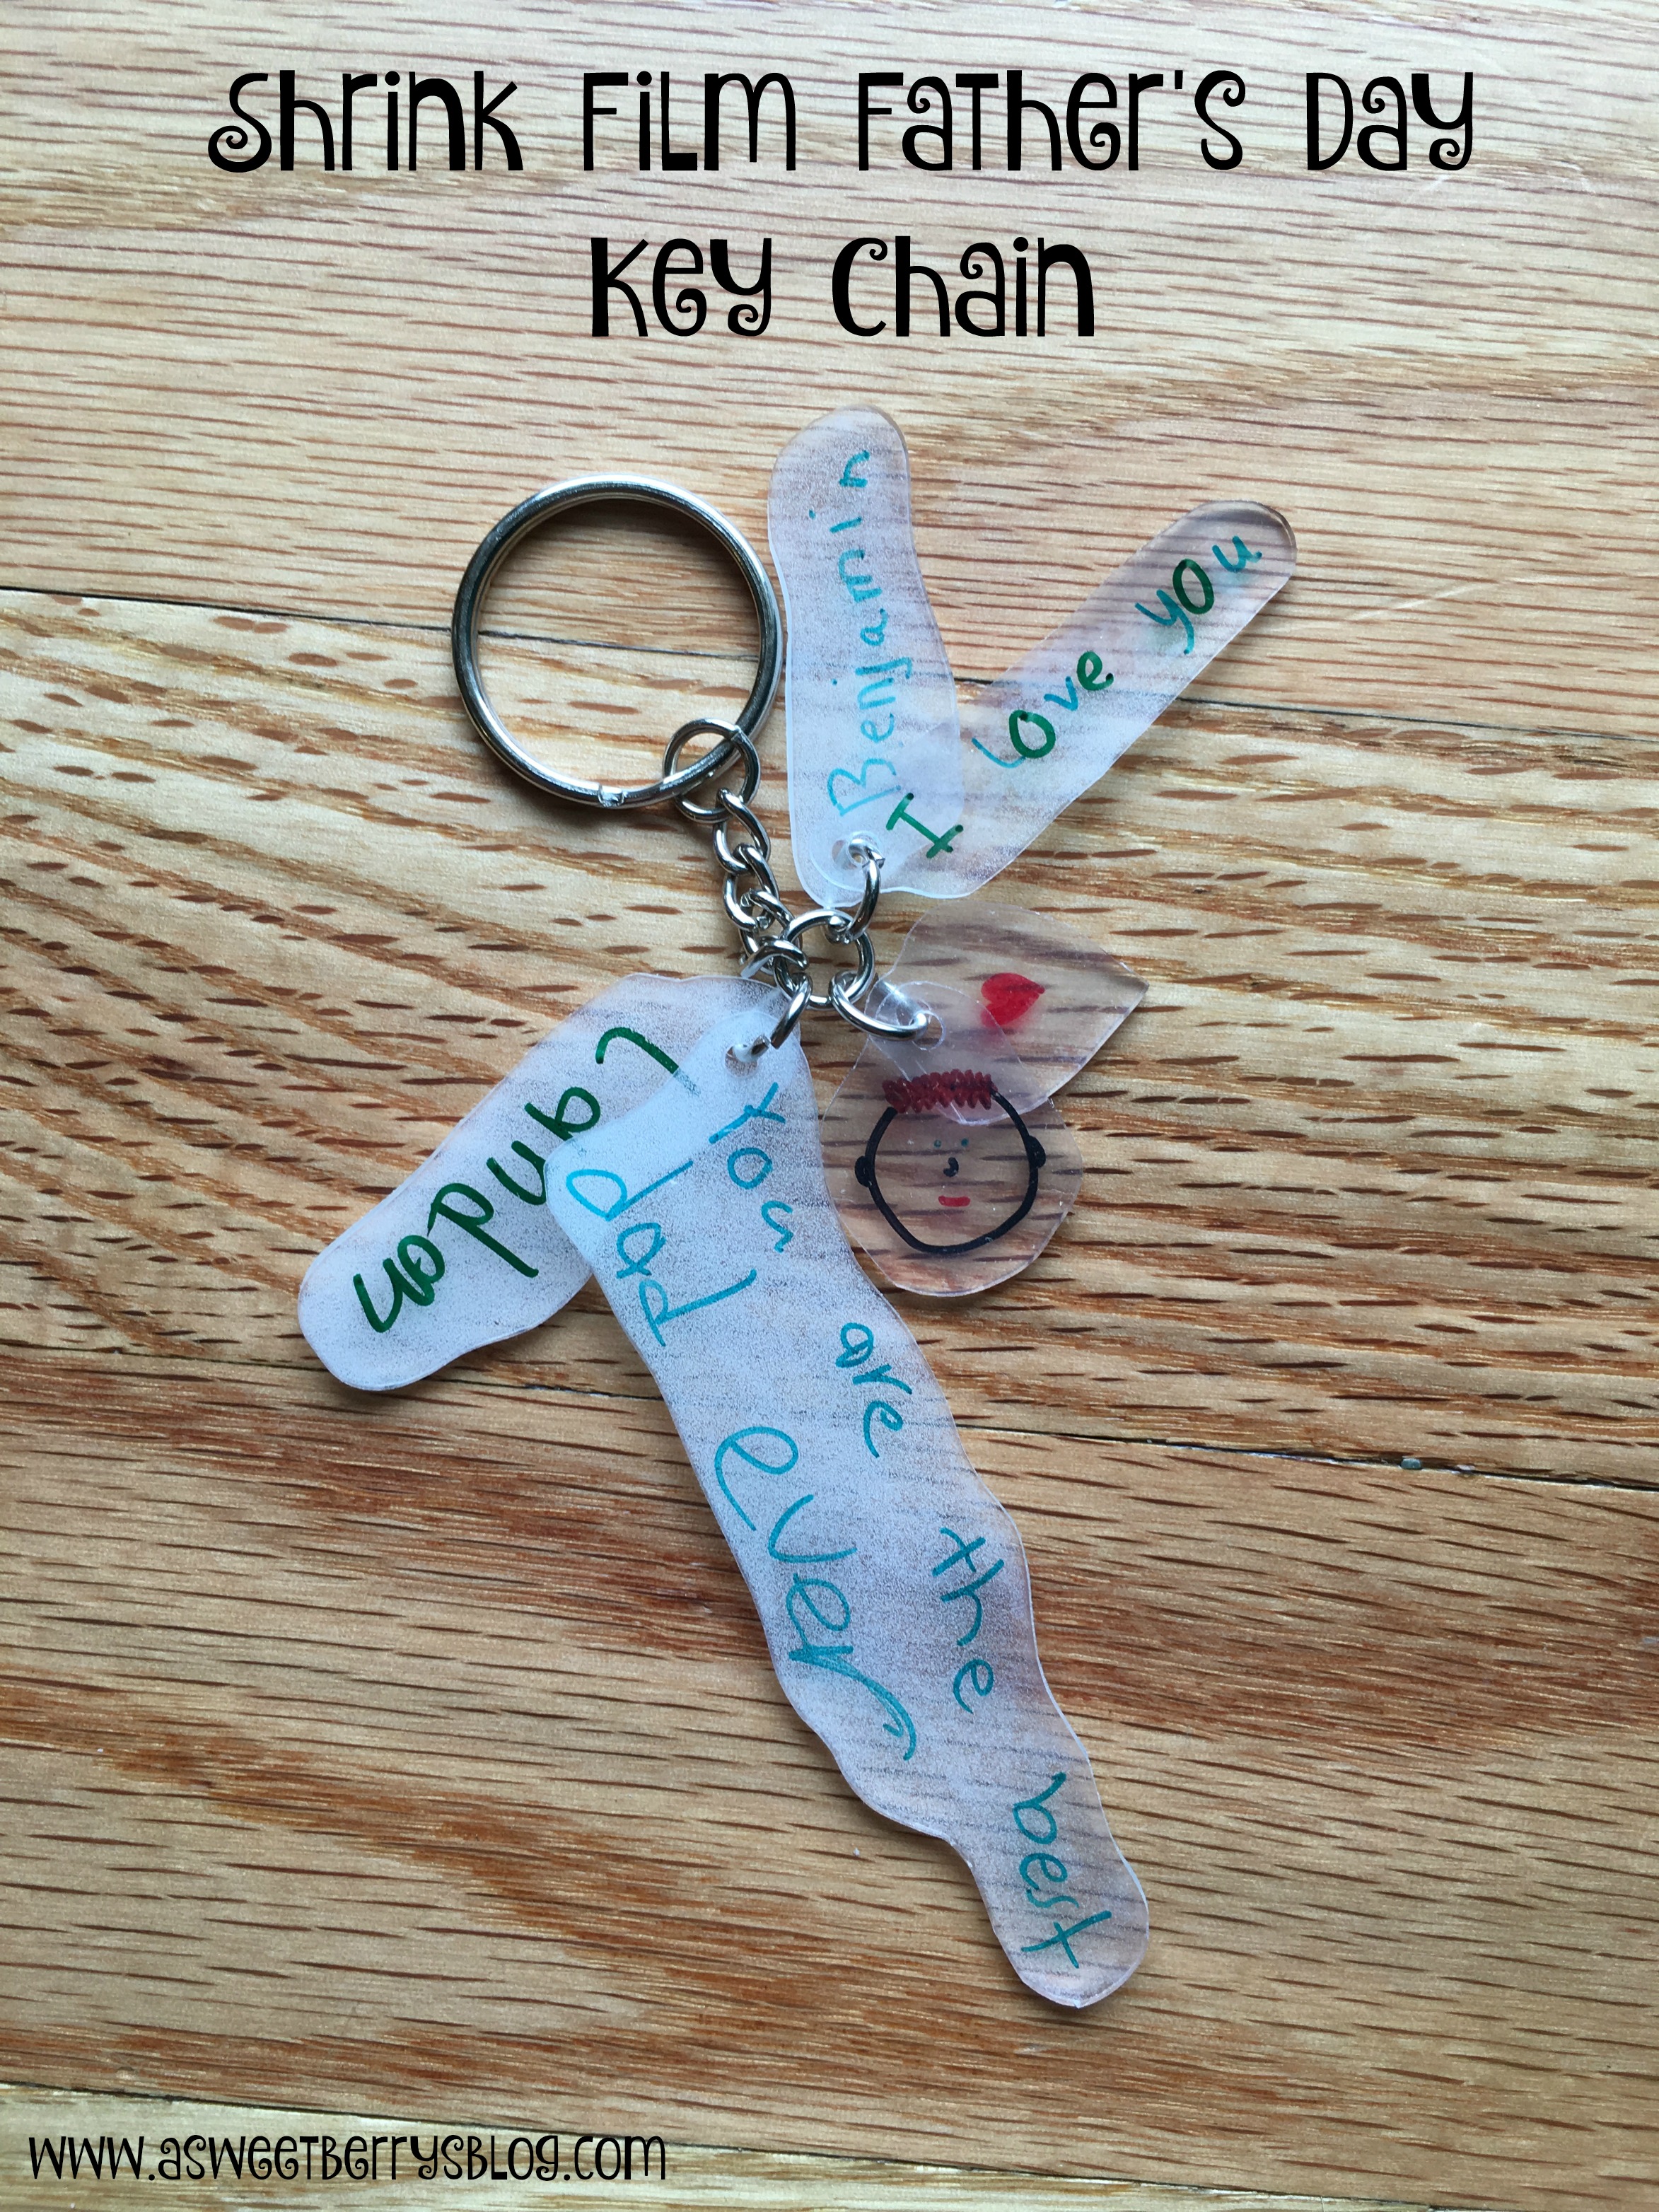
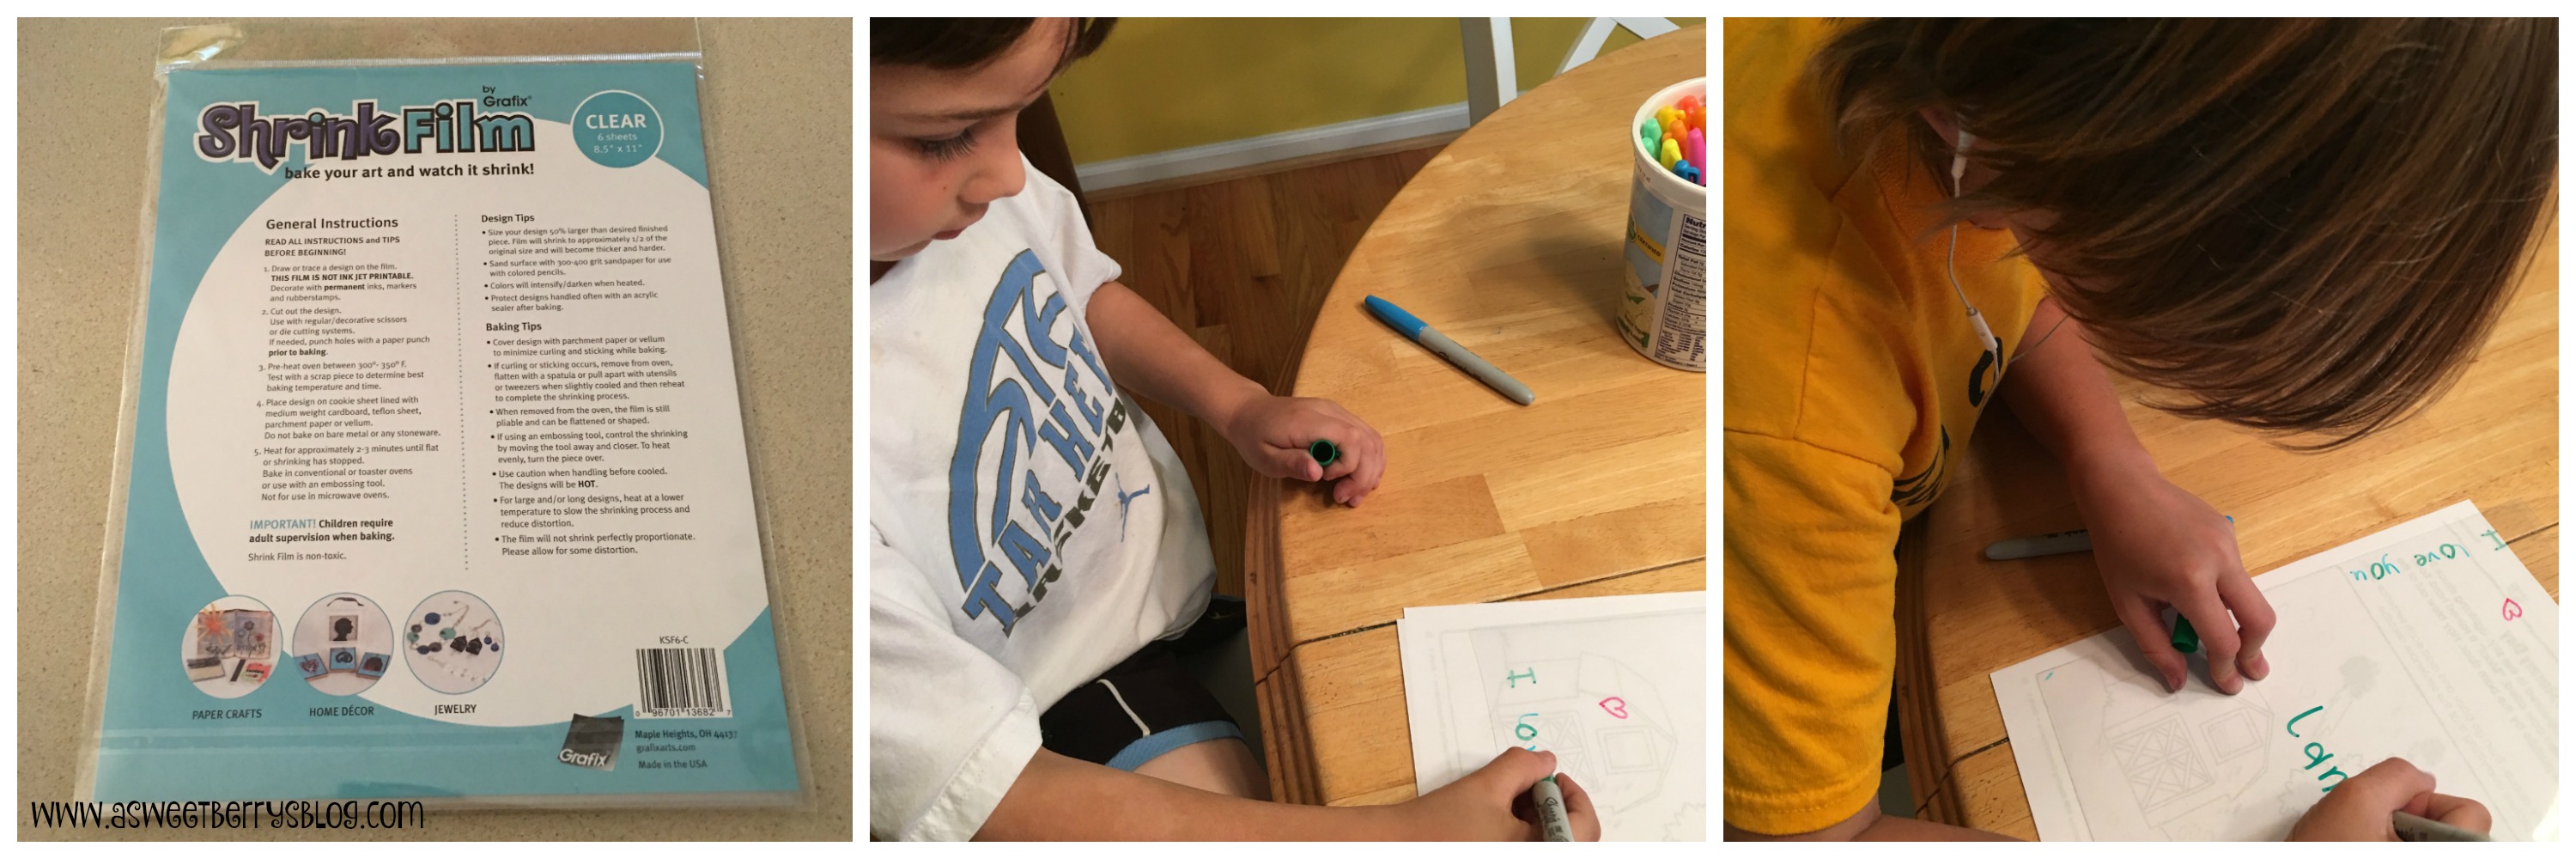
Now that Mother’s Day is behind us, Father’s Day is right around the corner!   Check out this easy and adorable key chain for dad to carry with him every day!   Using Shrink Film that I purchased at ACMoore, I let my boys write their names and a little saying and draw little pictures just for dad!
Shrink Film
Once they were finished, I cut them out, leaving just a little extra film in one spot so that I could punch a hole to attach it to the key chain.   I just used a regular hole punch to punch the hole.
cutting
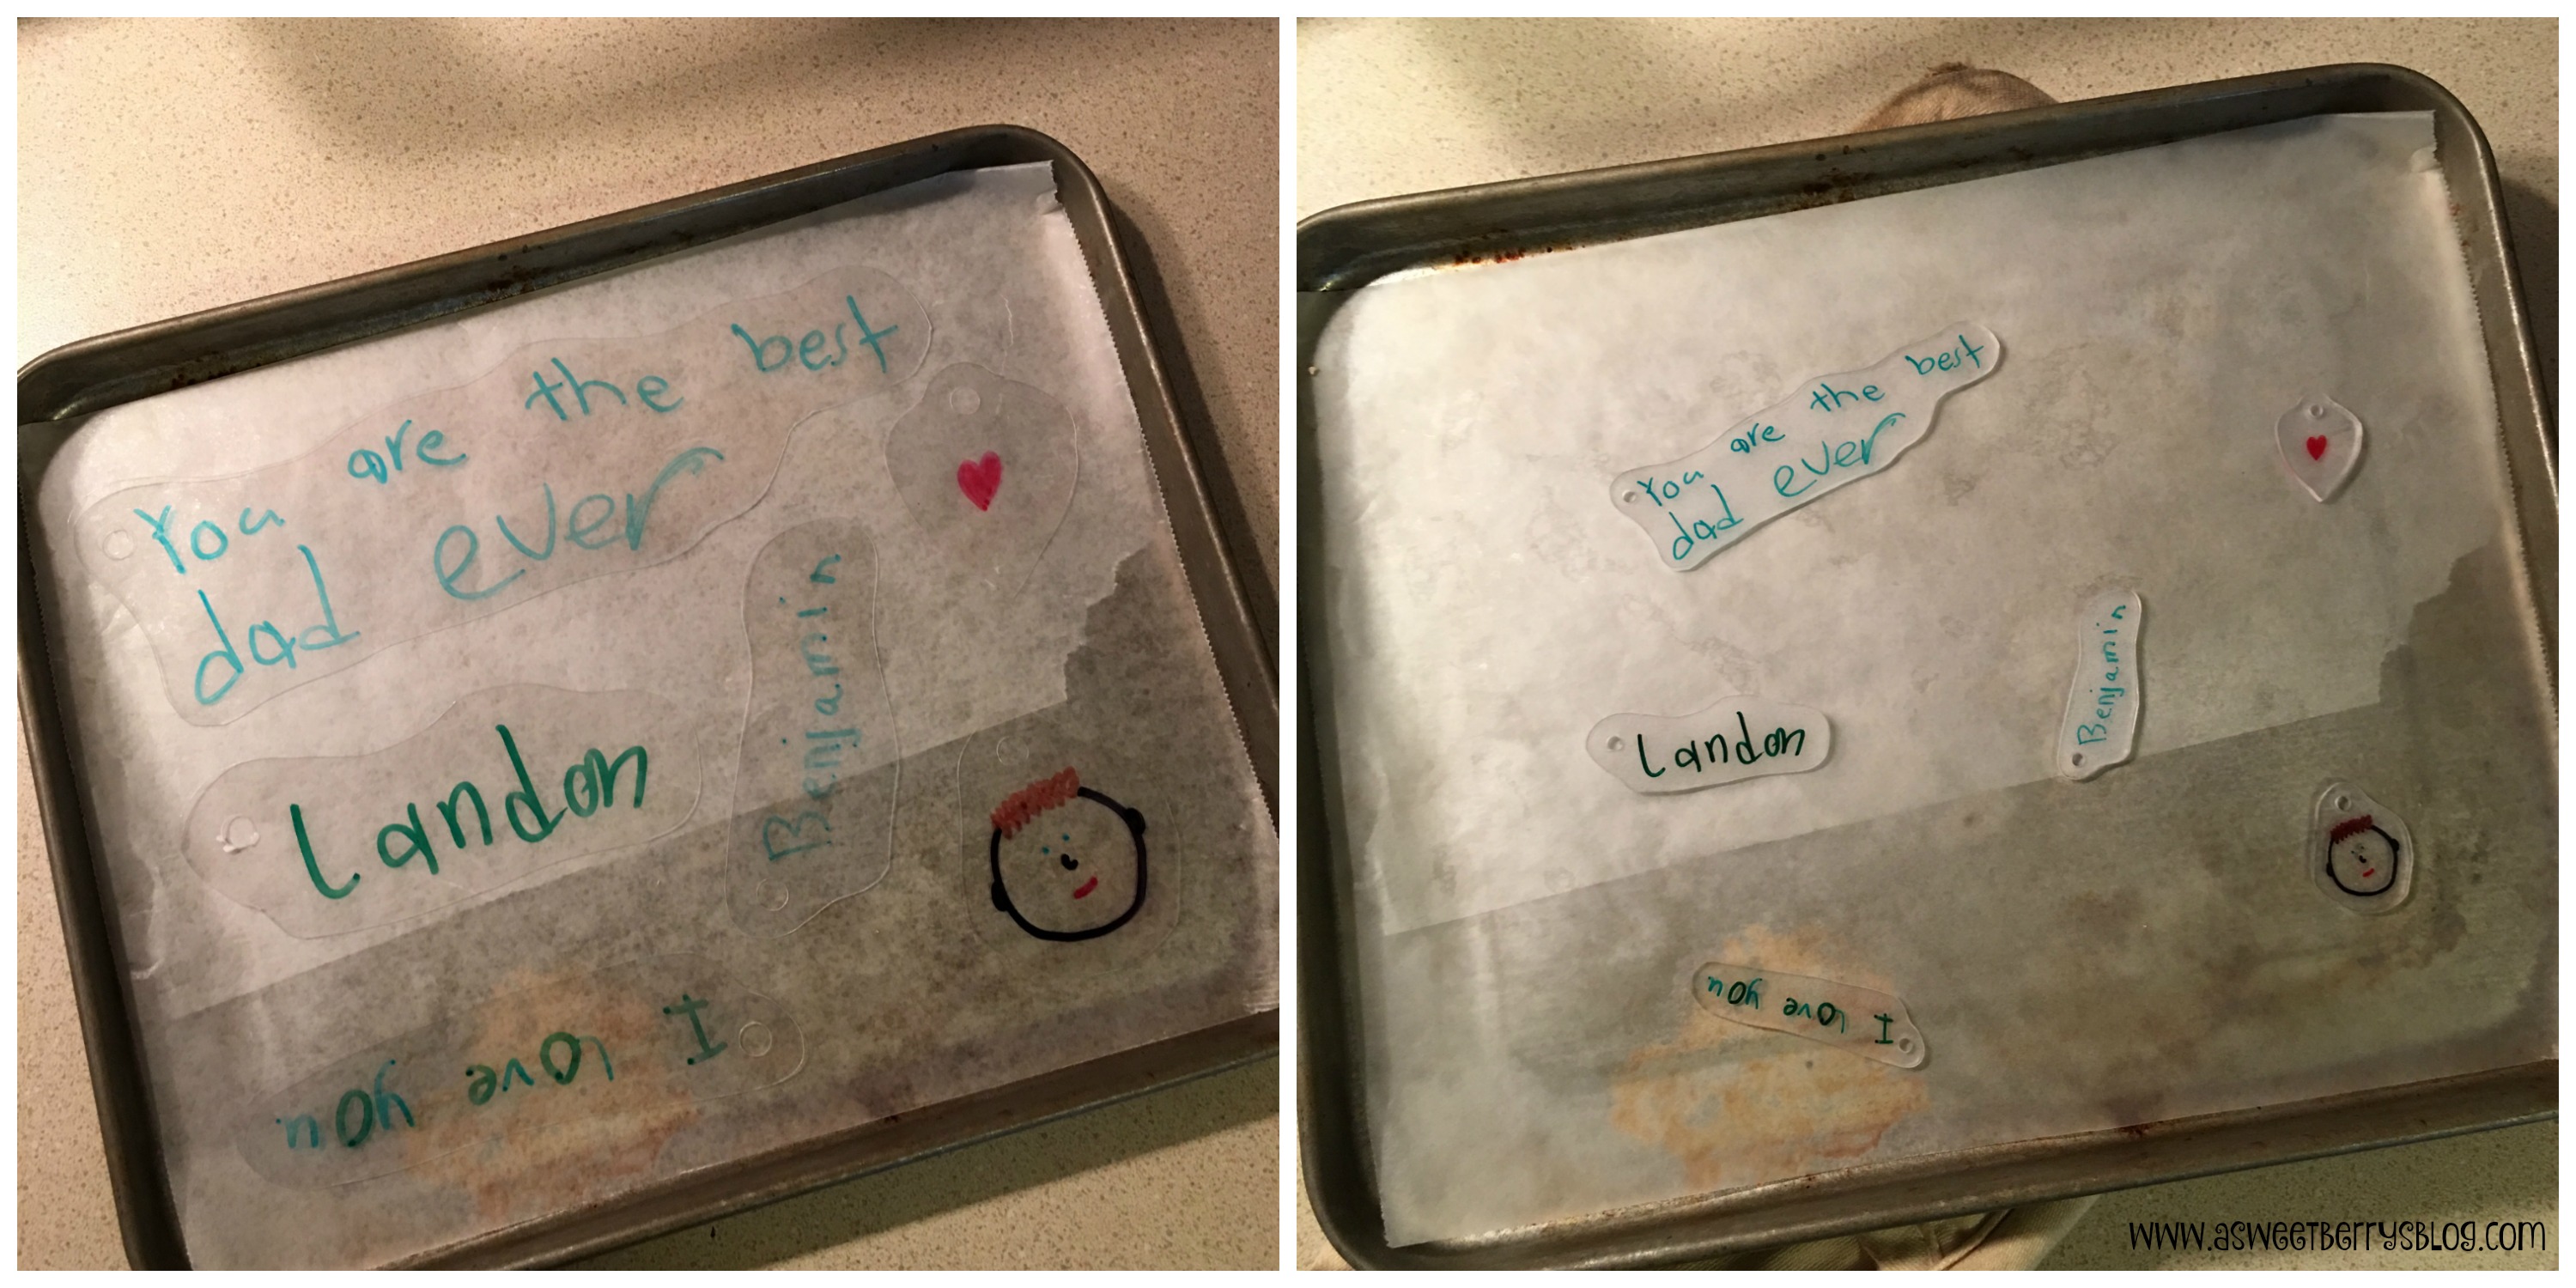
You definitely want to make sure that you punch your holes before you put it in the oven for shrinking!   Take a look at the before and after photos.  It just amazes me how much they shrink! baking
Once they were cooled, I used jump rings, round nose pliers and a key chain to put my Father’s Day key chain together!
putting it together
I love how this key chain turned out and can’t wait to give it to my amazing husband!
KeyChain
Hope you like this Shrink Film Father’s Day Key Chain!  

Be sure to check out other 15 minute Craft Lightning Father’s Day Crafts by clicking the photo below!!!

Until next time……

Sculpey Alien Magnets

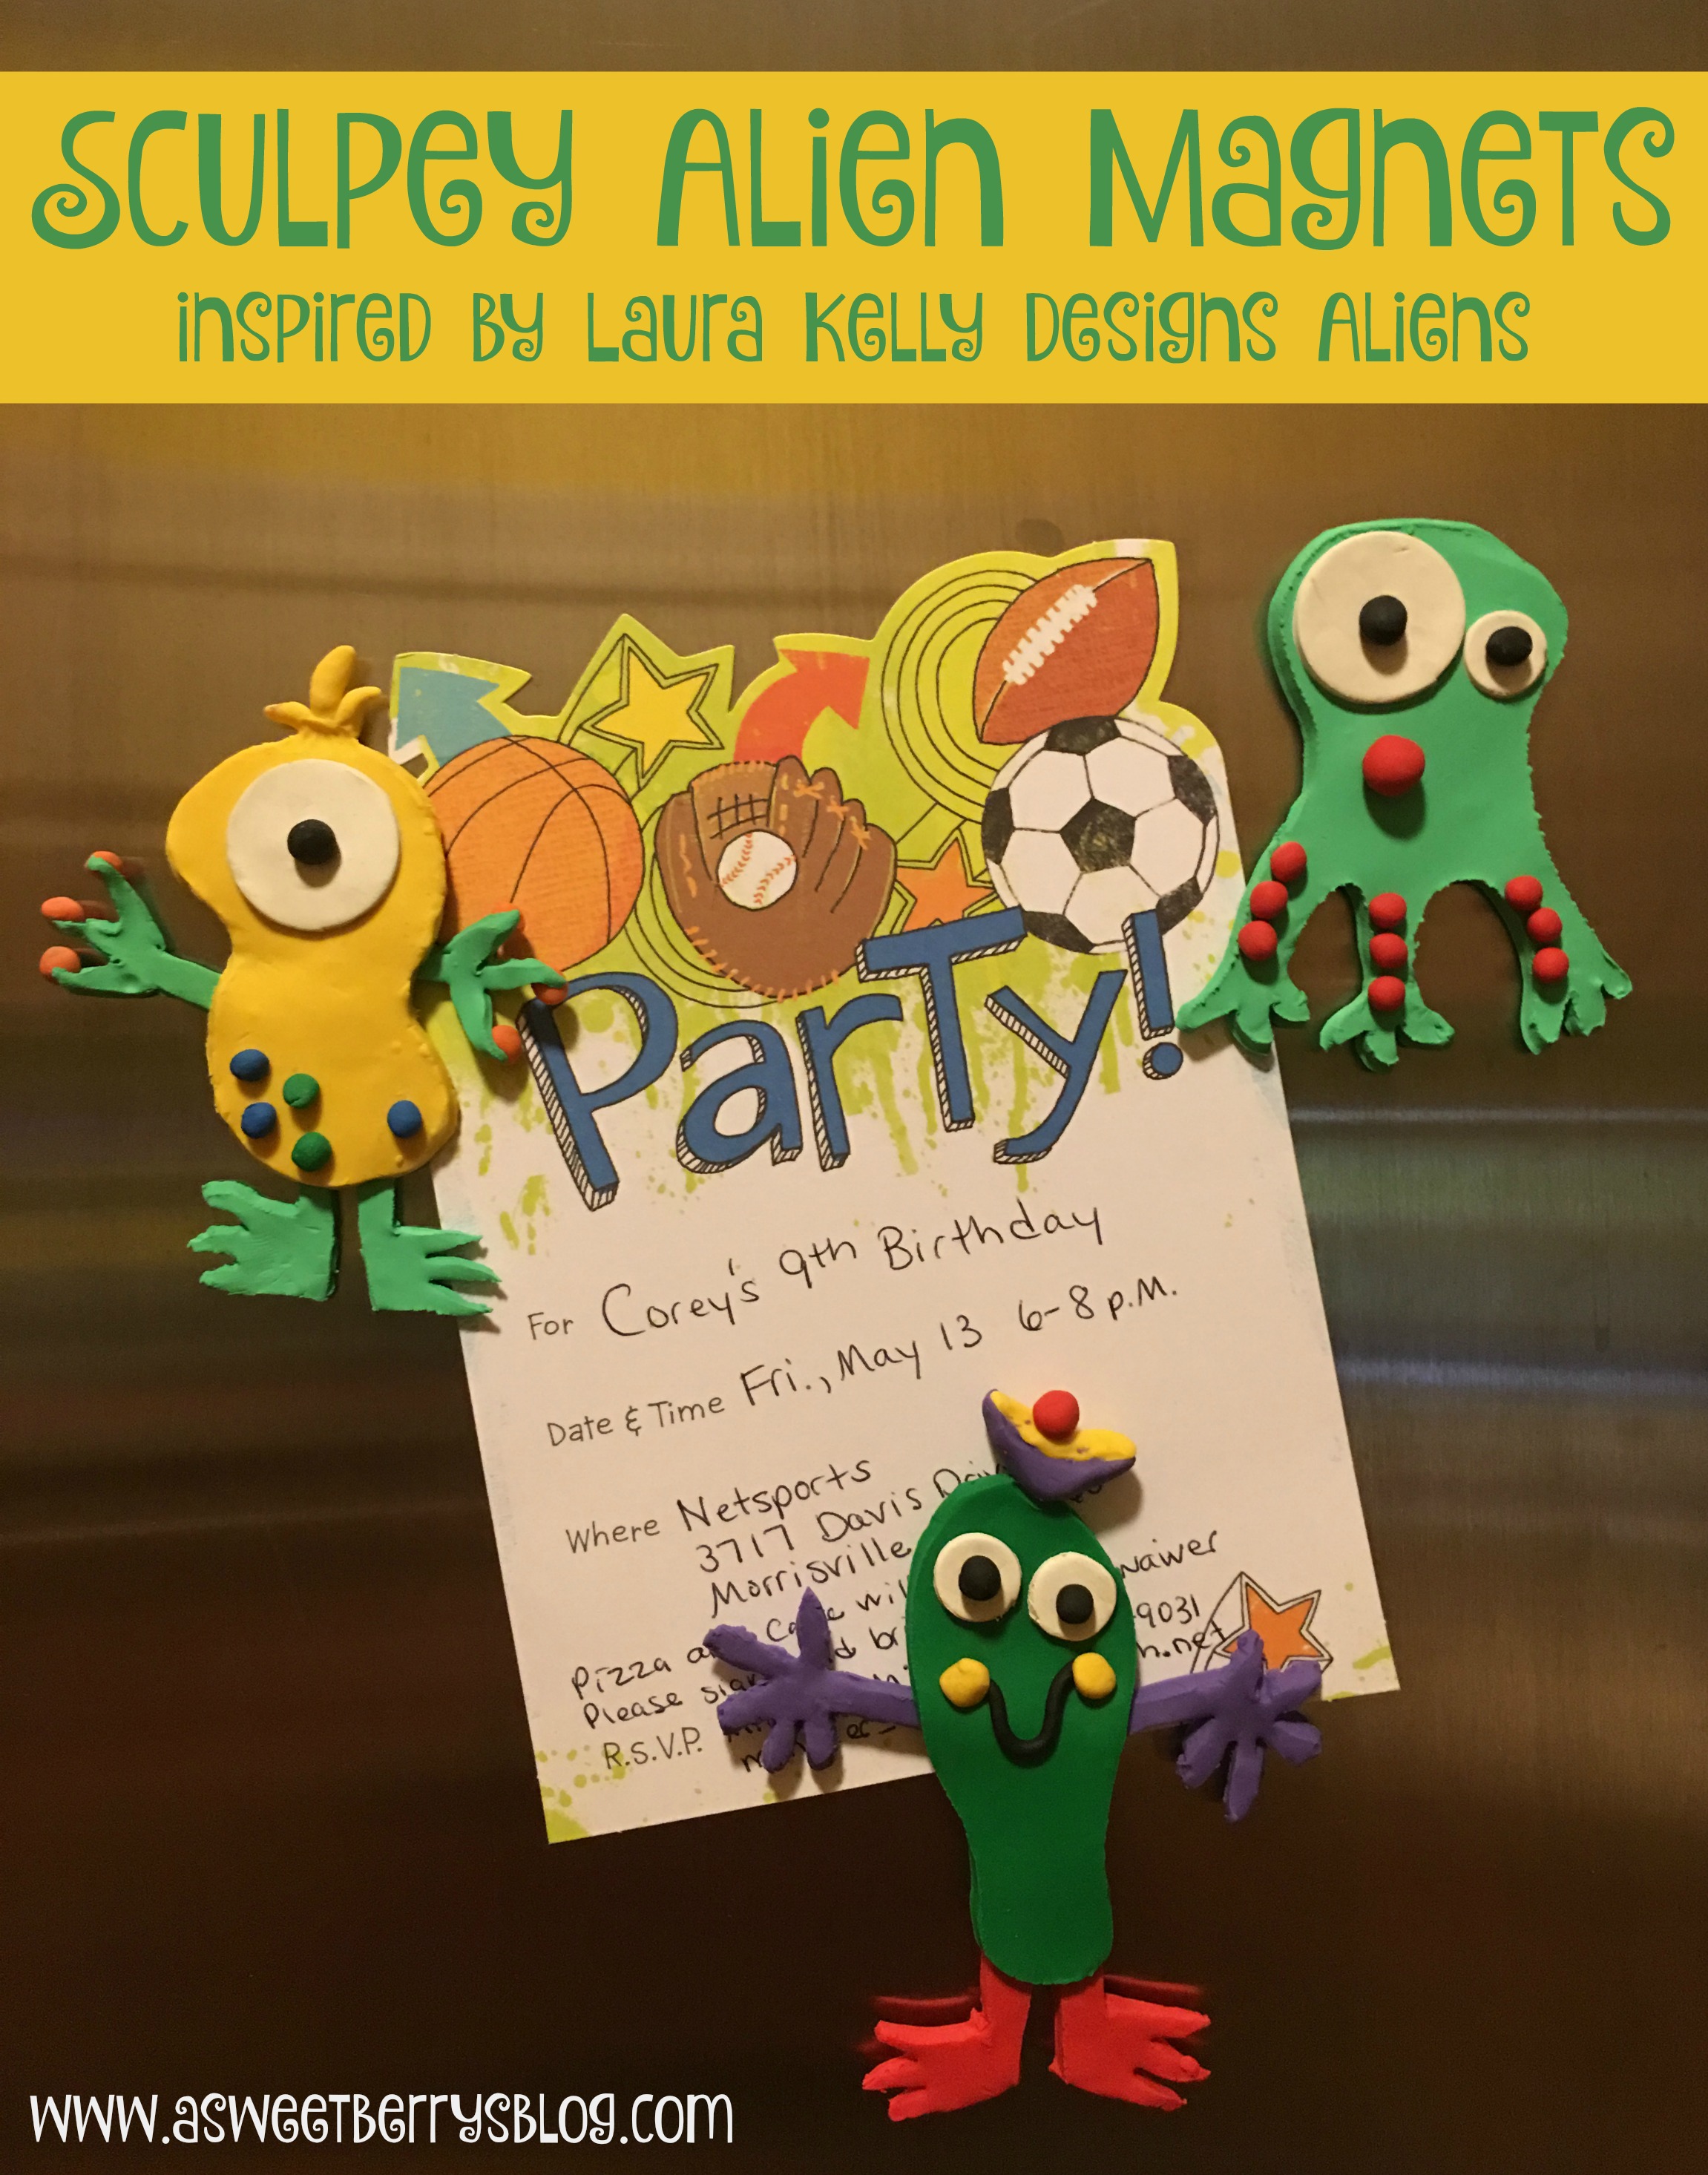
aliens
Everyone loves a good magnet, especially to hang up the kid’s art work!  I created these awesome Sculpey Alien Magnets inspired by Laura Kelly’s Alien and Cosmic Cafe Printables.  

Materials needed:
Sculpey (I prefer Bake Shop)
Clay tools
Laura Kelly’s Alien and Cosmic Cafe Printables
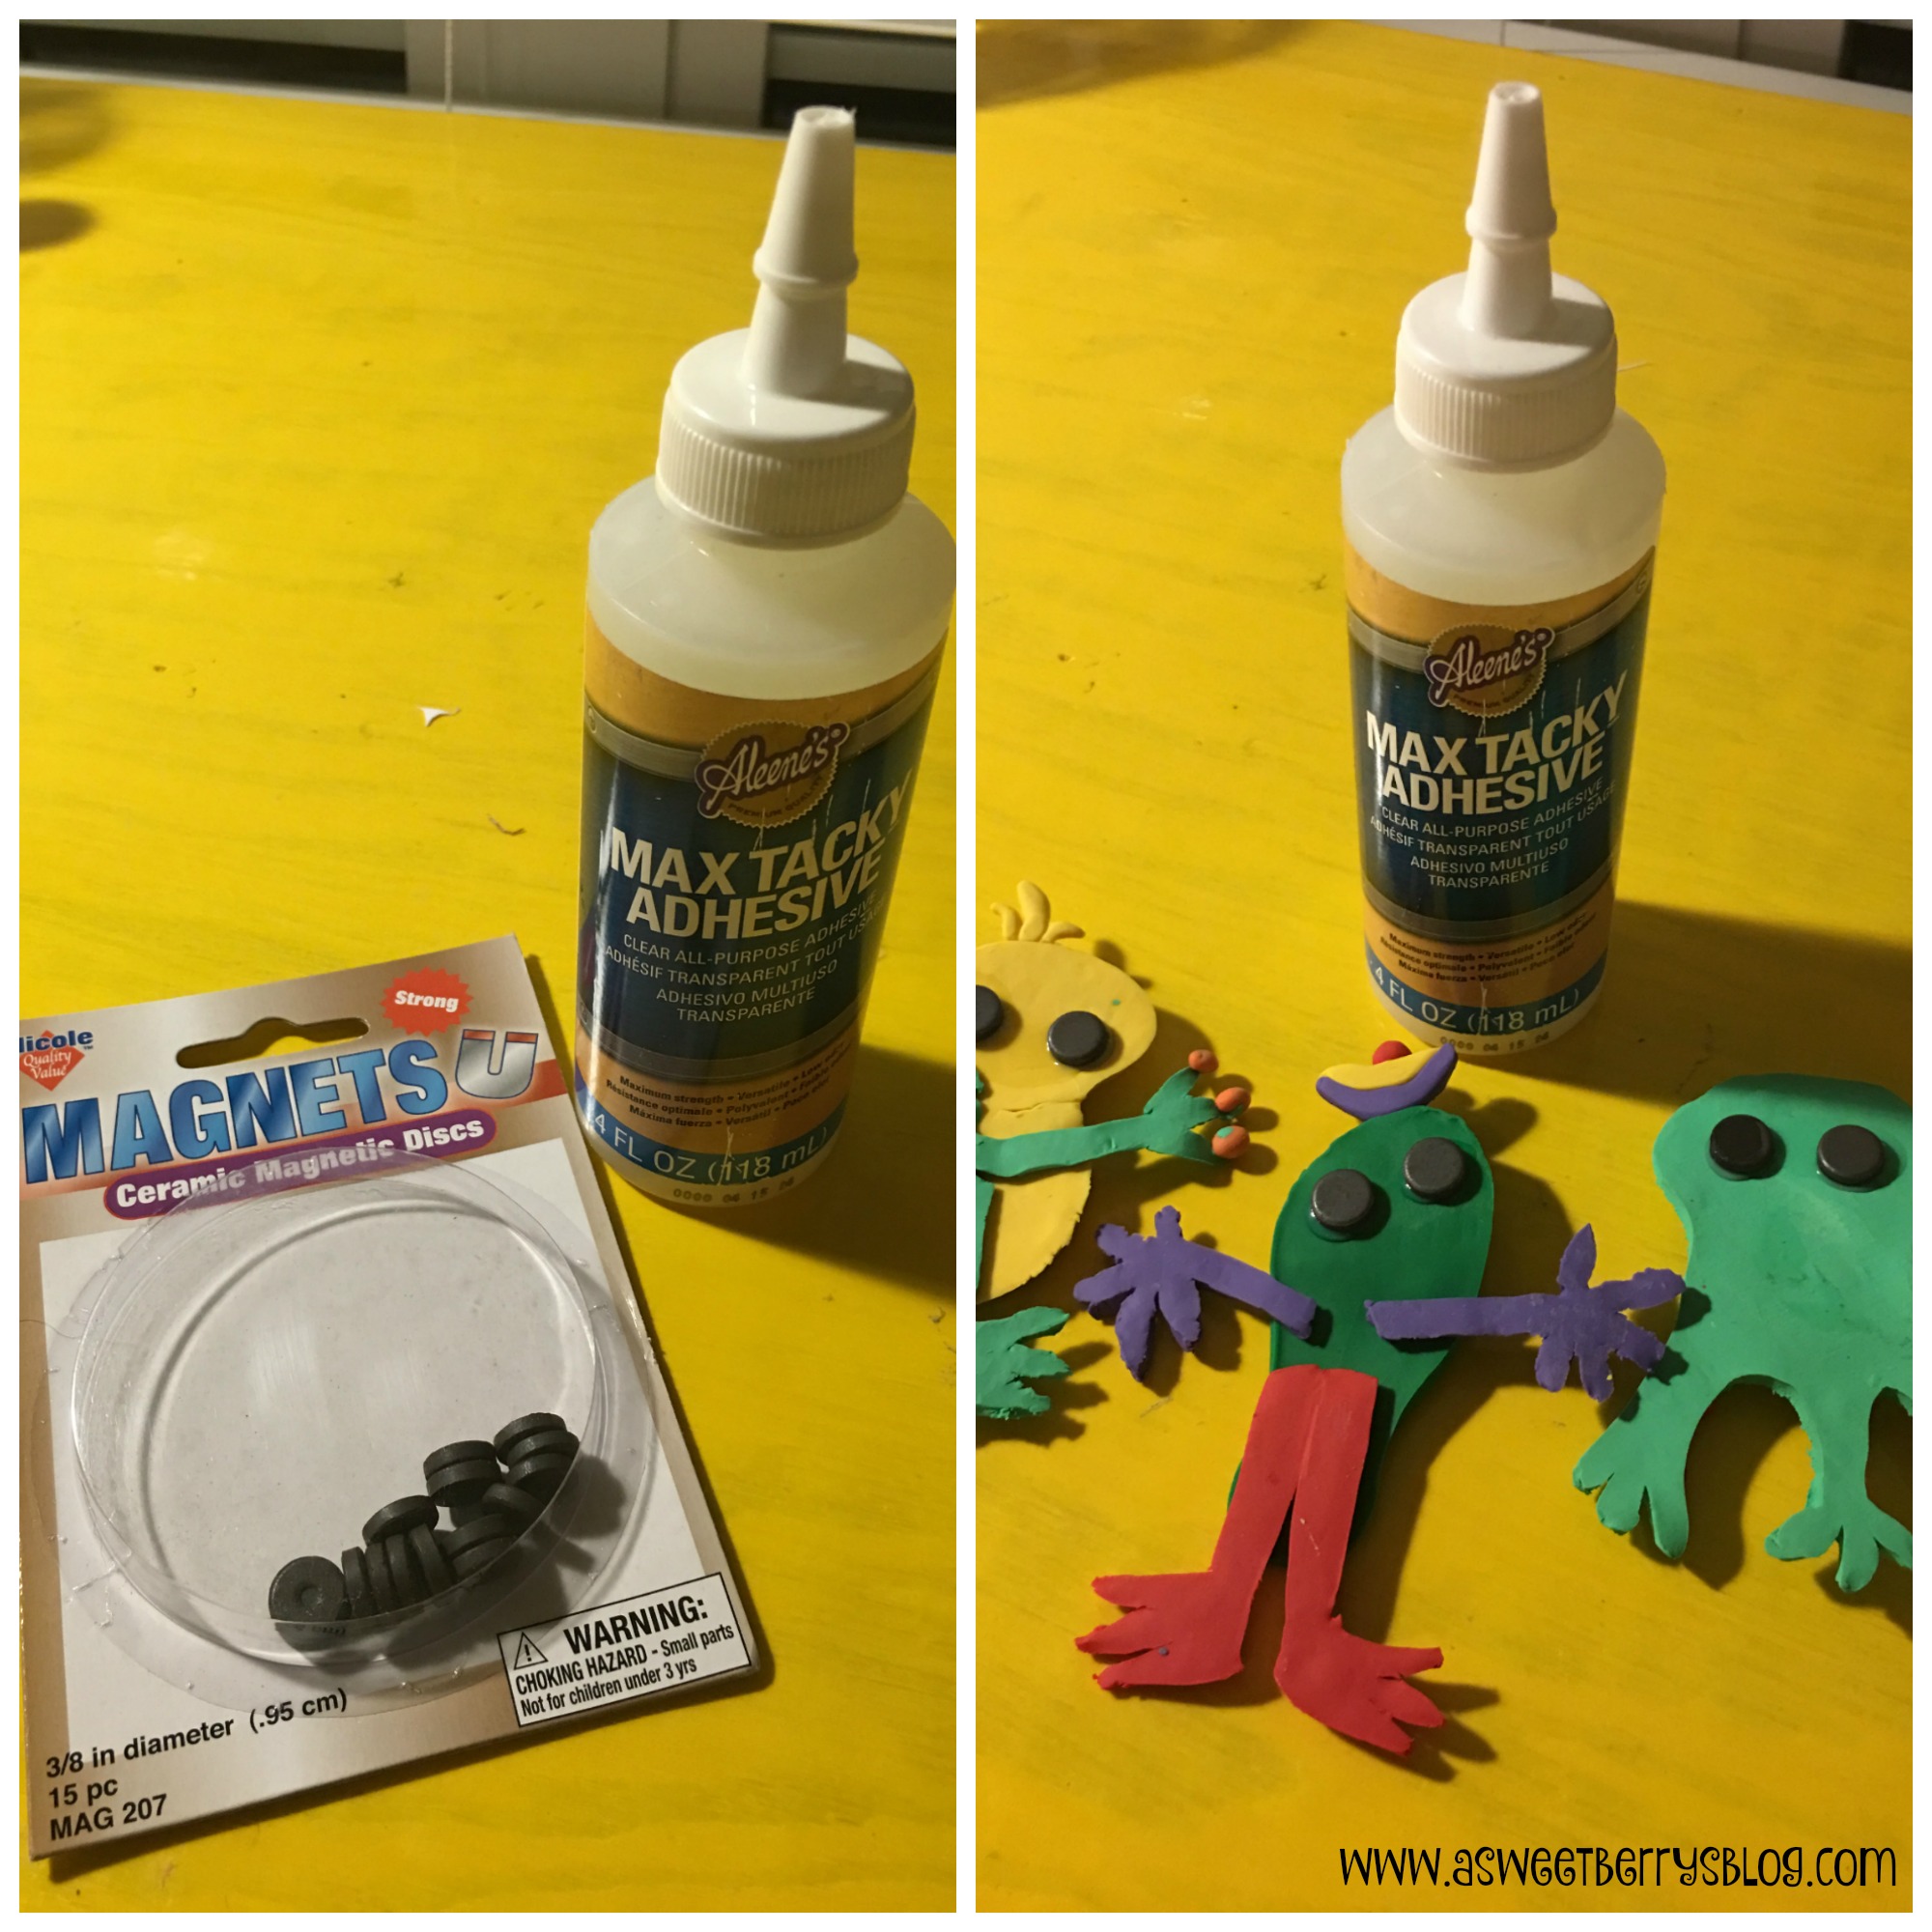
Magnets
Glue
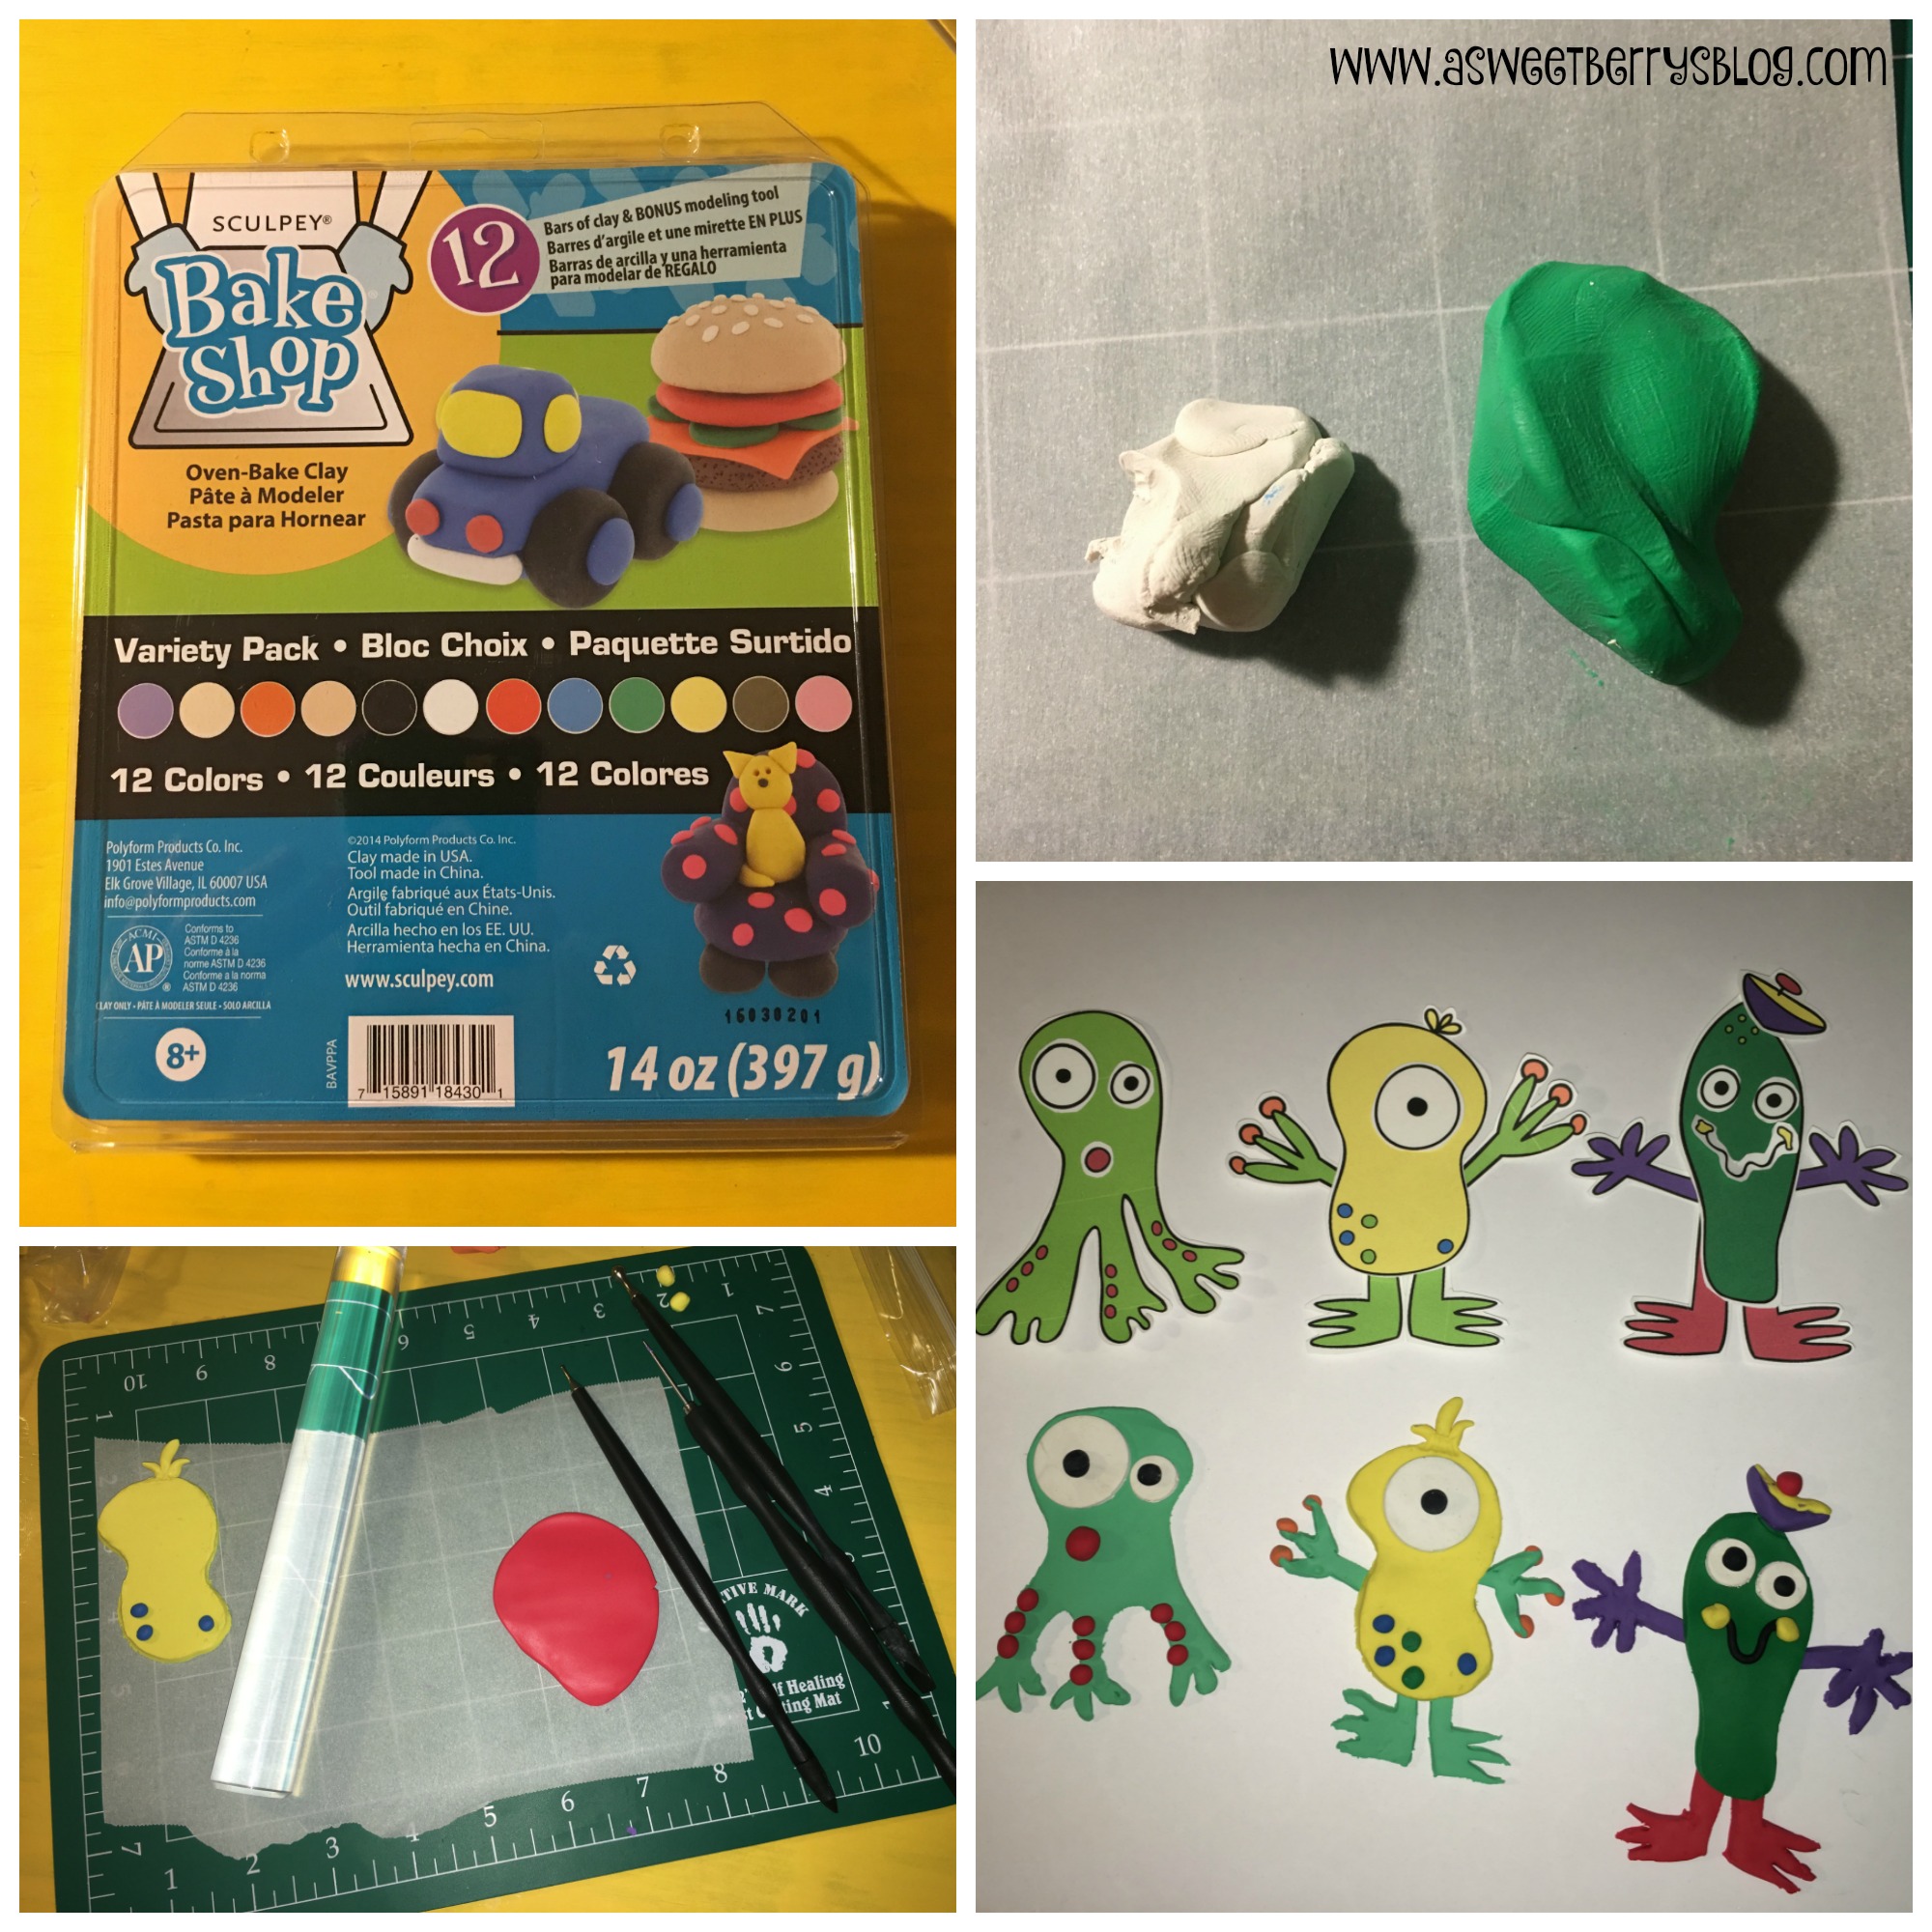
printables
My friend Laura is an incredible artist.  She designed these Alien and Cosmic Cafe Printables.  You can get your own at www.shoplaurakelly.com.  I think they are absolutely adorable!

Sculpey’s Bake Shop Oven-Bake Clay is super fun and easy to work with!  And it doesn’t take long to bake and harden!  Using clay tools, I rolled out my clay and cut shapes that resembled a few of the aliens that I created with the printable.  I rolled out my dots and then put everything together!   I didn’t want two aliens that were the same color, so I added some white clay to my green to lighten it up.  
sculpey
Once my aliens were baked, hardened and cooled, I added magnets to the backs using Aleene’s Max Tacky Adhesive.  I let the glue dry and then hung my awesome Alien Magnets on the refrigerator!  
magnets
Hope you like my awesome Alien Magnets inspired by Laura Kelly’s Aliens!

Be sure to check out these other awesome Sculpey ideas!


And most definitely enter to win $50 worth of Sculpey and a $25 Walmart gift card!

a Rafflecopter giveaway

Until next time…….

Katie-Signature-2

LKDT-Badge-2

End of the School Year Banner

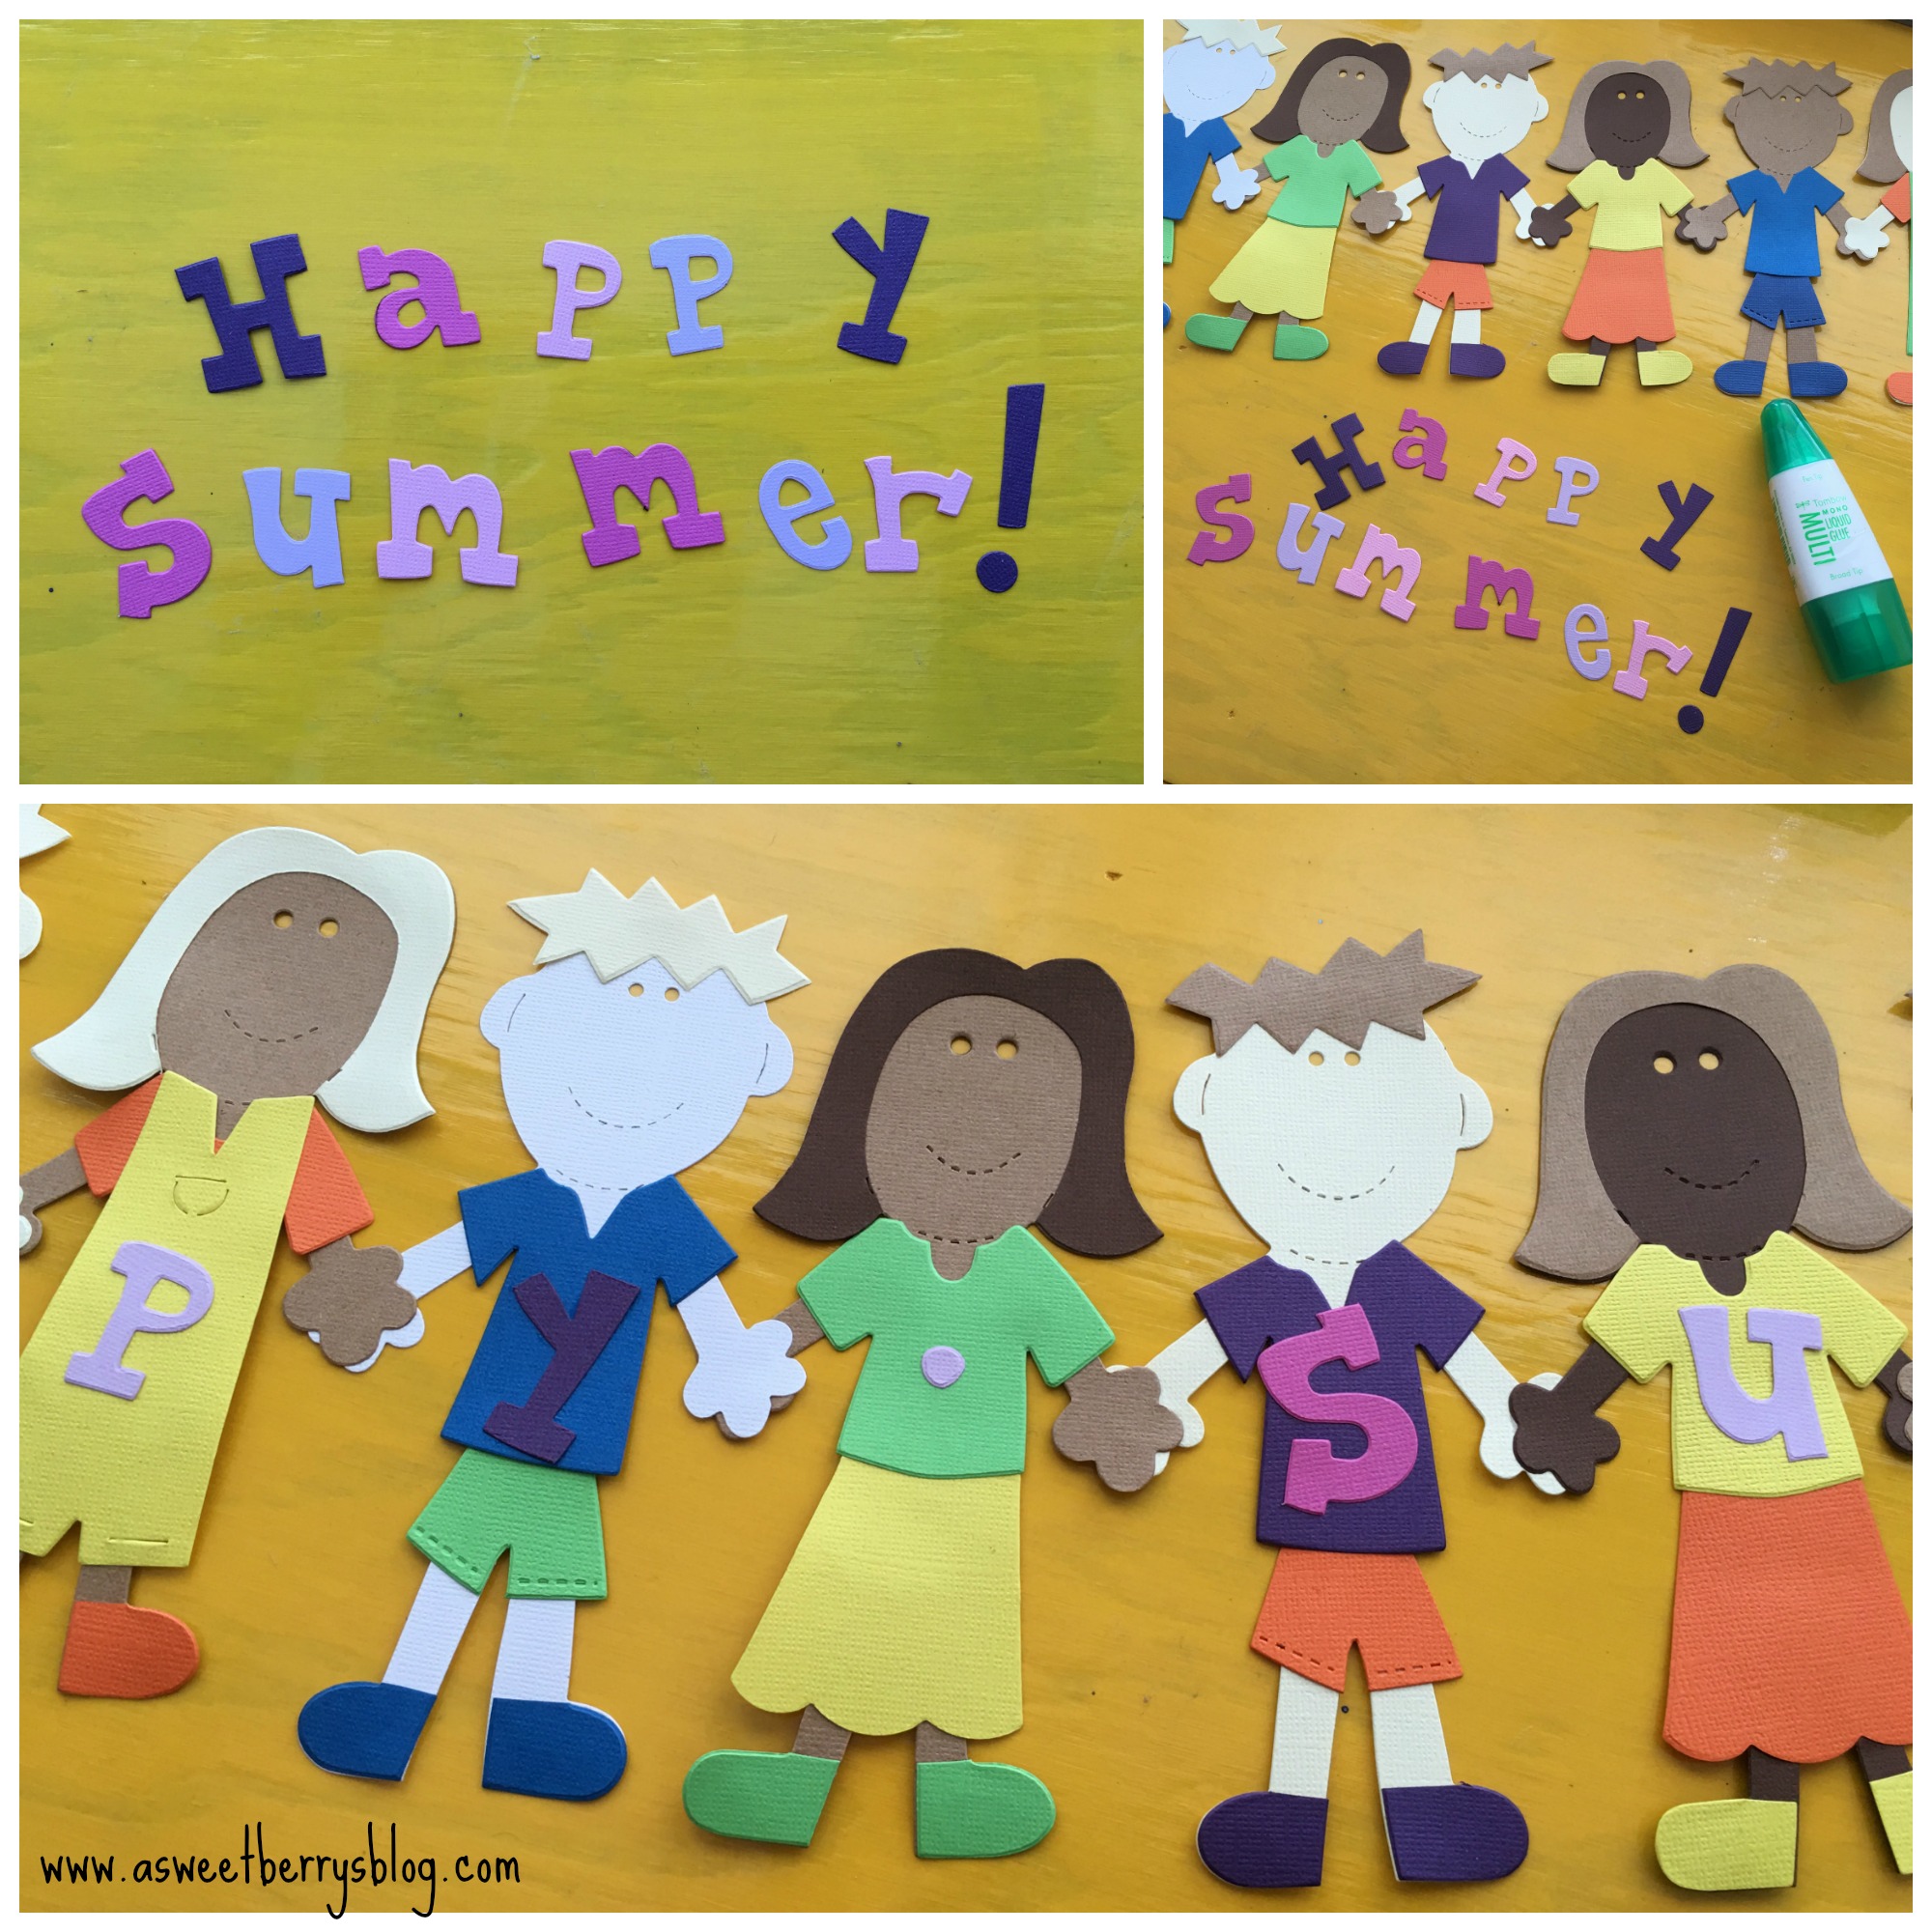
Before we know it, this school year will be ending and it will be Summer time!!!!  It’s hard to believe, but it’s true!   At our house, we are super excited about our summer vacation and the fun things that we get to do!   In honor of the End of the School Year, I made this adorable little “Happy Summer” banner using Laura Kelly’s Peep and Lemonade Alphabet Dies from Sizzix! 
banner
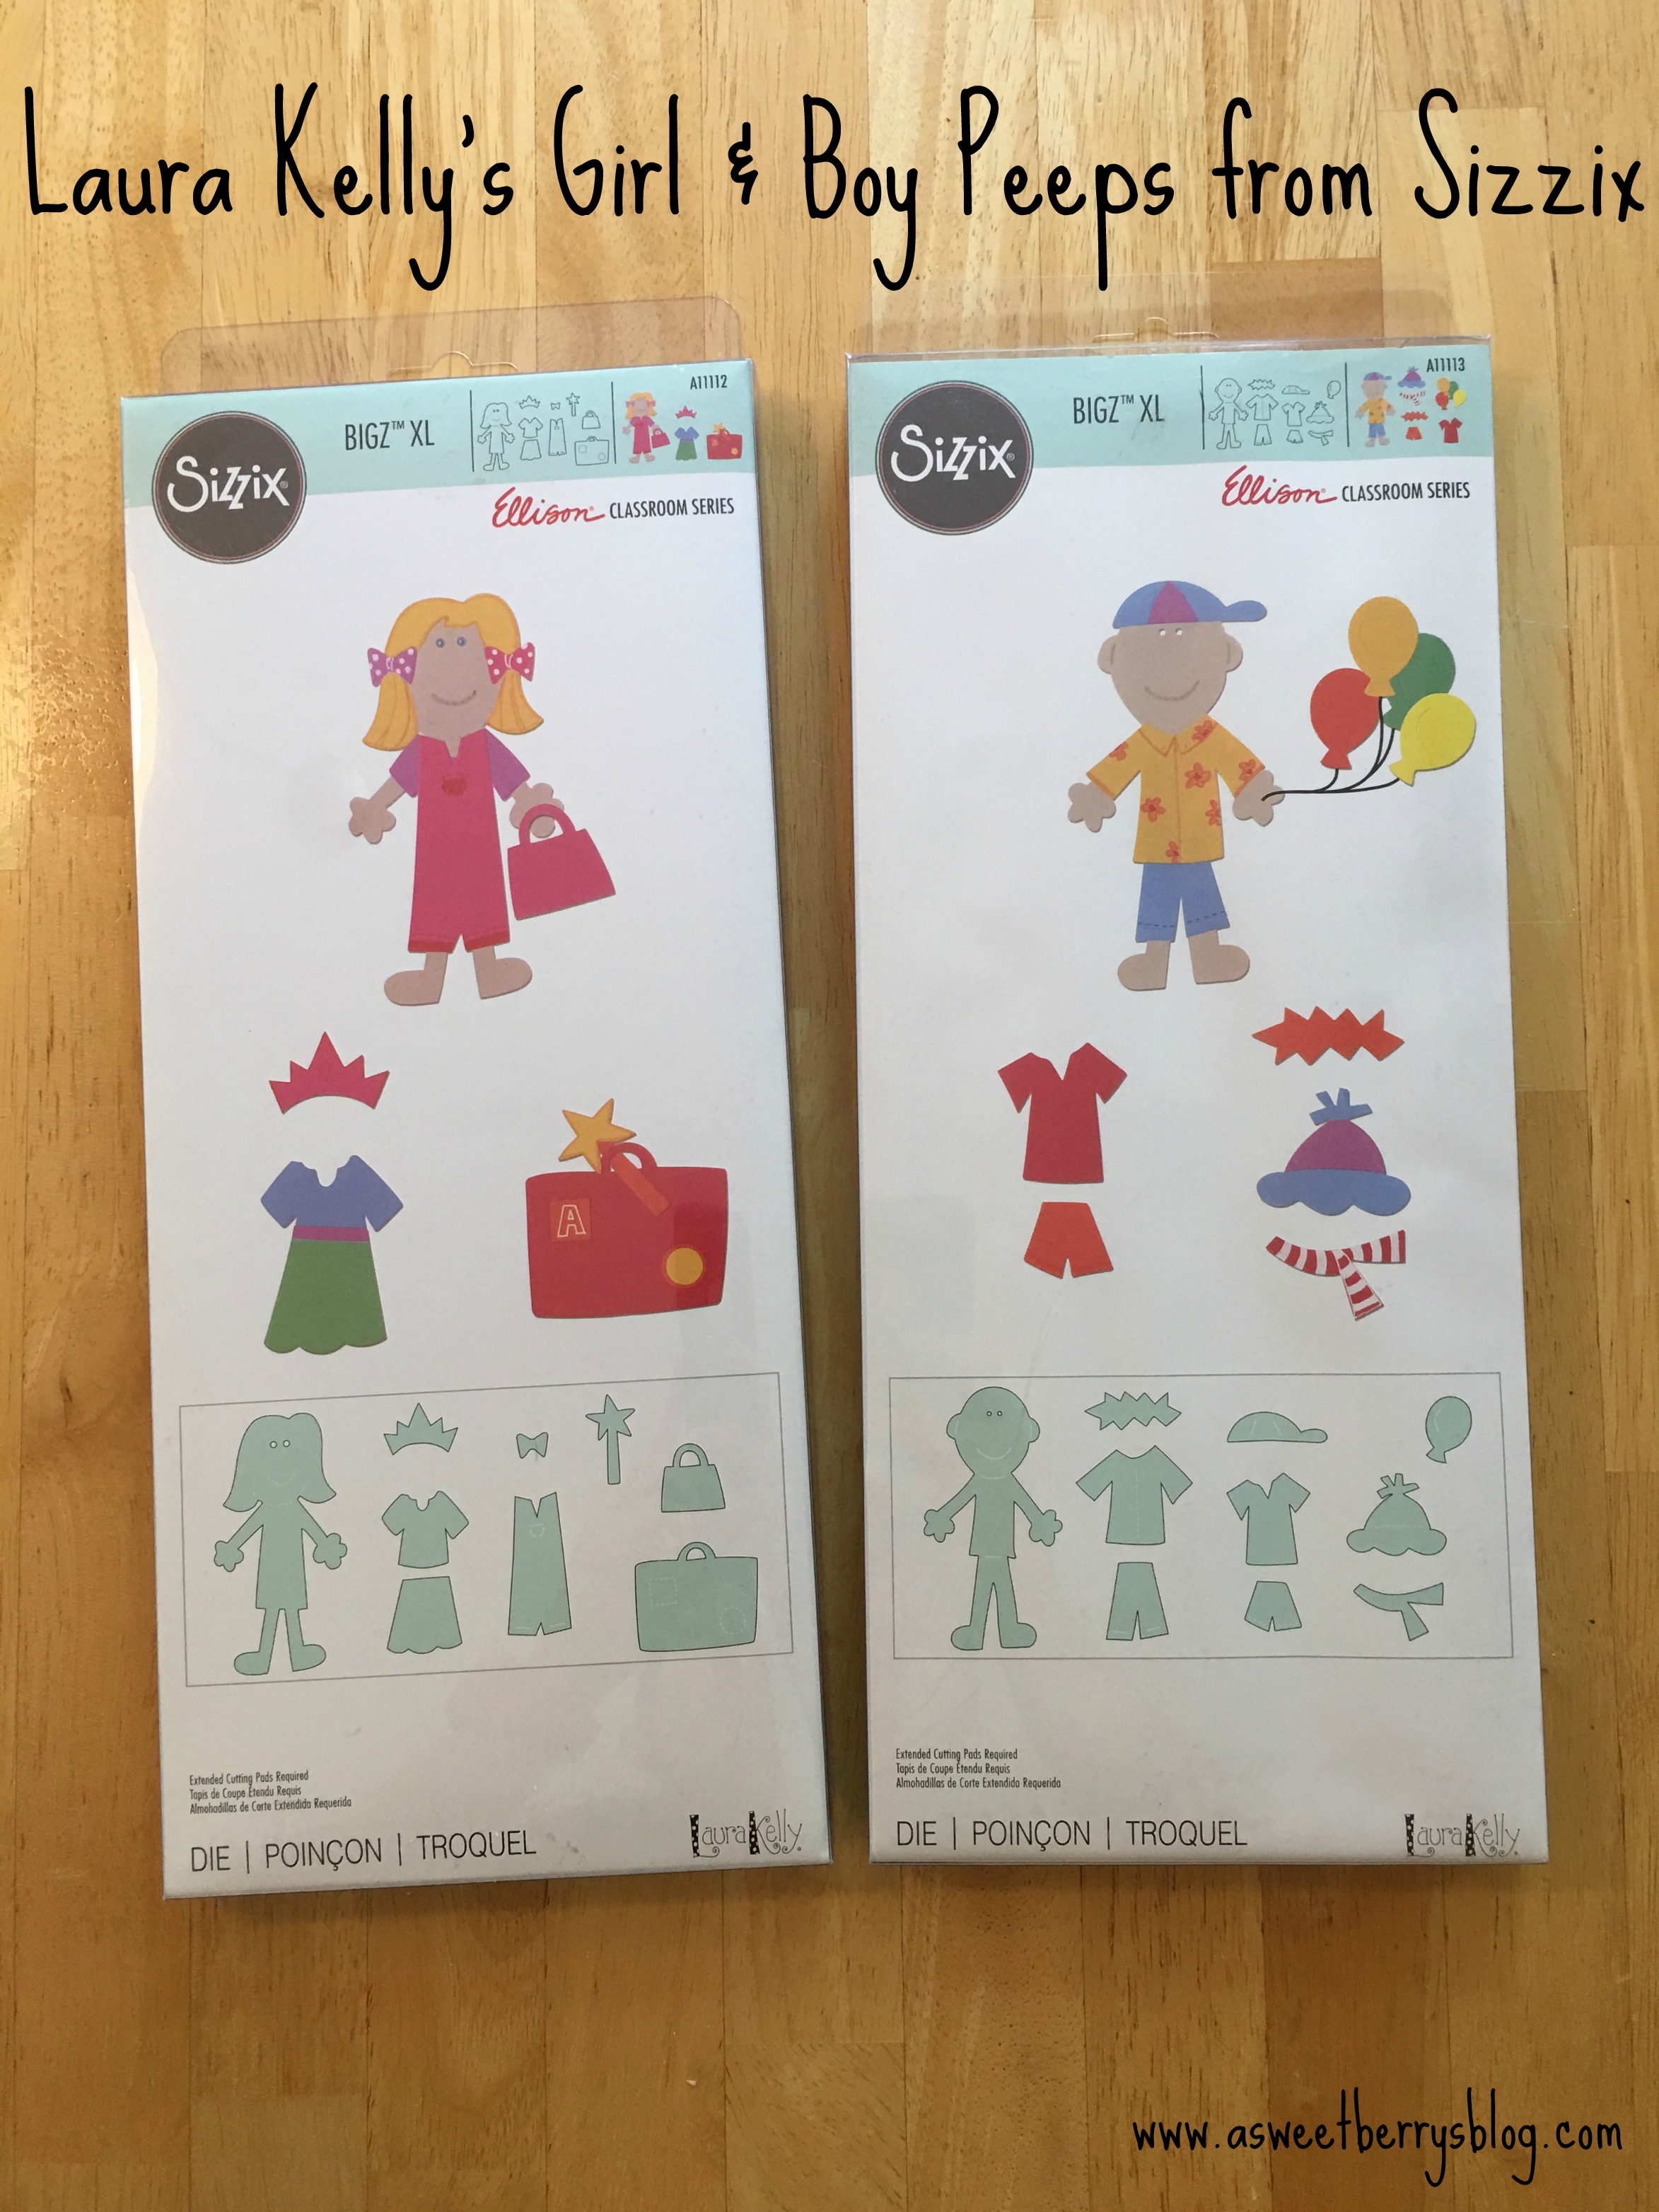
My friend Laura Kelly is such a creative lady and she has a great collection of dies with Sizzix.   These particular dies are a part of the Ellison Classroom Series.  Click the picture below to find the link to where you can get your own.
Girl and Boy Peeps
Alright, now on to how I made this adorable little banner.  Using my Sizzix BigShot, Boy and Girl Peep dies, and an extended cutting pad I cut the peeps using different flesh tones.  Using bright colors, I cut out all of the different clothes.  For the feet, I just cut out part of the legs and cut the feet part off.   For the hair of the girls, I just cut out extra heads and then cut the hair off of them.  

Once everything was cut out and organized (who was getting what clothes), I used Tombow Liquid Glue to glue all of the parts together.   Once they were all dried, I laid them out so that it looked like they were holding hands and then I glued them together.
glue
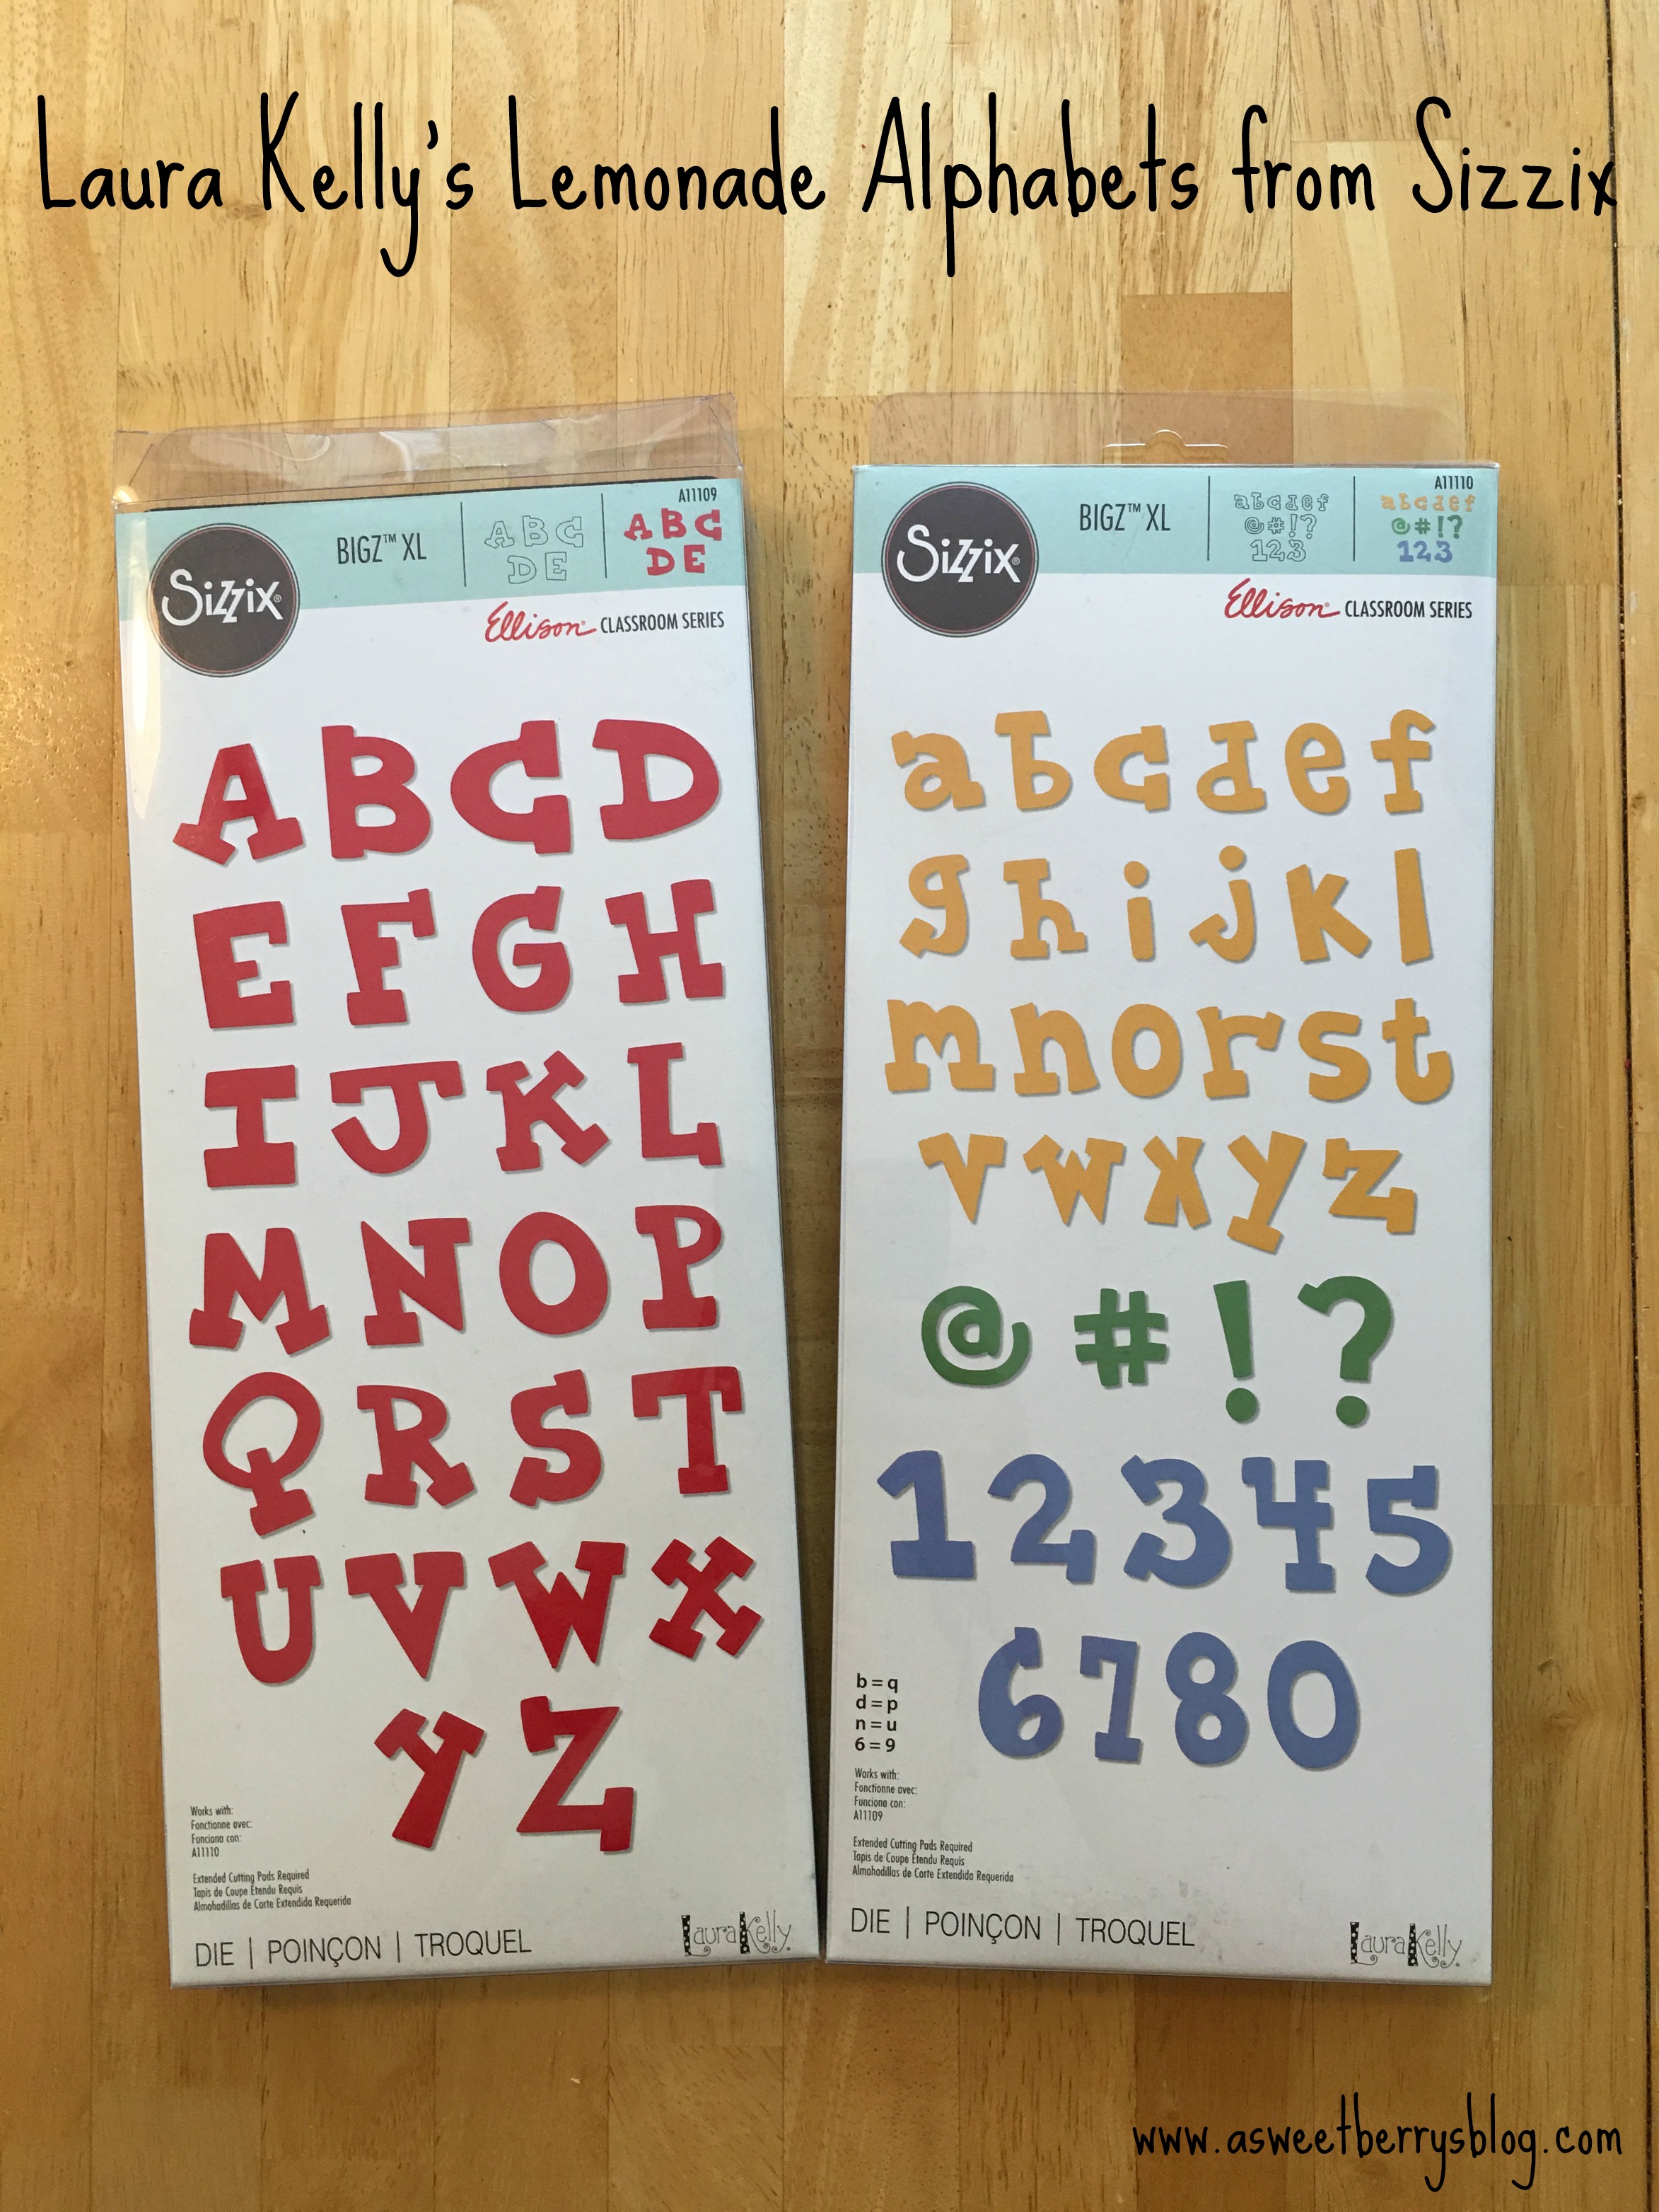
Once everyone was glued together, I used Laura Kelly’s Lemonade Upper Case and Lower Case Alphabets to add the words “Happy Spring”.   Click the photo below to go to the link where you can get your own!
alphabets
Again, using the Tombow Liquid Glue, I added the letters to each of my peeps.  I also added a dot between the words “Happy” and “Summer” just so that one of them wouldn’t be lonely!!!
adding letters
Once everyone was completely dry, I punched a hole in the first and last hand.  Then I tied baker’s twine to each hand so that I could hang it up! string
Hope you like my End of the Year – Happy Summer Banner!  
individual letters
Until next time……….

Disclosure:  I received product from Sizzix as a member of the Laura Kelly Design Team.  Laura Kelly is a licensed designer for Sizzix.  All opinions are that of Katie Berry.

Katie-Signature-2