
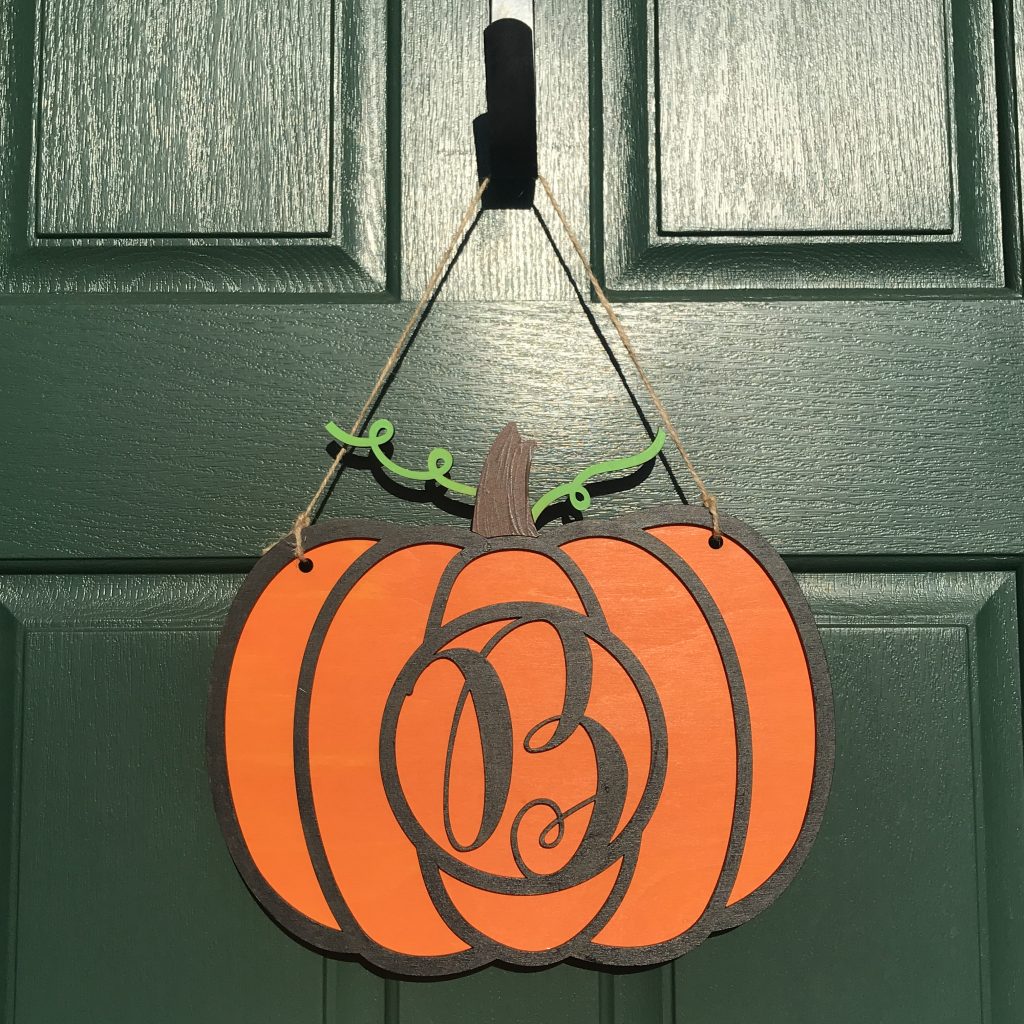
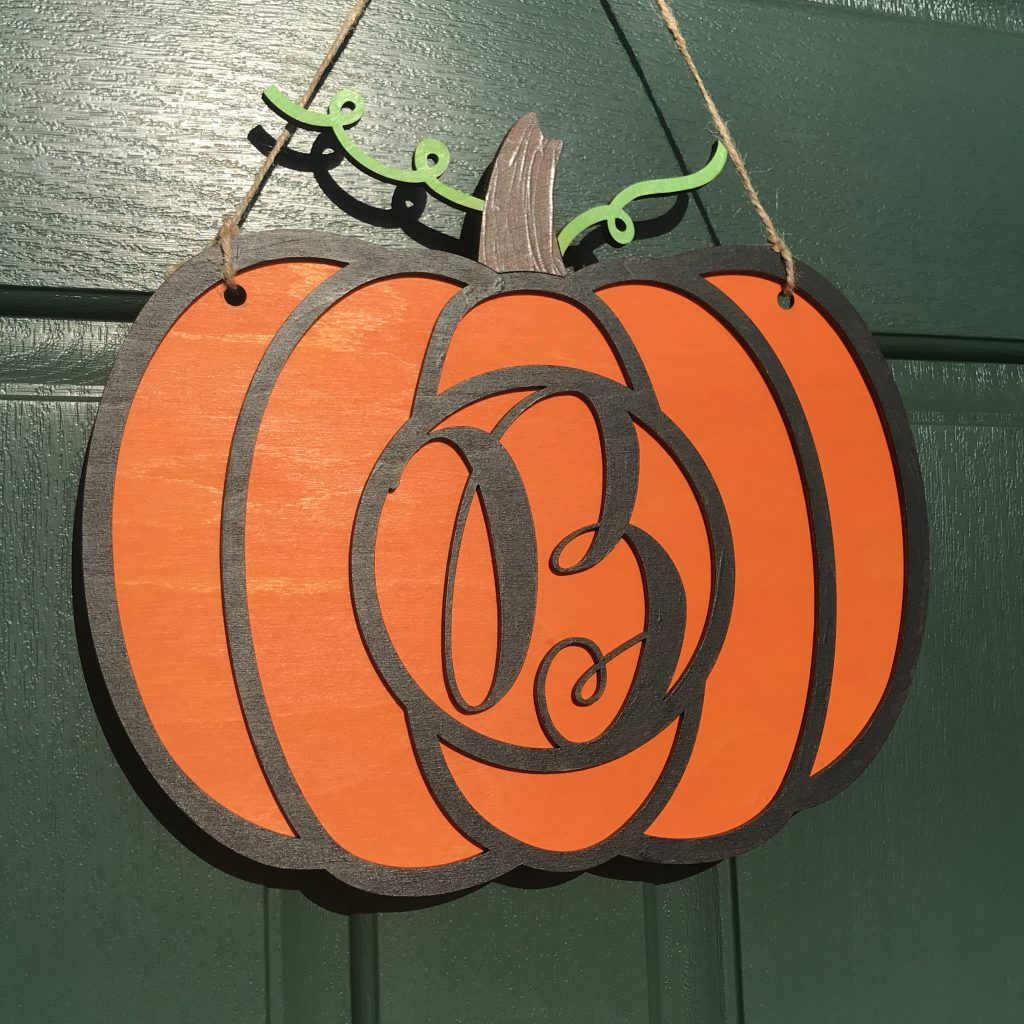
This week I’m joining my creative friends for the Creative Crafts Halloween Edition and my craft is this adorable little wooden pumpkin door hanger with a “B” in the middle. I am one of those crazy pumpkin lovers! I love the way they look, I love the way they taste and I love the way they smell!
As most of you may know, I love to work with wood. My Glowforge laser is like one of my best friends! So, my craft was created using the Glowforge.
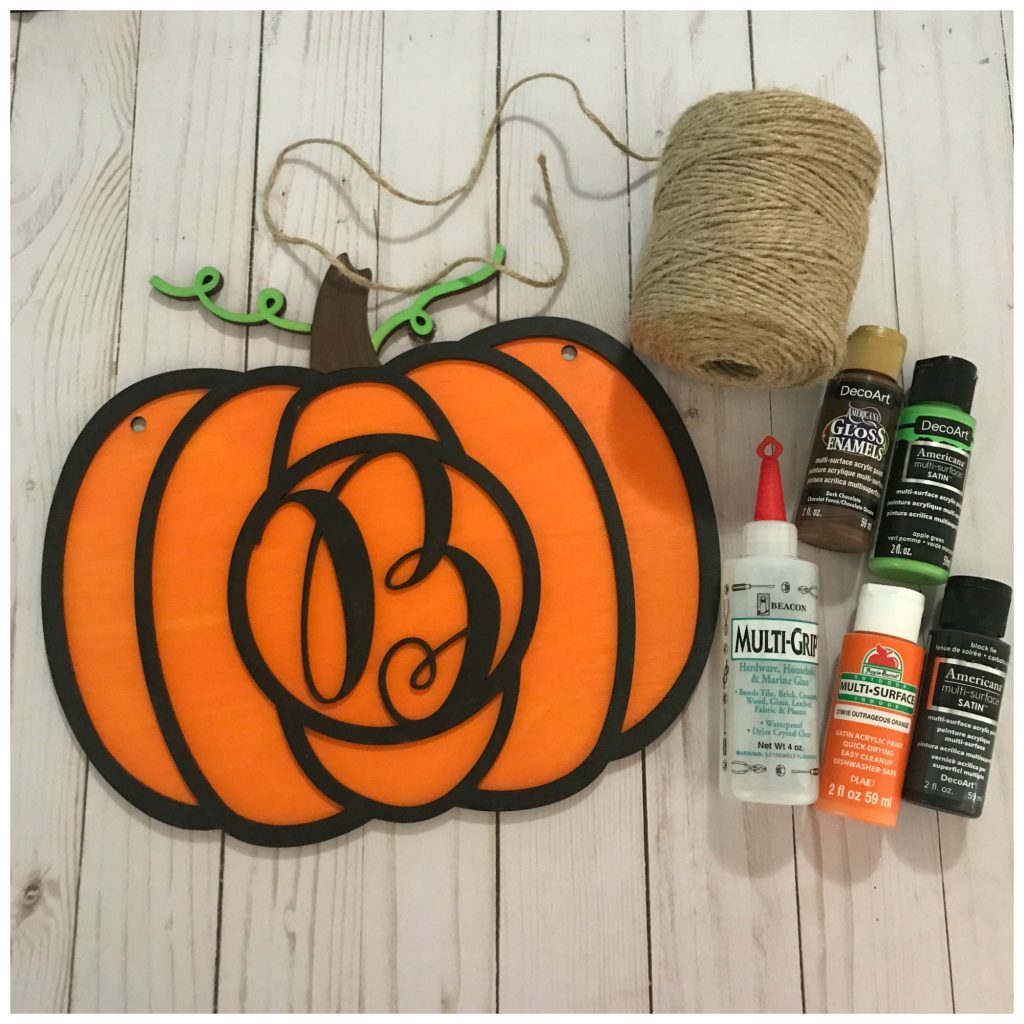
Materials:
- Plywood (This is 1/8″ Baltic Birch)
- Glowforge or other laser machine. (If you cut thinner wood, you could possibly do this on the Cricut Maker)
- Computer with software to add letter and weld it (I use Illustrator)
- Pumpkin SVG file (I got this one from Etsy, and the file comes with 6 different pumpkins!)
- Paint
- Paint Brushes
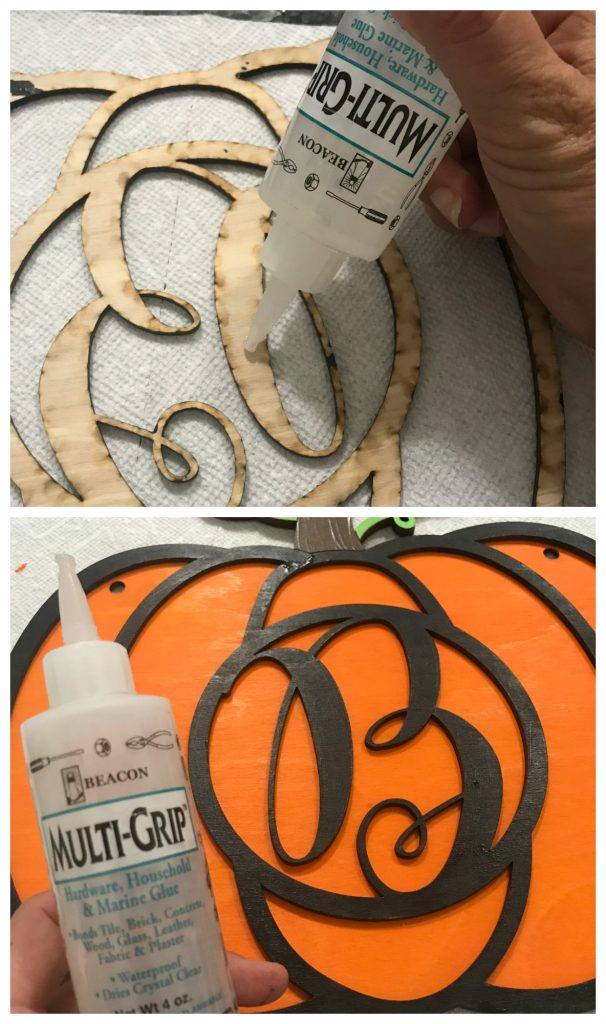
- Strong gripping glue (I used Beacon Multi-Grip)
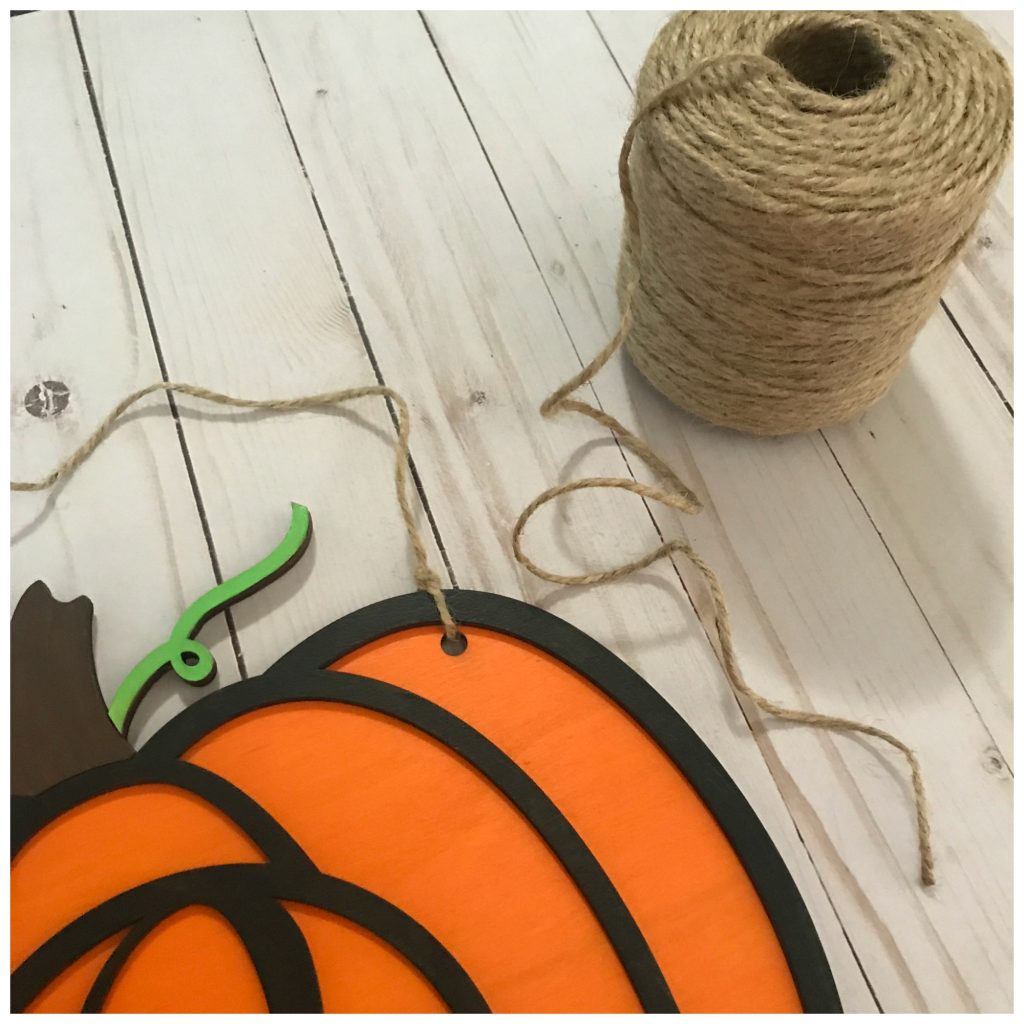
- Twine, Ribbon or String
Here is how I made it:
I downloaded the pumpkin svg file that I purchased from Etsy. I added the letter that I wanted in the middle and made sure to weld it to the center circle. I wanted this pumpkin to look layered so I created an offset path (set to 0) the same size as the original pumpkin. That gave me an extra pumpkin to use as a backing. I removed all of the extra pieces from the extra one. I then welded the stem and vines in place. I also added two circles to the solid pumpkin backing.
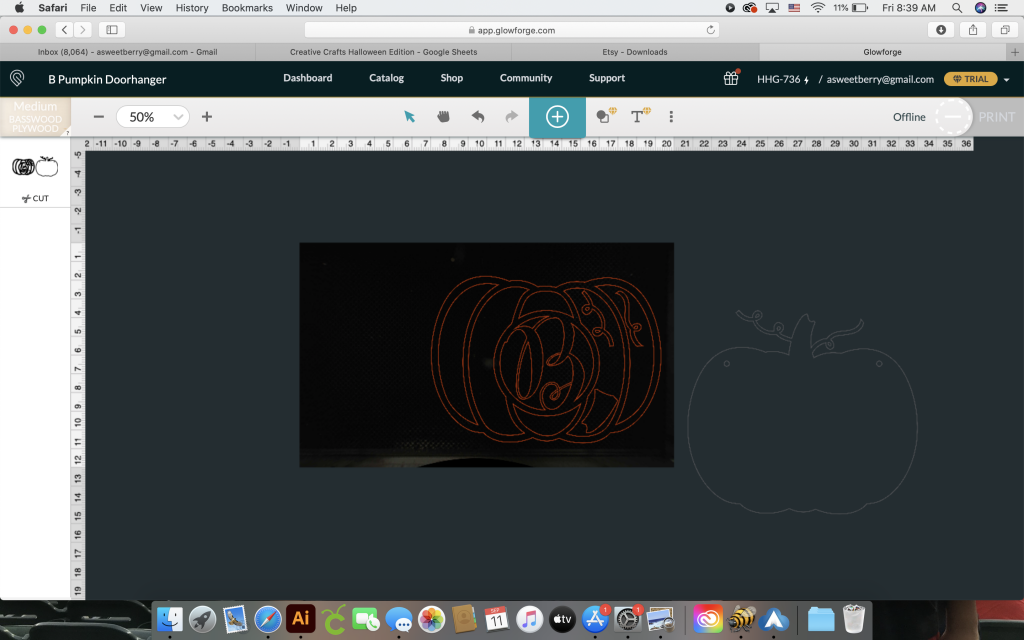
Next, I uploaded the file into the Glowforge Software, resized it to the biggest size that I could make it and hit the magic button to cut.
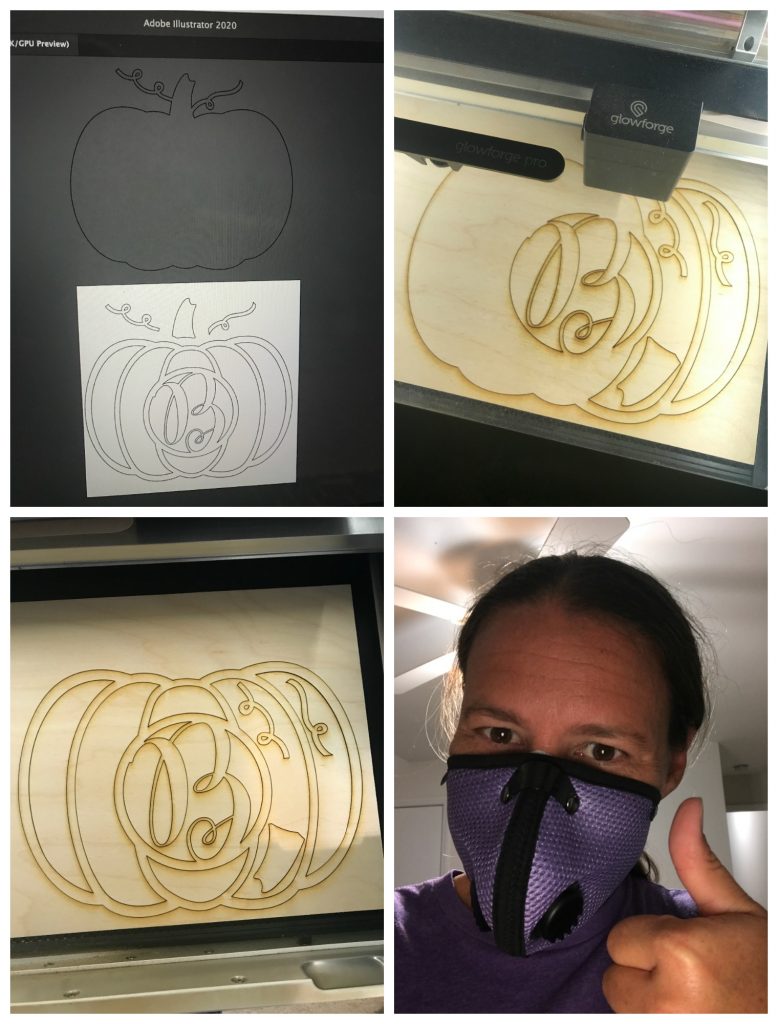
Once everything was cut out , it was time to paint it. I painted each piece individually.
Once the paint was dry, I used Beacon Multi-Grip glue to glue it all together.
Next was my favorite part…..adding the twine and hanging it up!
Oh my goodness, I love it so much!!!!! It’s definitely going to be hanging on my door for the next couple of months!
Be sure to click below to see other Creative Halloween Crafts.
A special thanks to my crafty friends Laura Kelly Designs, Makeable Crafts, Ann Butler Designs and Creatively Beth for hosting another addition of Creative Crafts!

Until next time……